Generic OIDC
Learn how to configure a generic OIDC identity provider for secure single sign-on (SSO) with your application.
This guide walks you through configuring a generic OIDC identity provider for your application, enabling secure single sign-on for your users. You’ll learn how to set up OIDC integration, configure client credentials, and test the connection.
-
Configure OIDC
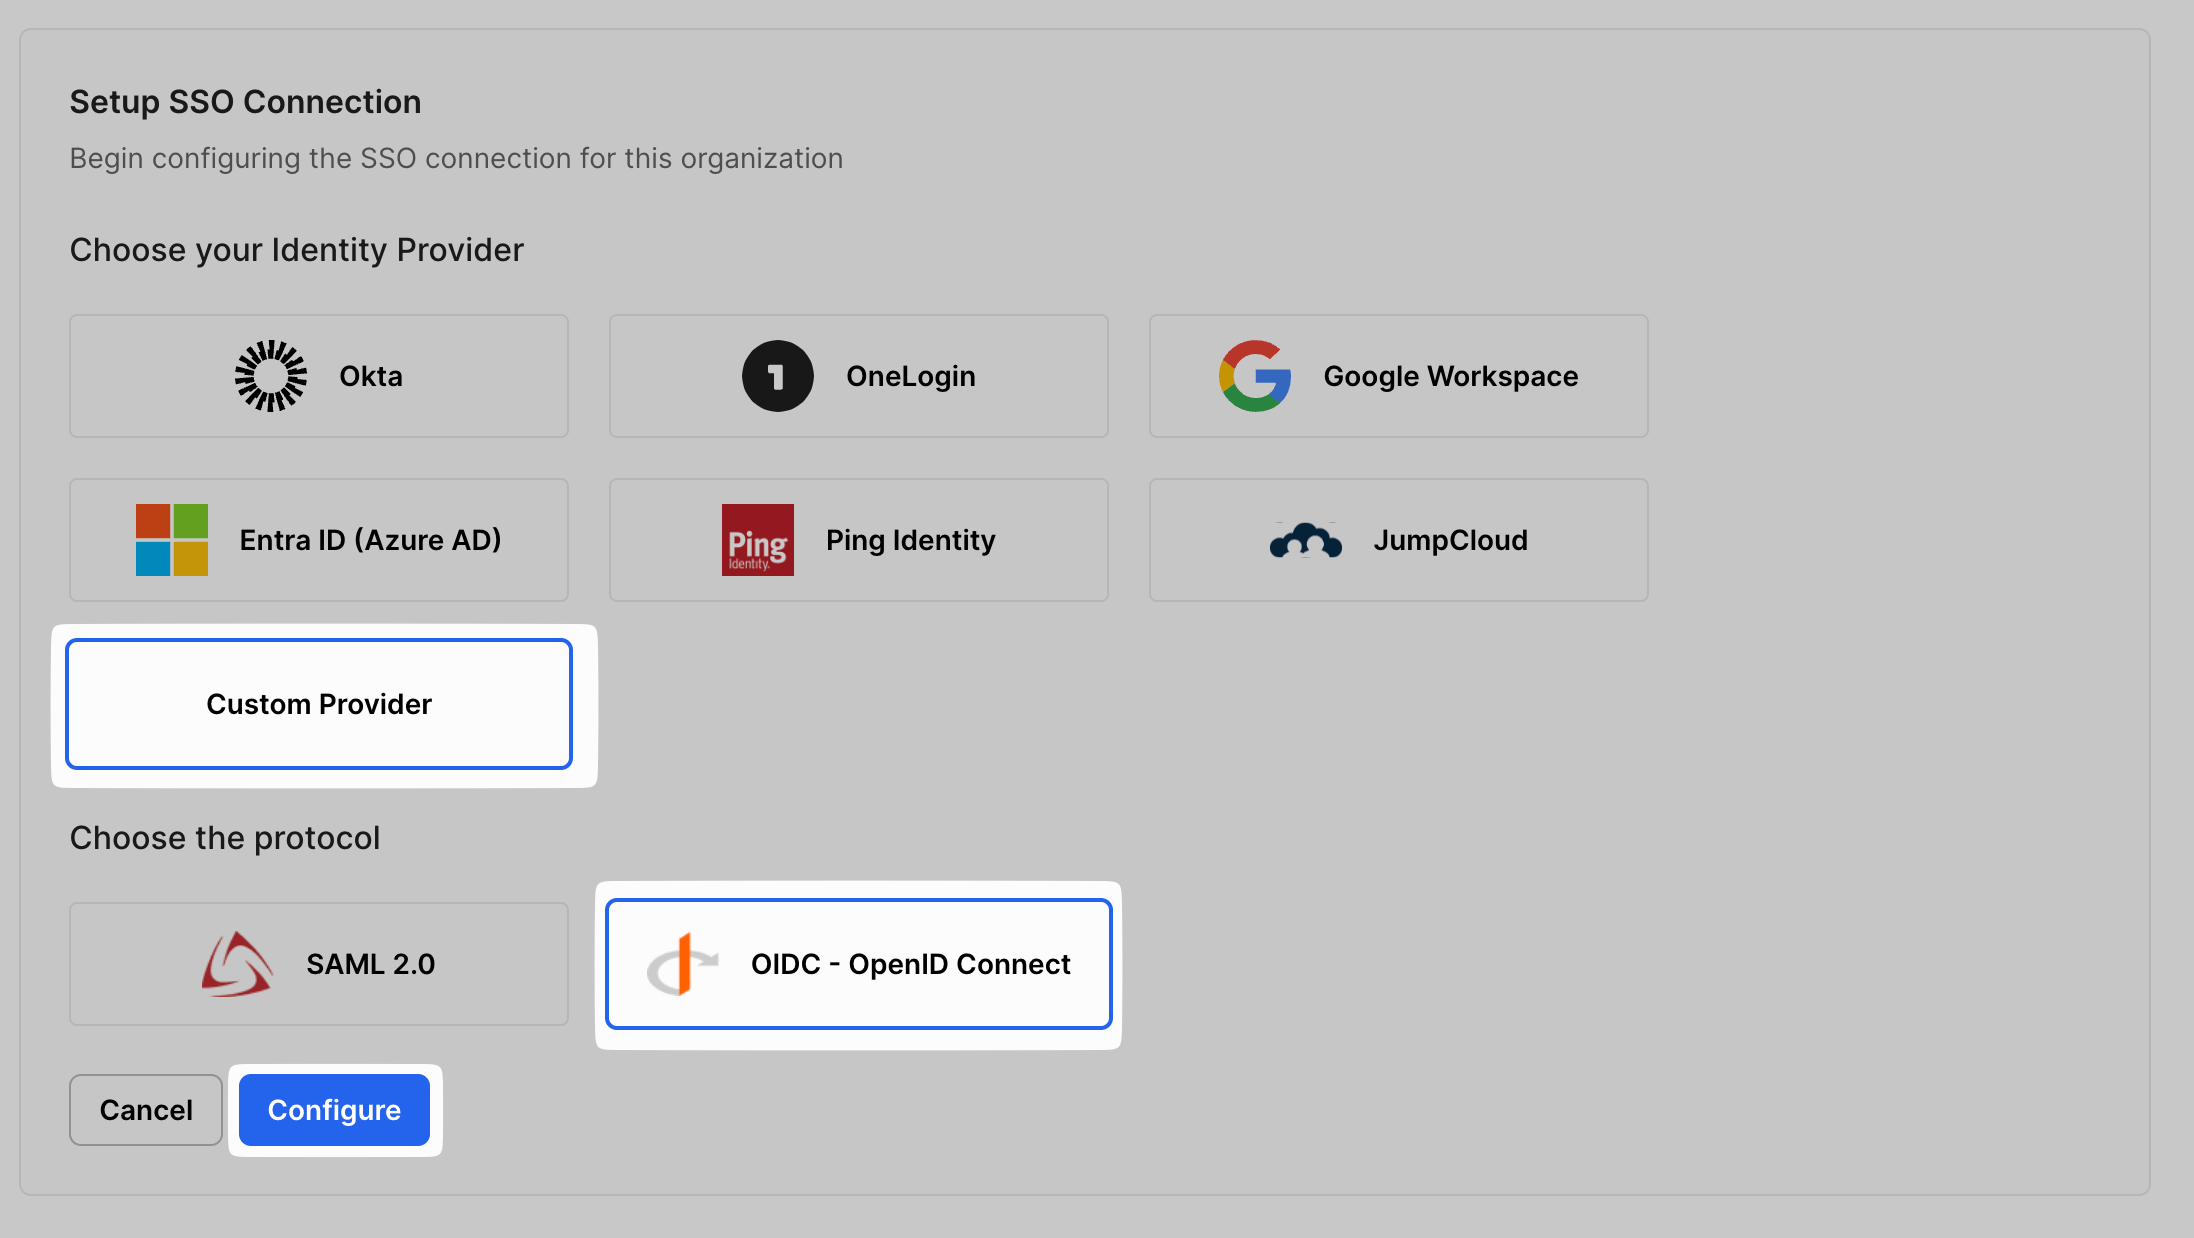
Section titled “Configure OIDC”Sign into the SSO Configuration Portal, select Custom Provider, then OIDC, and click on Configure.
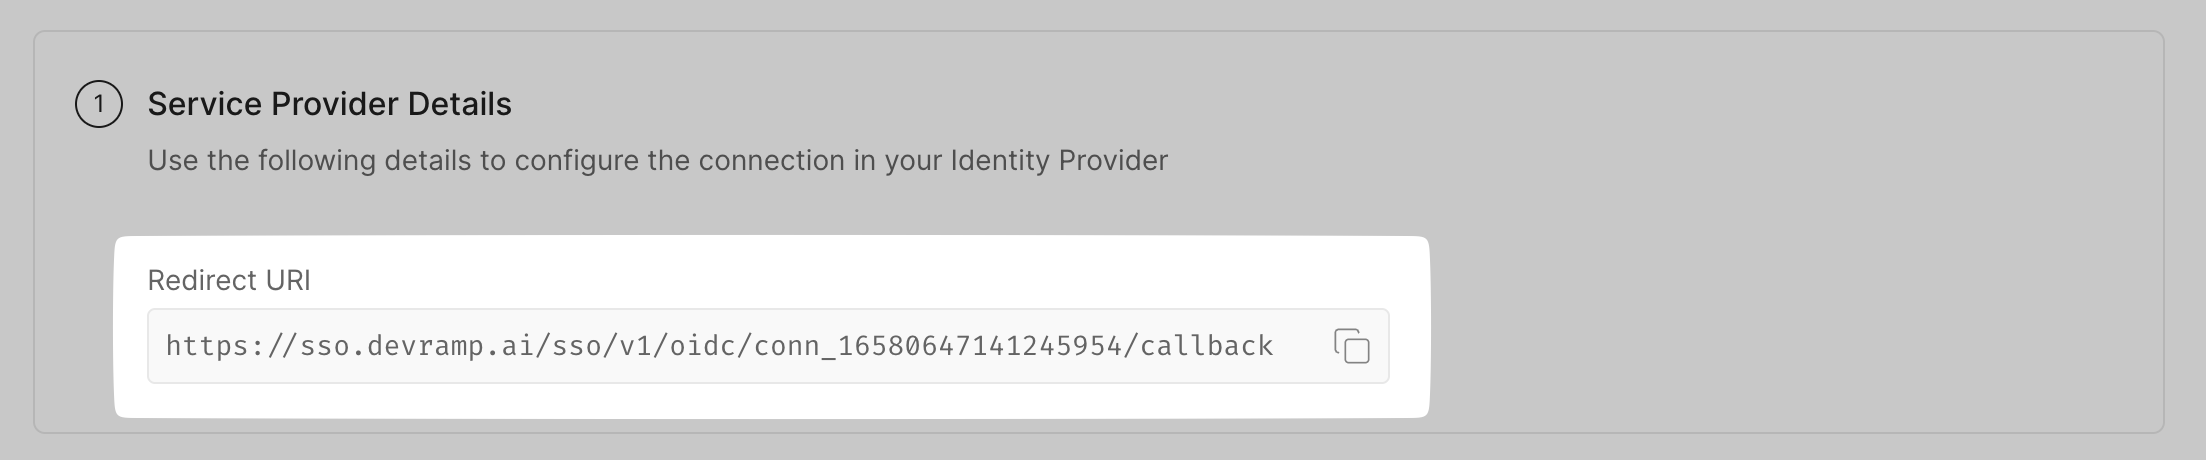
Copy the Redirect URl from the SSO Configuration Portal.
On your Identity Provider portal, select OIDC as the integration method, and Web Applications as application type.
Paste this Redirect URI in the sign in redirect URI space on your identity provider portal.
-
Configure Attribute mapping
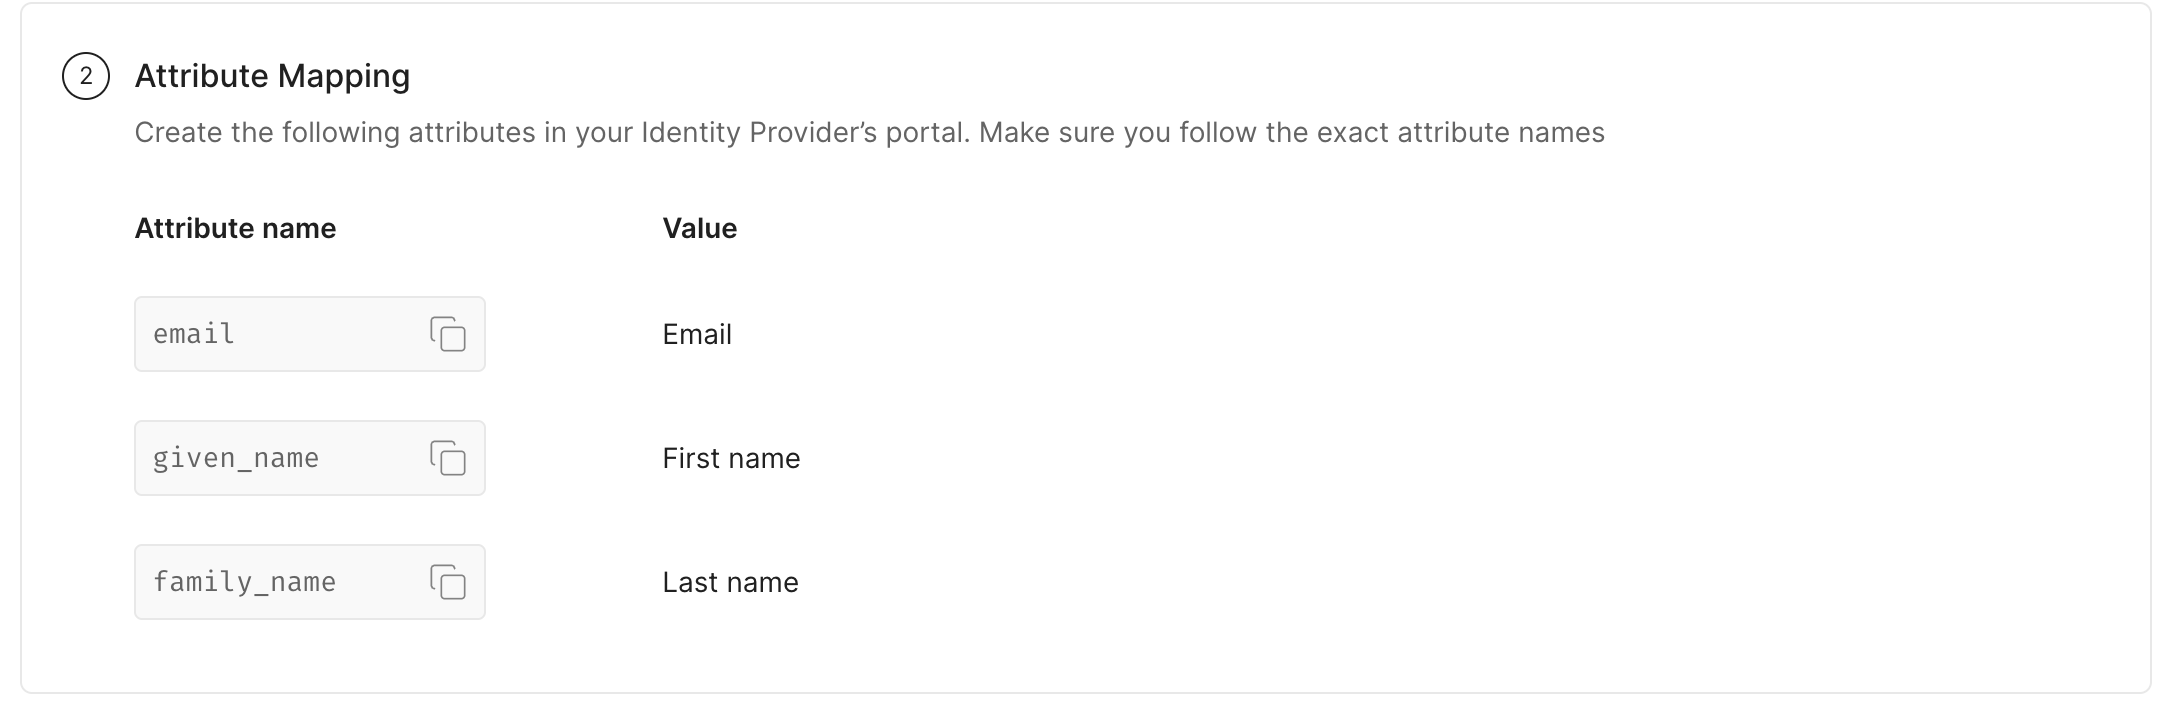
Section titled “Configure Attribute mapping”On your identity provider portal, if attribute mapping is required, map the given attributes exactly as shown below.
-
Assign users/groups
Section titled “Assign users/groups”Choose who can access the app by assigning users to your app on your identity provider portal.
-
Configure Identity Provider
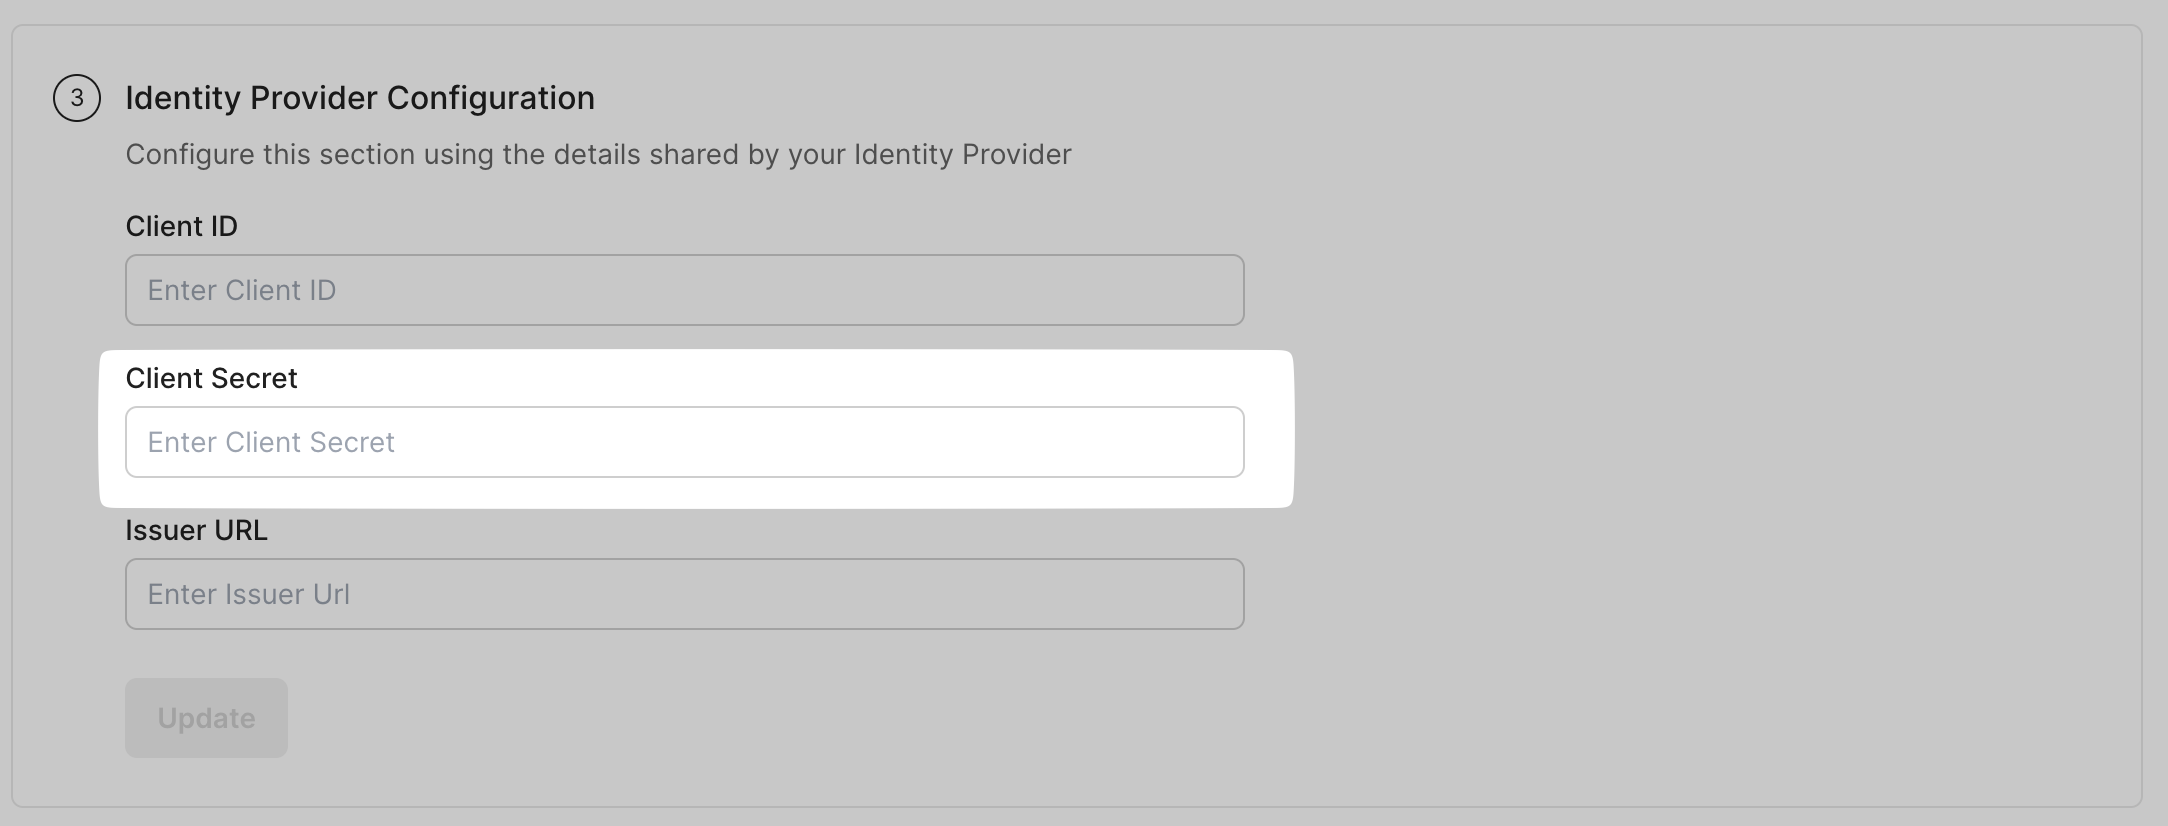
Section titled “Configure Identity Provider”Find the client ID from your identity provider portal. Paste this in the space for Client ID on your SSO Configuration Portal.
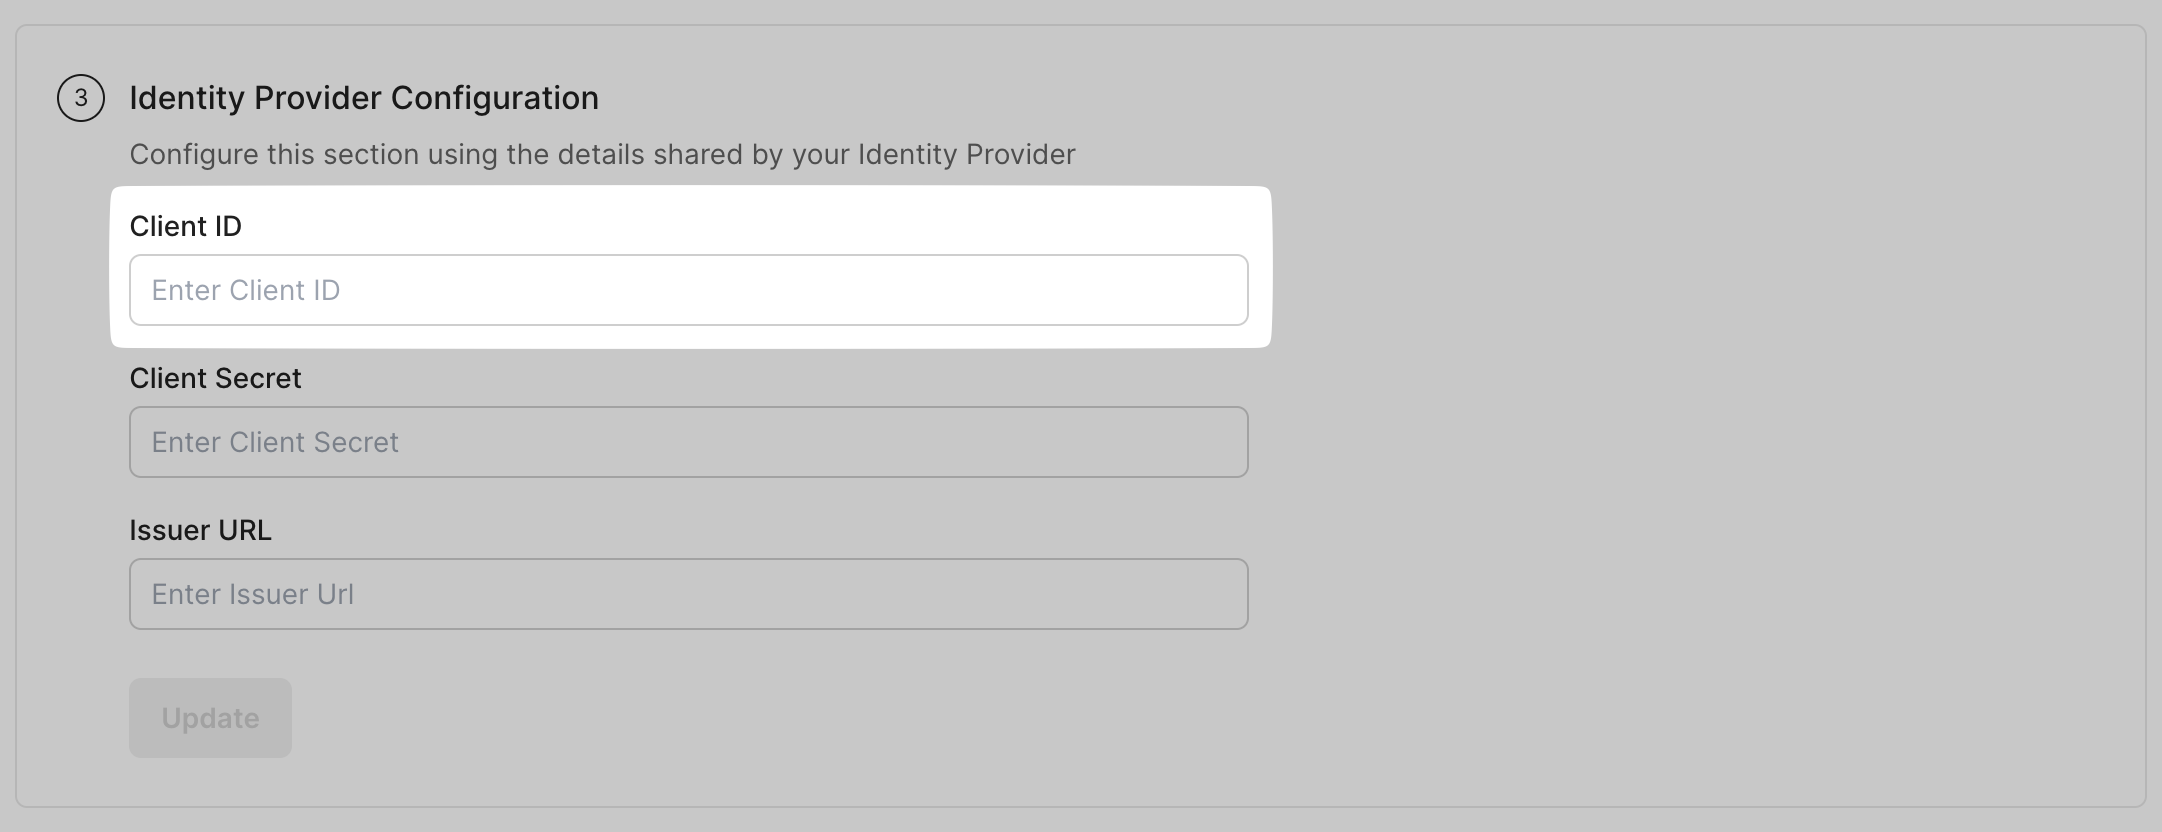
Similarly, generate and copy the Client Secret from your SSO Configuration Portal and paste it under Client Secret under IdP Configuration.
Find and copy the Issuer URL from your custom provider’s portal. Paste the above URL in the SSO configuration Portal under Issuer URL. Click on Update.
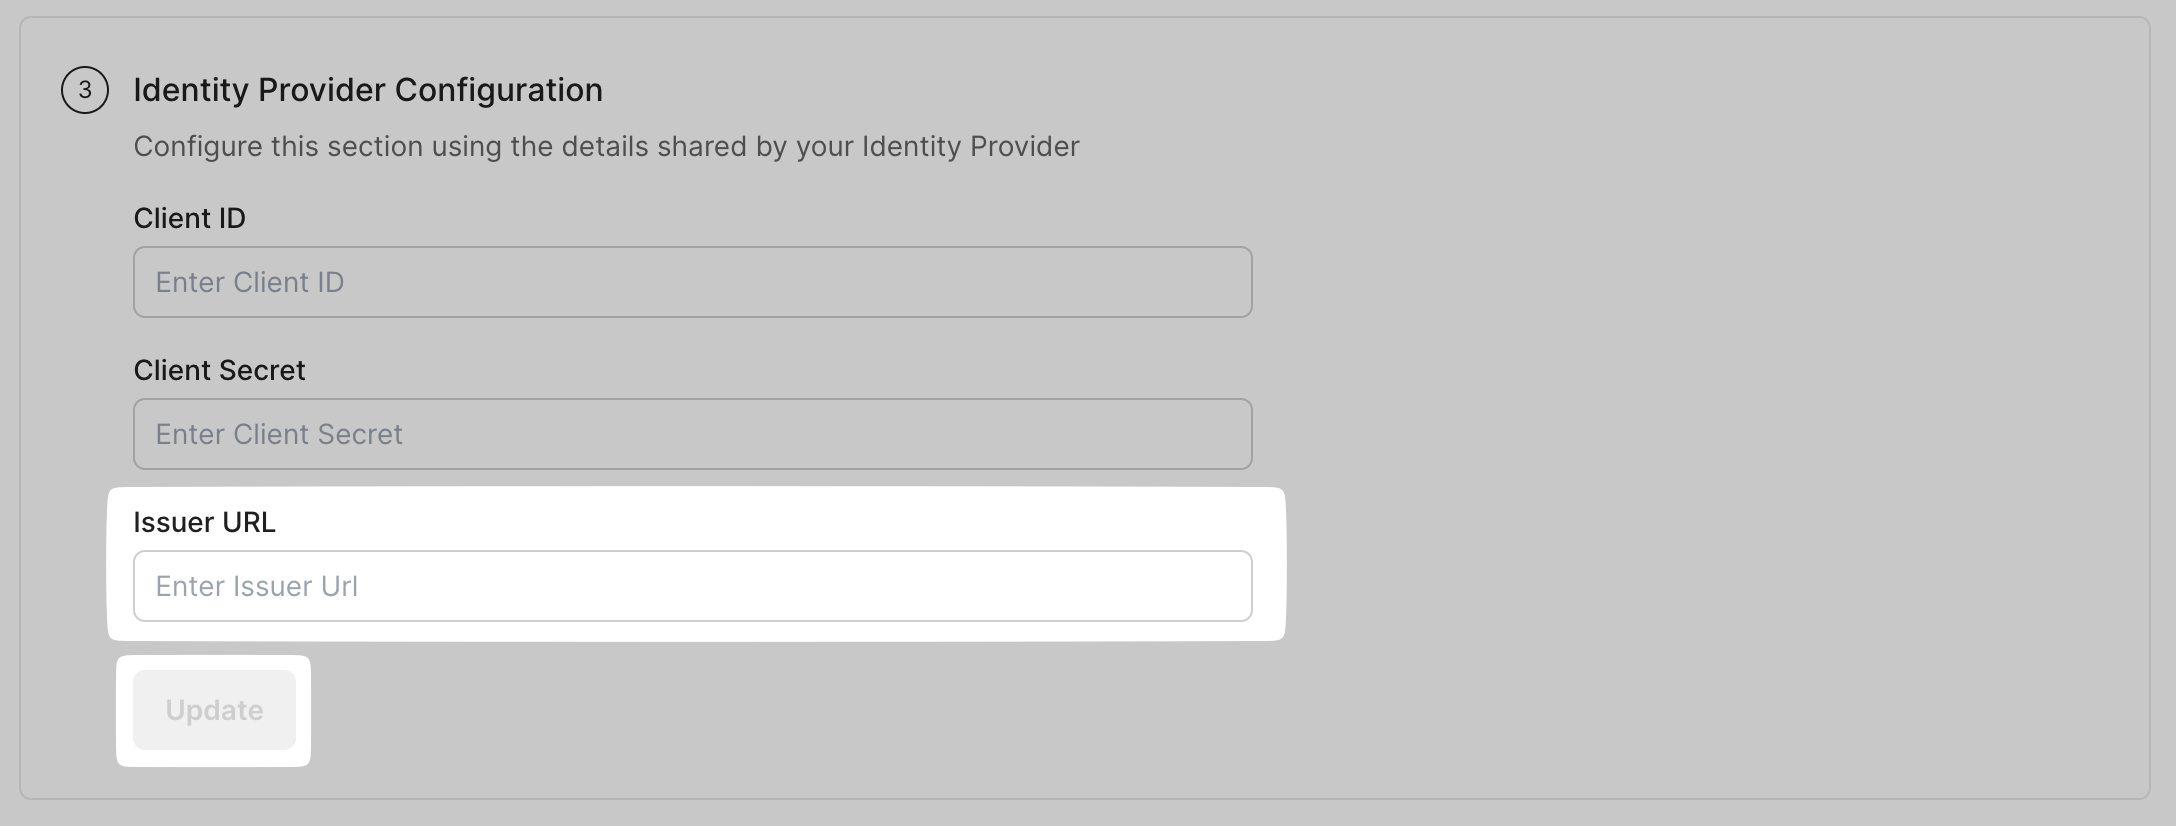
We support configuring Issuer URL field with Discovery Endpoint also.
Discovery Endpoints usually end with ./well-known/openid-configuration
-
Finalize application
Section titled “Finalize application”Your IdP configuration section on the SSO Configuration Portal should look something like this once you’re done configuring it.

-
Test connection
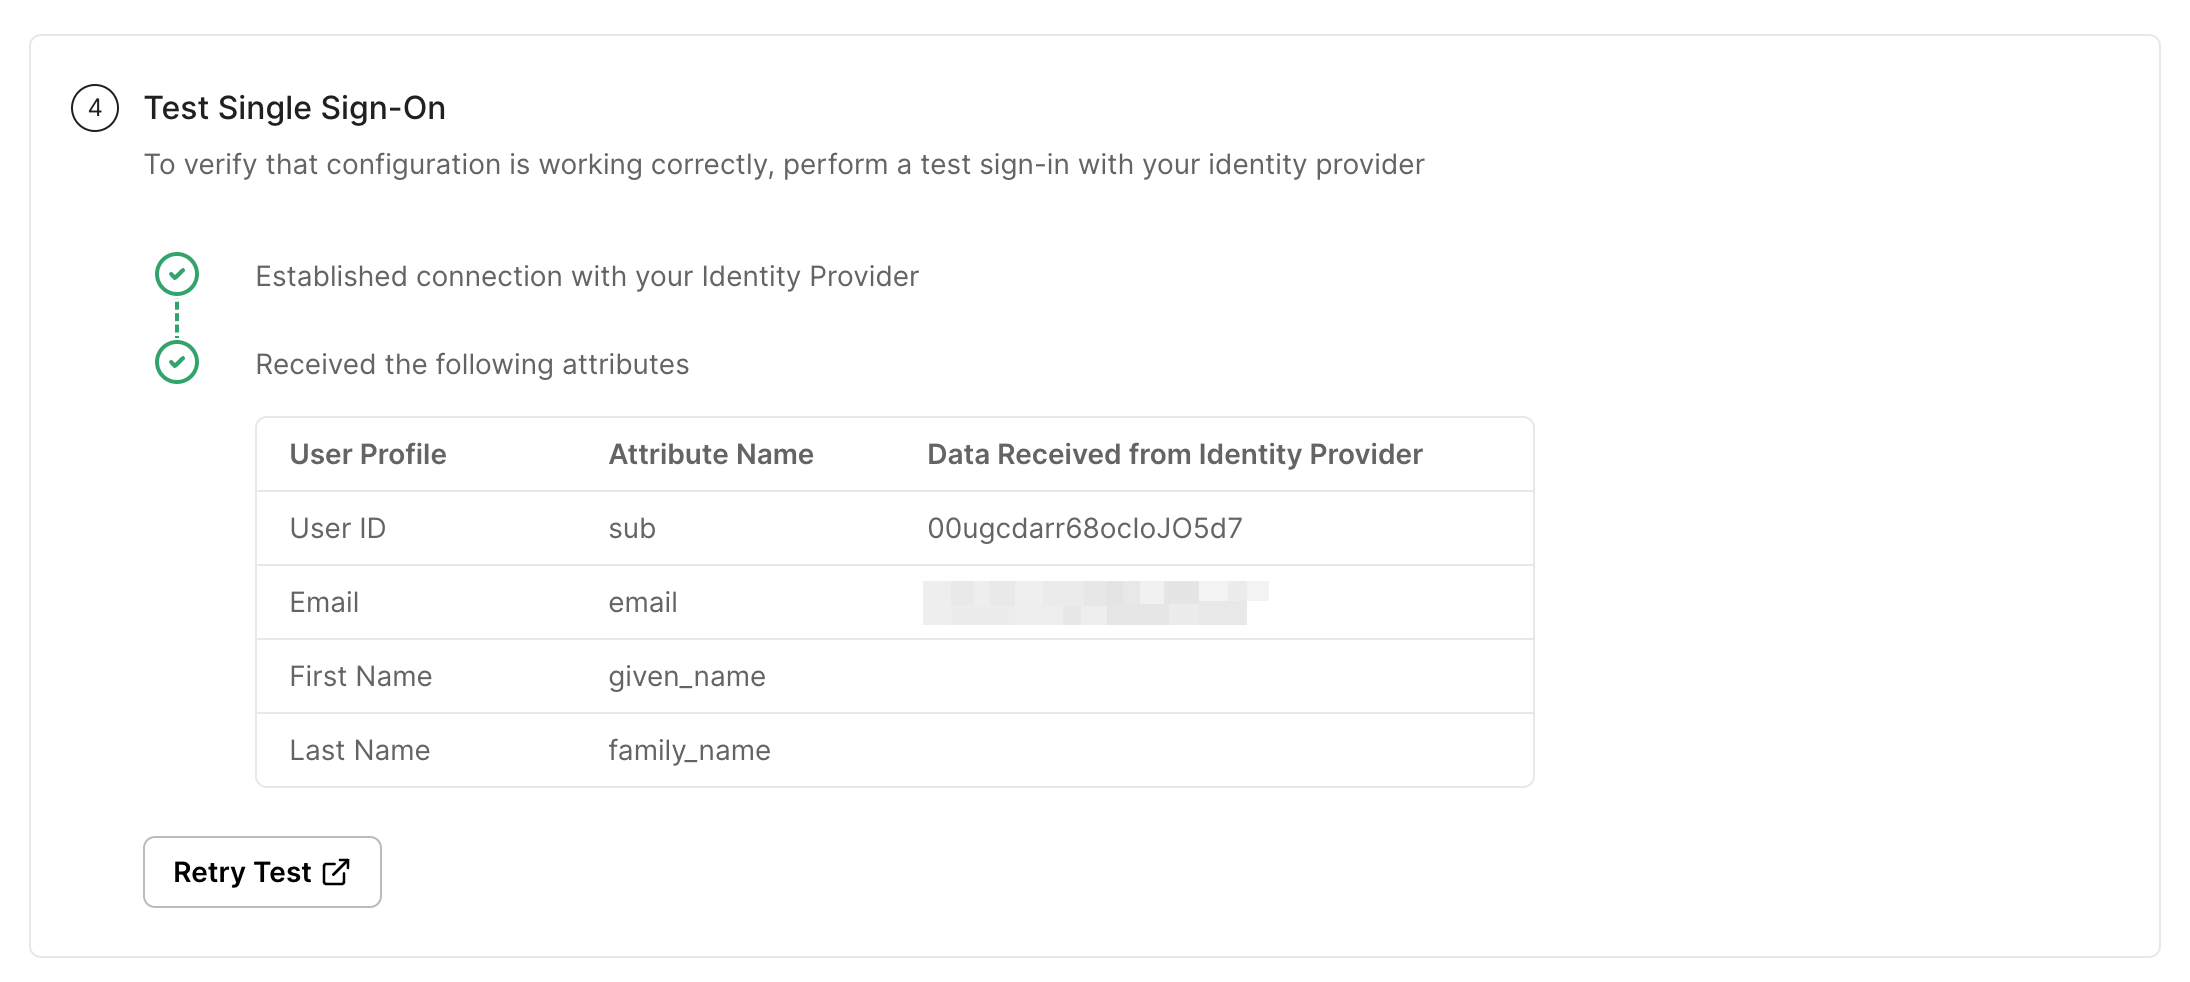
Section titled “Test connection”Click on Test Connection. If everything is done correctly, you will see a Success response as shown below.
If the connection fails, you’ll see an error, the reason for the error, and a way to solve that error right on the screen.
-
Enable connection
Section titled “Enable connection”Click on Enable Connection. This will let all your selected users login to the new application via OIDC.

With this, we are done configuring your application for an OIDC login setup.