Microsoft as your sign in option
Learn how to integrate Microsoft Sign-In with Scalekit, enabling secure social authentication for your users with step-by-step OAuth configuration instructions.
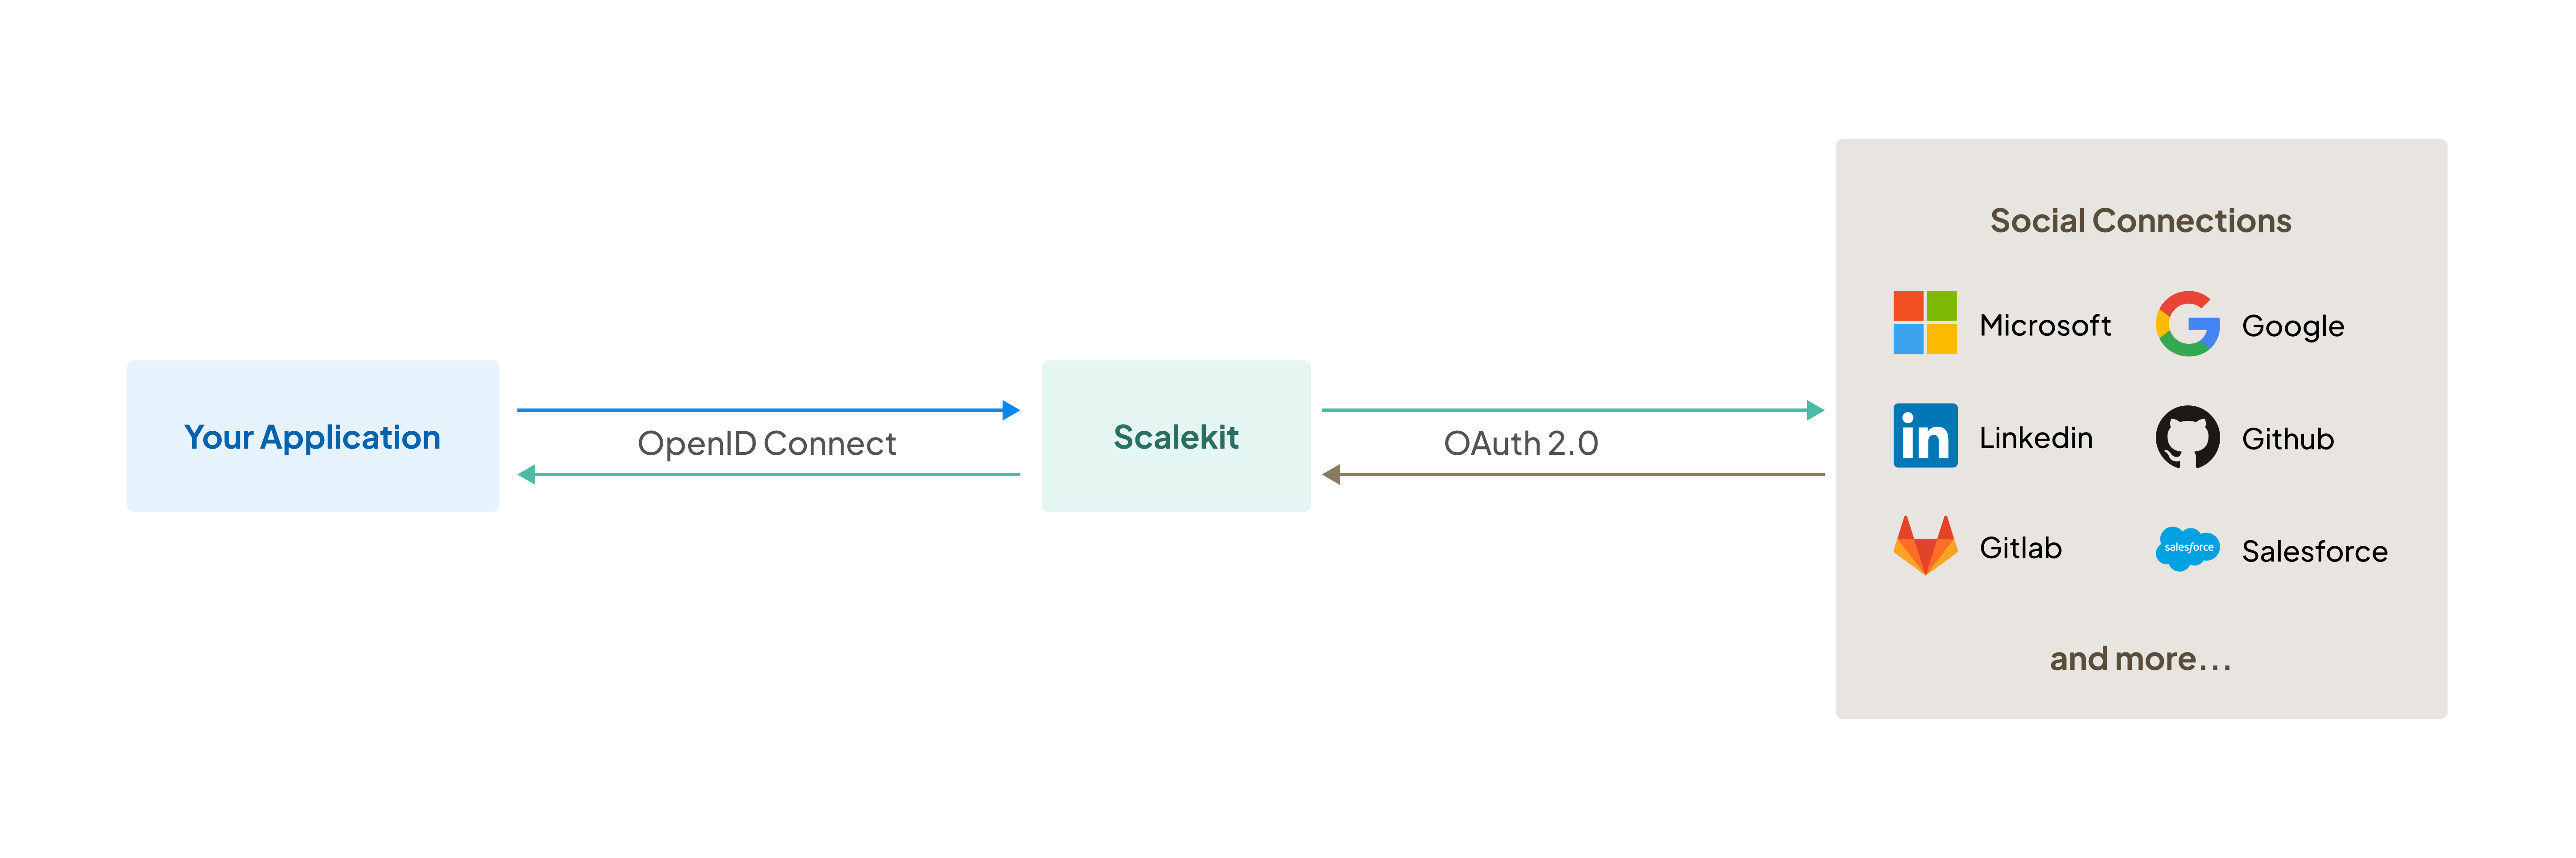
Scalekit enables apps to easily let users sign in using Microsoft as their social connector. This guide walks you through the process of setting up the connection between Scalekit and Microsoft, and using the Scalekit SDK to add “Sign in with Microsoft” to your application.
By the end of this guide, you will be able to:
- Set up an OAuth 2.0 connection between Scalekit and Microsoft
- Use the Scalekit SDK to add “Sign in with Microsoft” to your application
Connect Microsoft with Scalekit
Section titled “Connect Microsoft with Scalekit”-
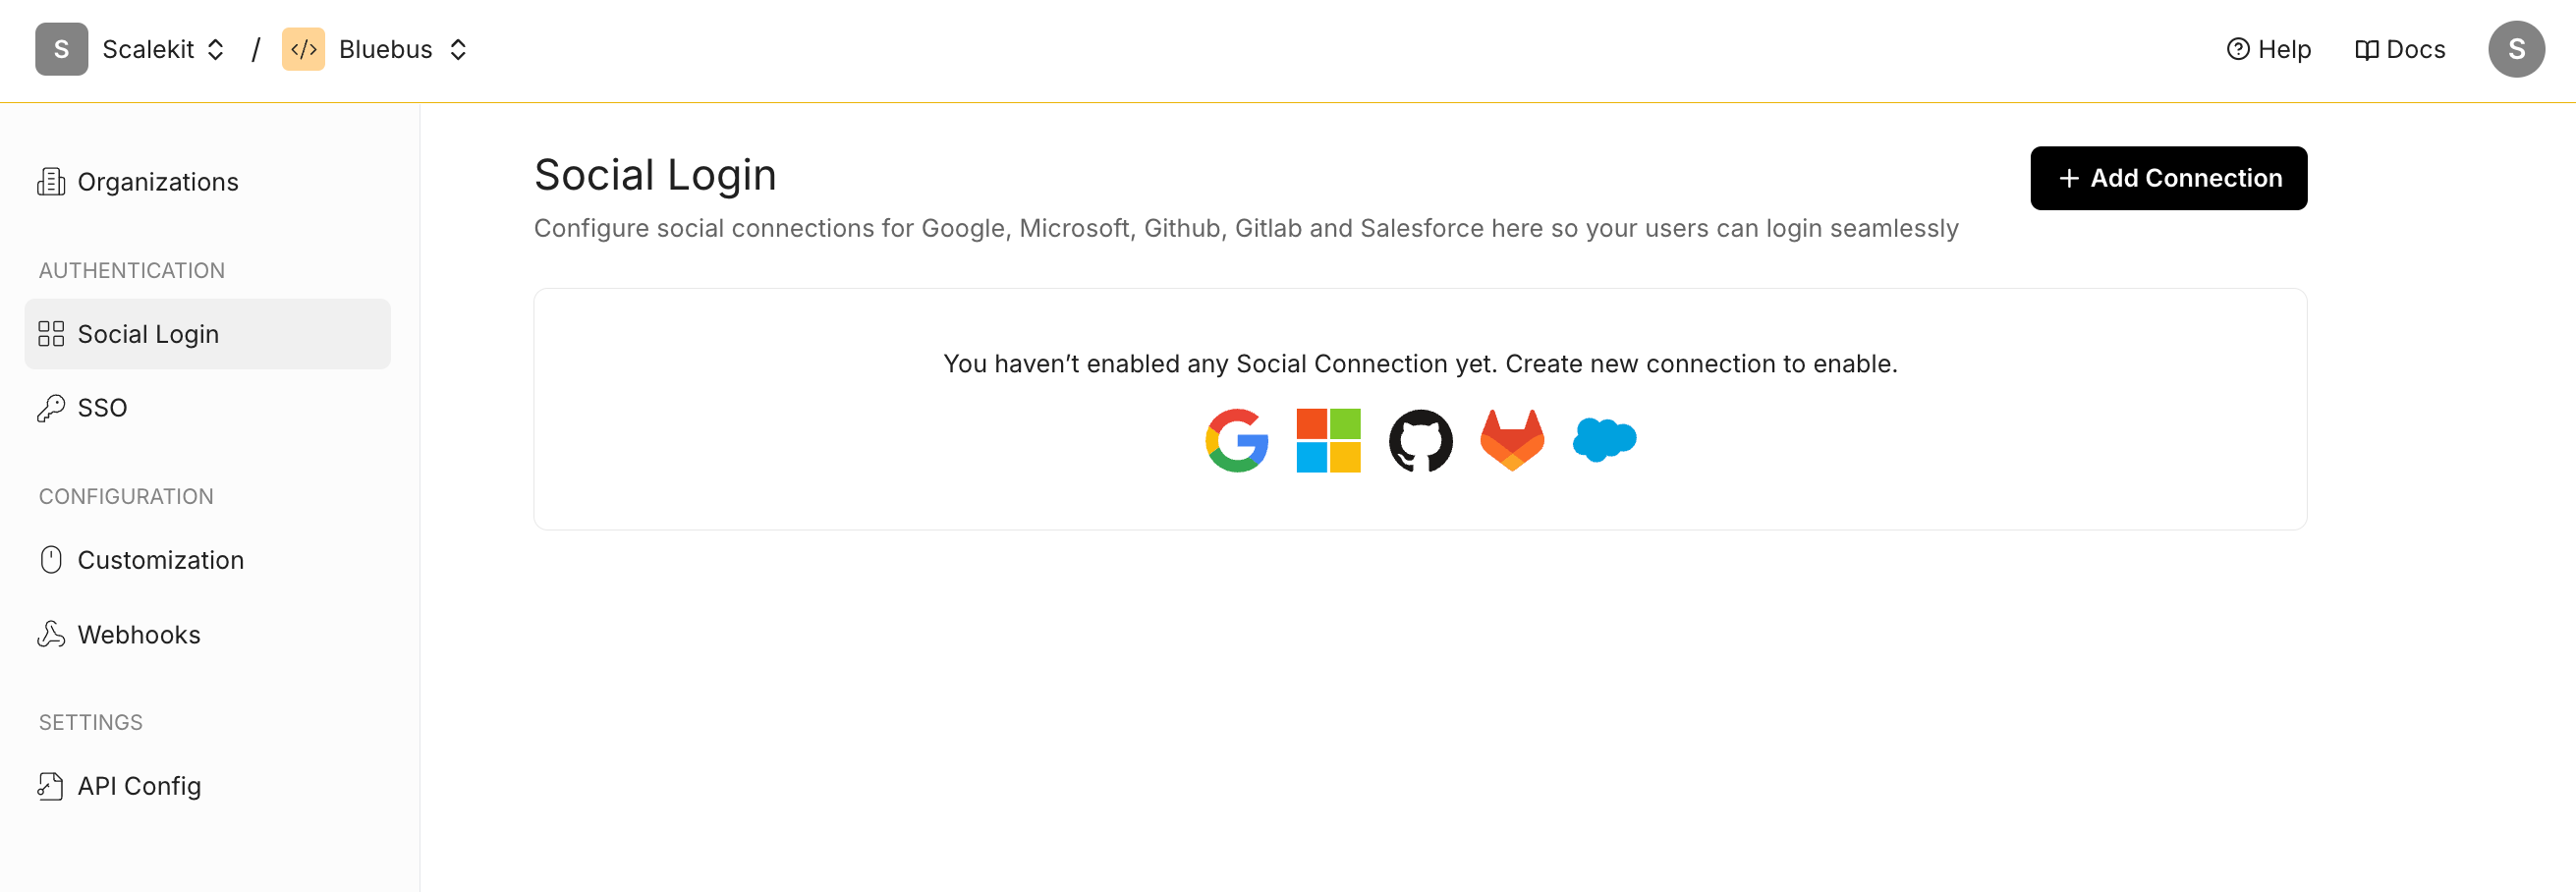
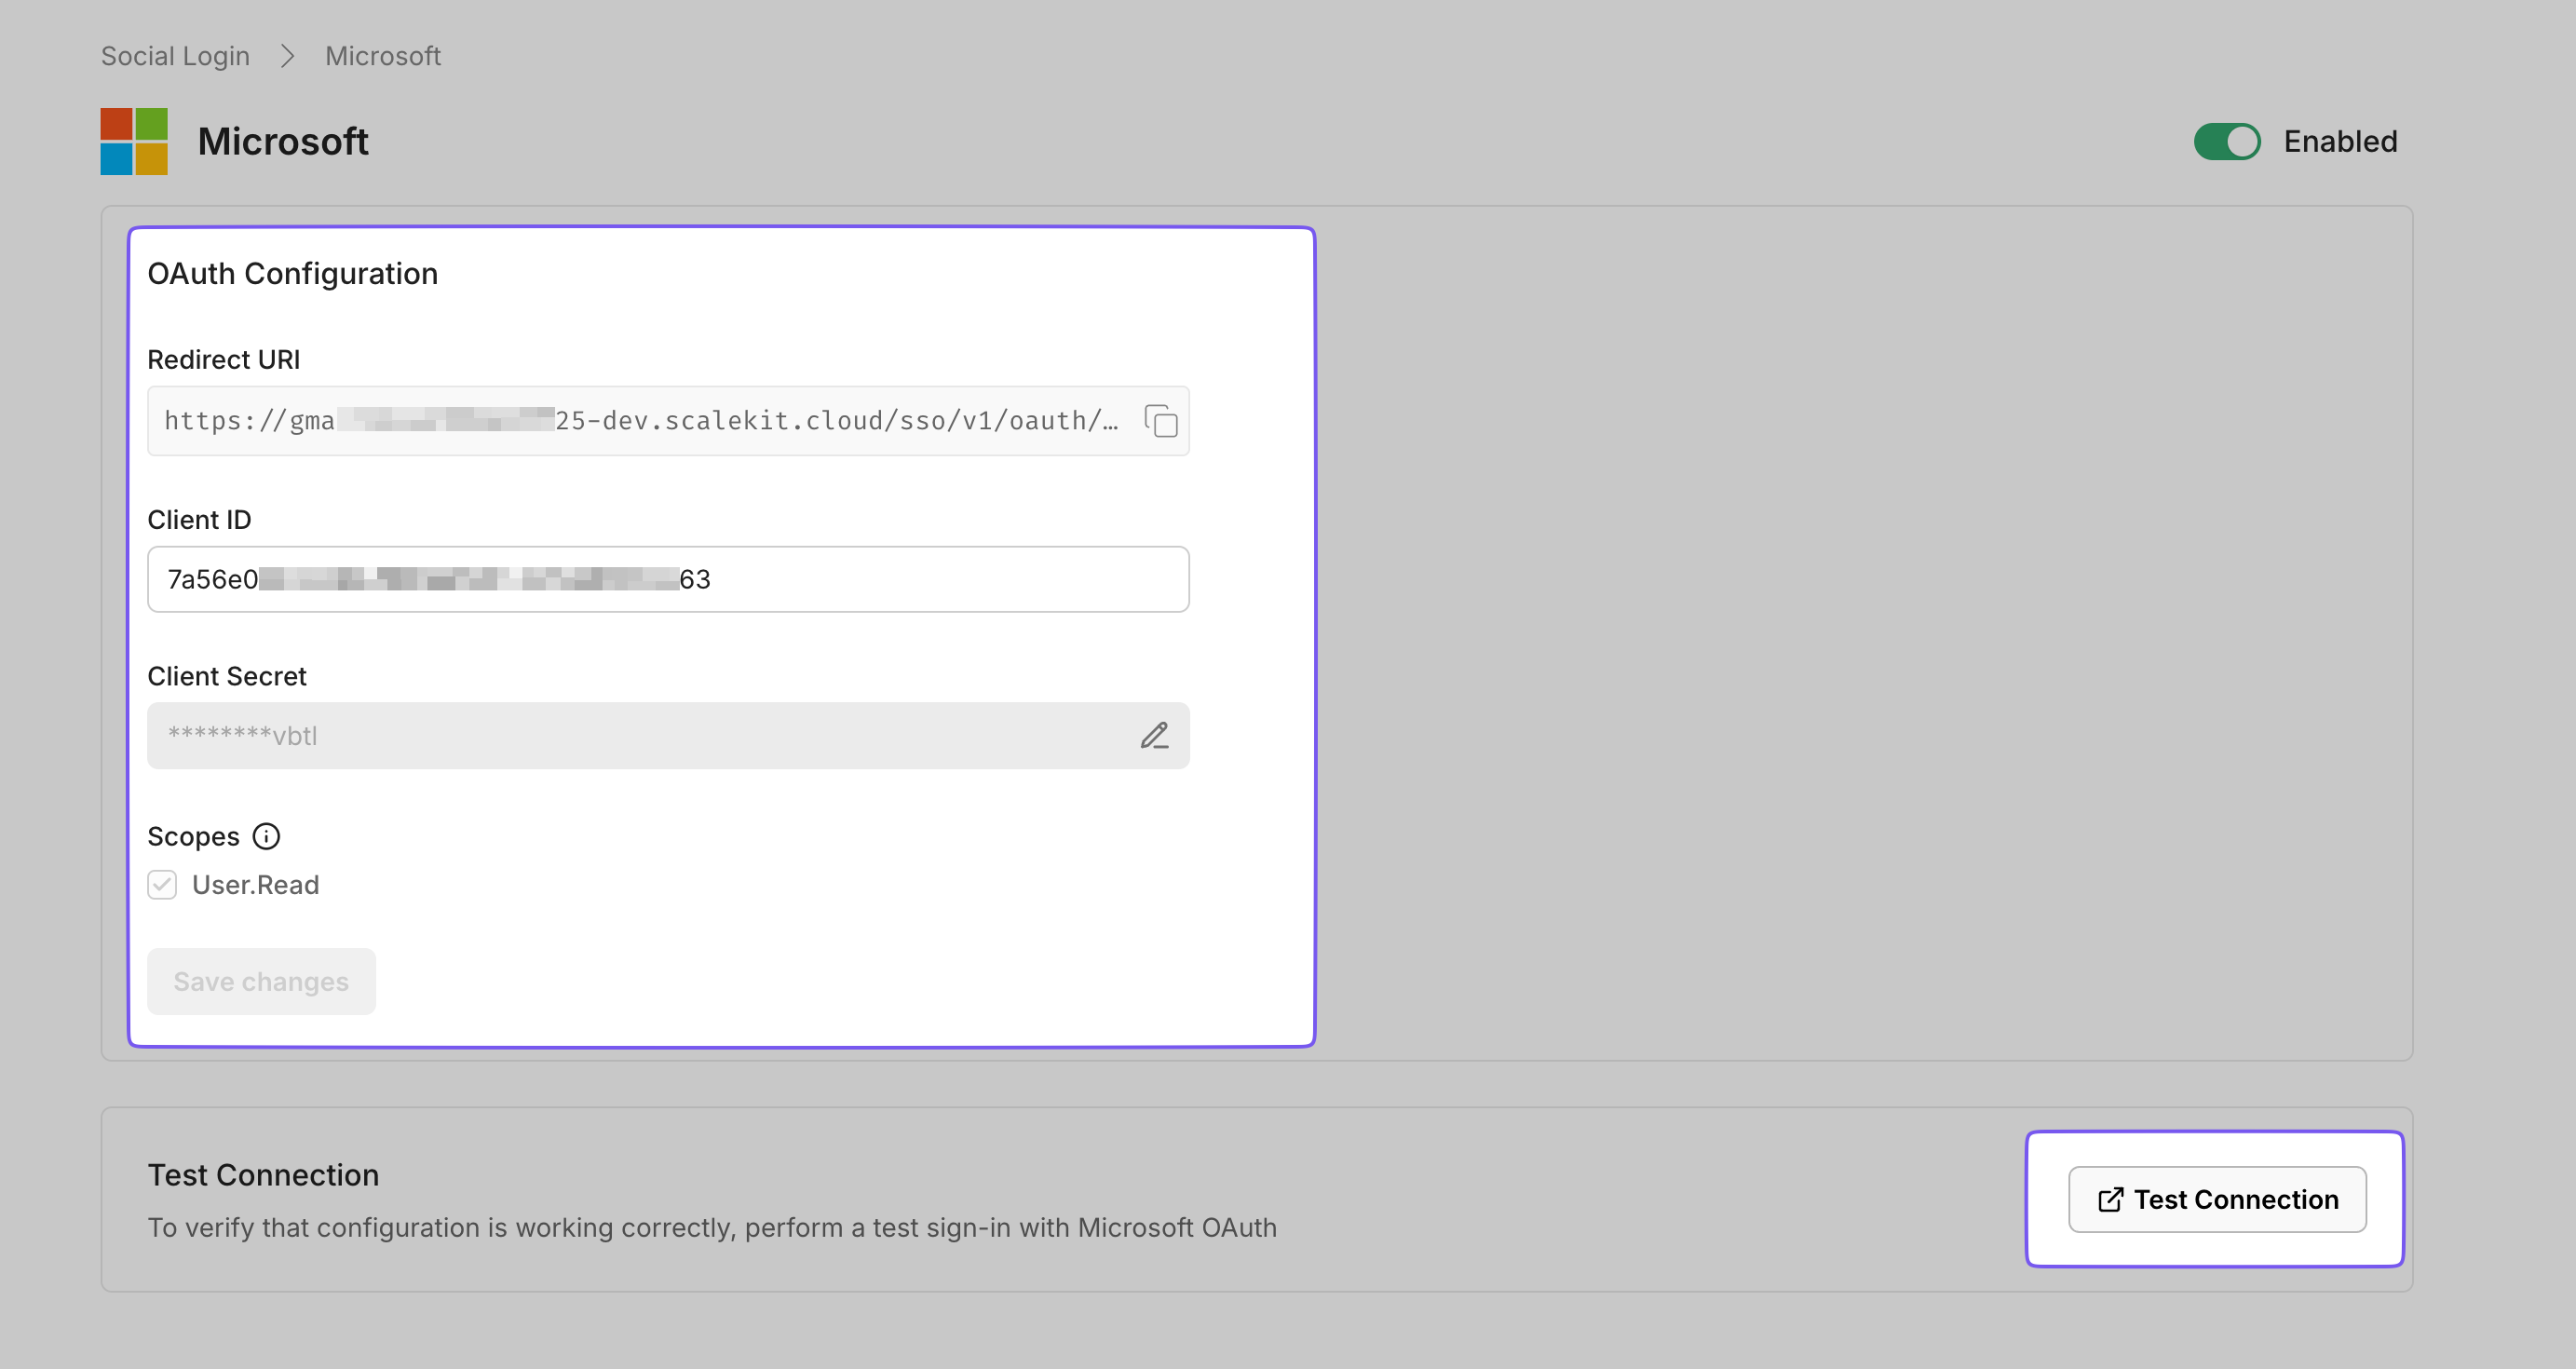
Navigate to social login settings Open your Scalekit dashboard and navigate to Social Login under the Authentication section.
-
Add a new Microsoft connection Click the ”+ Add Connection” button and select Microsoft from the list of available options.
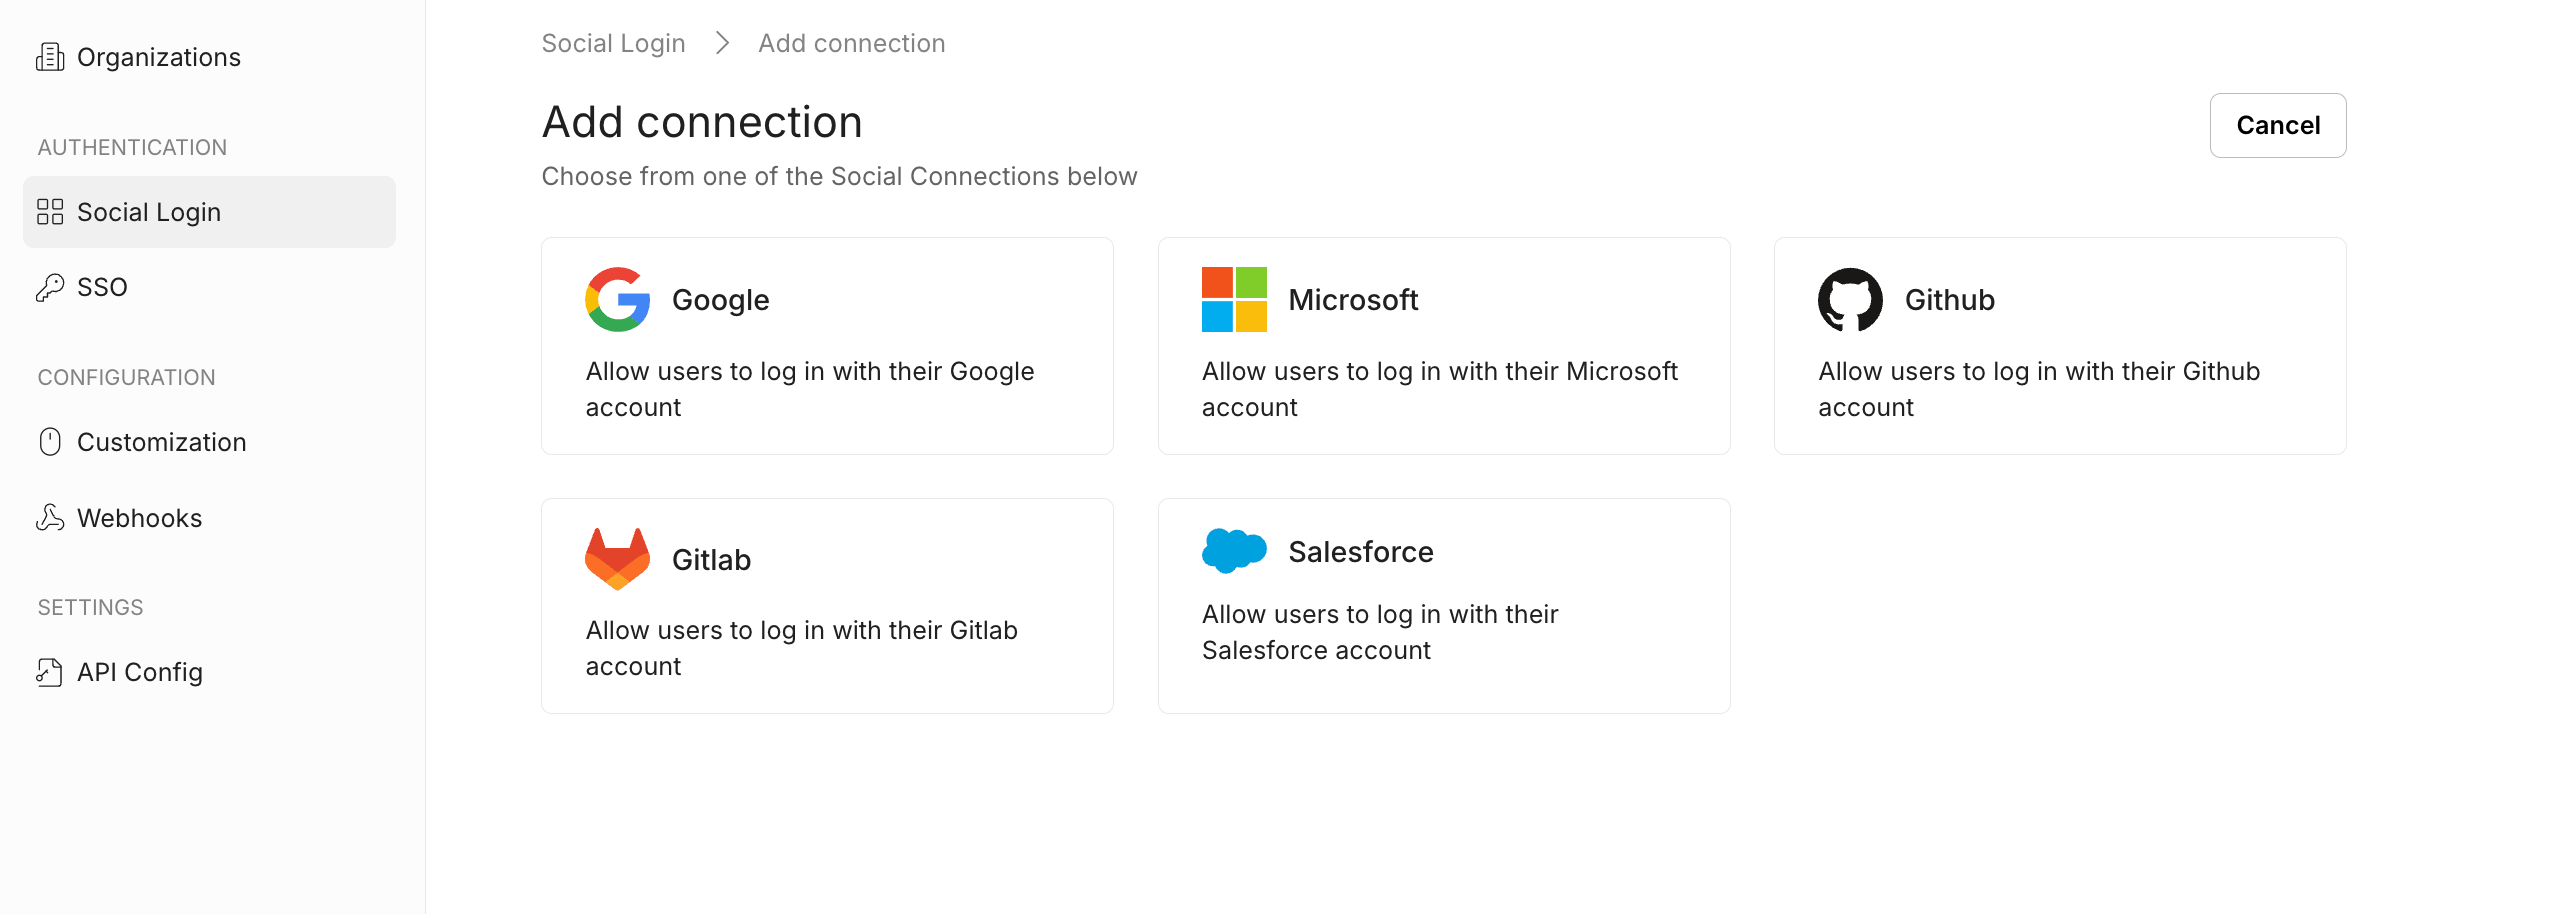
Add social login connections: Microsoft
Configure OAuth settings
Section titled “Configure OAuth settings”The OAuth Configuration details page helps you set up the connection:
- Note the Redirect URI provided for your app. You’ll use this URL to register with Microsoft.
- Client ID and Client Secret are generated by Microsoft when you register an OAuth App. They enable Scalekit to authenticate your app and establish trust with Microsoft.
Set up Microsoft OAuth 2.0
Section titled “Set up Microsoft OAuth 2.0”Microsoft lets you set up OAuth through the Microsoft Identity Platform. Follow Microsoft’s instructions to set up OAuth 2.0.
- Use the Redirect URI from Scalekit as the Redirect URI in Microsoft’s setup
- Copy the generated Client ID and Client Secret into the Scalekit Dashboard
- Click “Save Changes” in Scalekit for the changes to take effect
Choose the user experience for login prompt
Section titled “Choose the user experience for login prompt”Scalekit offers flexibility to control how and when users are prompted for reauthentication, consent, or account selection. Below are the available options for customizing user sign-in behavior:
-
Auto Sign-in (default): Automatically completes the login process without showing any confirmation prompts. This is ideal for single account users who are already logged in and have previously provided consent.
-
Consent: The authorization server triggers a consent screen after sign-in, asking the user to grant permissions to the app.
-
Select Account: The authorization server prompts the user to select a user account. This allows a user who has multiple accounts at the authorization server to select amongst the multiple accounts that they may have current sessions for.
-
Login: Forces the user to re-enter their credentials and log in, even if a valid session already exists.
-
None: Performs a background authentication check without displaying any screens. If the user is not authenticated or hasn’t provided consent, an error will be returned.
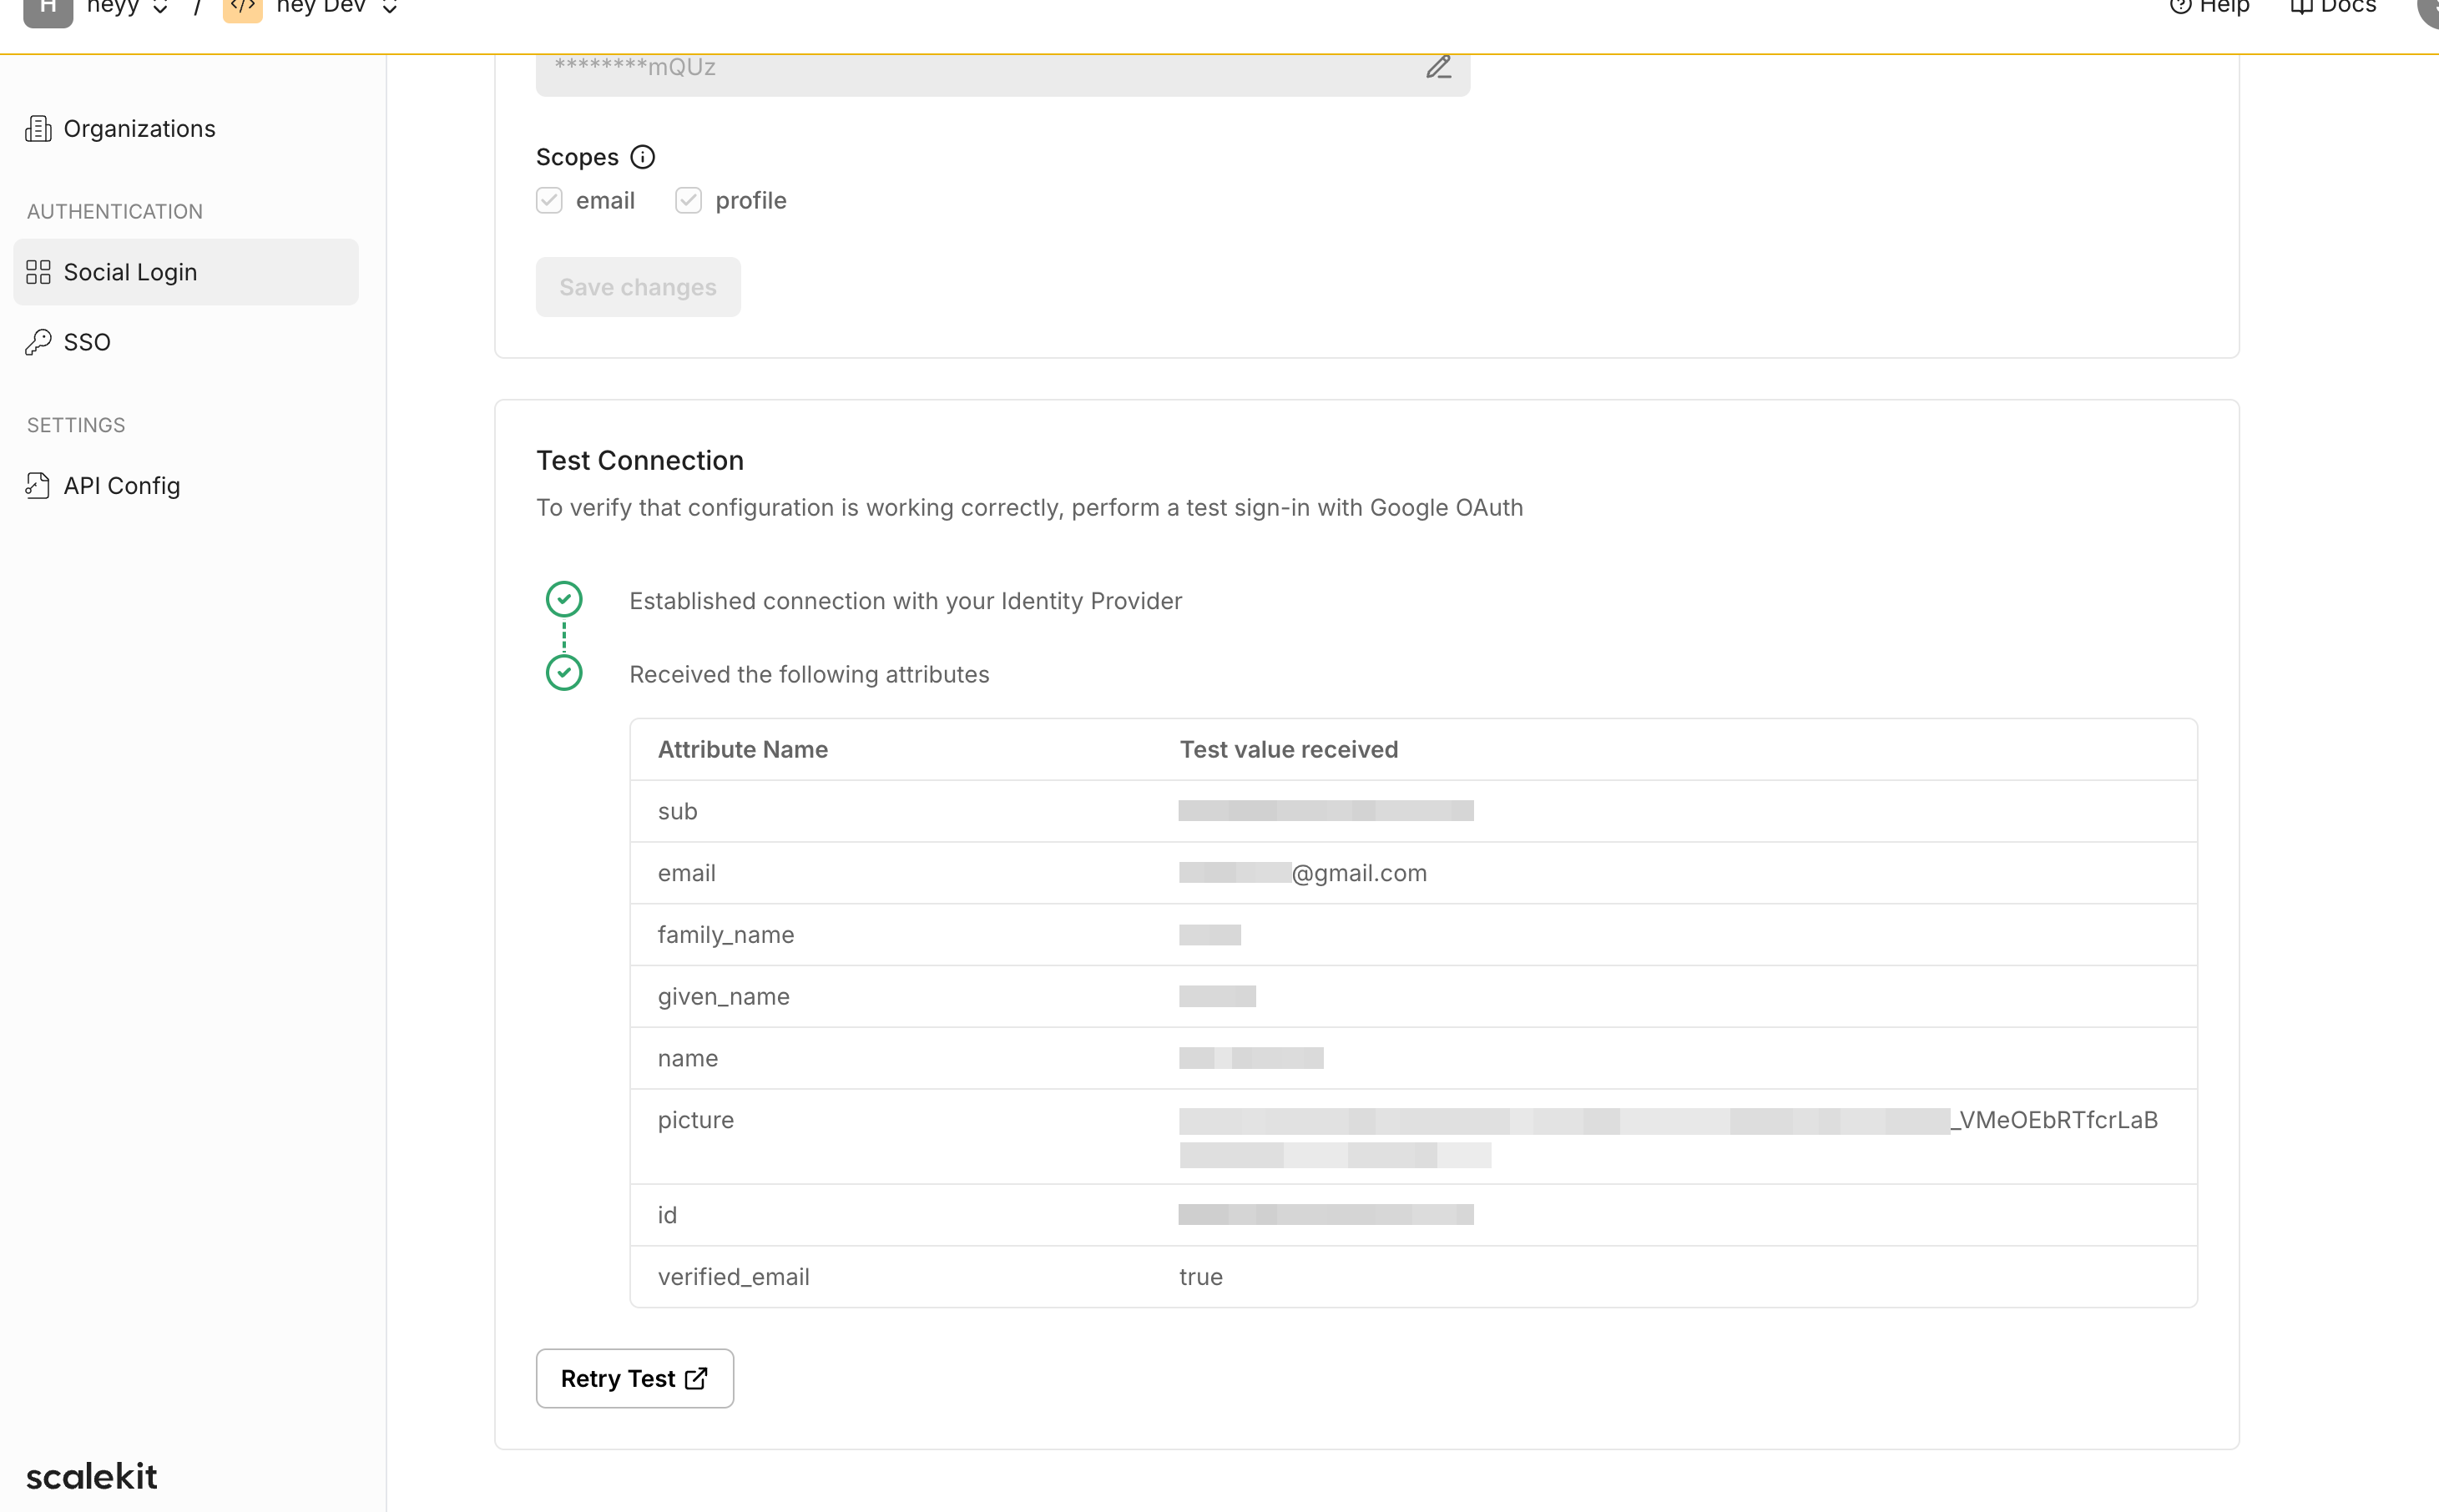
Test the connection
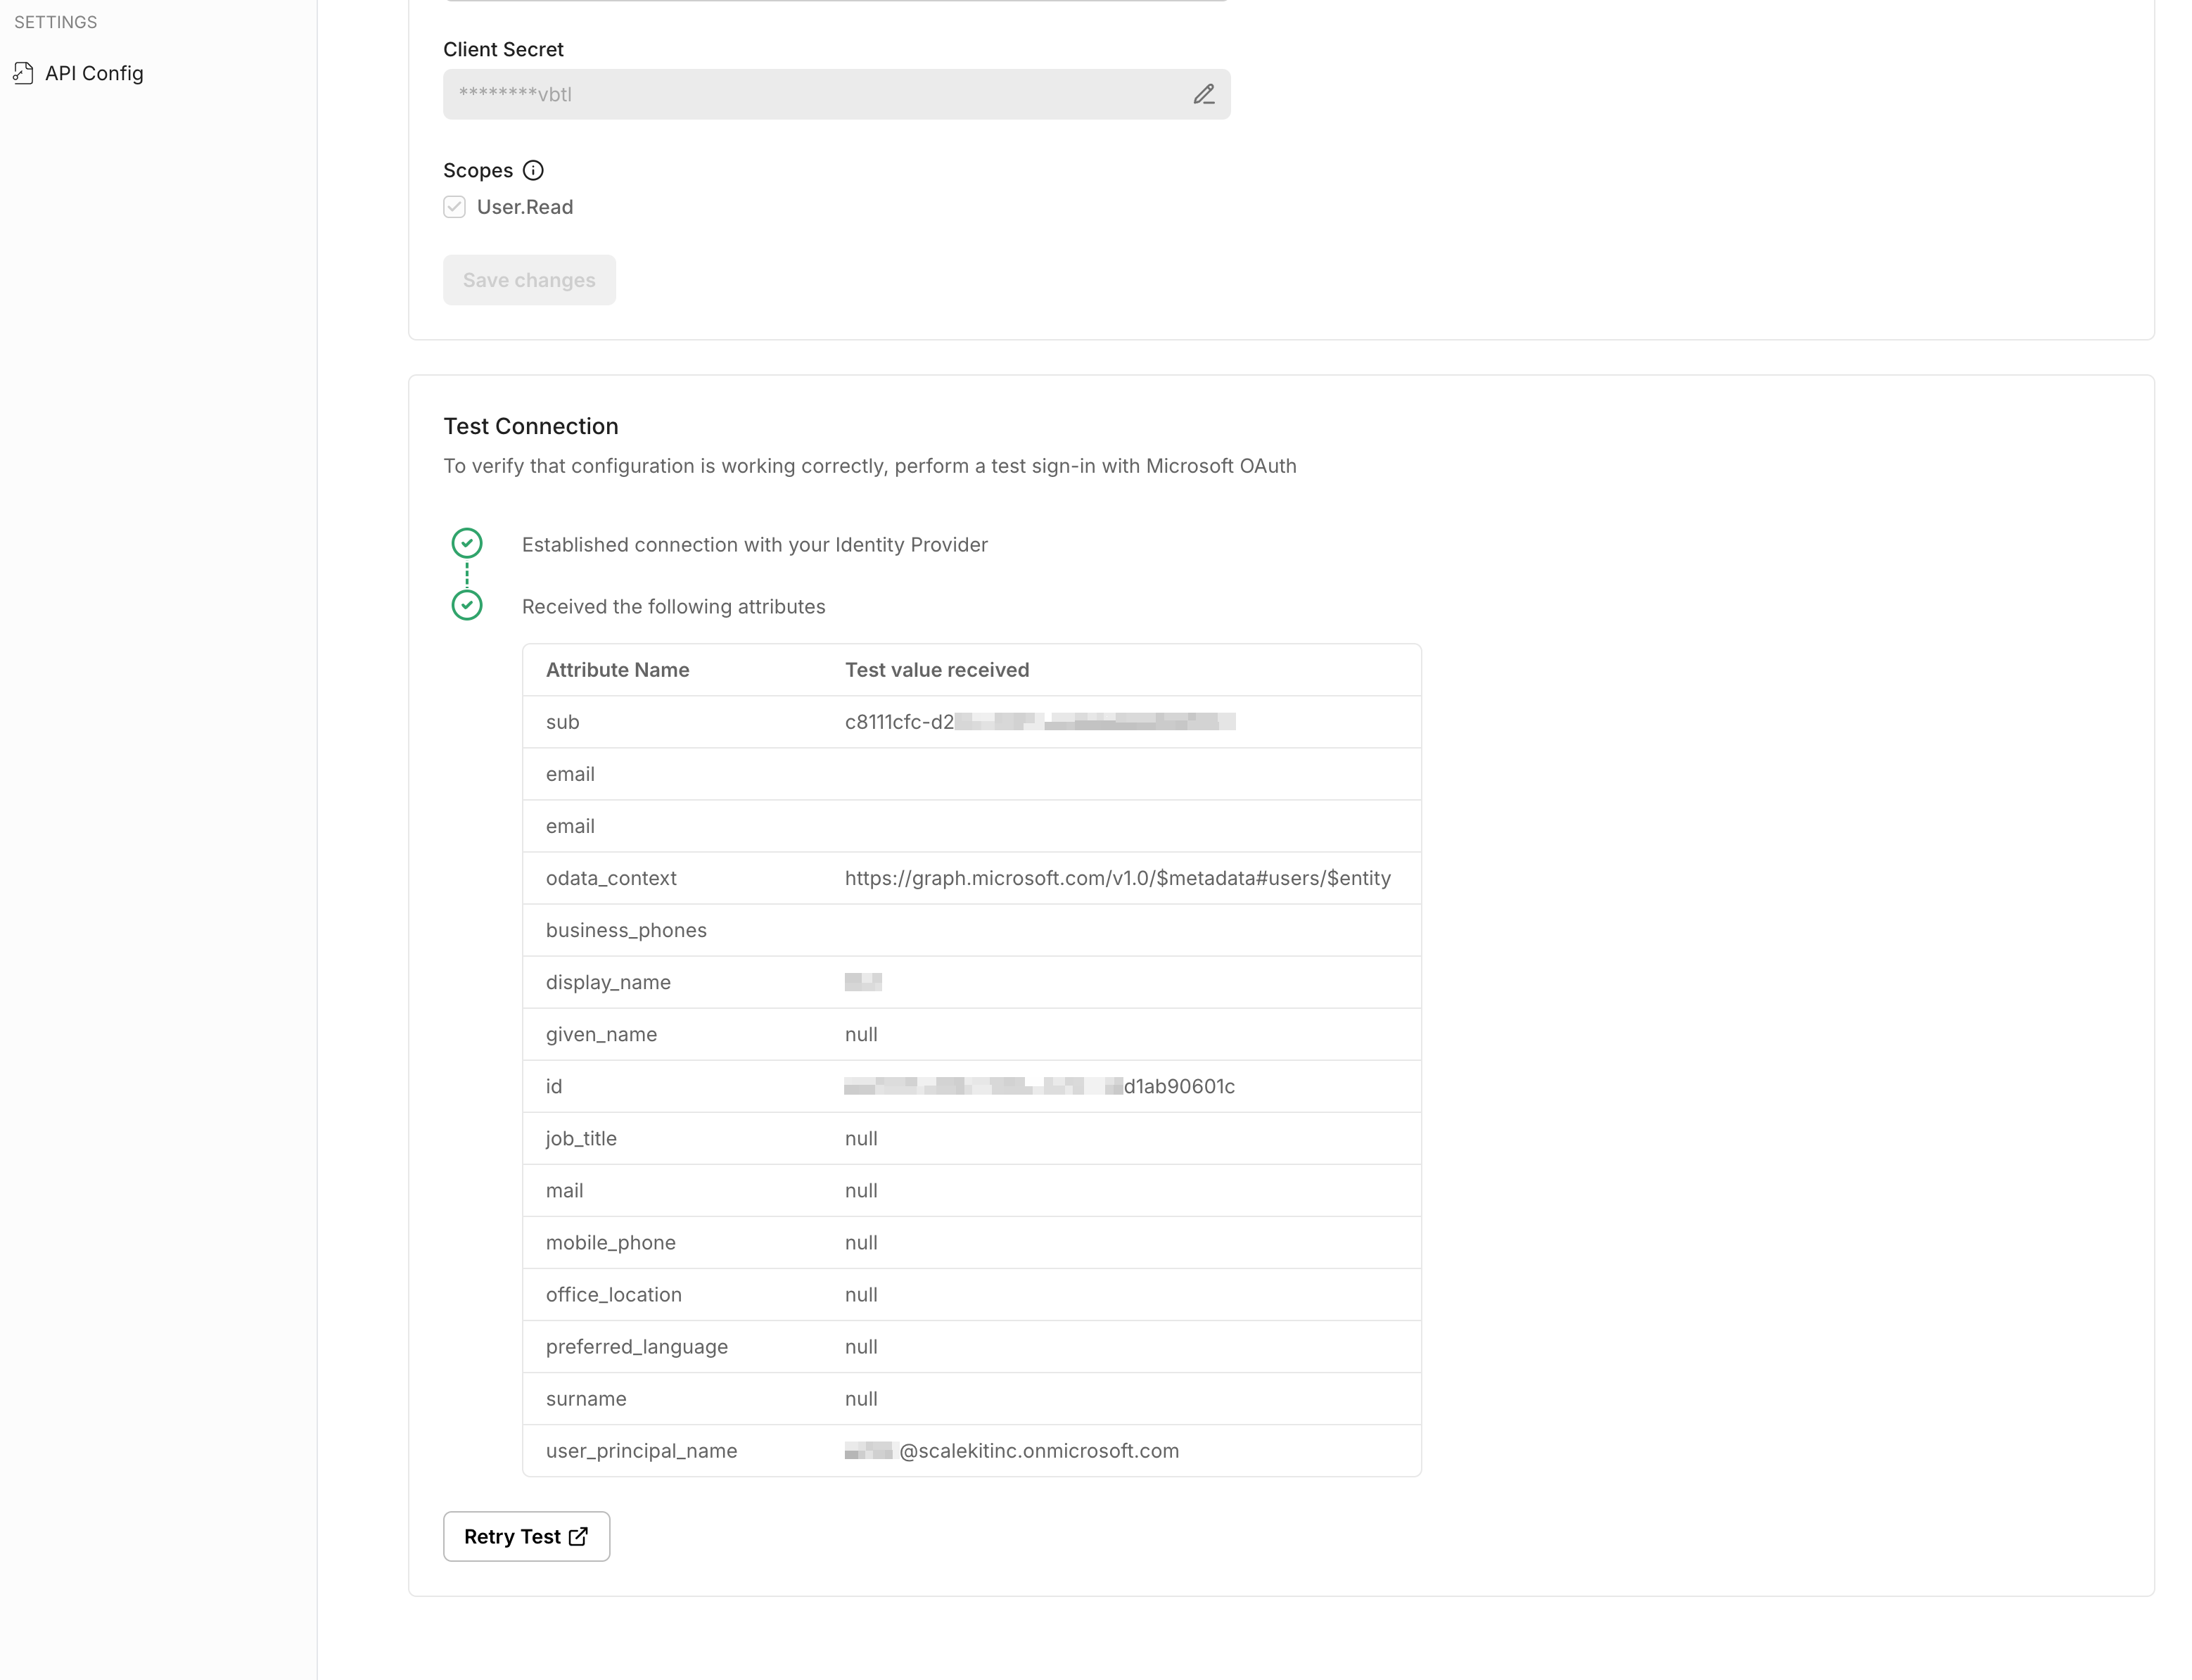
Section titled “Test the connection”- Click the “Test Connection” button in Scalekit
- You will be redirected to the Microsoft Consent screen to authorize access
- A summary table will show the information that will be sent to your app