Microsoft Entra ID - SAML
Learn how to set up SAML-based Single Sign-On (SSO) using Microsoft Entra ID (Azure AD), with step-by-step instructions for enterprise application configuration.
Step-by-step guide to configure Single Sign-On with Microsoft Entra ID as the identity provider
This guide walks you through configuring Microsoft Entra ID as your SAML identity provider for the application you are onboarding, enabling secure Single Sign-On for your users. You’ll learn how to set up an enterprise application, configure SAML settings, map user attributes, and assign users to the application. By following these steps, your users will be able to seamlessly authenticate using their Microsoft Entra ID credentials.
Download metadata XML
Section titled “Download metadata XML”-
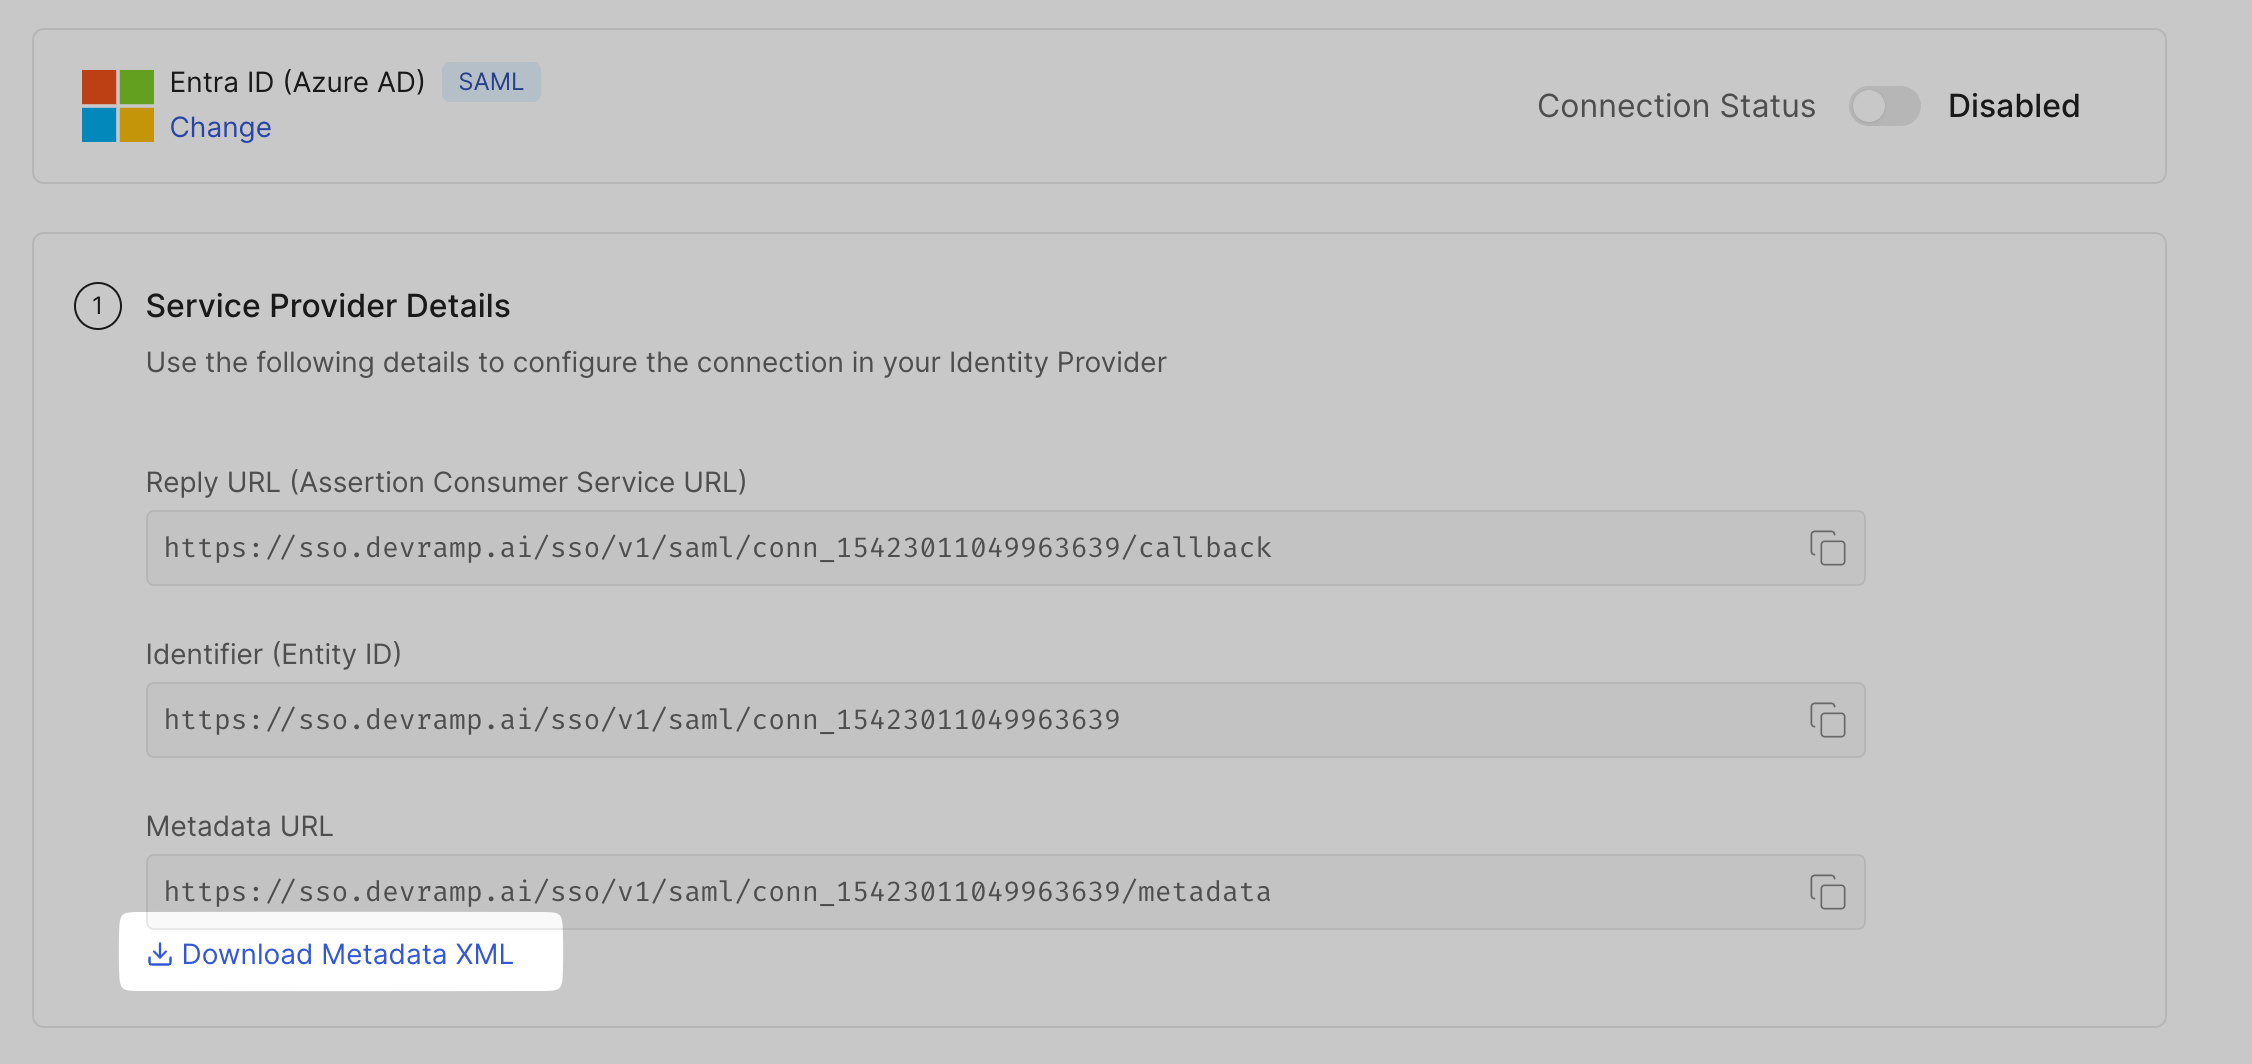
Sign into the SSO Configuration Portal, select Microsoft Entra ID, then SAML, and click on Configure
Under Service Provider Details, click on Download Metadata XML
Create enterprise application
Section titled “Create enterprise application”-
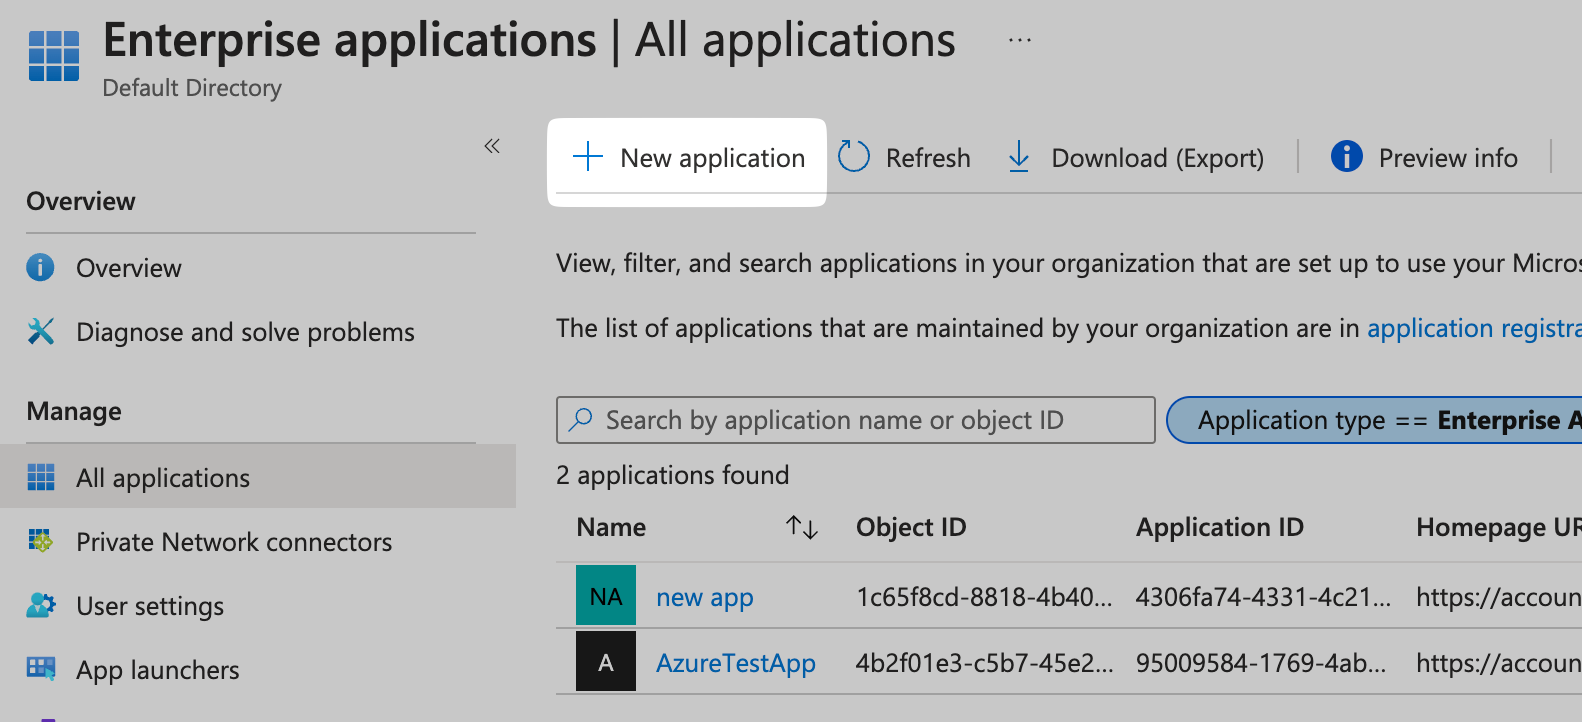
Login to Microsoft Entra ID in the Microsoft Azure Portal. Select the option for Entra ID application and locate the Enterprise Applications tab

-
In the Enterprise Applications tab New Application in the top navigation bar
-
Click on Create your own Application and give your application a name
Select the Integrate any other application you don’t find in the gallery (Non-gallery) option. Click on Create
Configure SAML settings
Section titled “Configure SAML settings”-
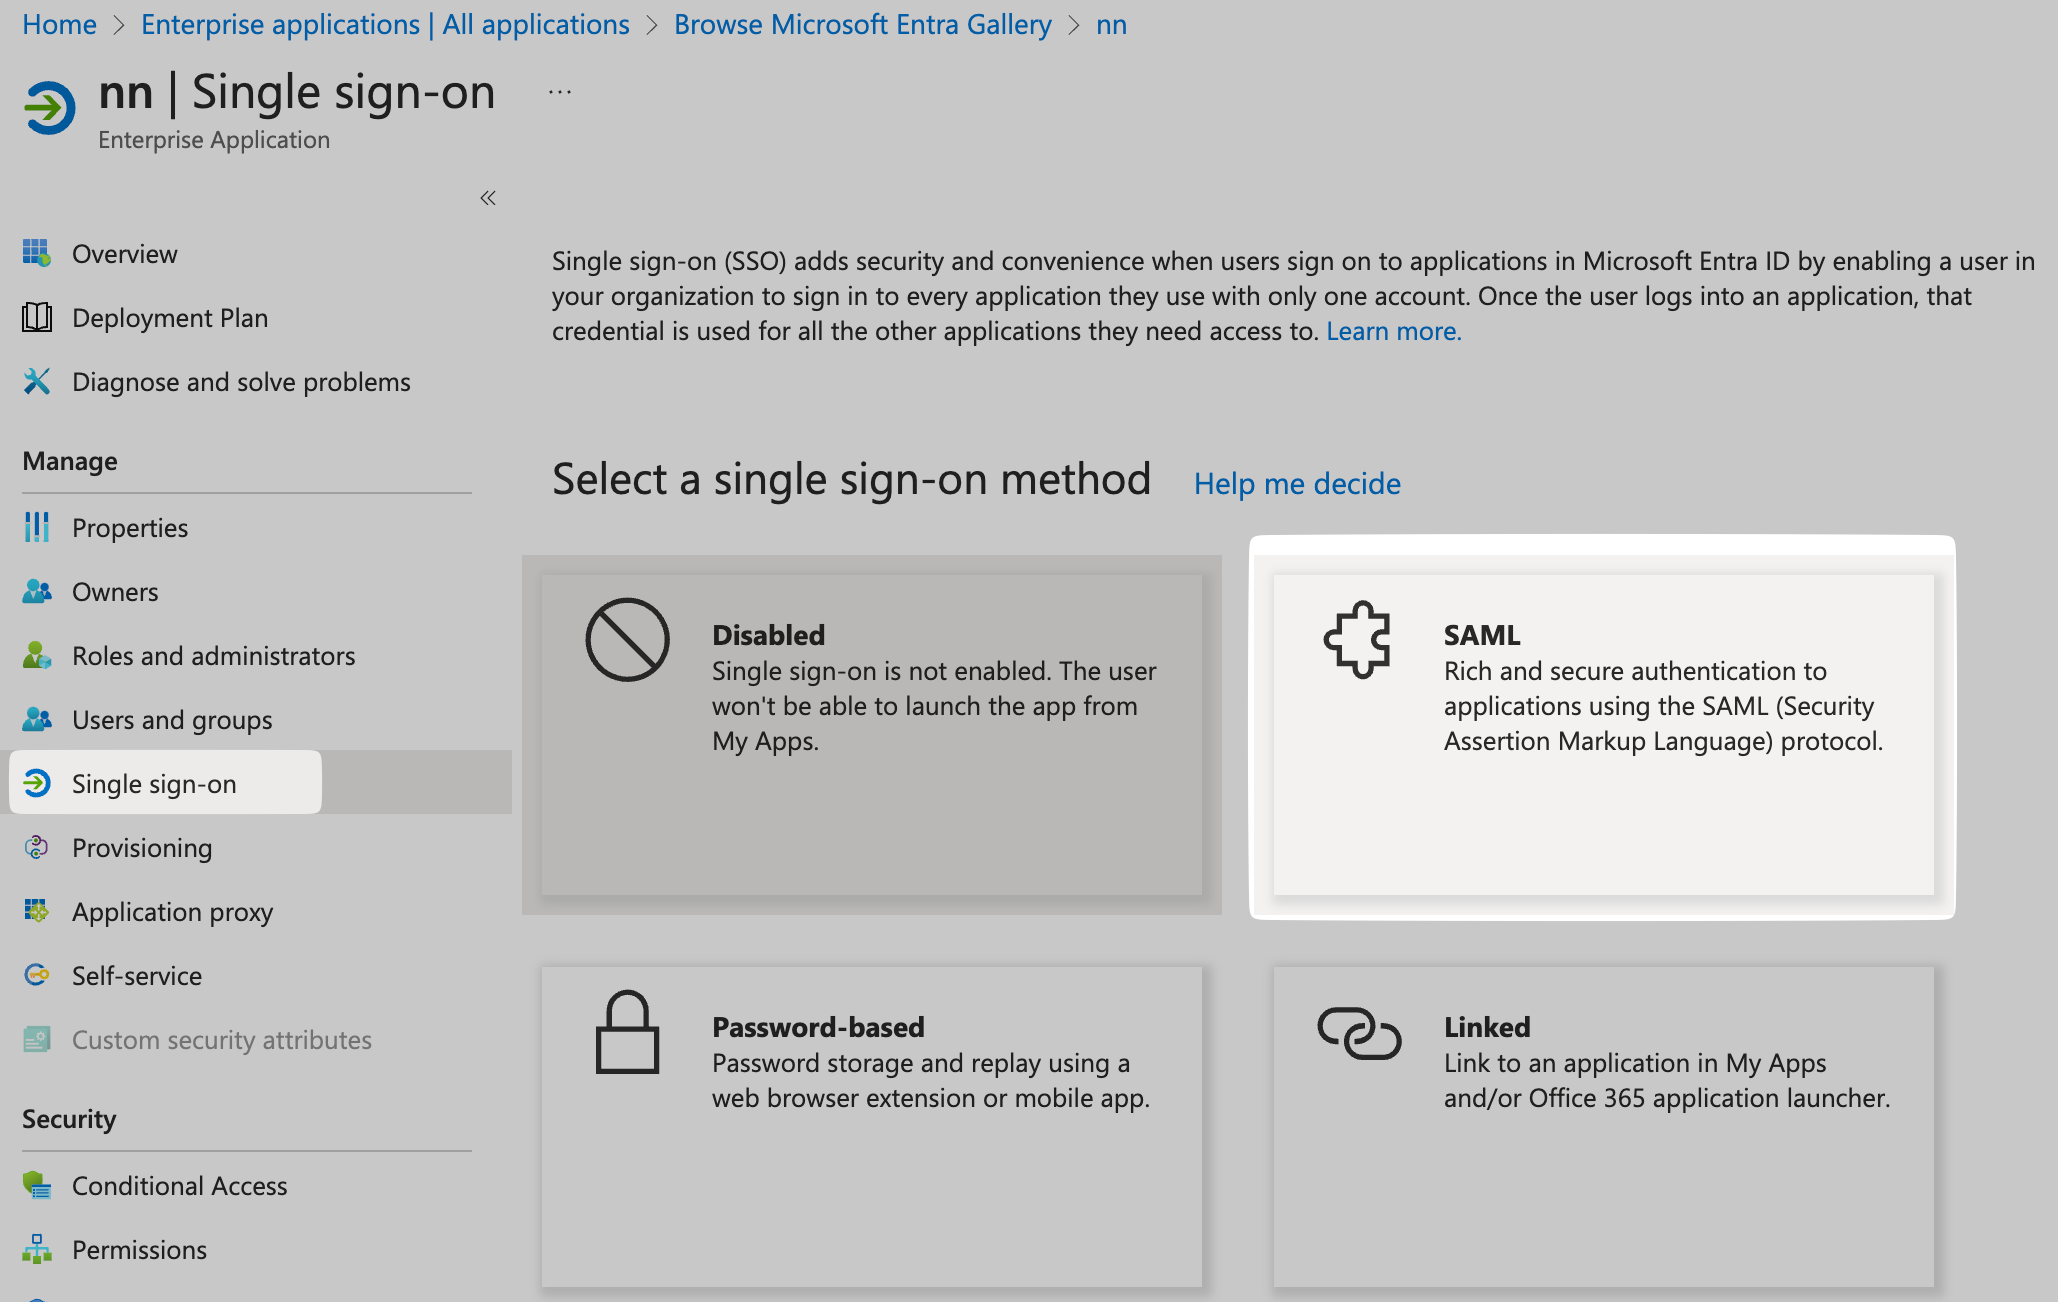
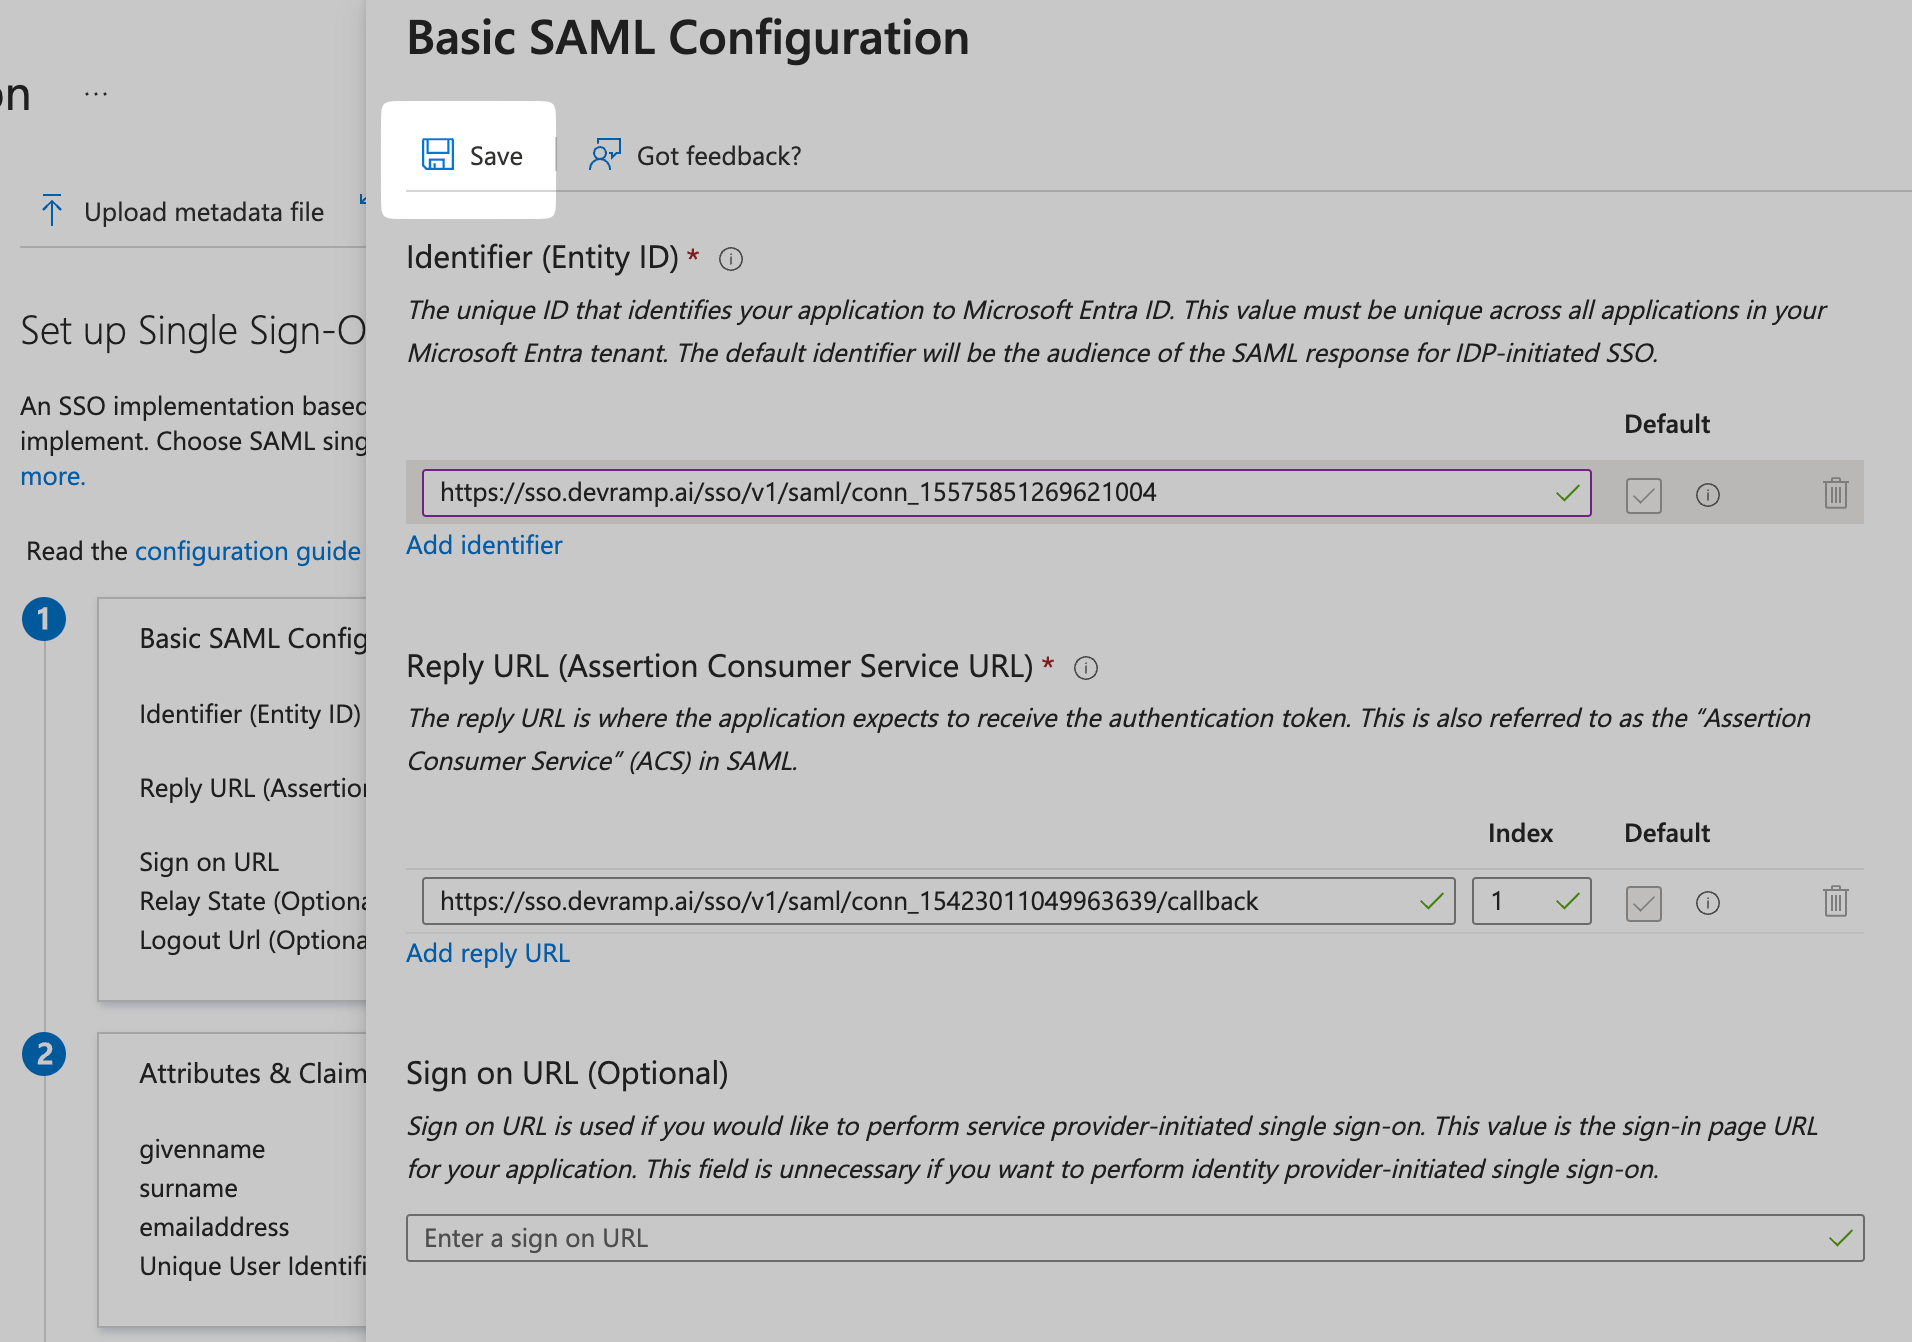
Locate the Single Sign-On option under Manage, and choose SAML
-
Click on Upload metadata file. Upload the Metadata XML file downloaded in step 1
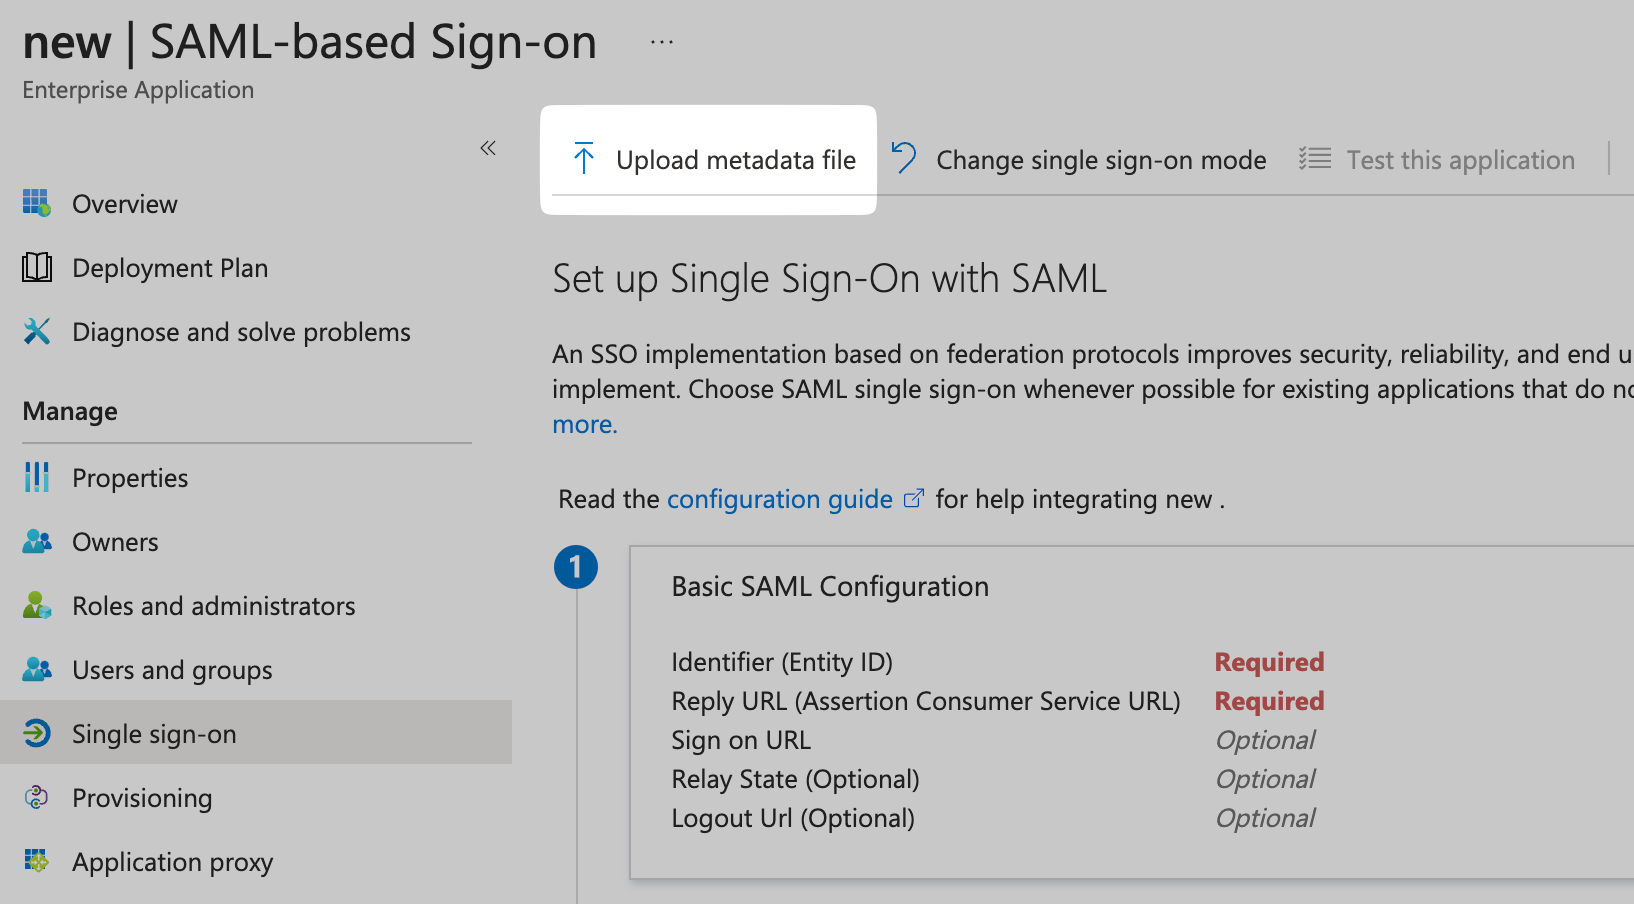
-
Click on Save
Map user attributes
Section titled “Map user attributes”-
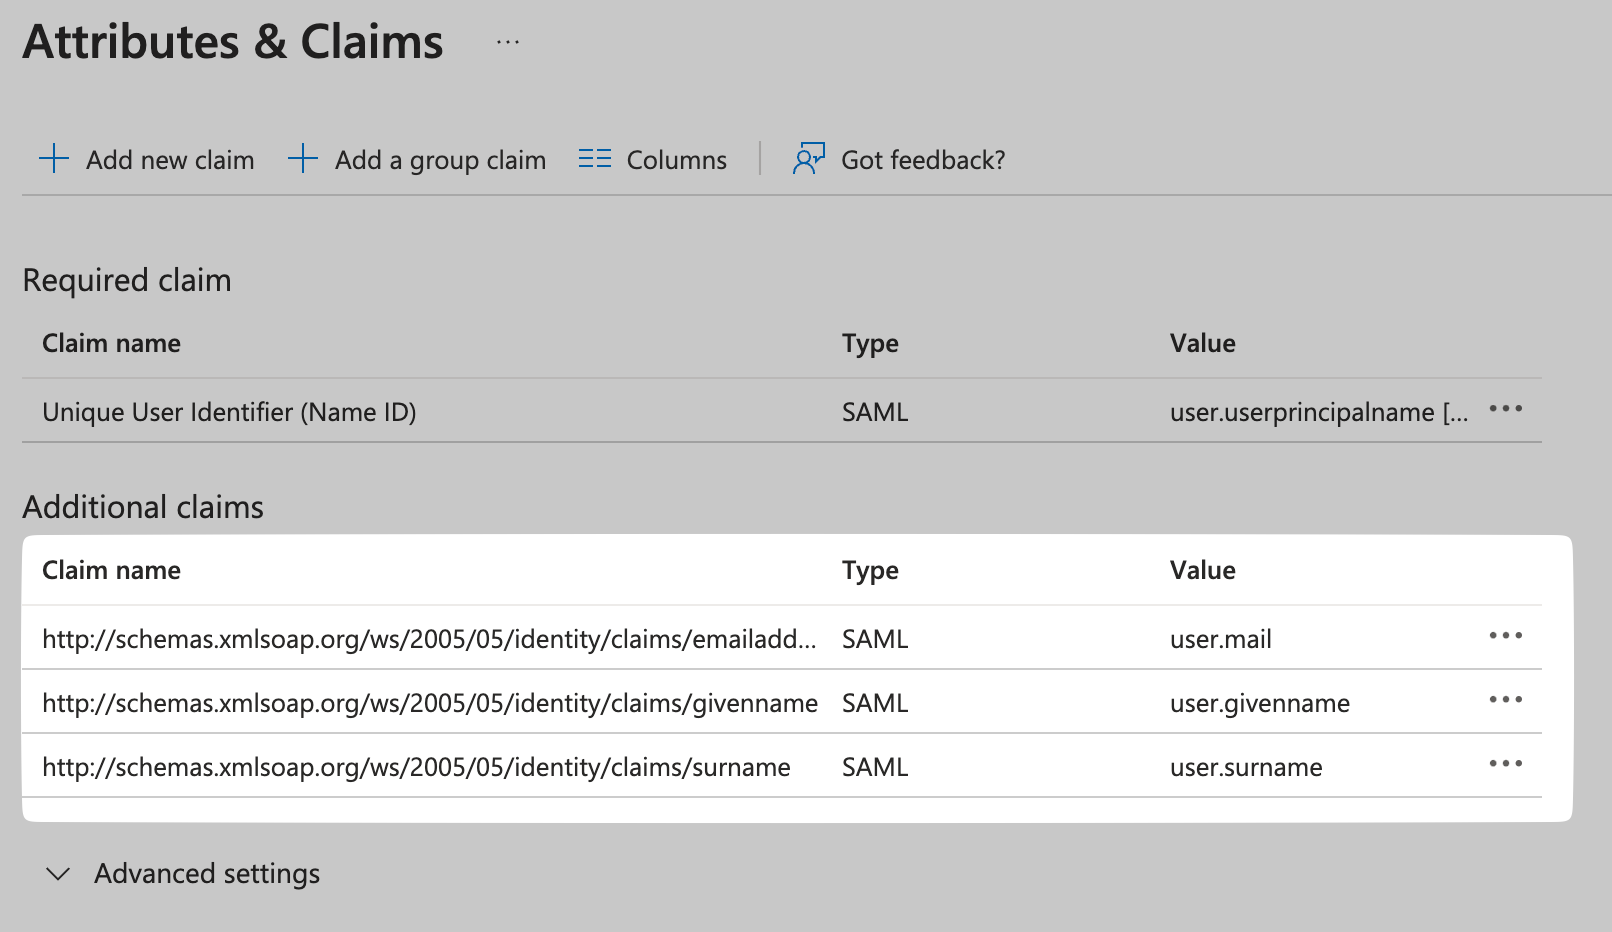
Under Attributes & Claims, click on Edit
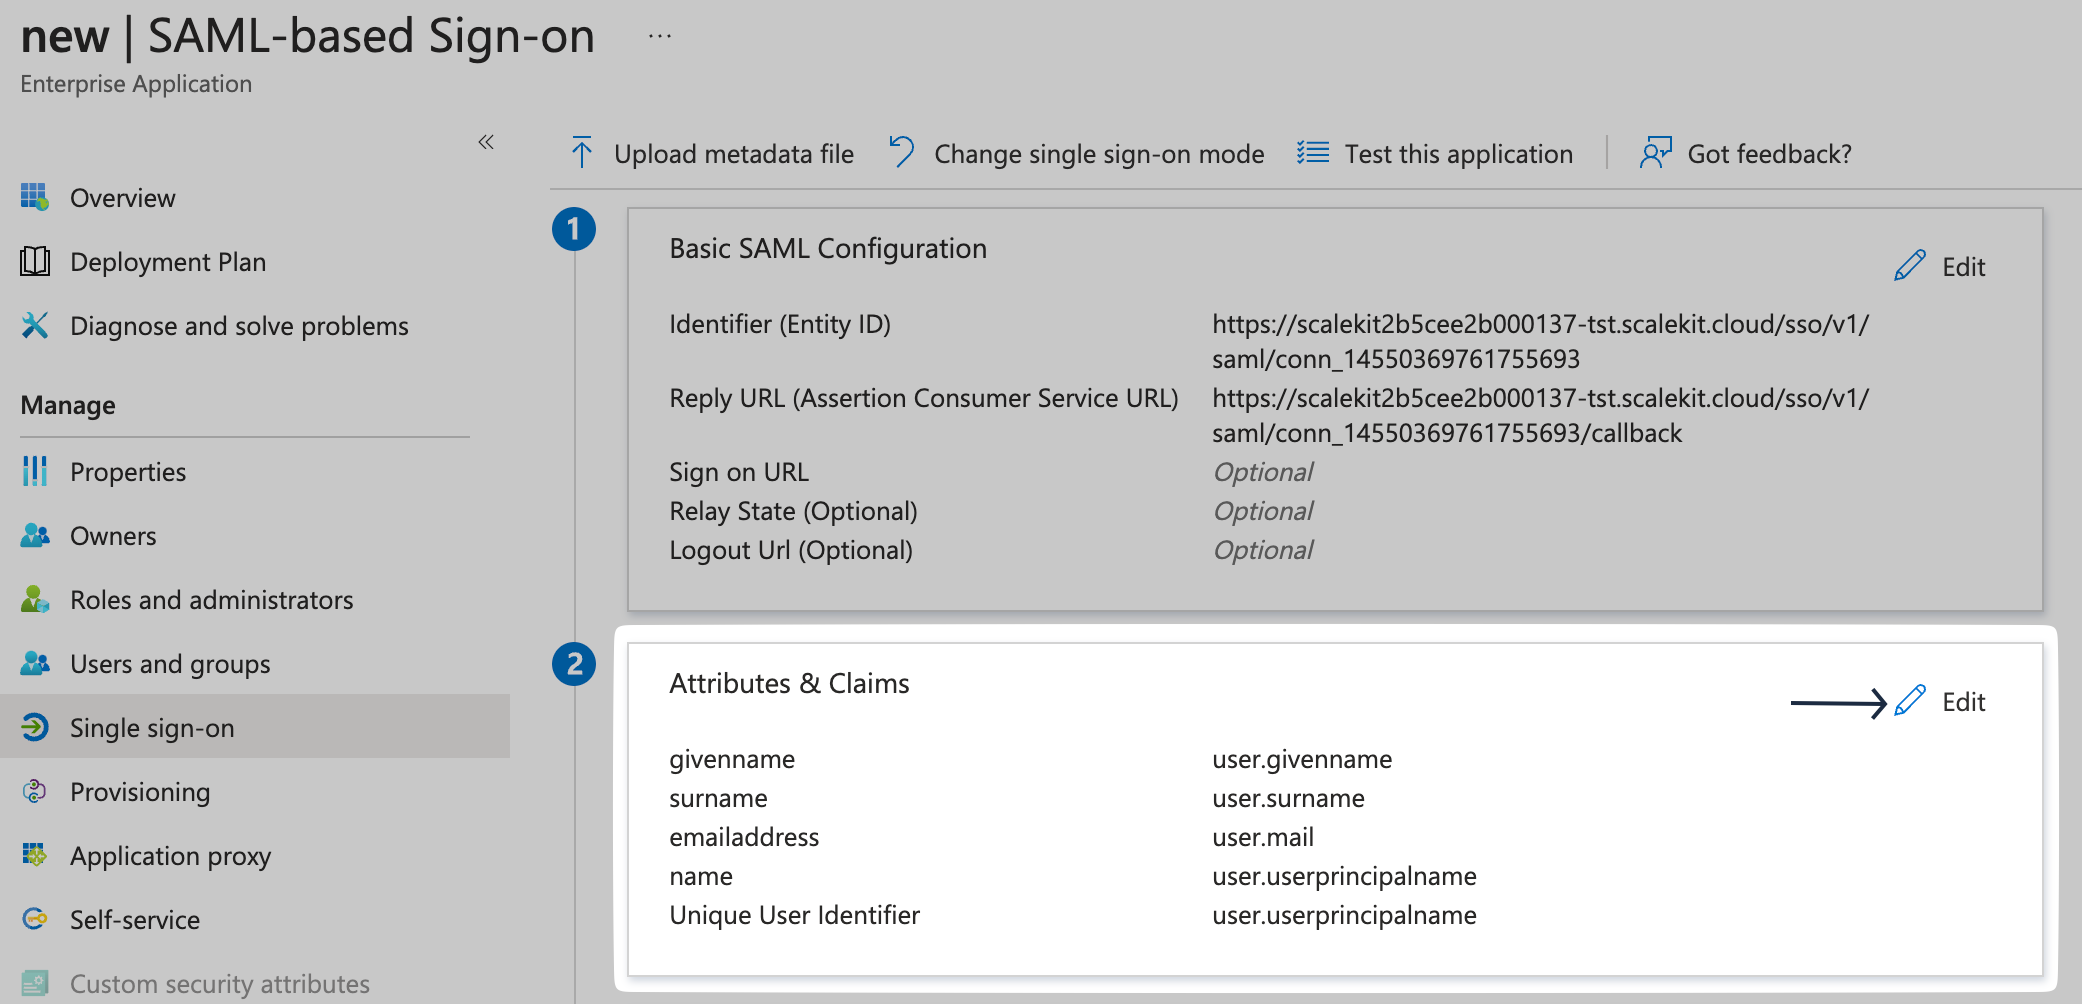
-
Check the Attribute Mapping section in the SSO Configuration Portal, and carefully map the same attributes on your Entra ID app
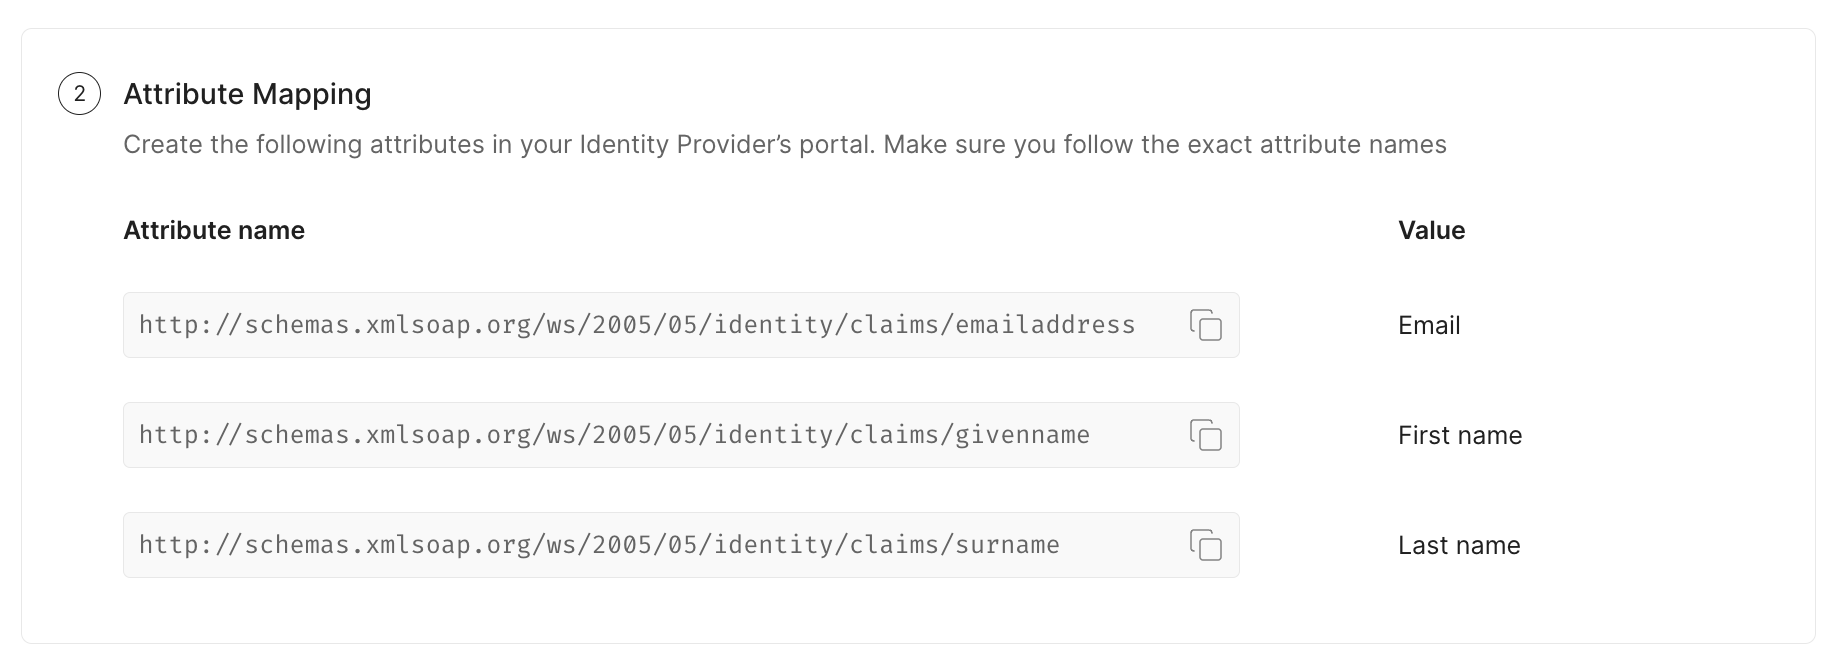
-
To map new claims, click Add a new claim and select the claim to map. If you created a user attribute in the Admin dashboard (for example,
department), enter that attribute name in the Name field. optional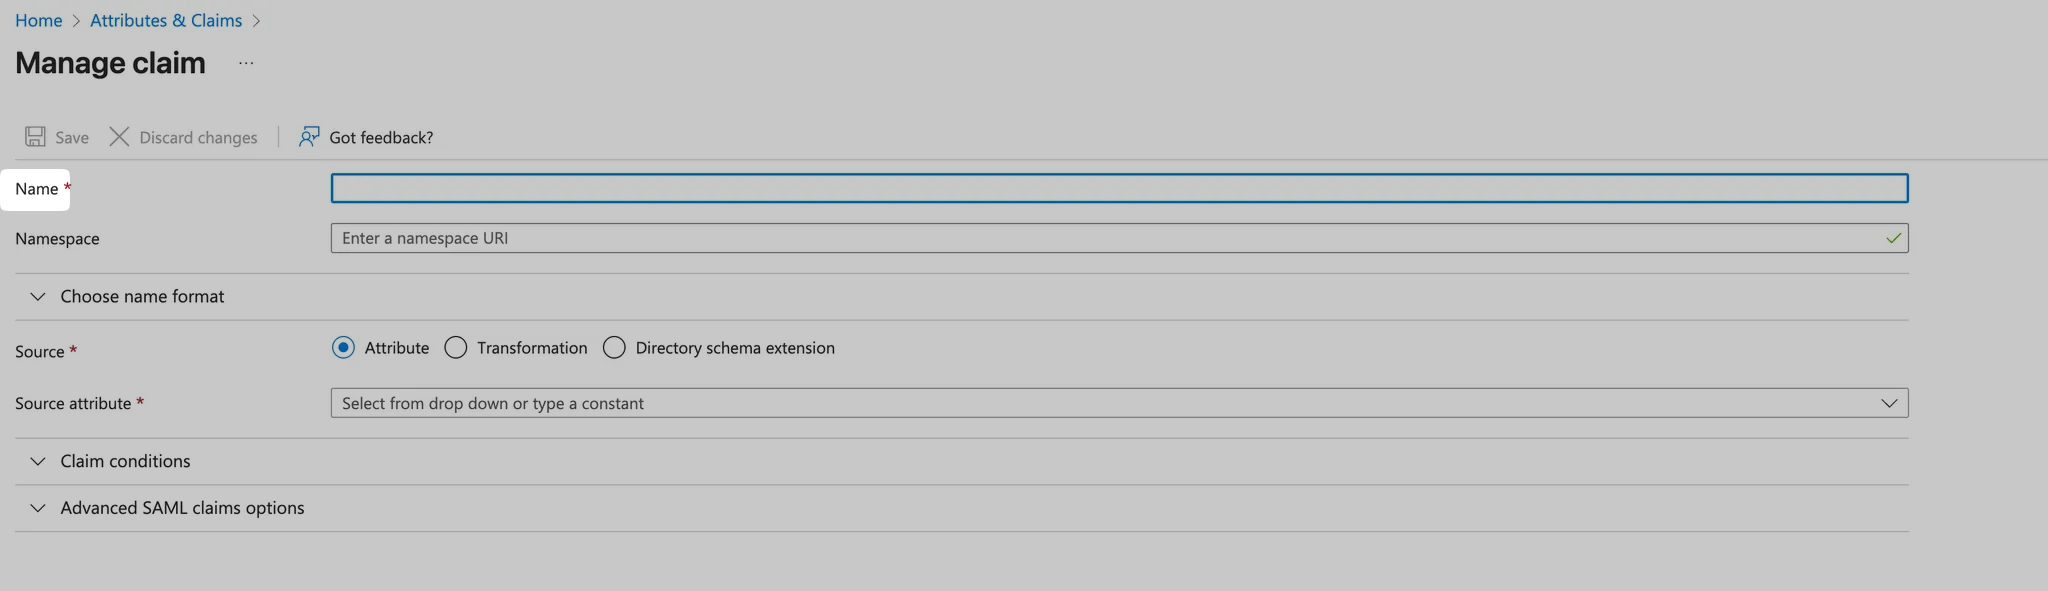
Assign users and groups
Section titled “Assign users and groups”-
Go to the Users and groups tab, and click on Add user/group
Here, please select all the required users or user groups that need login access to this application via Single Sign-On
Configure metadata URL
Section titled “Configure metadata URL”-
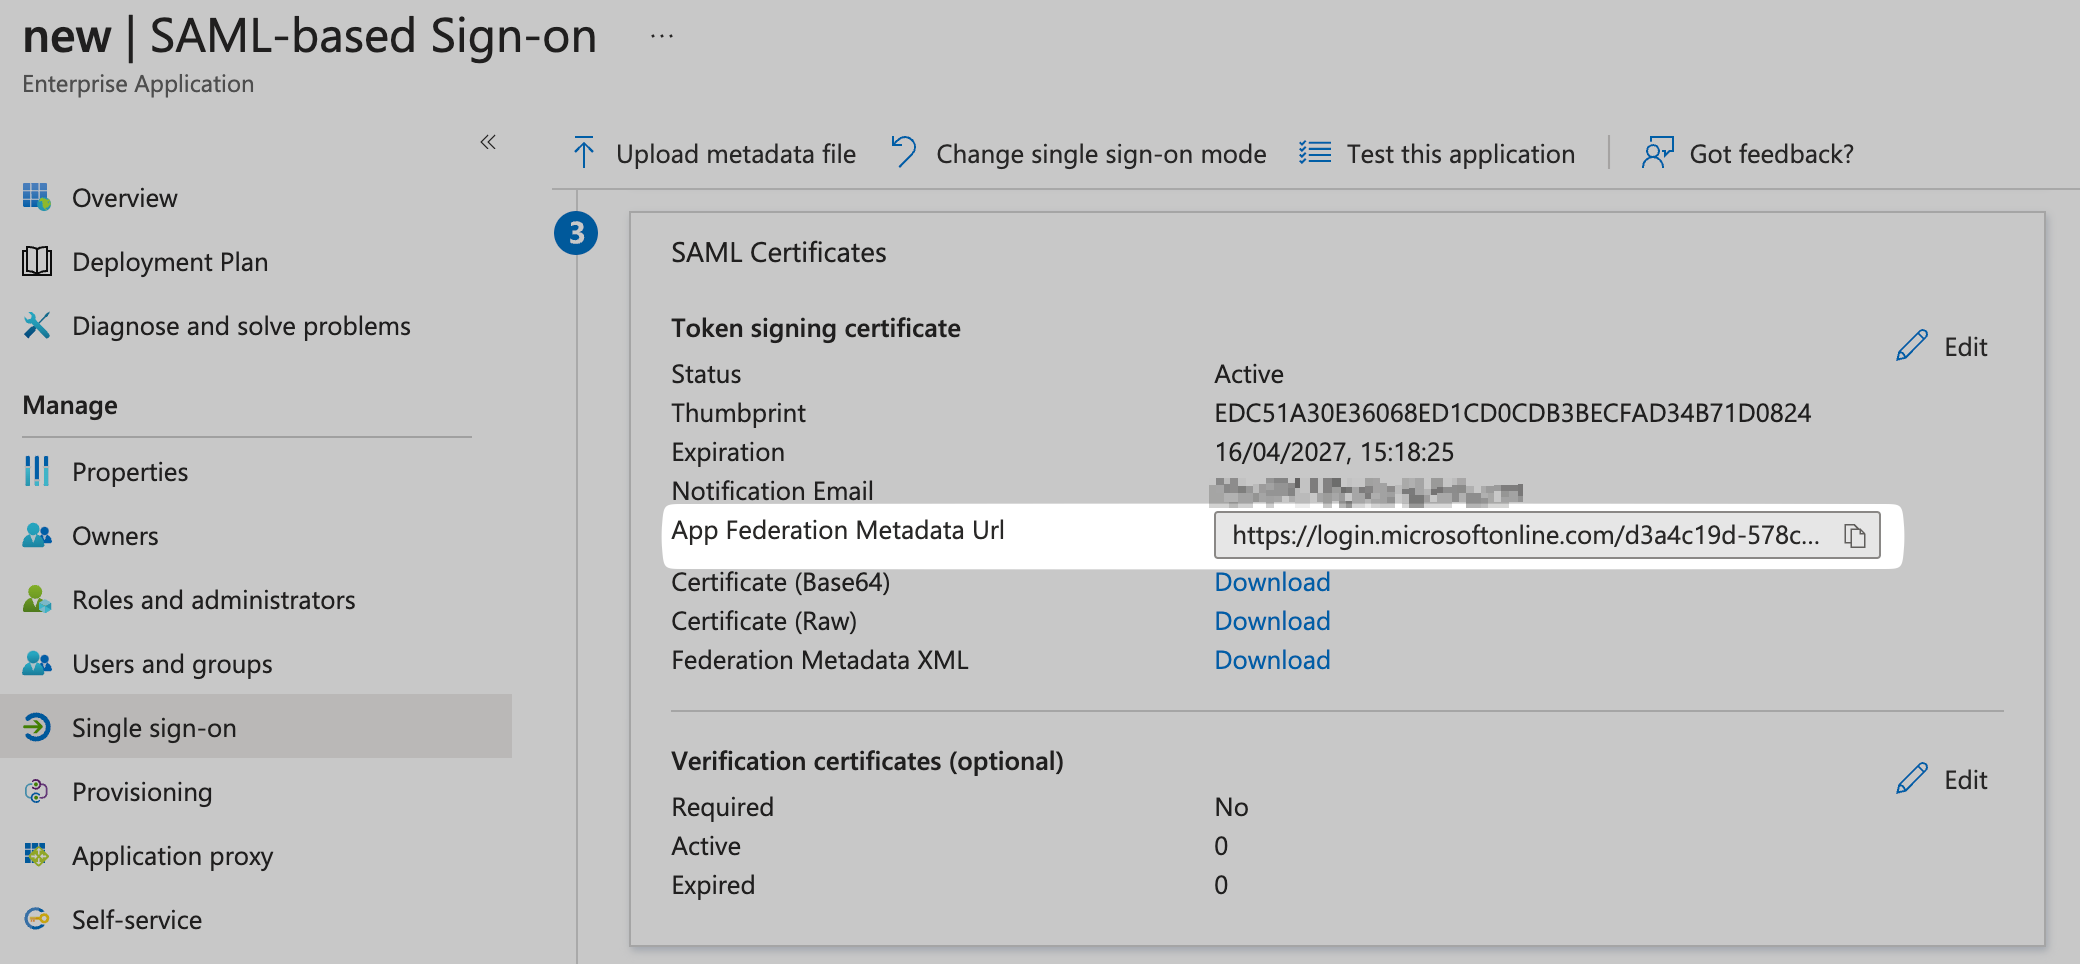
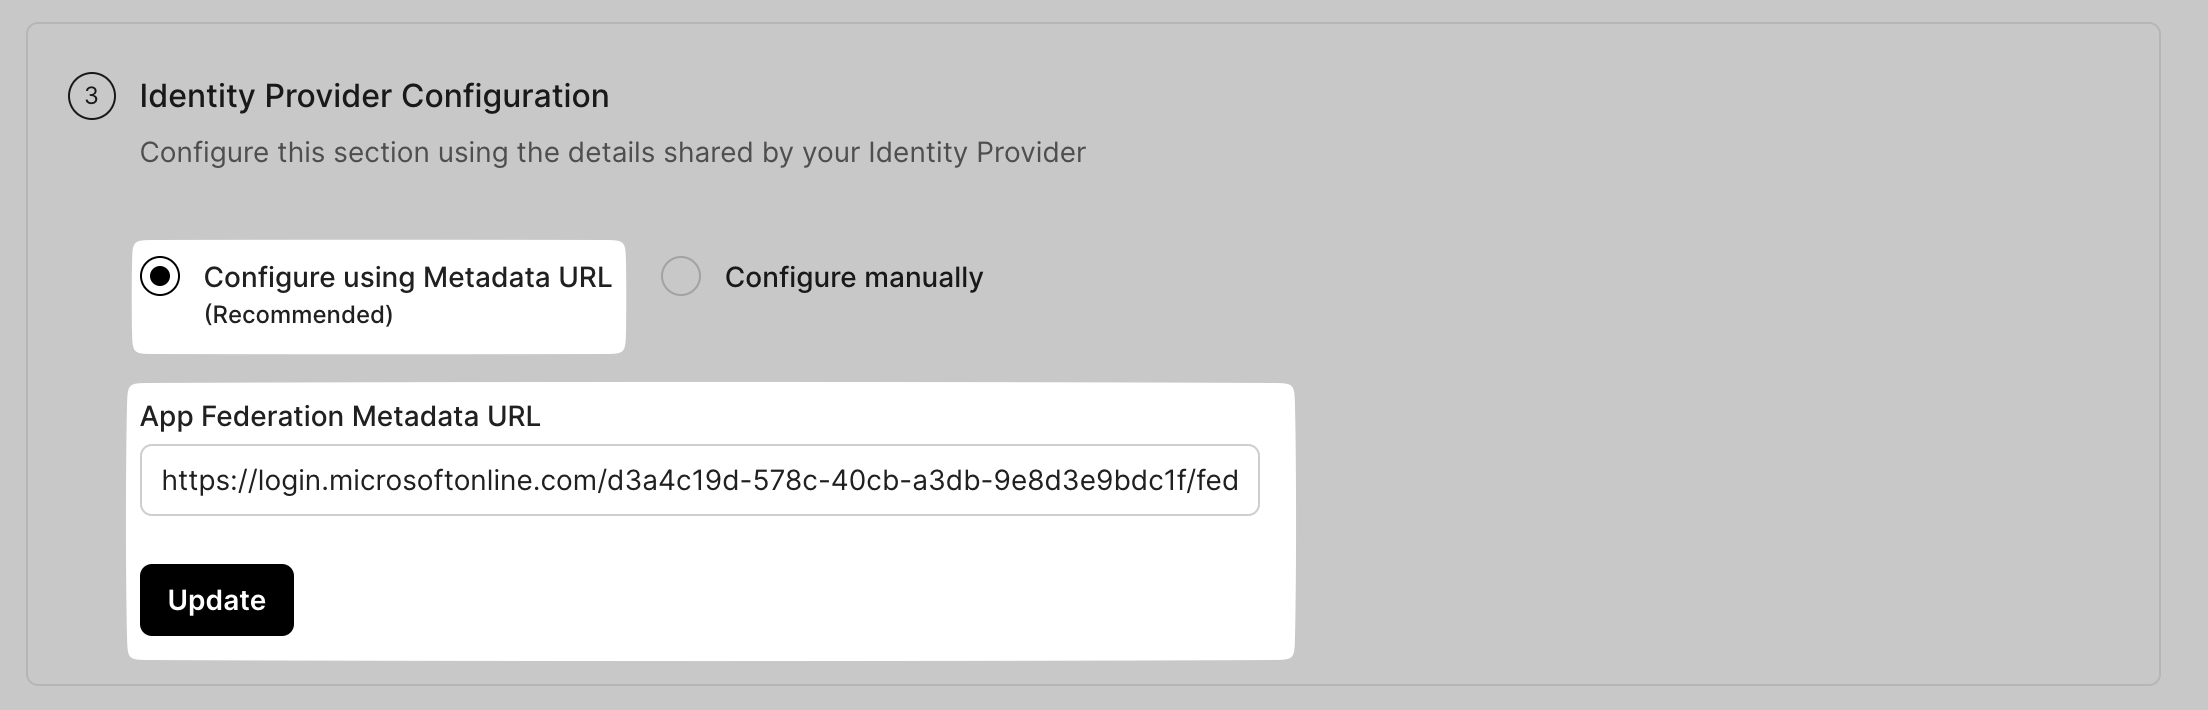
Under SAML Certification, copy the link under App Federation Metadata URL on Entra ID
-
Under Identify Provider Configuration, select Configure using Metadata URL, and paste it under App Federation Metadata URL on the SSO Configuration Portal
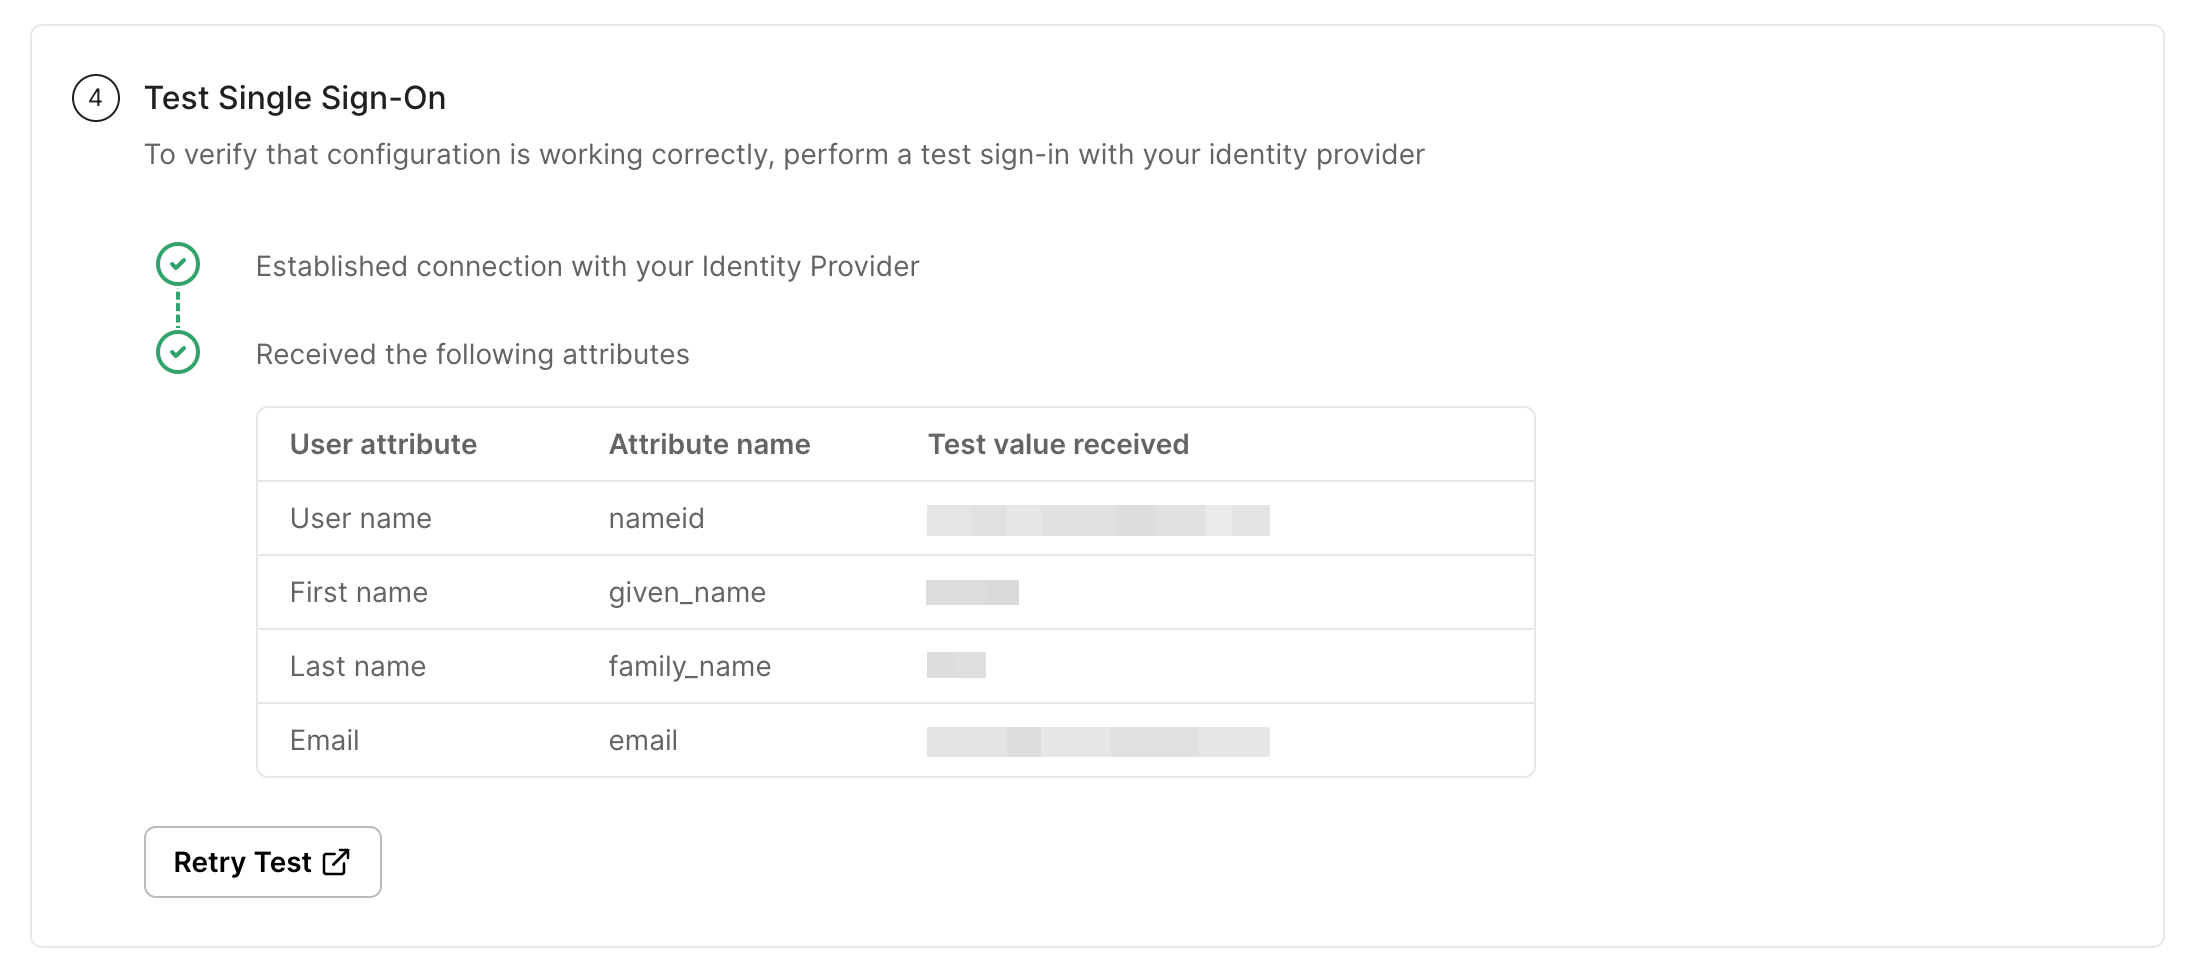
Test the connection
Section titled “Test the connection”Click on Test Connection. If everything is done correctly, you will see a Success response as shown below.
Enable the connection
Section titled “Enable the connection”Click on Enable Connection. This will let all your selected users login to the new application via your Microsoft Entra ID SSO.

With this, we are done configuring your Microsoft Entra ID application for an SSO login setup.