Passwordless quickstart (via OIDC)
This guide will walk you through implementing passwordless authentication via Scalekit’s OIDC flow. Depending on your configuration, your users will be sent either a one time passcode (OTP) or a magic link to verify their identity.
Prerequisites
Section titled “Prerequisites”Before you begin, ensure you have:
-
Access to your Scalekit Account and the API credentials. If you don’t have a Scalekit account yet, you can signup here.
-
Installed Scalekit SDK into your project
Terminal window npm install @scalekit/sdkimport { Scalekit } from '@scalekit-sdk/node';const scalekit = new Scalekit('<SCALEKIT_ENVIRONMENT_URL>','<SCALEKIT_CLIENT_ID>','<SCALEKIT_CLIENT_SECRET>',);
Implementation guide
Section titled “Implementation guide”-
Configure settings
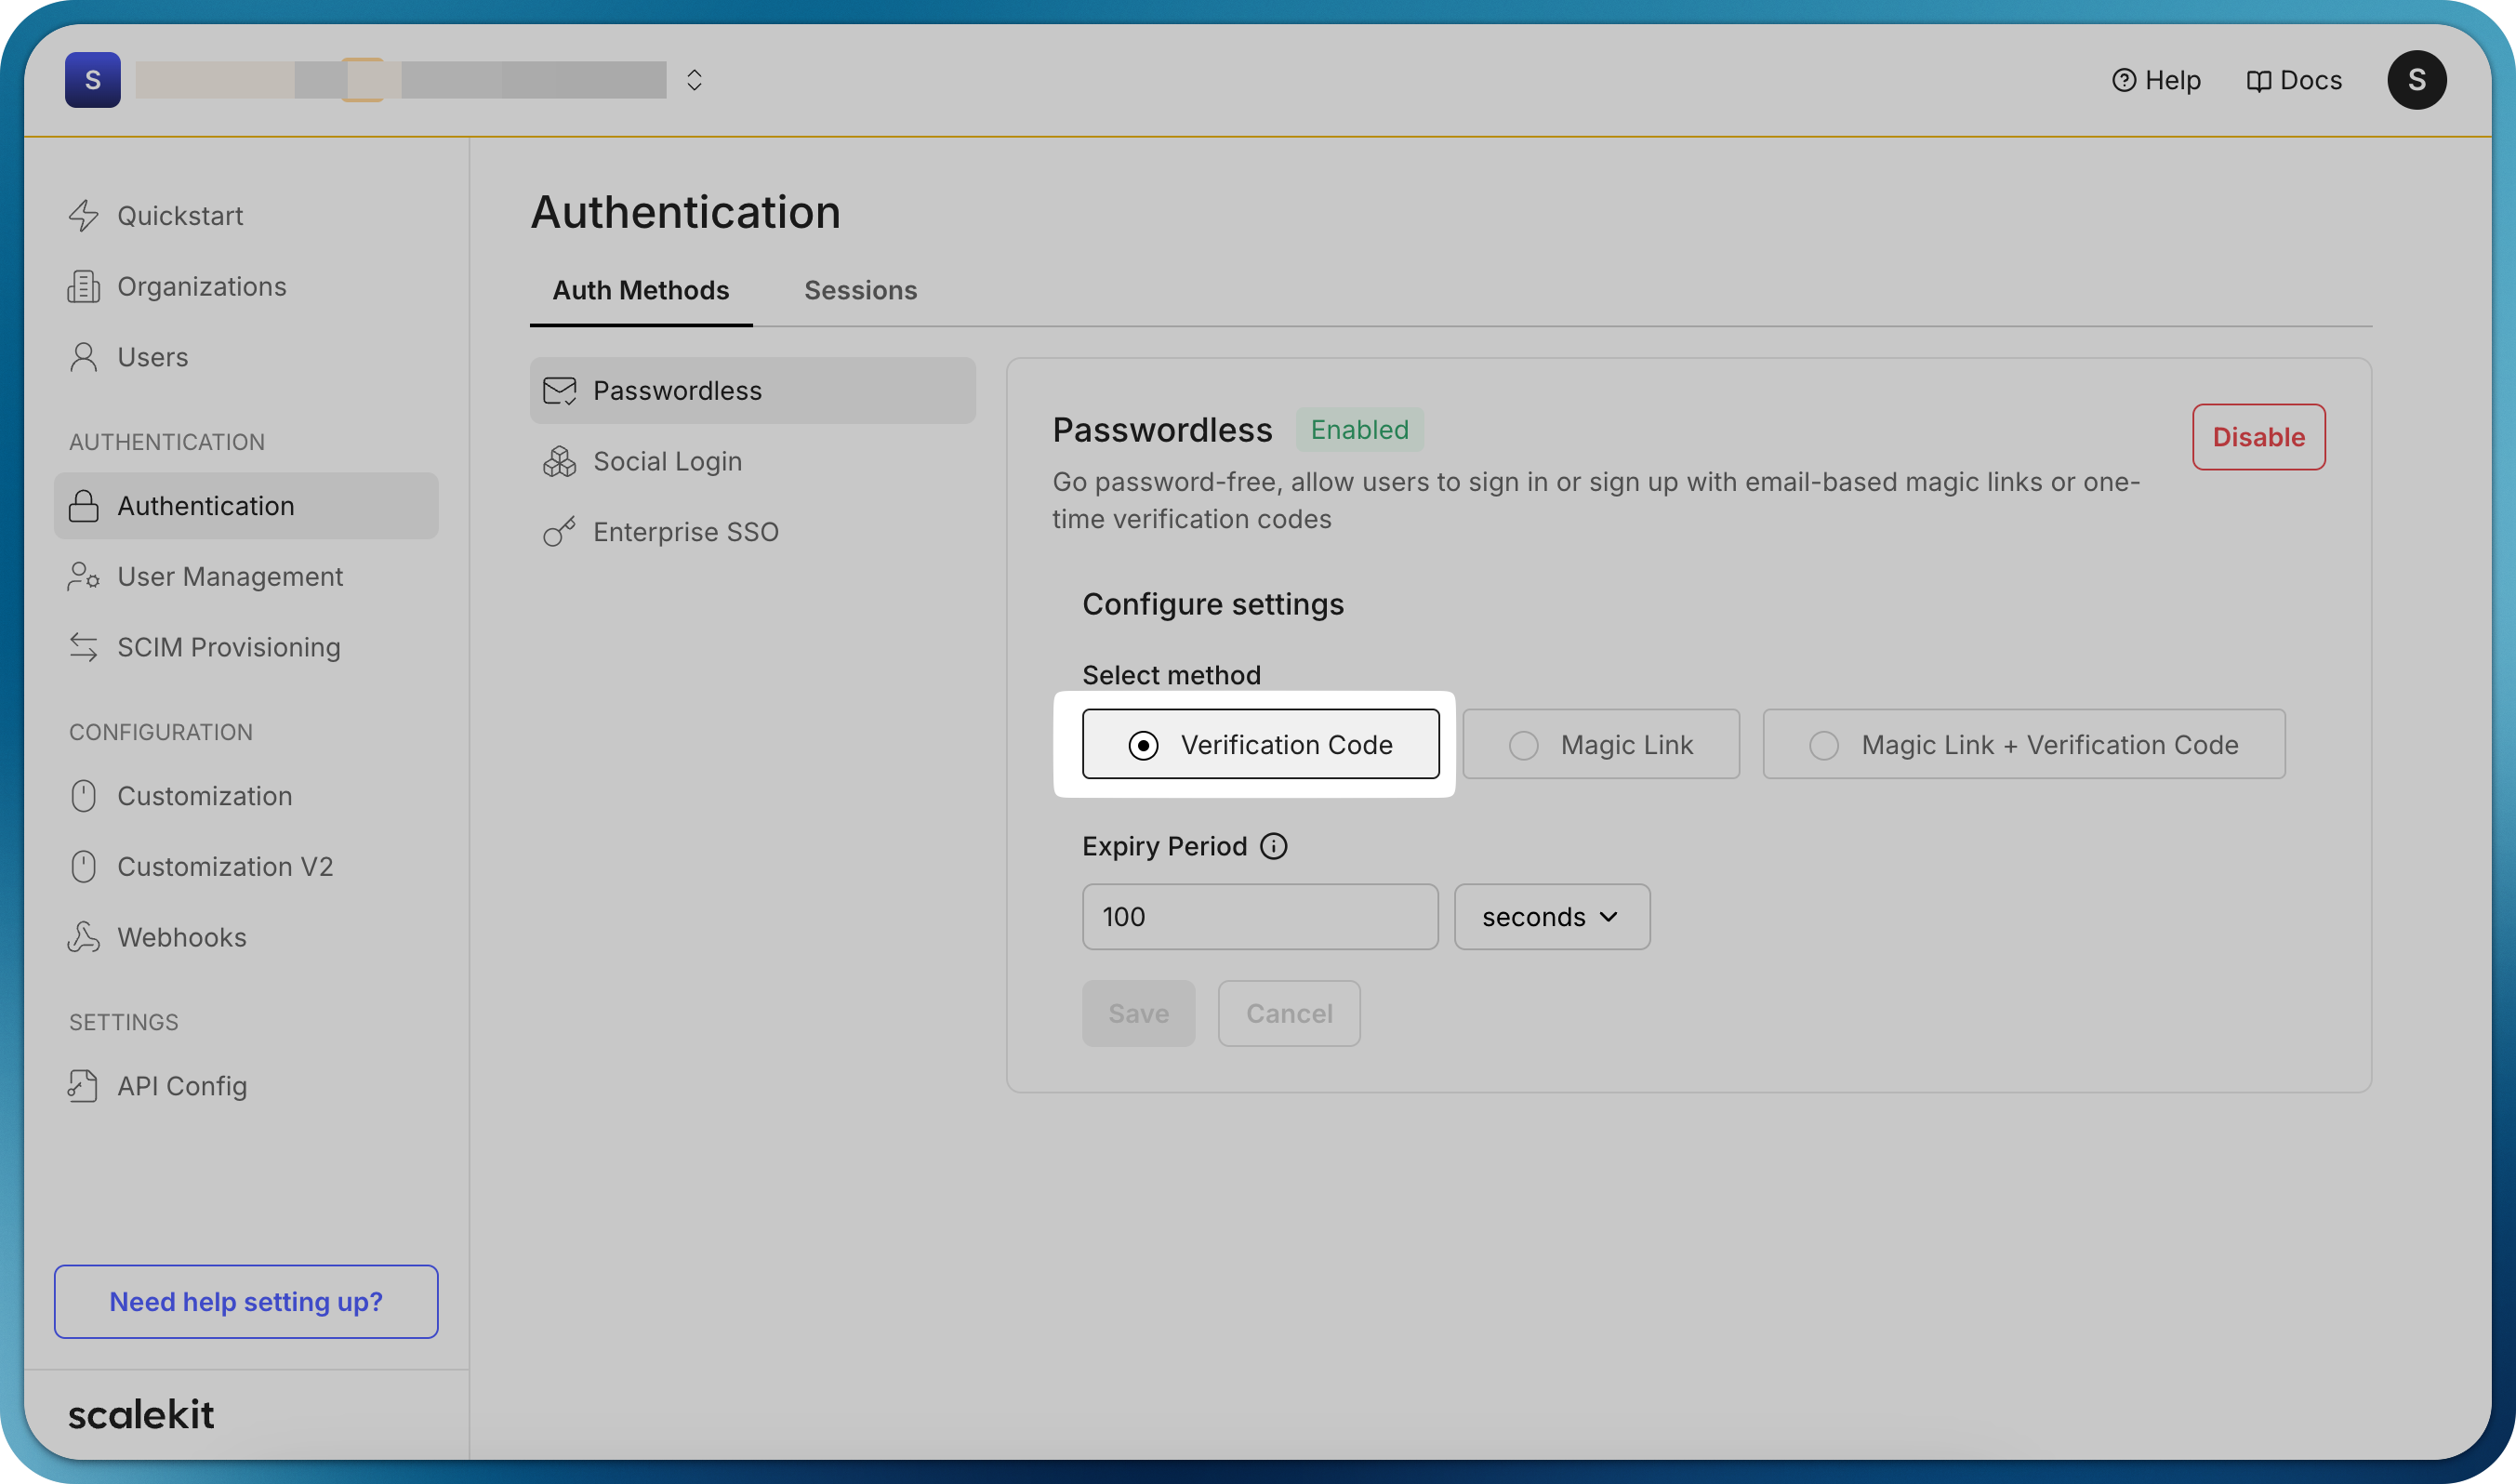
Section titled “Configure settings”Before implementing the code, ensure passwordless authentication is properly configured in your Scalekit dashboard:
- Navigate to Authentication > Auth Methods
- Locate the Passwordless section
- Choose the type of passwordless authentication to use.
- Save your changes

-
Initiate authorize request
Section titled “Initiate authorize request”To initiate passwordless authentication, redirect users to the Scalekit authorization endpoint with the appropriate parameters.
Construct your authorization URL with the following parameters and redirect the user to the authorization URL.
Parameter Description redirect_uriYour application endpoint that will receive the authorization code after successful authentication. Example: https://your-app.com/auth/callbackclient_idYour unique Scalekit application identifier that specifies both your app and environment (staging, production). login_hintThe email address of the user to send the verification email Example implementation
import { ScalekitClient } from '@scalekit-sdk/node';// Initialize the SDK clientconst scalekit = new ScalekitClient('<SCALEKIT_ENVIRONMENT_URL>','<SCALEKIT_CLIENT_ID>','<SCALEKIT_CLIENT_SECRET>',);const options = {};options['loginHint'] = 'user@example.com';const authorizationURL = scalekit.getAuthorizationUrl(redirectUrl, options);from scalekit import ScalekitClient, AuthorizationUrlOptions, CodeAuthenticationOptions# Initialize the SDK clientscalekit = ScalekitClient('<SCALEKIT_ENVIRONMENT_URL>','<SCALEKIT_CLIENT_ID>','<SCALEKIT_CLIENT_SECRET>')options = AuthorizationUrlOptions()# Authorization URL with login hintoptions.login_hint = 'user@example.com'authorization_url = scalekit_client.get_authorization_url(redirect_uri=<redirect_uri>,options=options)# Redirect the user to this authorization URLimport ("github.com/scalekit/scalekit-sdk-go")func main() {// Initialize the SDK clientscalekitClient := scalekit.NewScalekitClient("<SCALEKIT_ENVIRONMENT_URL>","<SCALEKIT_CLIENT_ID>","<SCALEKIT_CLIENT_SECRET>")options := scalekitClient.AuthorizationUrlOptions{}// User's email domain detects the correct enterprise SSO connection.options.LoginHint = "user@example.com"authorizationURL := scalekitClient.GetAuthorizationUrl(redirectUrl,options,)// Next step is to redirect the user to this authorization URL}// Redirect the user to this authorization URLpackage com.scalekit;import com.scalekit.ScalekitClient;import com.scalekit.internal.http.AuthorizationUrlOptions;public class Main {public static void main(String[] args) {// Initialize the SDK clientScalekitClient scalekitClient = new ScalekitClient("<SCALEKIT_ENVIRONMENT_URL>","<SCALEKIT_CLIENT_ID>","<SCALEKIT_CLIENT_SECRET>");AuthorizationUrlOptions options = new AuthorizationUrlOptions();// User's email domain detects the correct enterprise SSO connection.options.setLoginHint("user@example.com");try {String url = scalekitClient.authentication().getAuthorizationUrl(redirectUrl, options).toString();} catch (Exception e) {System.out.println(e.getMessage());}}}// Redirect the user to this authorization URLThis redirect will send users to the Scalekit authentication flow, where they’ll authenticate with their email before being returned to your application.
Example authorization URL <YOURAPP_SCALEKIT_ENVIRONMENT_URL>/oauth/authorize?client_id=skc_122056050118122349527&redirect_uri=https://yourapp.com/auth/callback&login_hint=user@example.com&response_type=code&scope=openid%20profile%20email&state=jAy-state1-gM4fdZdV22nqm6Q_jAy-XwpYdYFh..2nqm6QAfter redirecting users to the Scalekit authorization endpoint, handle the callback at your
redirect_urito retrieve the user profile and complete the authentication process. -
Fetch user details
Section titled “Fetch user details”After successful user authentication via OTP, Scalekit redirects users to your specified
redirect_uriwith a temporary authorization code parameter. This code must be exchanged for the user’s profile information through a secure server-side request.The authorization code exchange process should always be performed server-side to maintain security. This server-side request will:
- Validate the authorization code
- Return the authenticated user’s profile details
Fetch user profile // Handle oauth redirect_url, fetch code and error_description from request paramsconst { code, error, error_description } = req.query;if (error) {// Handle errors}const result = await scalekit.authenticateWithCode(code, redirectUri);const userEmail = result.user.email;// Next step: create a session for this user and allow accessFetch user profile # Handle oauth redirect_url, fetch code and error_description from request paramscode = request.args.get('code')error = request.args.get('error')error_description = request.args.get('error_description')if error:raise Exception(error_description)result = scalekit.authenticate_with_code(code, '<redirect_uri>')# result.user has the authenticated user's detailsuser_email = result.user.email# Next step: create a session for this user and allow accessFetch user profile // Handle oauth redirect_url, fetch code and error_description from request paramscode: = r.URL.Query().Get("code")error: = r.URL.Query().Get("error")errorDescription: = r.URL.Query().Get("error_description")if error != "" {// Handle errors}result, err: = a.scalekit.AuthenticateWithCode(code,<redirectUrl>)if err != nil {// Handle errors}// result.User has the authenticated user's detailsuserEmail: = result.User.Email// Next step: create a session for this user and allow accessFetch user profile // Handle oauth redirect_url, fetch code and error_description from request paramsString code = request.getParameter("code");String error = request.getParameter("error");String errorDescription = request.getParameter("error_description");if (error != null && !error.isEmpty()) {// Handle errorsreturn;}try {AuthenticationResponse result = scalekit.authentication().authenticateWithCode(code, redirectUrl);String userEmail = result.getIdTokenClaims().getEmail();// Next step: create a session for this user and allow access} catch (Exception e) {// Handle errors}The
resultobject{user: {email: "john.doe@example.com" // User's email address},idToken: "<USER_PROFILE_JWT>", // JWT containing user profile informationaccessToken: "<API_CALL_JWT>", // Temporary Access Token for accessing user's emailexpiresIn: 899 // Token expiration time in seconds}{"alg": "RS256","kid": "snk_82937465019283746","typ": "JWT"}.{"amr": ["conn_92847563920187364"],"at_hash": "j8kqPm3nRt5Kx2Vy9wL_Zp","aud": ["skc_73645291837465928"],"azp": "skc_73645291837465928","c_hash": "Hy4k2M9pWnX7vqR8_Jt3bg","client_id": "skc_73645291837465928","email": "alice.smith@example.com","email_verified": true,"exp": 1751697469,"iat": 1751438269,"iss": "https://demo-company-dev.scalekit.cloud","sid": "ses_83746592018273645","sub": "conn_92847563920187364;alice.smith@example.com" // A scalekit user ID is sent if user management is enabled}.[Signature]{"alg": "RS256","kid": "snk_794467716206433","typ": "JWT"}.{"iss": "https://acme-corp-dev.scalekit.cloud","sub": "conn_794467724427269;robert.wilson@acme.com","aud": ["skc_794467724259497"],"exp": 1751439169,"iat": 1751438269,"nbf": 1751438269,"client_id": "skc_794467724259497","jti": "tkn_794754665320942"}.[Signature]
Congratulations! You’ve successfully implemented passwordless authentication in your application. Users can now sign in securely without passwords by entering a verification code or clicking a magic link sent to their email.