
Invite users to organizations
Build comprehensive user invitation systems in your application. Send verification emails, track invitation status, and create seamless onboarding experiences
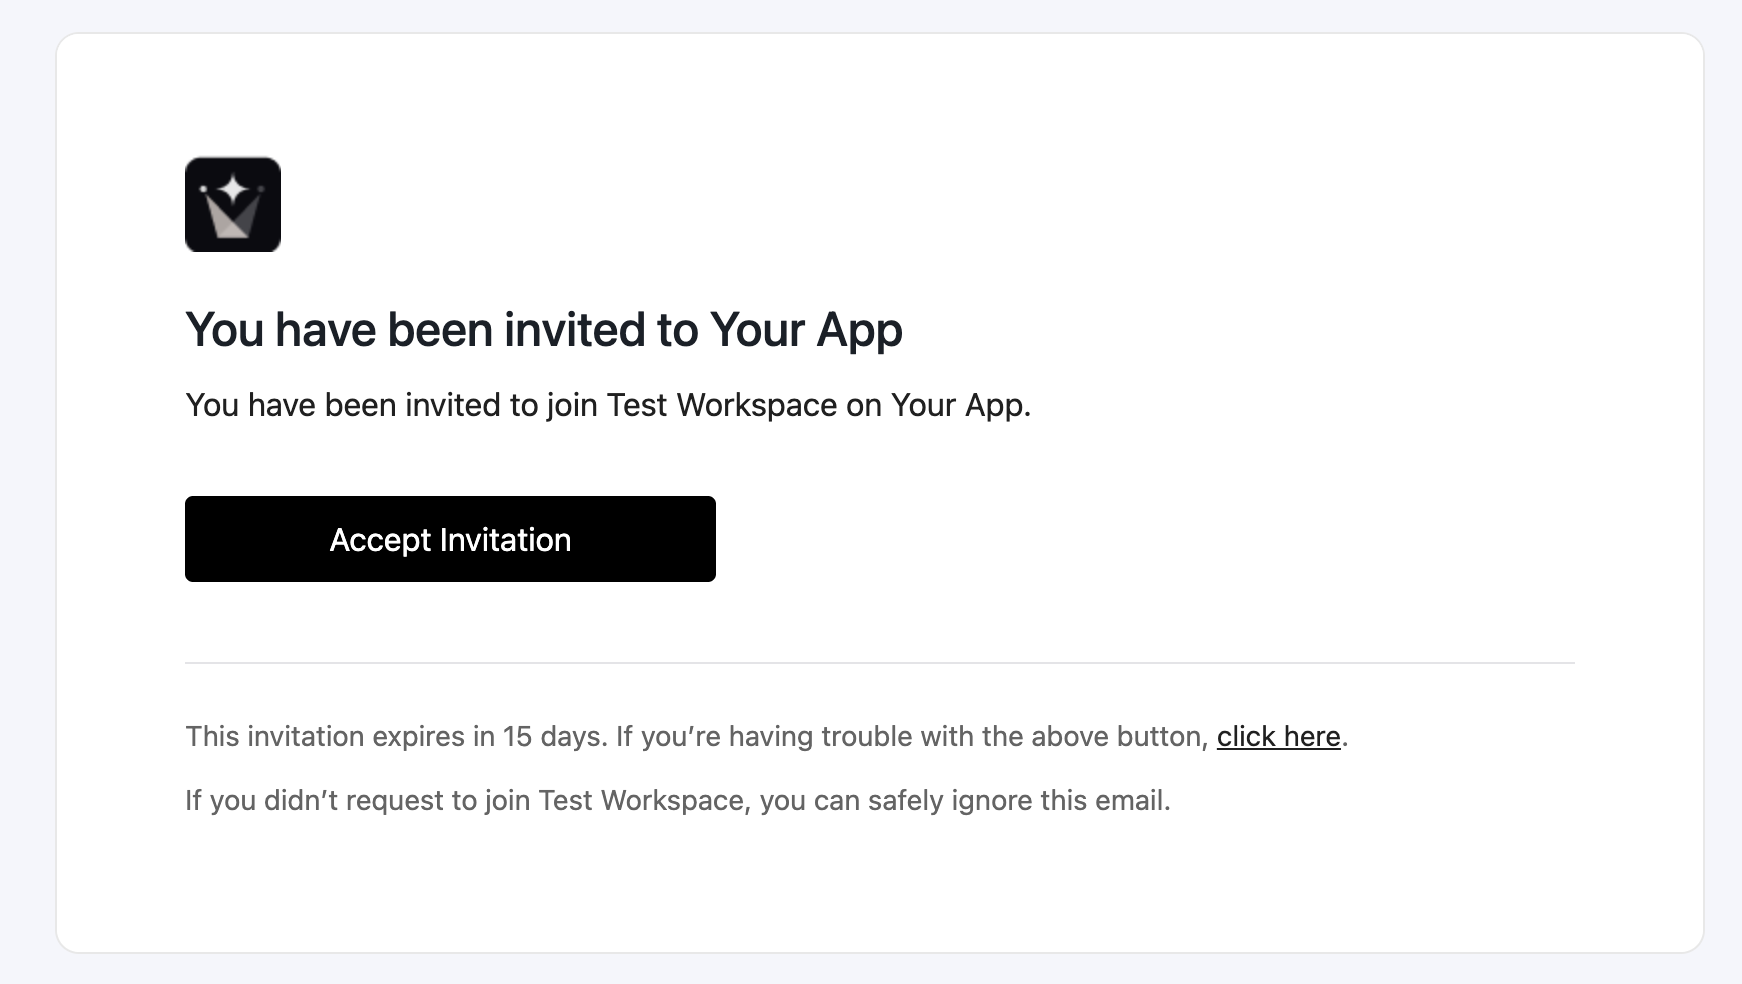
The journey of bringing users into your application begins with a smooth invitation experience. User invitations are essential for growing organizations, enabling team collaboration, and maintaining secure access control. When done right, invitations create a seamless onboarding experience that sets the tone for users’ entire interaction with your product.
Build applications that enable organization owners to invite users to join their organization. Scalekit takes care of sending the invite emails, verifying their email addresses, and creating the user accounts end to end. For applications that require custom invitation flows or automated user management, Scalekit provides comprehensive APIs to programmatically invite users, manage invitations, and integrate with your existing systems.
This is ideal when organization admins or workspace owners need to invite team members directly from your application’s dashboard, whether individually or in bulk.
Common use cases
- Admin dashboards: Organization admins can invite users from a settings or team management page.
- Bulk invitations: Import and invite multiple users at once from CSV files or directory systems.
- Custom workflows: Implement approval processes or conditional invitations based on business logic.
- Integration with existing systems: Connect invitation flows with your CRM, HR systems, or user directories.
Invite users from the Scalekit dashboard
Section titled “Invite users from the Scalekit dashboard”The quickest way to get started with user invitations is through the Scalekit Dashboard.
Navigate to the Users section and click the “Add User” button to invite new members to your organization. You can specify their email address, assign roles, and customize the invitation settings directly from the UI.
Build user invitation flows API
Section titled “Build user invitation flows ”For applications that require custom invitation flows or automated user management, Scalekit provides a comprehensive SDK. This allows you to programmatically invite users, manage invitations, and integrate with your existing systems.
Review the user invitation flow
-
Create user invitations
Section titled “Create user invitations”To invite a user to an organization, create a user membership with their email address and the target organization ID. Scalekit handles sending the invitation email and managing the invitation process end to end.
Express.js // Use case: Admin invites team member from organization settings page// Security: Verify the organization ID belongs to the authenticated usertry {// Create user account and organization membershipconst newUser = await scalekit.user.createUserAndMembership('org_xxxxxxxxxxxx',{email: "user@example.com",externalId: "crm-user-87425", // Your system's user ID for referenceuserProfile: {firstName: "John",lastName: "Doe"},metadata: {plan: "free",department: "Engineering"},sendInvitationEmail: true // Scalekit sends the invitation email automatically});// Invitation sent successfully - user will receive email with magic linkconsole.log('User invited:', newUser.user.id);} catch (error) {console.error('Failed to invite user:', error.message);// Handle error: duplicate email, invalid org ID, etc.}Flask 4 collapsed linesfrom scalekit.v1.users import CreateUser, CreateUserProfile# Use case: Admin invites team member from organization settings page# Security: Verify the organization ID belongs to the authenticated usertry:# Create user object with profile and metadatauser = CreateUser(email="user@example.com",external_id="crm-user-87425", # Your system's user ID for referenceuser_profile=CreateUserProfile(first_name="John",last_name="Doe"),metadata={"plan": "free","department": "Engineering"},send_invitation_email=True # Scalekit sends the invitation email automatically)# Create the user and organization membershipnew_user = scalekit_client.user.create_user_and_membership(organization_id='org_xxxxxxxxxxxx',user=user)# Invitation sent successfully - user will receive email with magic linkprint(f'User invited: {new_user.user.id}')except Exception as error:print(f'Failed to invite user: {str(error)}')# Handle error: duplicate email, invalid org ID, etc.Gin 5 collapsed linesimport ("context""log"usersv1 "github.com/scalekit-inc/scalekit-sdk-go/pkg/grpc/scalekit/v1/users")// Use case: Admin invites team member from organization settings page// Security: Verify the organization ID belongs to the authenticated user// Create user object with profile and metadatauser := &usersv1.CreateUser{Email: "user@example.com",ExternalId: "crm-user-87425", // Your system's user ID for referenceUserProfile: &usersv1.CreateUserProfile{FirstName: "John",LastName: "Doe",},Metadata: map[string]string{"plan": "free","department": "Engineering",},}// Create the user and organization membershipnewUser, err := scalekitClient.User().CreateUserAndMembership(context.Background(),"org_xxxxxxxxxxxx", // The organization the user is joininguser,true, // sendInvitationEmail - Scalekit sends the invitation email automatically)if err != nil {log.Printf("Failed to invite user: %v", err)// Handle error: duplicate email, invalid org ID, etc.return err}// Invitation sent successfully - user will receive email with magic linklog.Printf("User invited: %s", newUser.User.Id)Spring Boot 6 collapsed linesimport com.scalekit.grpc.scalekit.v1.users.*;import java.util.logging.Logger;// Use case: Admin invites team member from organization settings page// Security: Verify the organization ID belongs to the authenticated usertry {// Build the user profile objectCreateUserProfile profile = CreateUserProfile.newBuilder().setFirstName("John").setLastName("Doe").build();// Build the user object with profile and metadataCreateUser createUser = CreateUser.newBuilder().setEmail("user@example.com").setExternalId("crm-user-87425") // Your system's user ID for reference.putMetadata("plan", "free").putMetadata("department", "Engineering").setUserProfile(profile).build();// Create request for user and membershipCreateUserAndMembershipRequest cuReq = CreateUserAndMembershipRequest.newBuilder().setUser(createUser).setSendInvitationEmail(true) // Scalekit sends the invitation email automatically.build();// Send the request to create user and membershipCreateUserAndMembershipResponse cuResp = users.createUserAndMembership("org_xxxxxxxxxxxx",cuReq);// Invitation sent successfully - user will receive email with magic linkSystem.out.println("User invited: " + cuResp.getUser().getId());} catch (Exception error) {System.err.println("Failed to invite user: " + error.getMessage());// Handle error: duplicate email, invalid org ID, etc.}When you call
createUserAndMembership, Scalekit creates the user account, adds them to the organization, and sends an invitation email with a secure magic link. The user receives this email immediately and can click the link to verify their email and access your application.Parameters:
Parameter Type Description Required organization_idstringThe ID of the organization the user is joining (starts with ‘org_‘) Yes emailstringThe email address of the user to invite Yes sendInvitationEmailbooleanSet to trueto automatically send invitation emails via ScalekitRecommended externalIdstringYour system’s user ID for cross-referencing No userProfileobjectUser profile information ( firstName,lastName, etc.)No rolesstring[]Array of role IDs to assign to the invited user No metadataobjectCustom key-value data to associate with the user or membership No -
Monitor invitation status
Section titled “Monitor invitation status”After successfully creating an invitation, Scalekit returns a user object with membership details. Monitor the
membershipStatusfield to track invitation progress through its lifecycle:Invitation Status Values:
PENDING_INVITE: User has been invited but hasn’t accepted yet - the invitation email has been sentACTIVE: User has accepted the invitation and can access the organizationINVITE_EXPIRED: Invitation has expired or been deactivated
Example invitation response {"user": {"id": "usr_01HTR0ABCXYZ","environmentId": "env_01HTQZ99MMNZ","createTime": "2025-06-19T15:41:22Z","updateTime": "2025-06-19T15:41:22Z","email": "user@example.com","externalId": "crm-user-87425","memberships": [{"organizationId": "org_xxxxxxxxxxxx","joinTime": "2025-06-19T15:41:22Z","membershipStatus": "PENDING_INVITE","roles": [4 collapsed lines{"id": "role_admin","name": "admin"}],"primaryIdentityProvider": "IDENTITY_PROVIDER_UNSPECIFIED","metadata": {2 collapsed lines"plan": "free","department": "Engineering"}}],"userProfile": {"id": "prof_01HTR0PQRMNO","firstName": "John","lastName": "Doe",6 collapsed lines"name": "John Doe","locale": "en","emailVerified": false,"phoneNumber": "","metadata": {},"customAttributes": {}},"metadata": {"plan": "free","department": "Engineering"},"lastLogin": null}}Key fields to monitor:
membershipStatus: Track whether the invitation is pending, active, or expiredemailVerified: Showsfalseuntil the user accepts the invitation and verifies their emailmemberships[].roles: The roles assigned to the user in this organizationmetadata: Your custom data associated with the user or membership
Store the
user.idin your system to track the invitation and update the user’s status when they accept. -
Resend user invitation
Section titled “Resend user invitation”If users haven’t responded to their initial invitation or the invitation has expired, you can resend it. When an invitation expires, Scalekit automatically creates a new one with a fresh expiration timestamp. For valid invitations, Scalekit sends a reminder email instead.
When to resend invitations:
- Users haven’t responded to their initial invitation
- Original invitations have expired (after 15 days by default)
- Users request a new invitation link
- Users can’t find the original invitation email
Each resend operation increments the resend counter and updates the expiration timestamp if the previous invitation expired.
Express.js // Use case: User requests new invitation link after email expirestry {// Resend invitation to the userconst invitation = await scalekit.user.resendInvitation('org_xxxxxxxxxxxx', // Organization ID'usr_123456' // User ID from the original invitation);// Invitation resent successfully with updated expirationconsole.log('Invitation resent:', invitation.invite.resent_count);console.log('New expiration:', invitation.invite.expires_at);} catch (error) {console.error('Failed to resend invitation:', error.message);// Handle error: user not found, already active, etc.}Flask # Use case: User requests new invitation link after email expirestry:# Resend invitation to the userinvitation = scalekit_client.user.resend_invitation(organization_id='org_xxxxxxxxxxxx', # Organization IDuser_id='usr_123456' # User ID from the original invitation)# Invitation resent successfully with updated expirationprint(f'Invitation resent: {invitation.invite.resent_count}')print(f'New expiration: {invitation.invite.expires_at}')except Exception as error:print(f'Failed to resend invitation: {str(error)}')# Handle error: user not found, already active, etc.Gin import ("context""log")// Use case: User requests new invitation link after email expires// Resend invitation to the userinvitation, err := scalekitClient.User().ResendInvitation(context.Background(),"org_xxxxxxxxxxxx", // Organization ID"usr_123456", // User ID from the original invitation)if err != nil {log.Printf("Failed to resend invitation: %v", err)// Handle error: user not found, already active, etc.return err}// Invitation resent successfully with updated expirationlog.Printf("Invitation resent: %d", invitation.Invite.ResentCount)log.Printf("New expiration: %s", invitation.Invite.ExpiresAt)Spring Boot // Use case: User requests new invitation link after email expirestry {// Resend invitation to the userResendInvitationResponse invitation = users.resendInvitation("org_xxxxxxxxxxxx", // Organization ID"usr_123456" // User ID from the original invitation);// Invitation resent successfully with updated expirationSystem.out.println("Invitation resent: " + invitation.getInvite().getResentCount());System.out.println("New expiration: " + invitation.getInvite().getExpiresAt());} catch (Exception error) {System.err.println("Failed to resend invitation: " + error.getMessage());// Handle error: user not found, already active, etc.}Parameters:
Parameter Description organization_idUnique identifier of the organization (starts with ‘org_‘) idSystem-generated user ID of the user with a pending invitation (starts with ‘usr_’) Response:
200 {"invite": {"created_at": "2025-07-10T08:00:00Z","expires_at": "2025-12-31T23:59:59Z","invited_by": "admin_998877","organization_id": "org_987654321","resent_at": "2025-07-15T09:30:00Z","resent_count": 2,"status": "pending_invite","user_id": "usr_123456"}}The
resendInvitationmethod returns the updated invitation object with the new expiration timestamp and incremented resend counter. This helps you track the invitation lifecycle and understand user engagement with your onboarding process. -
Handle invitation acceptance
Section titled “Handle invitation acceptance”When invited users click the invitation link in their email, Scalekit automatically verifies their identity through the secure magic link embedded in the email. Once verified, Scalekit redirects them to your application’s registered initiate login endpoint to complete the authentication flow.
Your application receives the user through the standard authentication callback, where you can create their session and redirect them to your dashboard. The user won’t see a login page since their identity was already verified through the invitation link.
Set up the initiate login endpoint:
Express.js // Handle indirect auth entry points (invitation links, magic links, etc.)// 1. Register this endpoint in Dashboard > Authentication > Redirect URLs// 2. Scalekit redirects here after verifying the invitation linkapp.get('/auth/login/initiate', (req, res) => {try {const redirectUri = 'http://localhost:3000/api/callback';const options = {scopes: ['openid', 'profile', 'email', 'offline_access']};// Create authorization URL and redirect to Scalekitconst authorizationUrl = scalekit.getAuthorizationUrl(redirectUri, options);res.redirect(authorizationUrl);} catch (error) {console.error('Authorization failed:', error);res.redirect('/login?error=auth_failed');}});Flask from flask import redirectfrom scalekit import AuthorizationUrlOptions# Handle indirect auth entry points (invitation links, magic links, etc.)# 1. Register this endpoint in Dashboard > Authentication > Redirect URLs# 2. Scalekit redirects here after verifying the invitation link@app.route('/auth/login/initiate')def initiate_login():try:redirect_uri = 'http://localhost:3000/api/callback'options = AuthorizationUrlOptions()options.scopes = ['openid', 'profile', 'email', 'offline_access']# Create authorization URL and redirect to Scalekitauthorization_url = scalekit_client.get_authorization_url(redirect_uri, options)return redirect(authorization_url)except Exception as error:print(f'Authorization failed: {str(error)}')return redirect('/login?error=auth_failed')Gin // Handle indirect auth entry points (invitation links, magic links, etc.)// 1. Register this endpoint in Dashboard > Authentication > Redirect URLs// 2. Scalekit redirects here after verifying the invitation linkfunc initiateLogin(c *gin.Context) {redirectUri := "http://localhost:3000/api/callback"options := scalekitClient.AuthorizationUrlOptions{Scopes: []string{"openid", "profile", "email", "offline_access"}}// Create authorization URL and redirect to ScalekitauthorizationUrl, err := scalekitClient.GetAuthorizationUrl(redirectUri, options)if err != nil {log.Printf("Authorization failed: %v", err)c.Redirect(http.StatusFound, "/login?error=auth_failed")return}c.Redirect(http.StatusFound, authorizationUrl.String())}Spring Boot import org.springframework.web.bind.annotation.GetMapping;import java.net.URL;// Handle indirect auth entry points (invitation links, magic links, etc.)// 1. Register this endpoint in Dashboard > Authentication > Redirect URLs// 2. Scalekit redirects here after verifying the invitation link@GetMapping("/auth/login/initiate")public ResponseEntity<Void> initiateLogin() {try {String redirectUri = "http://localhost:3000/api/callback";AuthorizationUrlOptions options = new AuthorizationUrlOptions();options.setScopes(Arrays.asList("openid", "profile", "email", "offline_access"));// Create authorization URL and redirect to ScalekitURL authorizationUrl = scalekitClient.authentication().getAuthorizationUrl(redirectUri, options);return ResponseEntity.status(HttpStatus.FOUND).header("Location", authorizationUrl.toString()).build();} catch (Exception error) {System.err.println("Authorization failed: " + error.getMessage());return ResponseEntity.status(HttpStatus.FOUND).header("Location", "/login?error=auth_failed").build();}}After setting up this endpoint, your invited users experience a seamless flow: they click the invitation link, Scalekit verifies their identity, redirects to your initiate login endpoint, your application creates an authorization URL, Scalekit completes the auth flow, and finally the user lands in your application with an active session. The entire process is secure and requires no password or additional verification steps from the user.