
Enable users to sign in with their Google accounts using OAuth 2.0
Setup →Add social login to your app
Implement authentication with Google, Microsoft, GitHub, and other social providers
First, complete the quickstart guide to integrate Scalekit auth into your application. Scalekit natively supports OAuth 2.0, enabling you to easily configure social login providers that will automatically appear as authentication options on your login page.
-
Configure social login providers
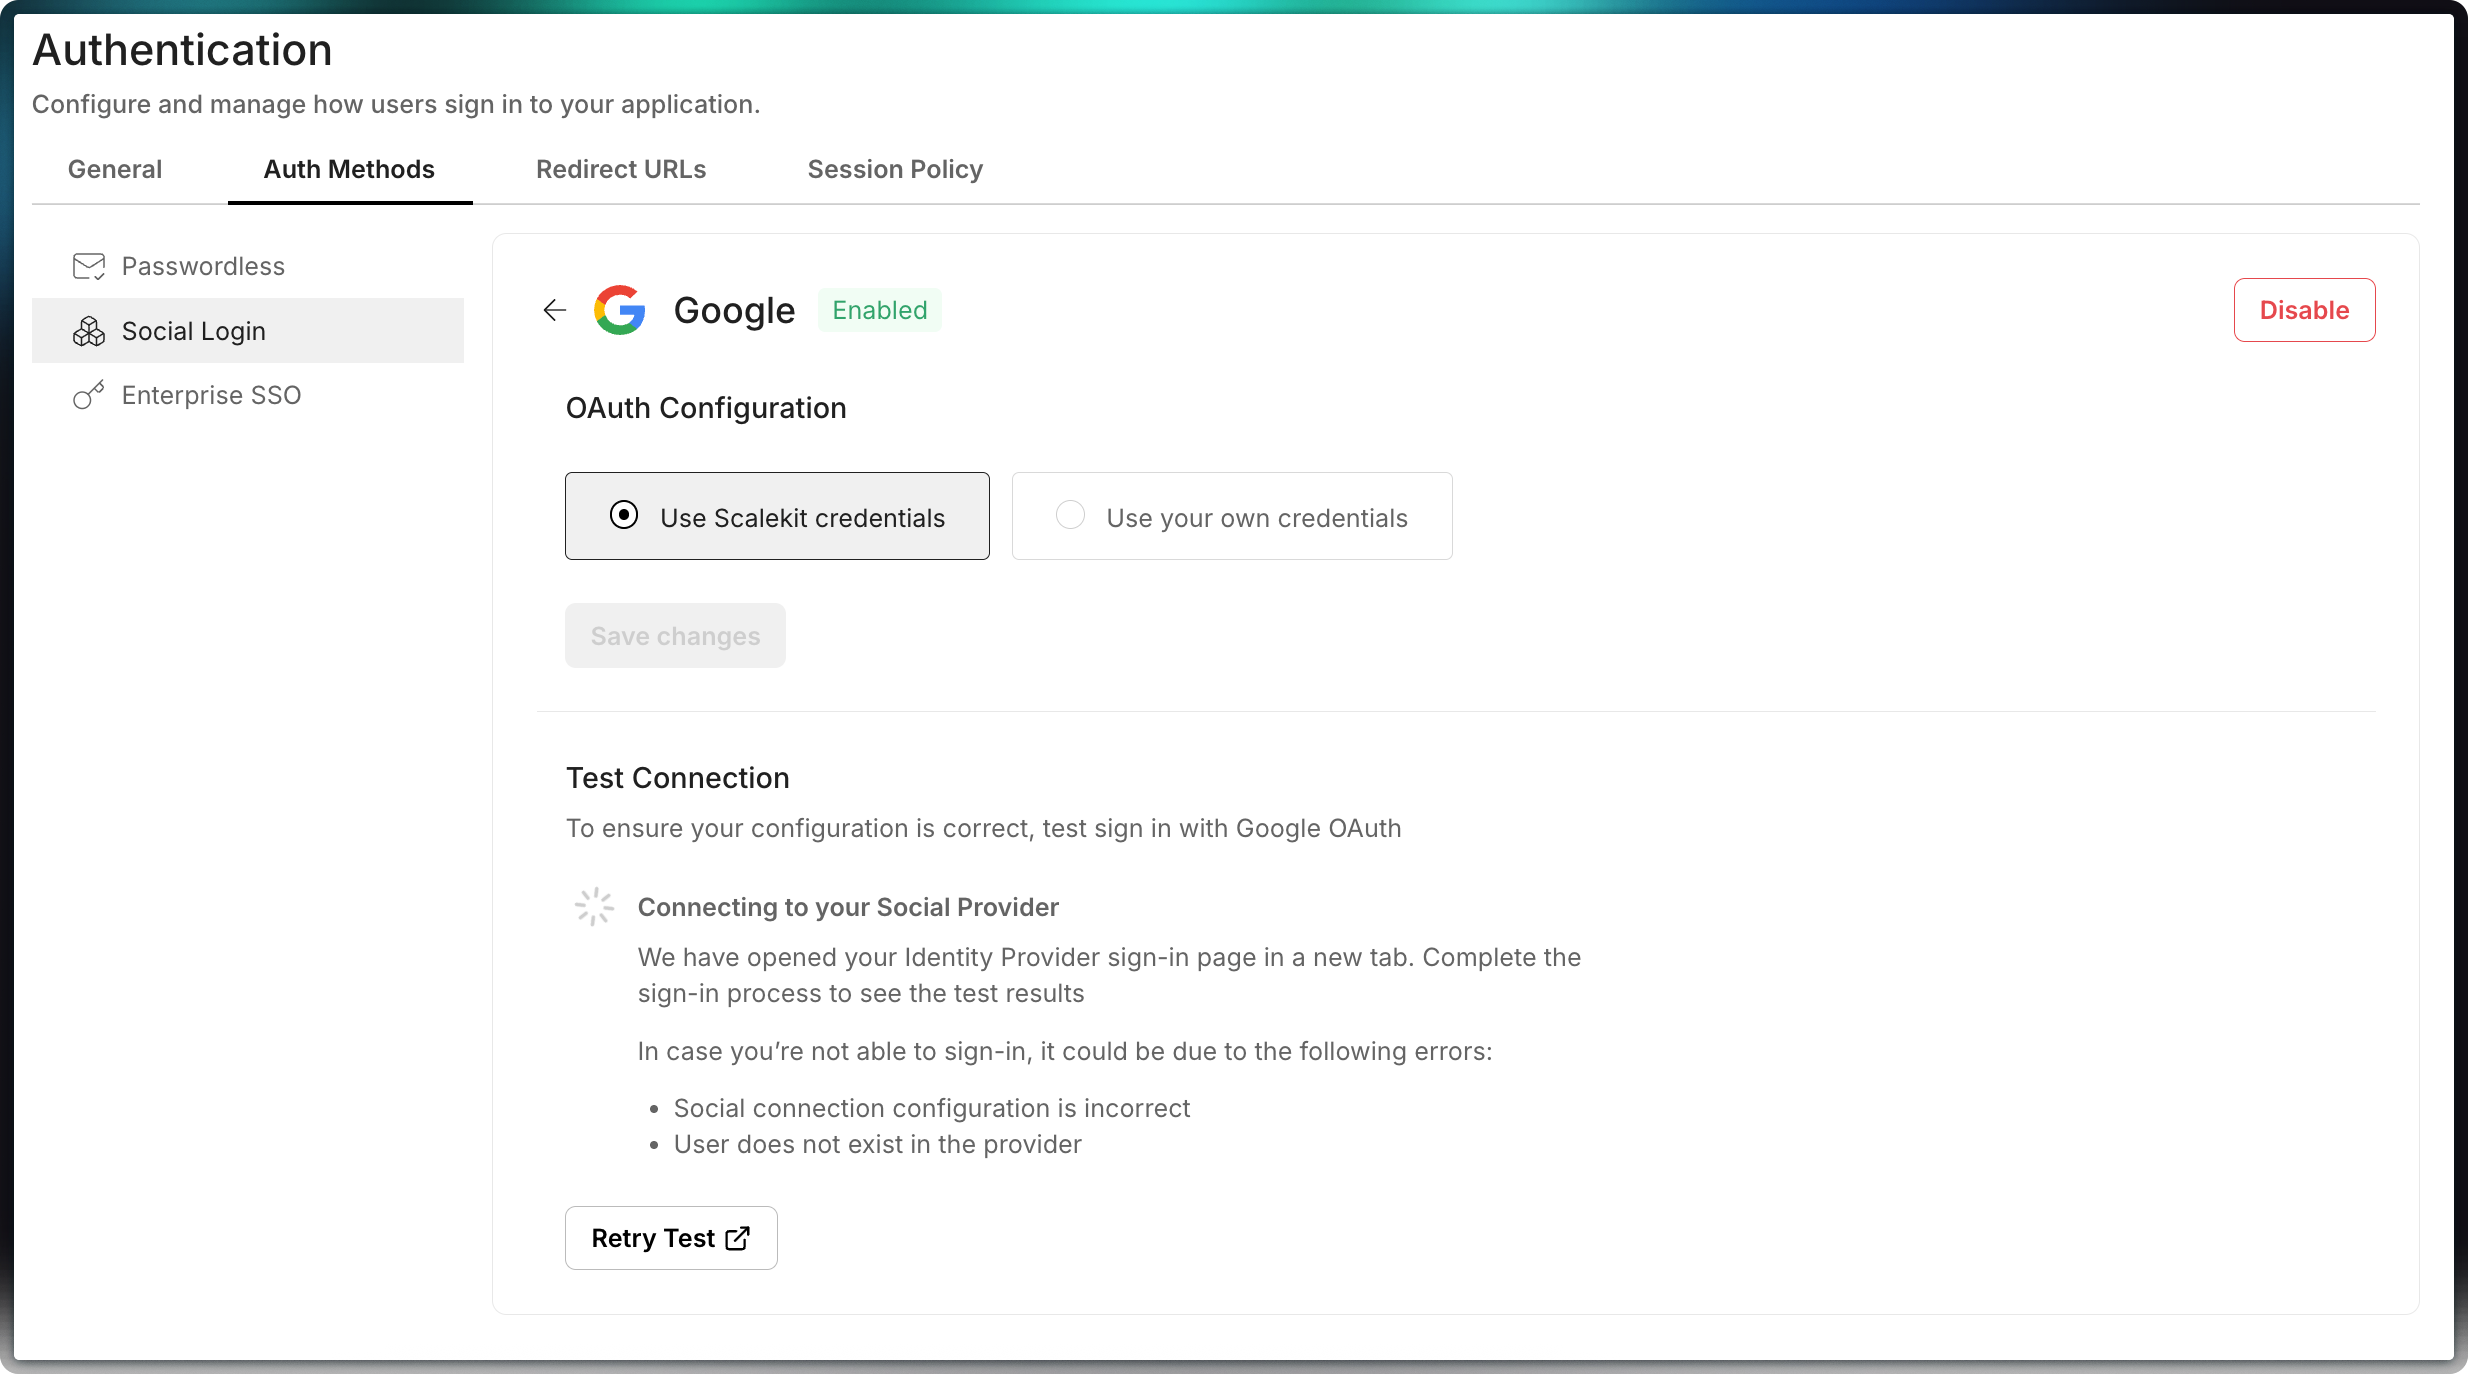
Section titled “Configure social login providers”Google login is pre-configured in all development environments for simplified testing. You can integrate additional social login providers by setting up your own connection credentials with each provider.
Navigate to Authentication > Auth Methods > Social logins in your dashboard to configure these settings
Google
GitHub
Allow users to authenticate using their GitHub credentials
Setup →Microsoft
Integrate Microsoft accounts for seamless user authentication
Setup →GitLab
Enable GitLab-based authentication for your application
Setup →LinkedIn
Let users sign in with their LinkedIn accounts using OAuth 2.0
Setup →Salesforce
Enable Salesforce-based authentication for your application
Setup → -
Test the social connection
Section titled “Test the social connection”After configuration, test the social connection by clicking on “Test Connection” in the dashboard. You will be redirected to the provider’s consent screen to authorize access. A summary table will show the information that will be sent to your app.
Access social login options on your login page
Section titled “Access social login options on your login page”Your application now supports social logins.
Begin the login process to experience the available social login options. Users can authenticate using providers like Google, GitHub, Microsoft, and any others you have set up.