Federated Auth Integration Guide
This document explains how to integrate your existing authentication system with Scalekit’s drop-in OAuth 2.1 authorization layer. Follow the steps below to enable seamless and secure OAuth2.1 MCP layer for your users.
Step-by-Step Workflow
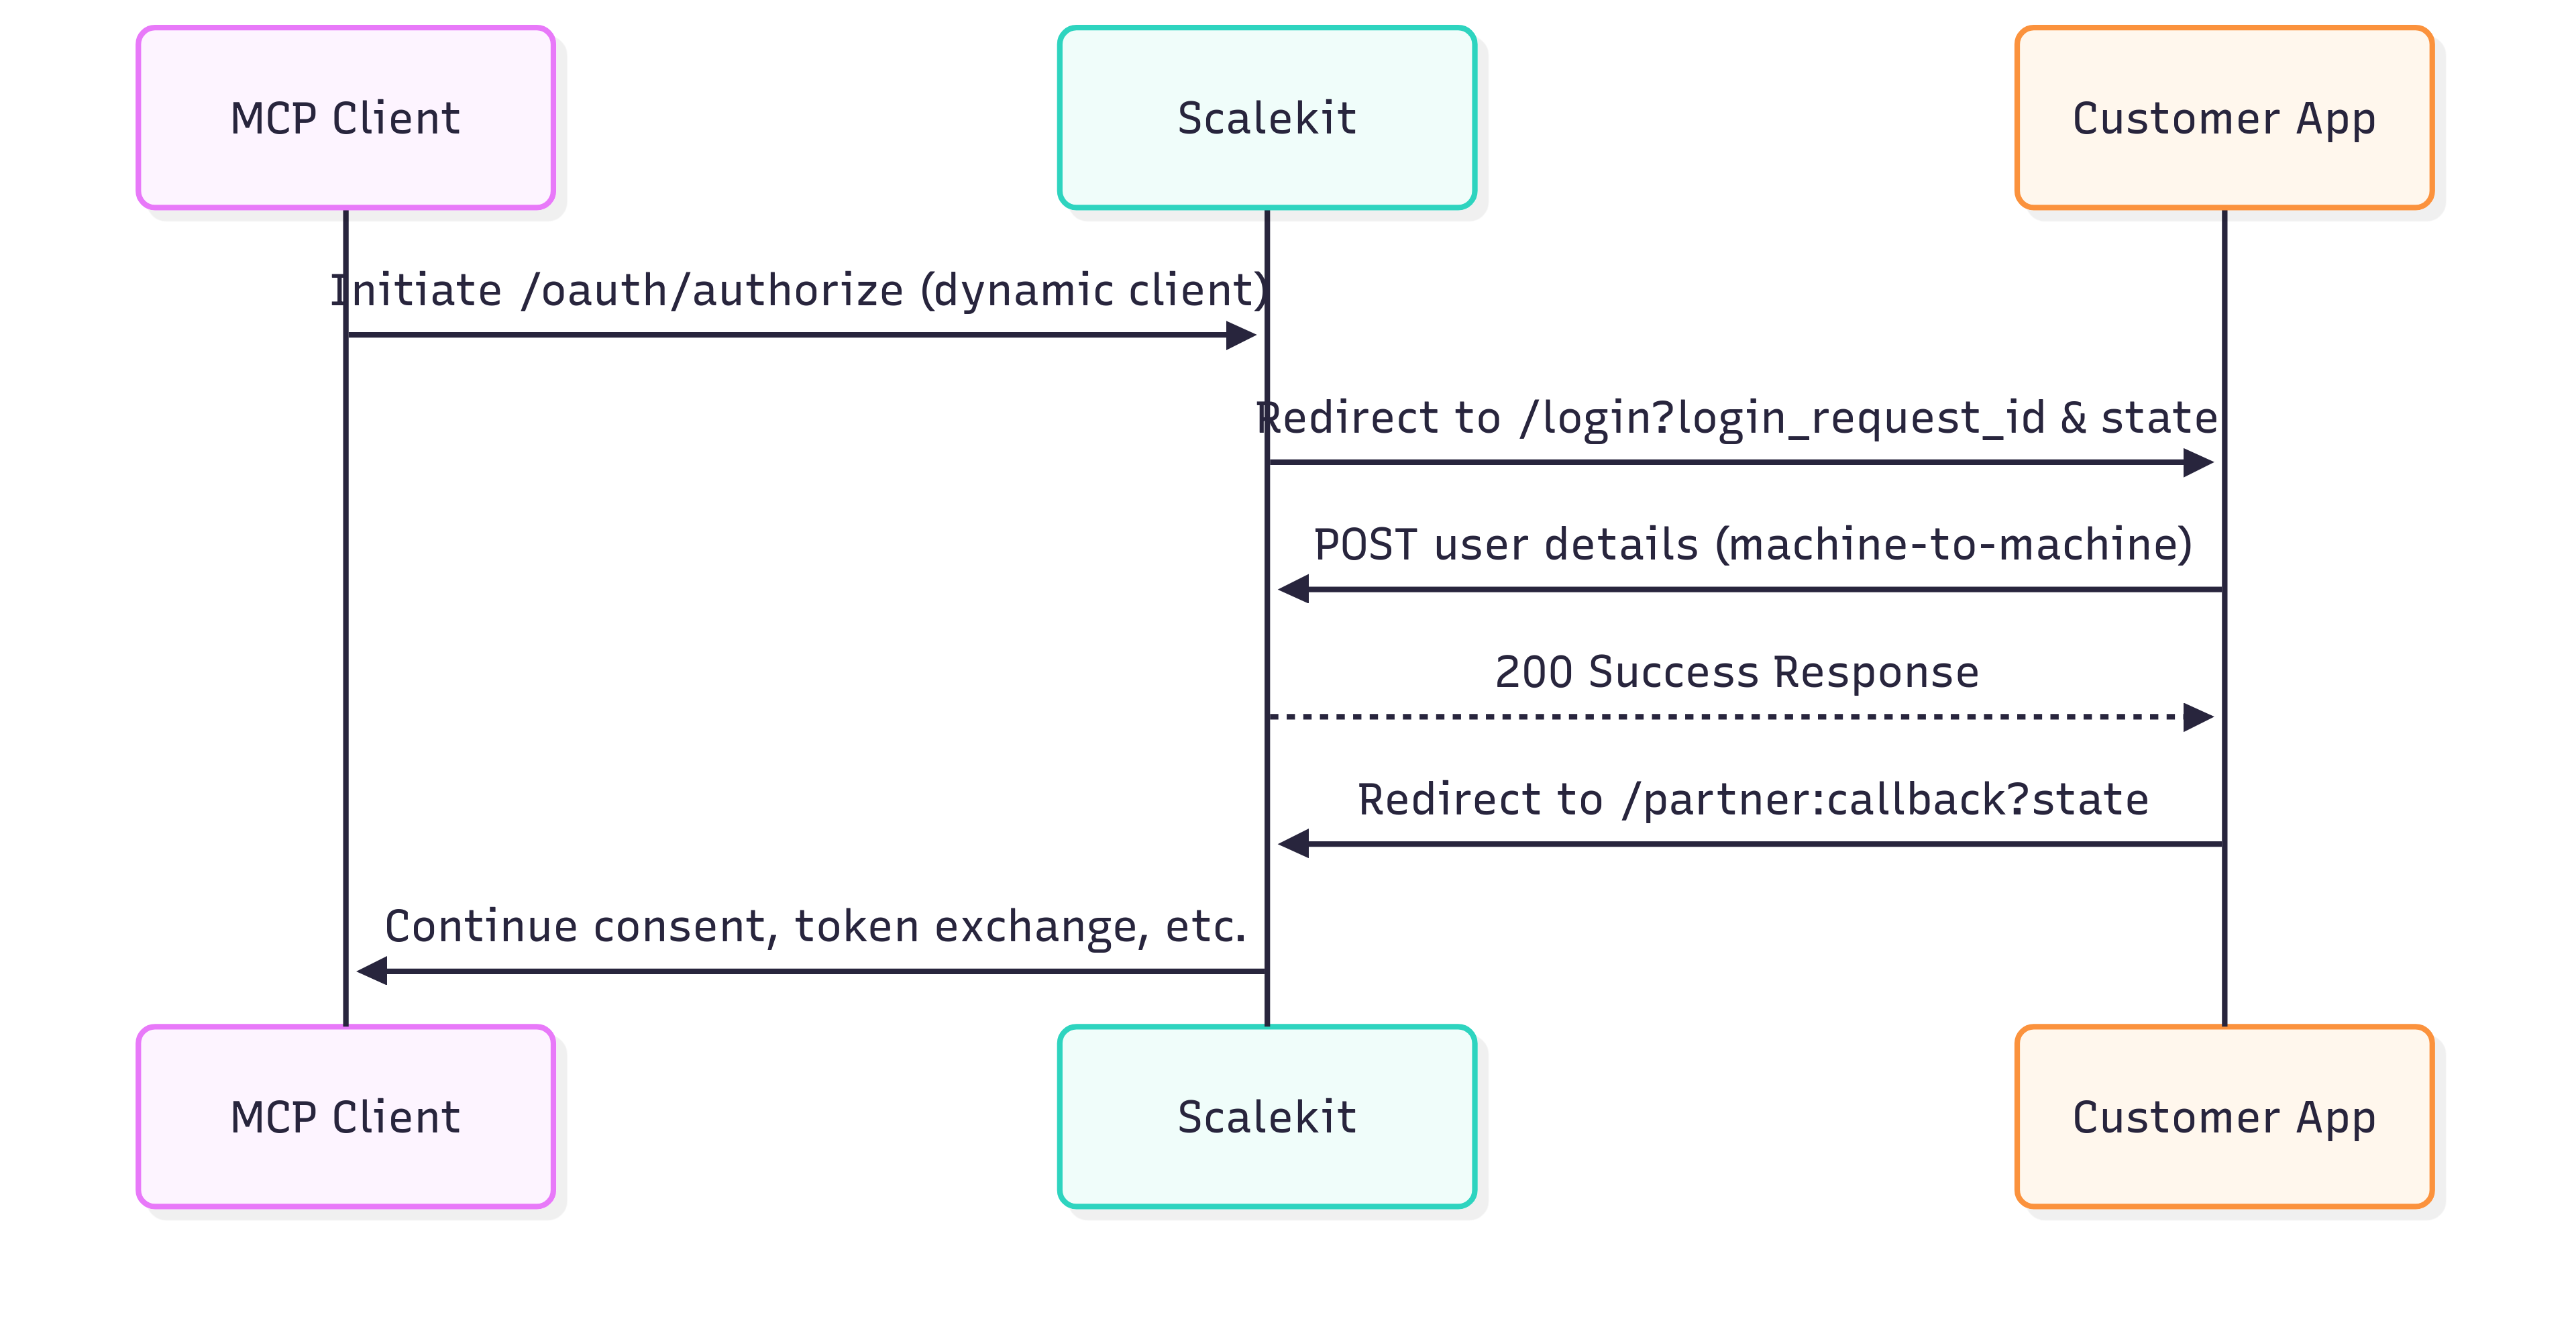
Section titled “Step-by-Step Workflow”When an MCP client initiates an authentication flow, Scalekit redirects to your login endpoint. You then provide user details to Scalekit via a secure backend call, and finally redirect back to Scalekit to complete the process.

1. Initiate Authentication
Section titled “1. Initiate Authentication”- The MCP client starts the authentication flow by calling
/oauth/authorizeon Scalekit. - Scalekit redirects the user to your login endpoint, passing two parameters:
login_request_id: Unique identifier for the login request.state: Value to maintain state between requests.
Example Redirect URL:
https://app.example.com/login?login_request_id=lri_86659065219908156&state=HntJ_ENB6y161i9_P1yzuZVv2SSTfD3aZH-Tej0_Y33_Fk8Z3g2. Handle Authentication in Your Application
Section titled “2. Handle Authentication in Your Application”Once the user lands on your login page:
a. Authenticate the User
Section titled “a. Authenticate the User”Take the user through your regular authentication logic (e.g., username/password, SSO, etc.).
b. Send User Details to Scalekit
Section titled “b. Send User Details to Scalekit”After successful authentication, make a machine-to-machine POST request to Scalekit with the user’s details.
Example cURL Request:
curl --location '{{envurl}}/api/v1/connections/{{connection_id}}/auth-requests/{{login_request_id}}/user' \ --header 'Content-Type: application/json' \ --header 'Authorization: Bearer {{access_token}}' \ --data-raw '{ "sub": "1234567890", "email": "alice@example.com", "given_name": "Alice", "family_name": "Doe", "email_verified": true, "phone_number": "+1234567890", "phone_number_verified": false, "name": "Alice Doe", "preferred_username": "alice.d", "picture": "https://example.com/avatar.jpg", "gender": "female", "locale": "en-US" }'3. Redirect Back to Scalekit
Section titled “3. Redirect Back to Scalekit”- Once you receive a successful response from Scalekit, redirect the user back to Scalekit using the provided
statevalue to the below endpoint.
Example Redirect URL:
{{envurl}}/sso/v1/connections/{{connection_id}}/partner:callback?state={{state_value}}state_value should match the state parameter you received in Step 1.
4. Completion
Section titled “4. Completion”- After processing the callback from your auth system, Scalekit will handle the remaining steps (showing the consent screen to the user, token exchange, etc.) automatically.
Next Steps
Section titled “Next Steps”Download our sample MCP Server: We have put together a simple MCP server that you can check out and run it locally to test the end to end functionality of a working MCP server complete with authentication and authorization. You can download and execute a sample MCP server implementation from GitHub.

