
Add passkeys login method
Enable passkey authentication for your users
Passkeys replace passwords with biometric authentication (fingerprint, face recognition) or device PINs. Built on FIDO® standards (WebAuthn and CTAP), passkeys offer superior security by eliminating phishing and credential stuffing vulnerabilities, while also providing a seamless one-tap login experience. Unlike traditional authentication methods, passkeys sync across devices, removing the need for multiple enrollments and providing better recovery options when devices are lost.
Your existing Scalekit integration already supports passkeys. To implement, enable passkeys in the Scalekit dashboard and leverage Scalekit’s built-in user passkey registration functionality.
-
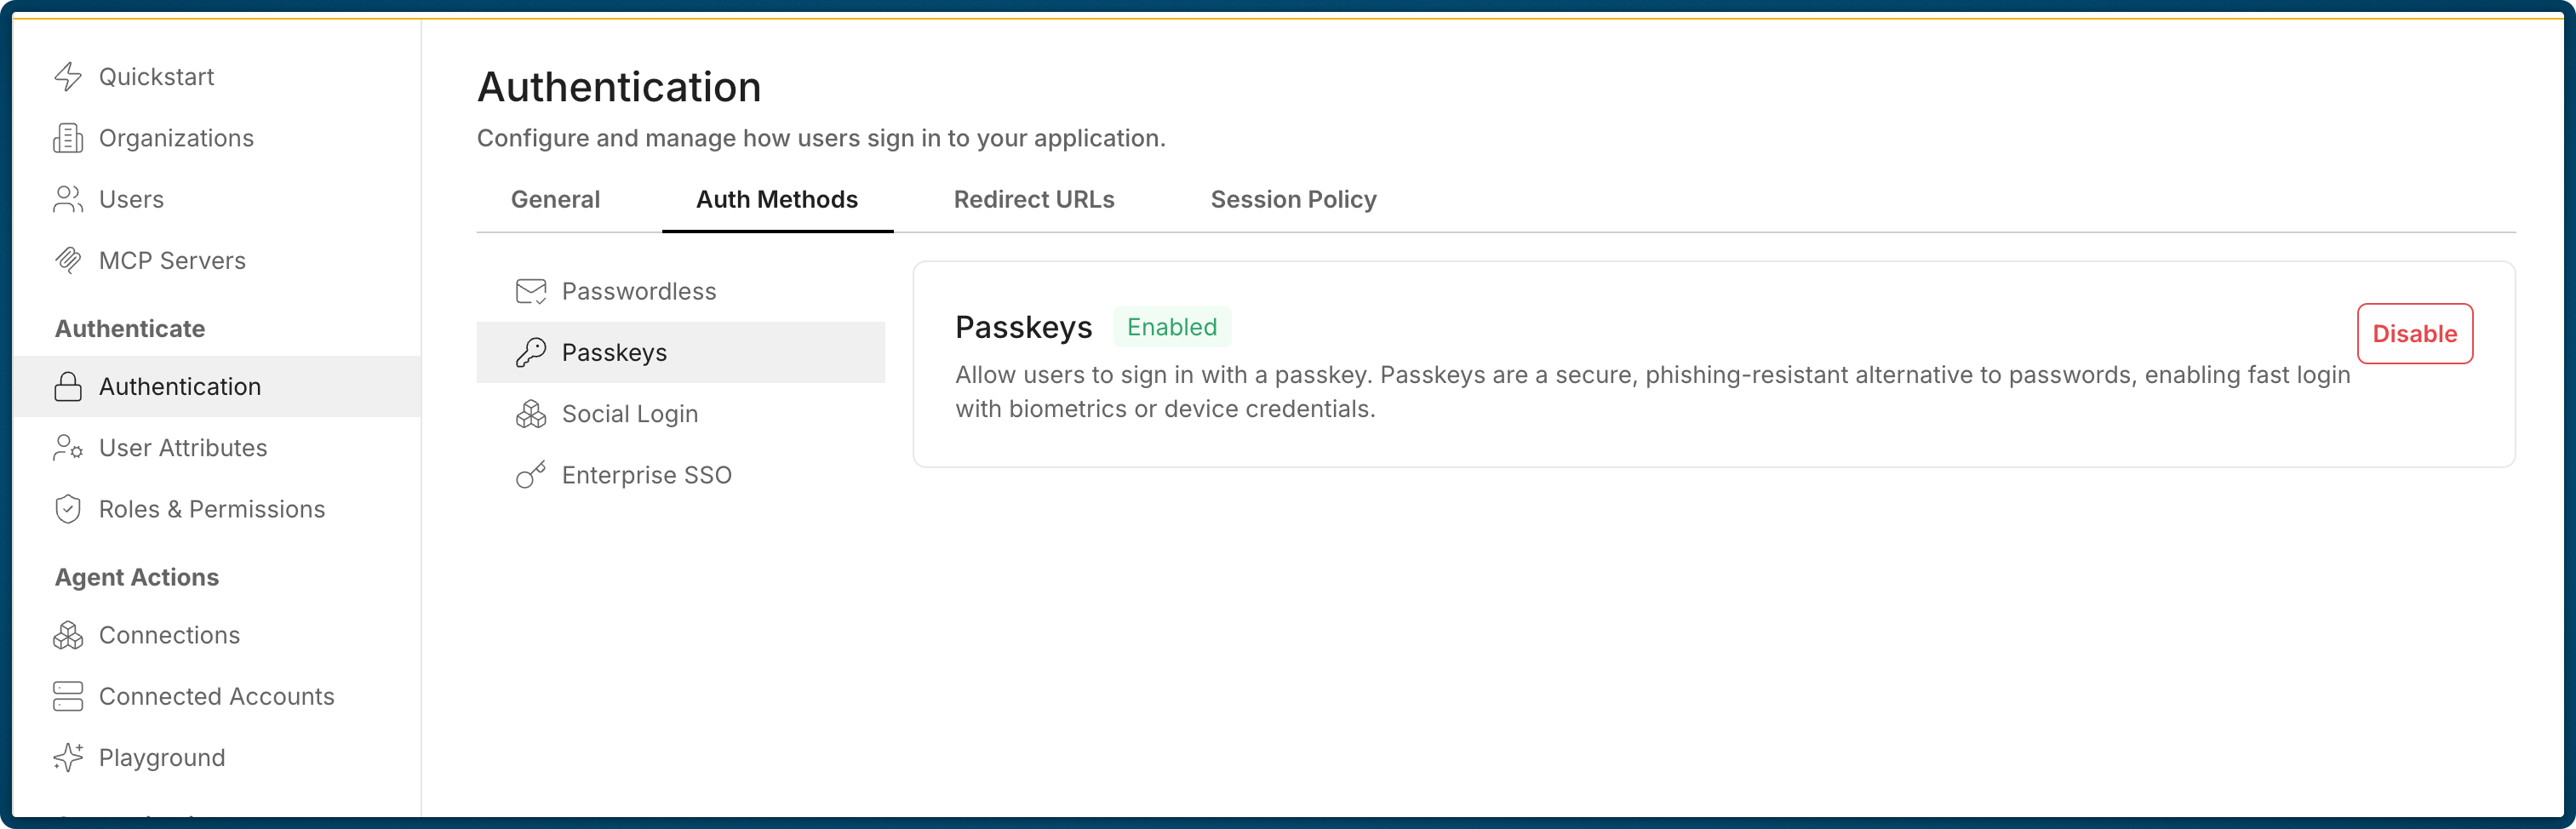
Enable passkeys in the Scalekit dashboard
Section titled “Enable passkeys in the Scalekit dashboard”Go to Scalekit Dashboard > Authentication > Auth methods > Passkeys and click “Enable”
-
Manage passkey registration
Section titled “Manage passkey registration”Let users manage passkeys just by redirecting them to Scalekit from your app (usually through a button in your app that says “Manage passkeys”), or building your own UI.
Using Scalekit UI
Section titled “Using Scalekit UI”To enable users to register and manage their passkeys, redirect them to the Scalekit passkey registration page.
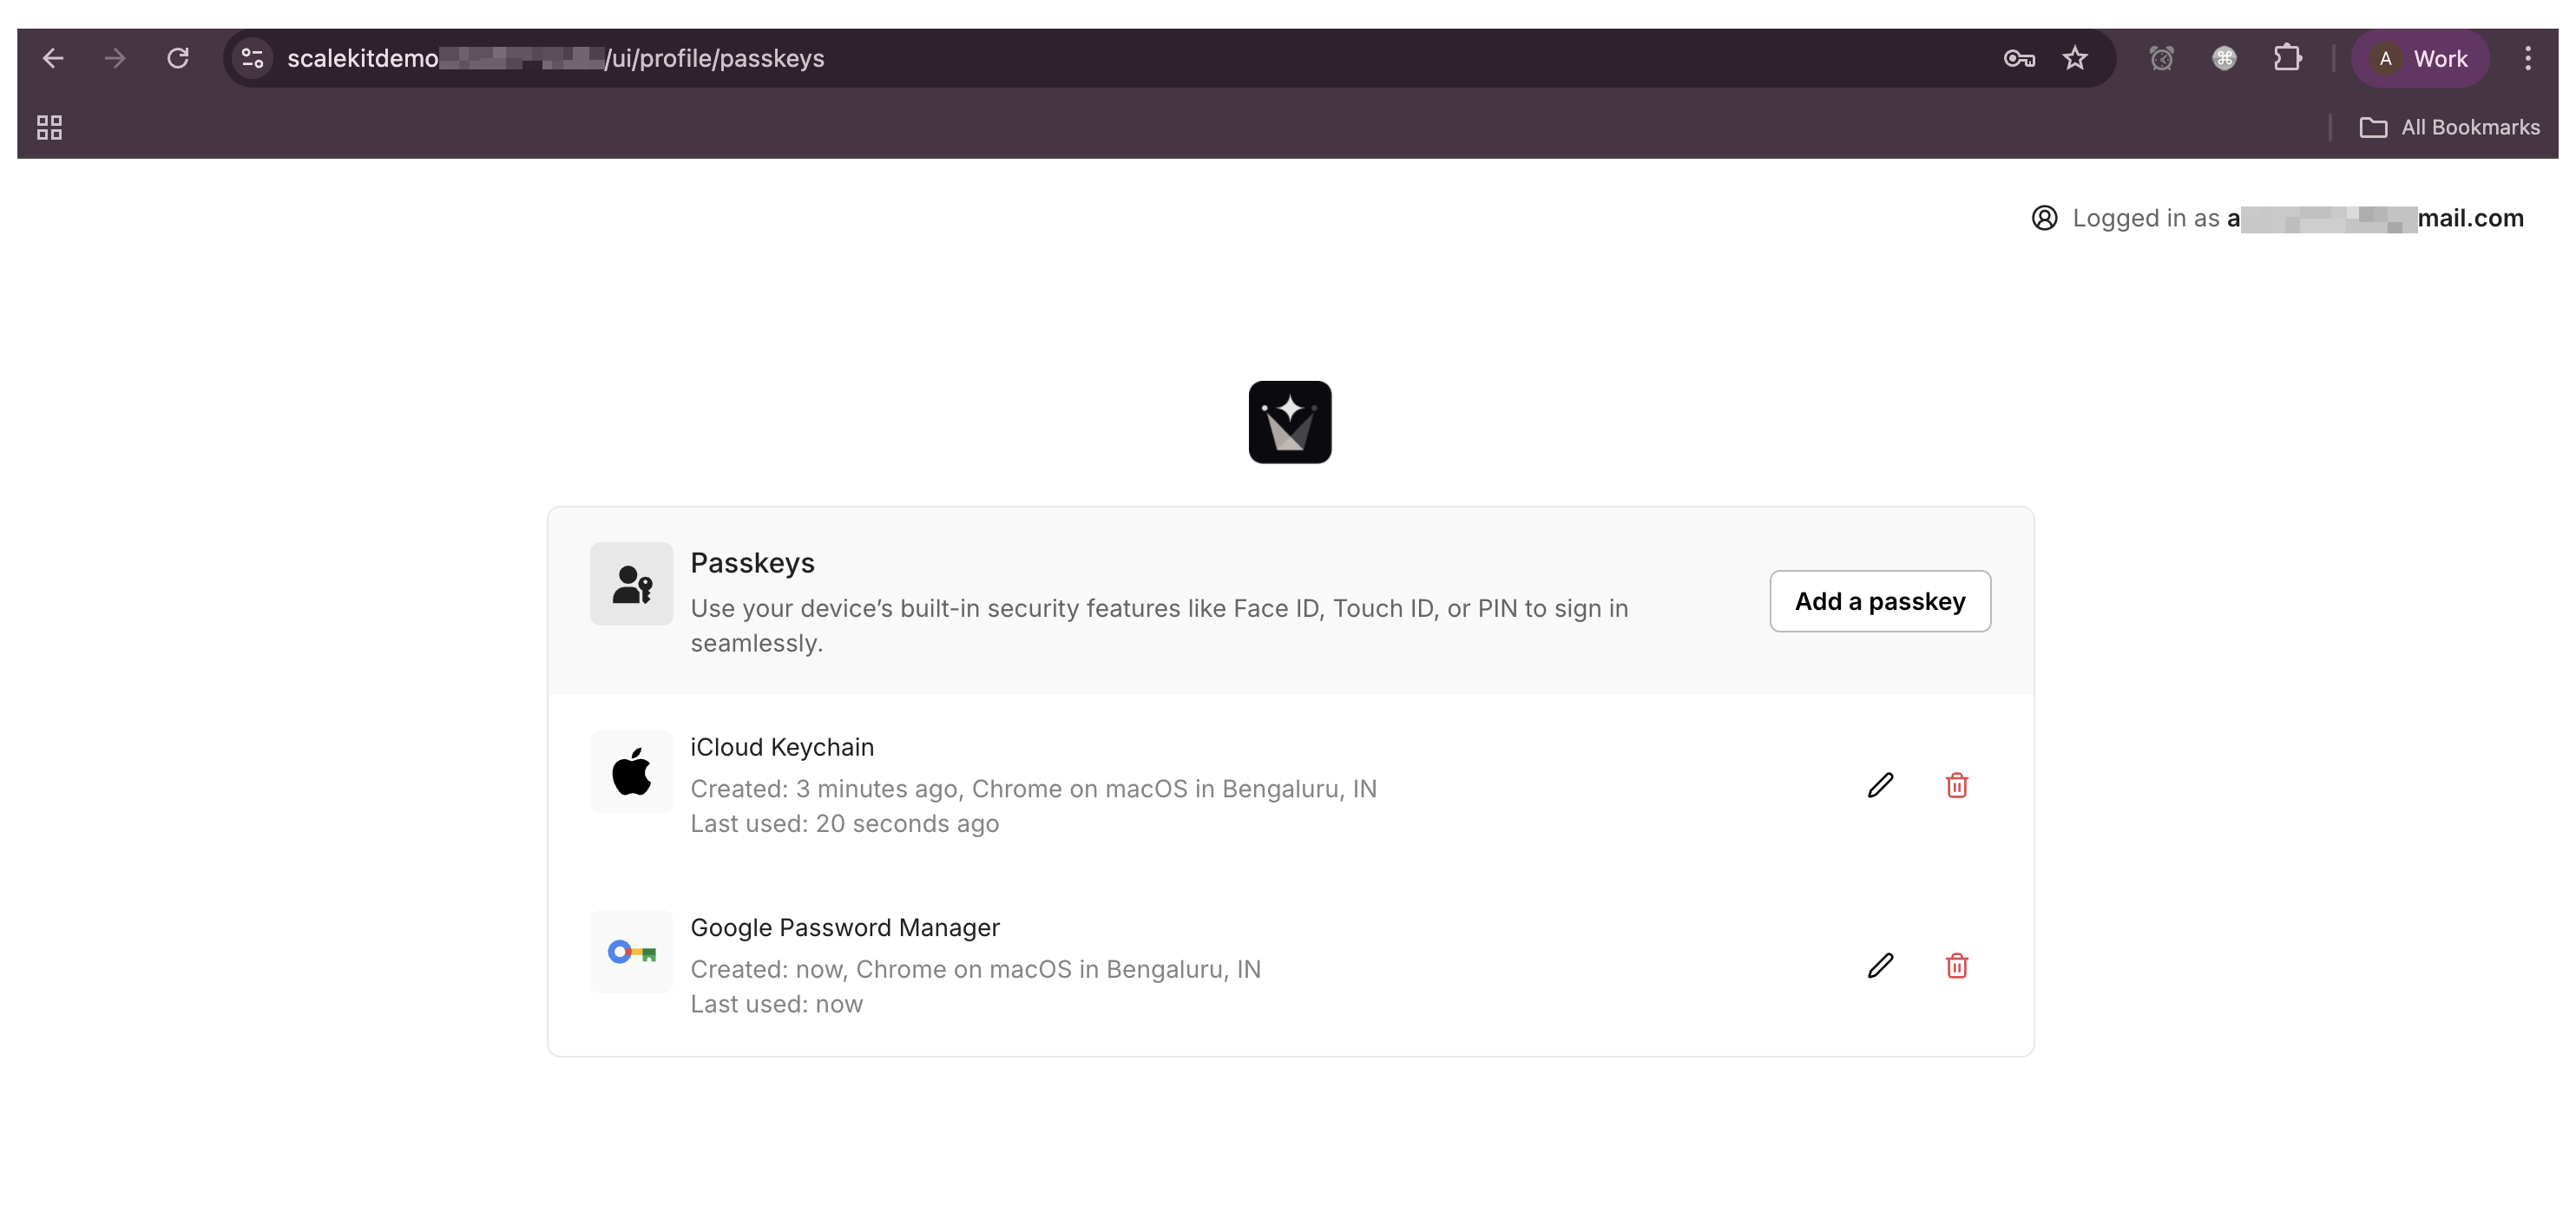
Construct the URL by appending
/ui/profile/passkeysto your Scalekit environment URLPasskey Registration URL <SCALEKIT_ENVIRONMENT_URL>/ui/profile/passkeysThis opens a page where users can:
- Register new passkeys
- Remove existing passkeys
- View their registered passkeys
In your own UI
Section titled “In your own UI”If you prefer to create a custom user interface for passkey management, Scalekit offers comprehensive APIs that enable you to build a personalized experience. These APIs allow you to list registered passkeys, rename them, and remove them entirely. However registration of passkeys is only supported through the Scalekit UI.
List user's passkeys // <USER_ID>: fetch from Access Token or ID Token after identity verificationconst res = await fetch('<SCALEKIT_ENVIRONMENT_URL>/api/v1/webauthn/credentials?user_id=<USER_ID>',{ headers: { Authorization: 'Bearer <ACCESS_TOKEN>' } });const data = await res.json();console.log(data);Rename a passkey // <CREDENTIAL_ID>: obtained from list response (id of each passkey)await fetch('<SCALEKIT_ENVIRONMENT_URL>/api/v1/webauthn/credentials/<CREDENTIAL_ID>', {method: 'PATCH',headers: {'Content-Type': 'application/json',Authorization: 'Bearer <ACCESS_TOKEN>'},body: JSON.stringify({ display_name: '<NEW_DISPLAY_NAME>' })});Remove a passkey // <CREDENTIAL_ID>: obtained from list response (id of each passkey)await fetch('<SCALEKIT_ENVIRONMENT_URL>/api/v1/webauthn/credentials/<CREDENTIAL_ID>', {method: 'DELETE',headers: { Authorization: 'Bearer <ACCESS_TOKEN>' }});List user's passkeys import requests# <USER_ID>: fetch from access token or ID token after identity verificationr = requests.get('<SCALEKIT_ENVIRONMENT_URL>/api/v1/webauthn/credentials',params={'user_id': '<USER_ID>'},headers={'Authorization': 'Bearer <ACCESS_TOKEN>'})print(r.json())Rename a passkey import requests# <CREDENTIAL_ID>: obtained from list response (id of each passkey)requests.patch('<SCALEKIT_ENVIRONMENT_URL>/api/v1/webauthn/credentials/<CREDENTIAL_ID>',json={'display_name': '<NEW_DISPLAY_NAME>'},headers={'Authorization': 'Bearer <ACCESS_TOKEN>'})Remove a passkey import requests# <CREDENTIAL_ID>: obtained from list response (id of each passkey)requests.delete('<SCALEKIT_ENVIRONMENT_URL>/api/v1/webauthn/credentials/<CREDENTIAL_ID>',headers={'Authorization': 'Bearer <ACCESS_TOKEN>'})List user's passkeys var client = java.net.http.HttpClient.newHttpClient();// <USER_ID>: fetch from Access Token or ID Token after identity verificationvar req = java.net.http.HttpRequest.newBuilder(java.net.URI.create("<SCALEKIT_ENVIRONMENT_URL>/api/v1/webauthn/credentials?user_id=<USER_ID>")).header("Authorization", "Bearer <ACCESS_TOKEN>").GET().build();var res = client.send(req, java.net.http.HttpResponse.BodyHandlers.ofString());System.out.println(res.body());Rename a passkey var client = java.net.http.HttpClient.newHttpClient();var body = "{\"display_name\":\"<NEW_DISPLAY_NAME>\"}";// <CREDENTIAL_ID>: obtained from list response (id of each passkey)var req = java.net.http.HttpRequest.newBuilder(java.net.URI.create("<SCALEKIT_ENVIRONMENT_URL>/api/v1/webauthn/credentials/<CREDENTIAL_ID>")).header("Authorization", "Bearer <ACCESS_TOKEN>").header("Content-Type","application/json").method("PATCH", java.net.http.HttpRequest.BodyPublishers.ofString(body)).build();client.send(req, java.net.http.HttpResponse.BodyHandlers.discarding());Remove a passkey var client = java.net.http.HttpClient.newHttpClient();// <CREDENTIAL_ID>: obtained from list response (id of each passkey)var req = java.net.http.HttpRequest.newBuilder(java.net.URI.create("<SCALEKIT_ENVIRONMENT_URL>/api/v1/webauthn/credentials/<CREDENTIAL_ID>")).header("Authorization", "Bearer <ACCESS_TOKEN>").DELETE().build();client.send(req, java.net.http.HttpResponse.BodyHandlers.discarding());List user's passkeys // imports: net/http, io, fmt// <USER_ID>: fetch from access token or ID token after identity verificationreq, _ := http.NewRequest("GET", "<SCALEKIT_ENVIRONMENT_URL>/api/v1/webauthn/credentials?user_id=<USER_ID>", nil)req.Header.Set("Authorization", "Bearer <ACCESS_TOKEN>")resp, _ := http.DefaultClient.Do(req)defer resp.Body.Close()b, _ := io.ReadAll(resp.Body)fmt.Println(string(b))Rename a passkey // imports: net/http, bytespayload := bytes.NewBufferString(`{"display_name":"<NEW_DISPLAY_NAME>"}`)// <CREDENTIAL_ID>: obtained from list response (id of each passkey)req, _ := http.NewRequest("PATCH", "<SCALEKIT_ENVIRONMENT_URL>/api/v1/webauthn/credentials/<CREDENTIAL_ID>", payload)req.Header.Set("Content-Type", "application/json")req.Header.Set("Authorization", "Bearer <ACCESS_TOKEN>")http.DefaultClient.Do(req)Remove a passkey // imports: net/http// <CREDENTIAL_ID>: obtained from list response (id of each passkey)req, _ := http.NewRequest("DELETE", "<SCALEKIT_ENVIRONMENT_URL>/api/v1/webauthn/credentials/<CREDENTIAL_ID>", nil)req.Header.Set("Authorization", "Bearer <ACCESS_TOKEN>")http.DefaultClient.Do(req) -
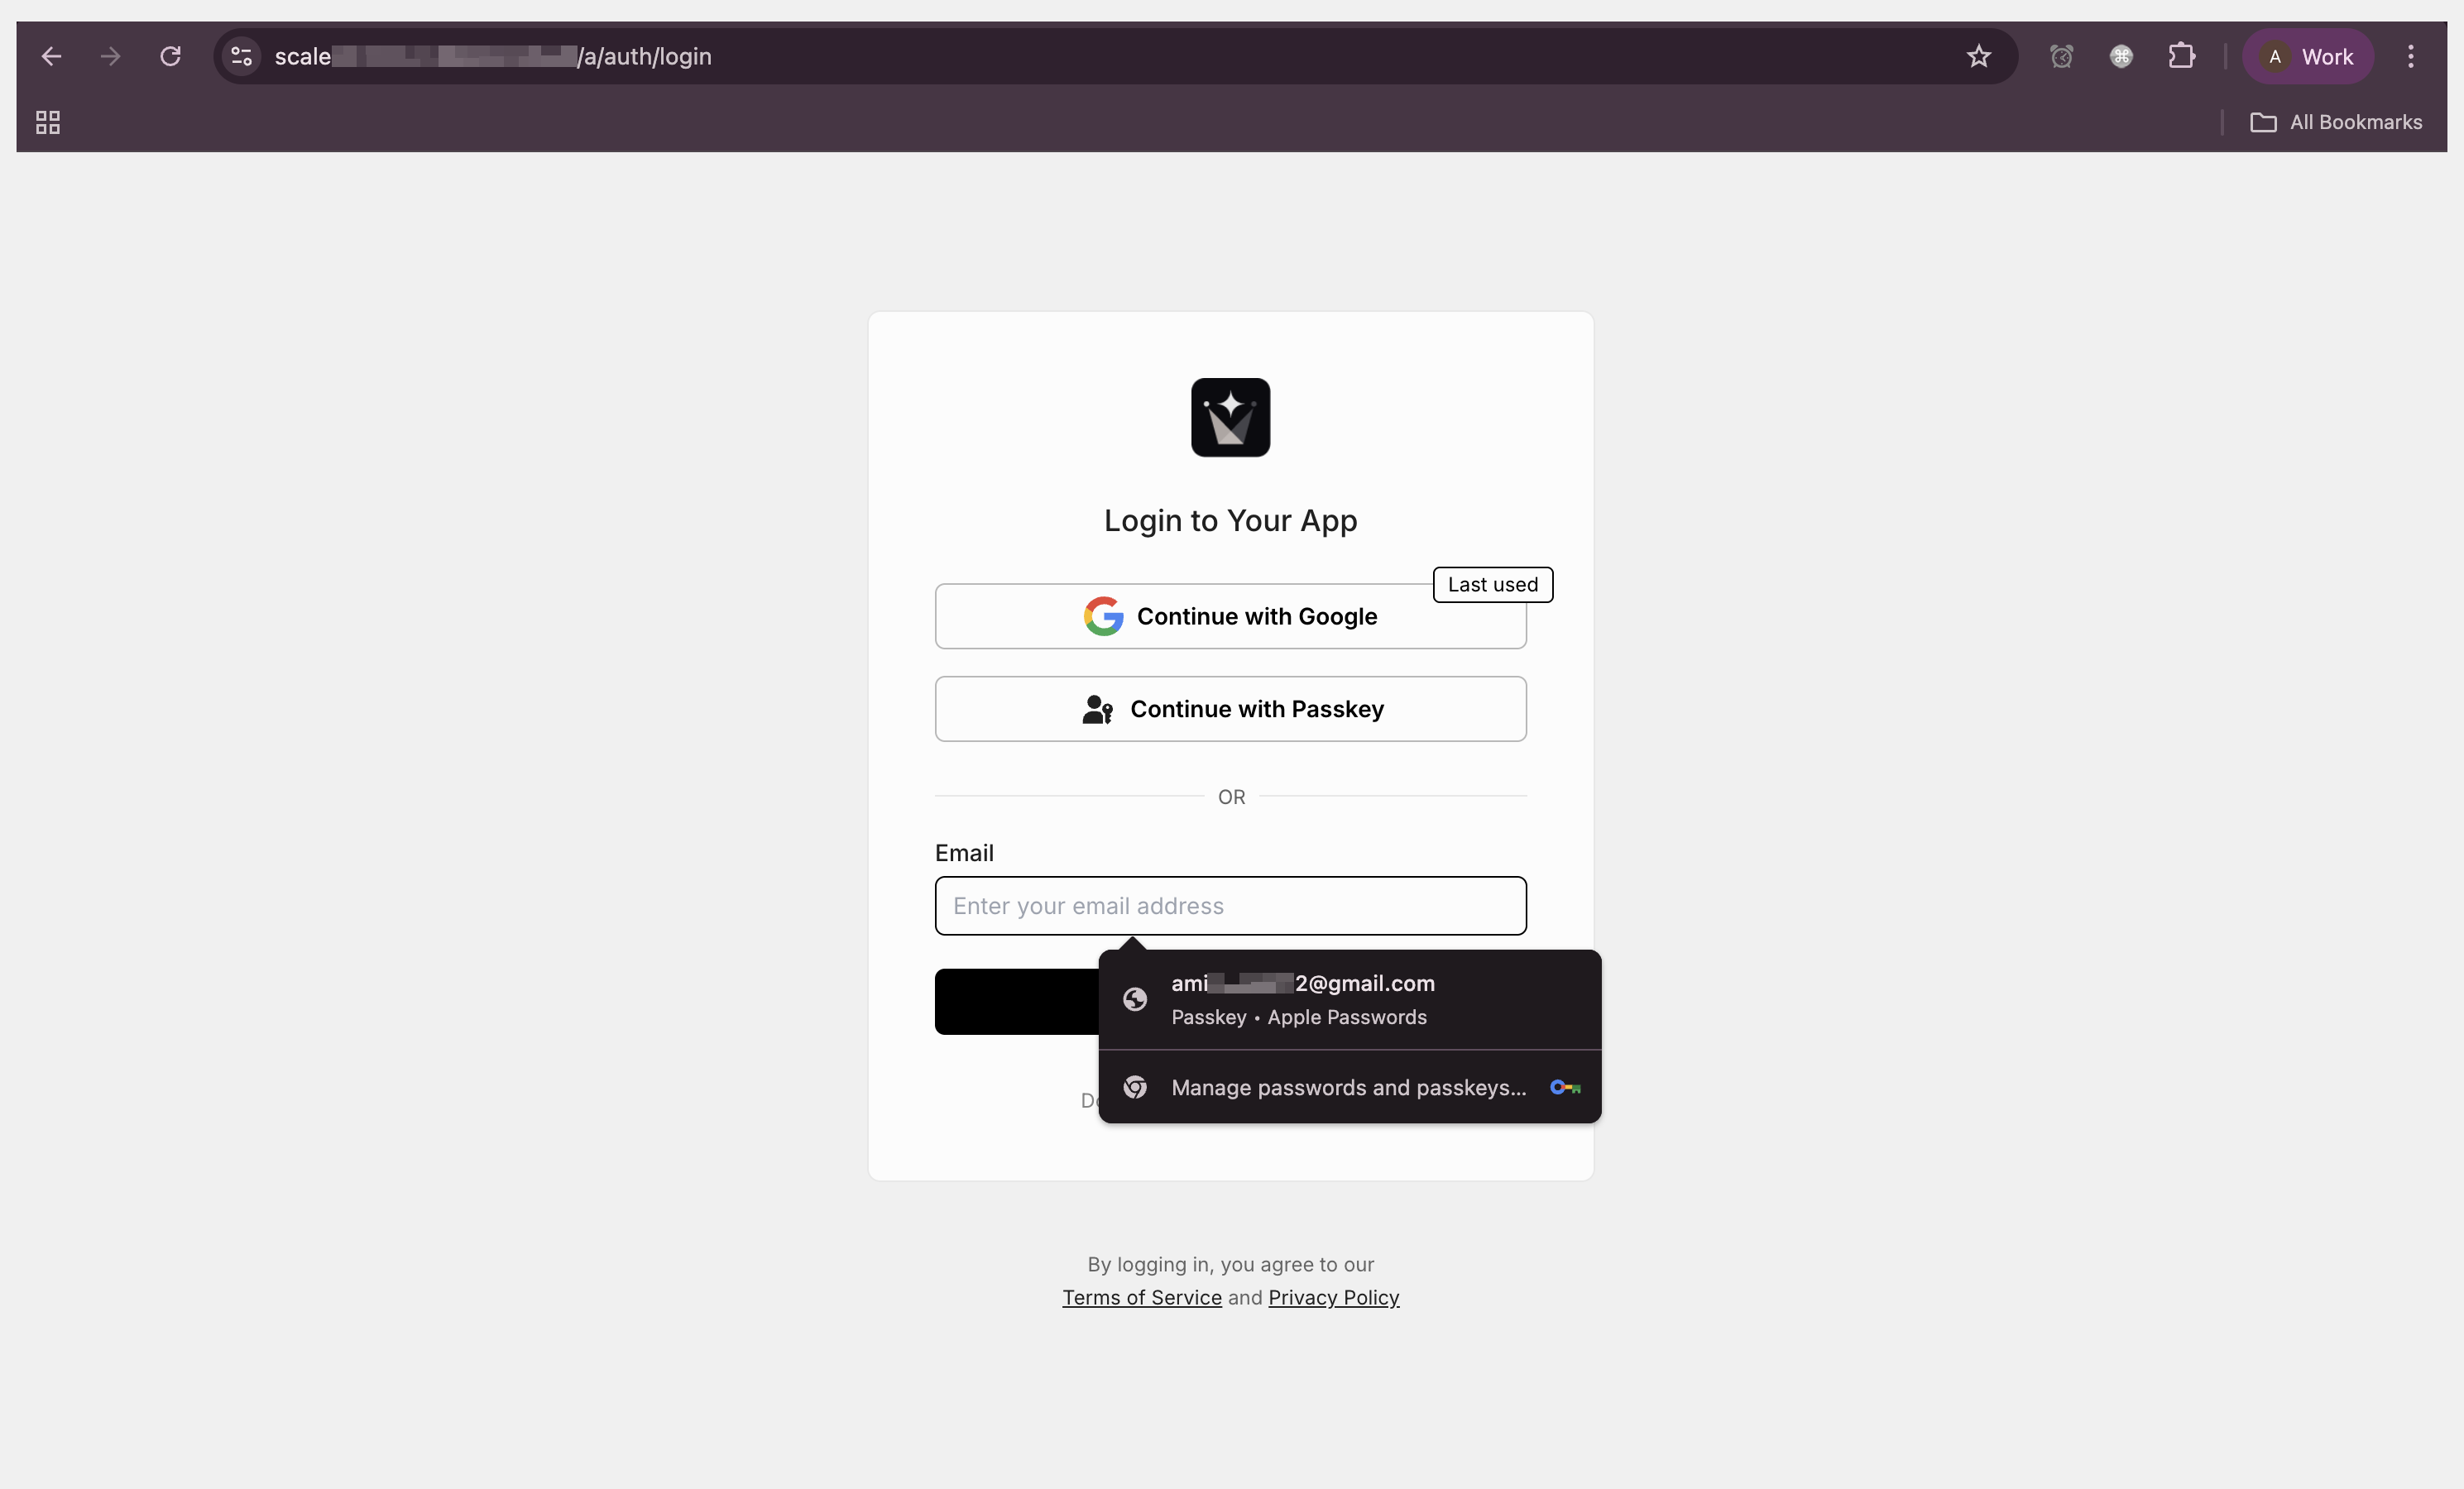
Users can log in with passkeys
Section titled “Users can log in with passkeys”Users who have registered passkeys can log in with them.
This time when login page shows, users can select “Passkey” as the authentication method.
During sign-up, you’ll continue to use established authentication methods like verification codes, magic links or social logins. Once a user is registered, they can then add passkeys as an additional, convenient login option.