
Google Workspace - SAML
Learn how to configure Google Workspace as a SAML identity provider for secure single sign-on (SSO) with your application.
This guide walks you through configuring Google Workspace as your SAML identity provider for the application you are onboarding, enabling secure single sign-on for your users. You’ll learn how to set up an enterprise application and configure SAML settings to the host application. By following these steps, your users will be able to seamlessly authenticate using their Google Workspace credentials.
-
Create a custom SAML app in Google Workspace
Section titled “Create a custom SAML app in Google Workspace”Google allows you to add custom SAML applications using the SAML protocol. This is the first step in establishing a secure SSO connection.
Prerequisites: You need a super administrator account in Google Workspace to complete these steps.
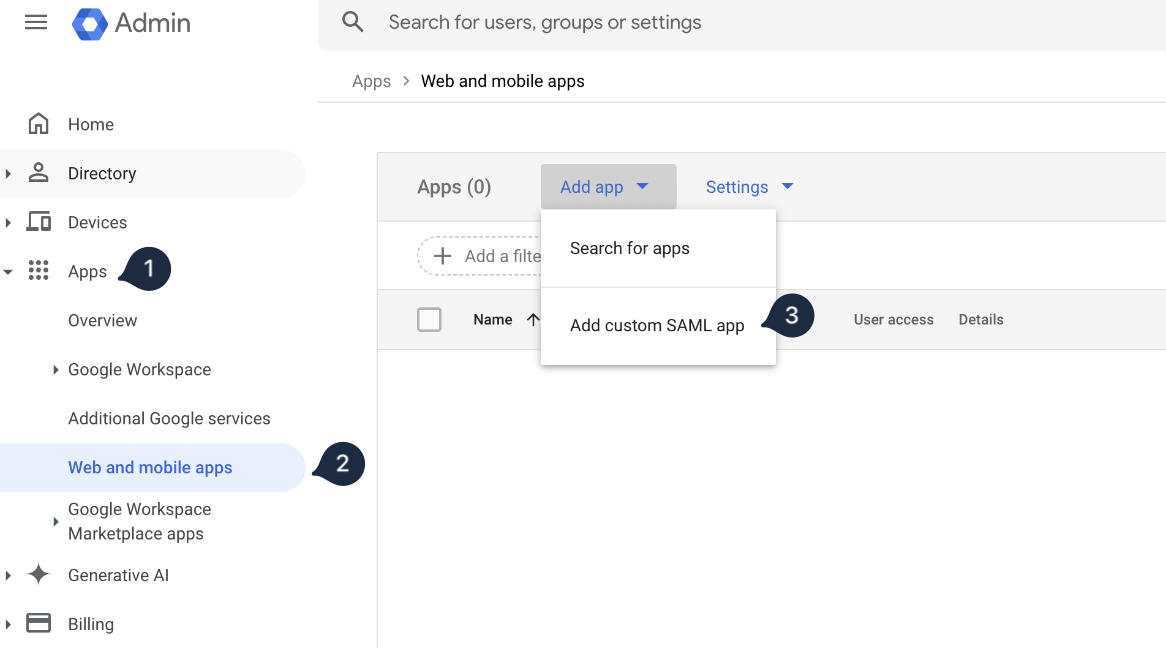
- Go to Google Admin console (
admin.google.com) - Select Apps → Web and mobile apps
- Click Add app → Add custom SAML app
- Provide an app name (e.g., “YourApp”) and upload an app icon if needed
- Click Continue
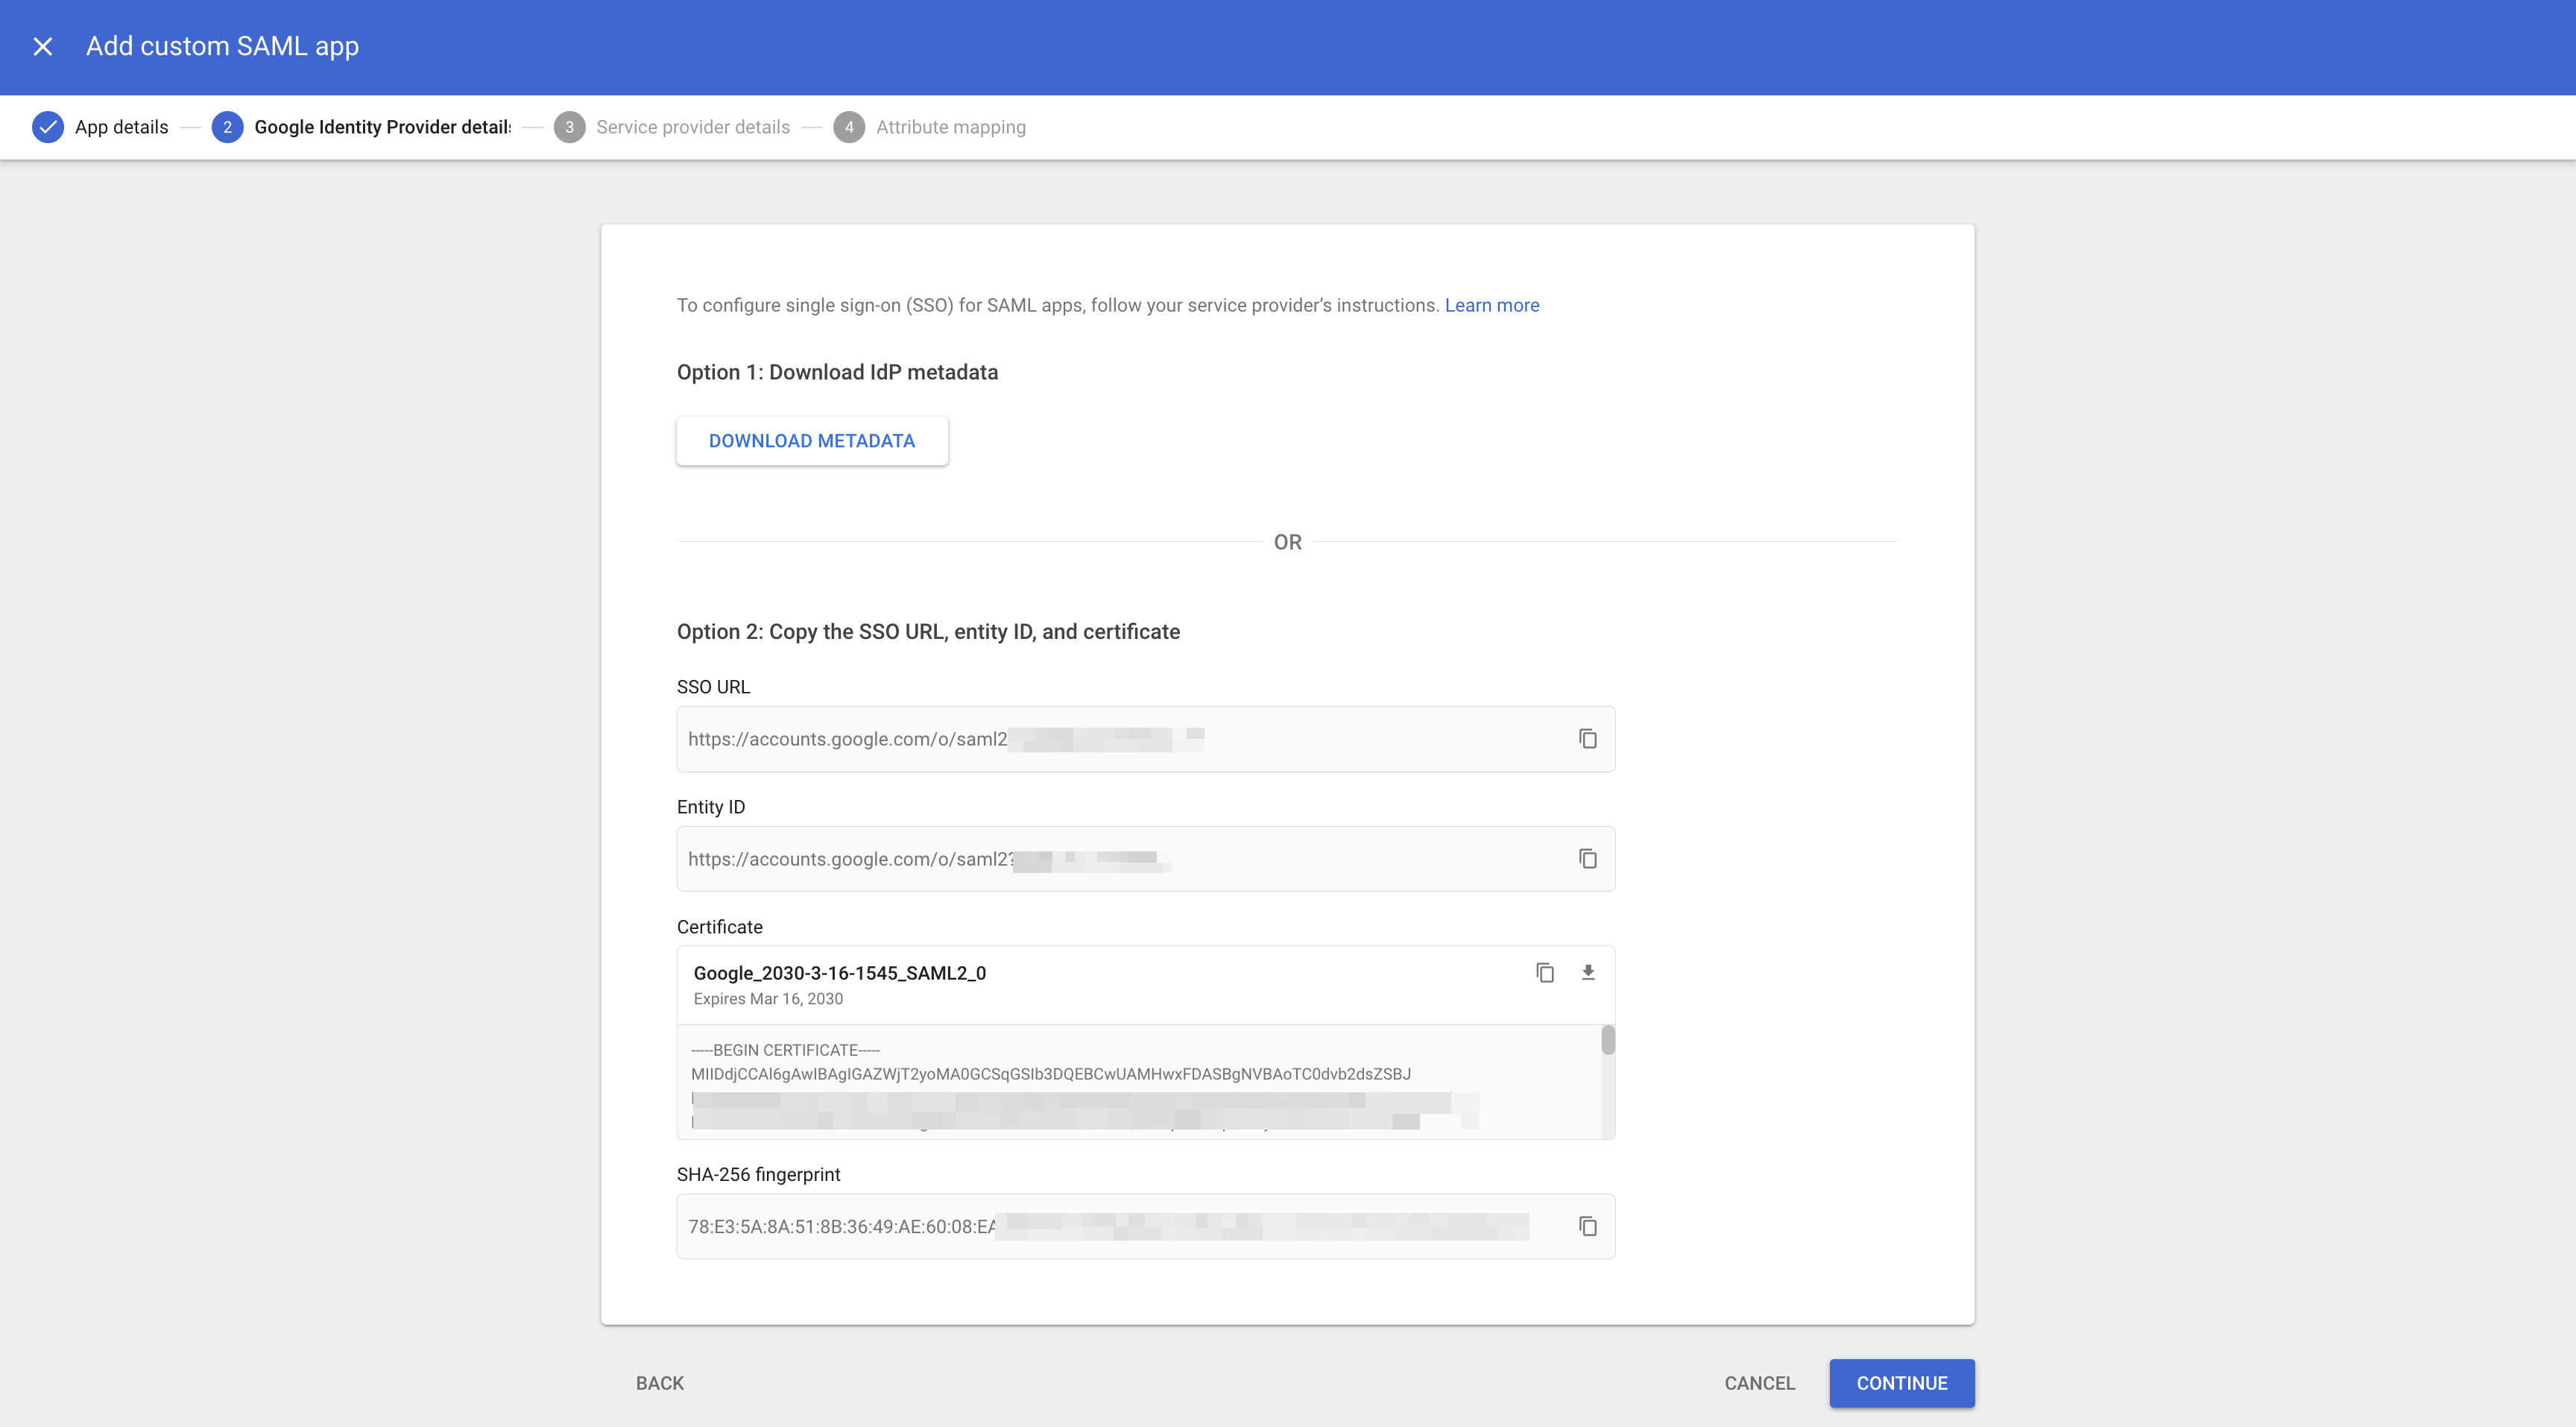
Get Google identity provider details:
On the Google identity provider details page, you’ll need to collect setup information. You can either:
- Download the IDP metadata file, or
- Copy the SSO URL and Entity ID and download the Certificate
Your SSO config portal connects with Google IdP using three essential pieces of information:
- SSO URL
- Entity ID
- Certificate
Copy these values from the Google console and paste them into your config portal.

Note: Keep this page open as you’ll need to return to it after configuring the service provider details.
- Go to Google Admin console (
-
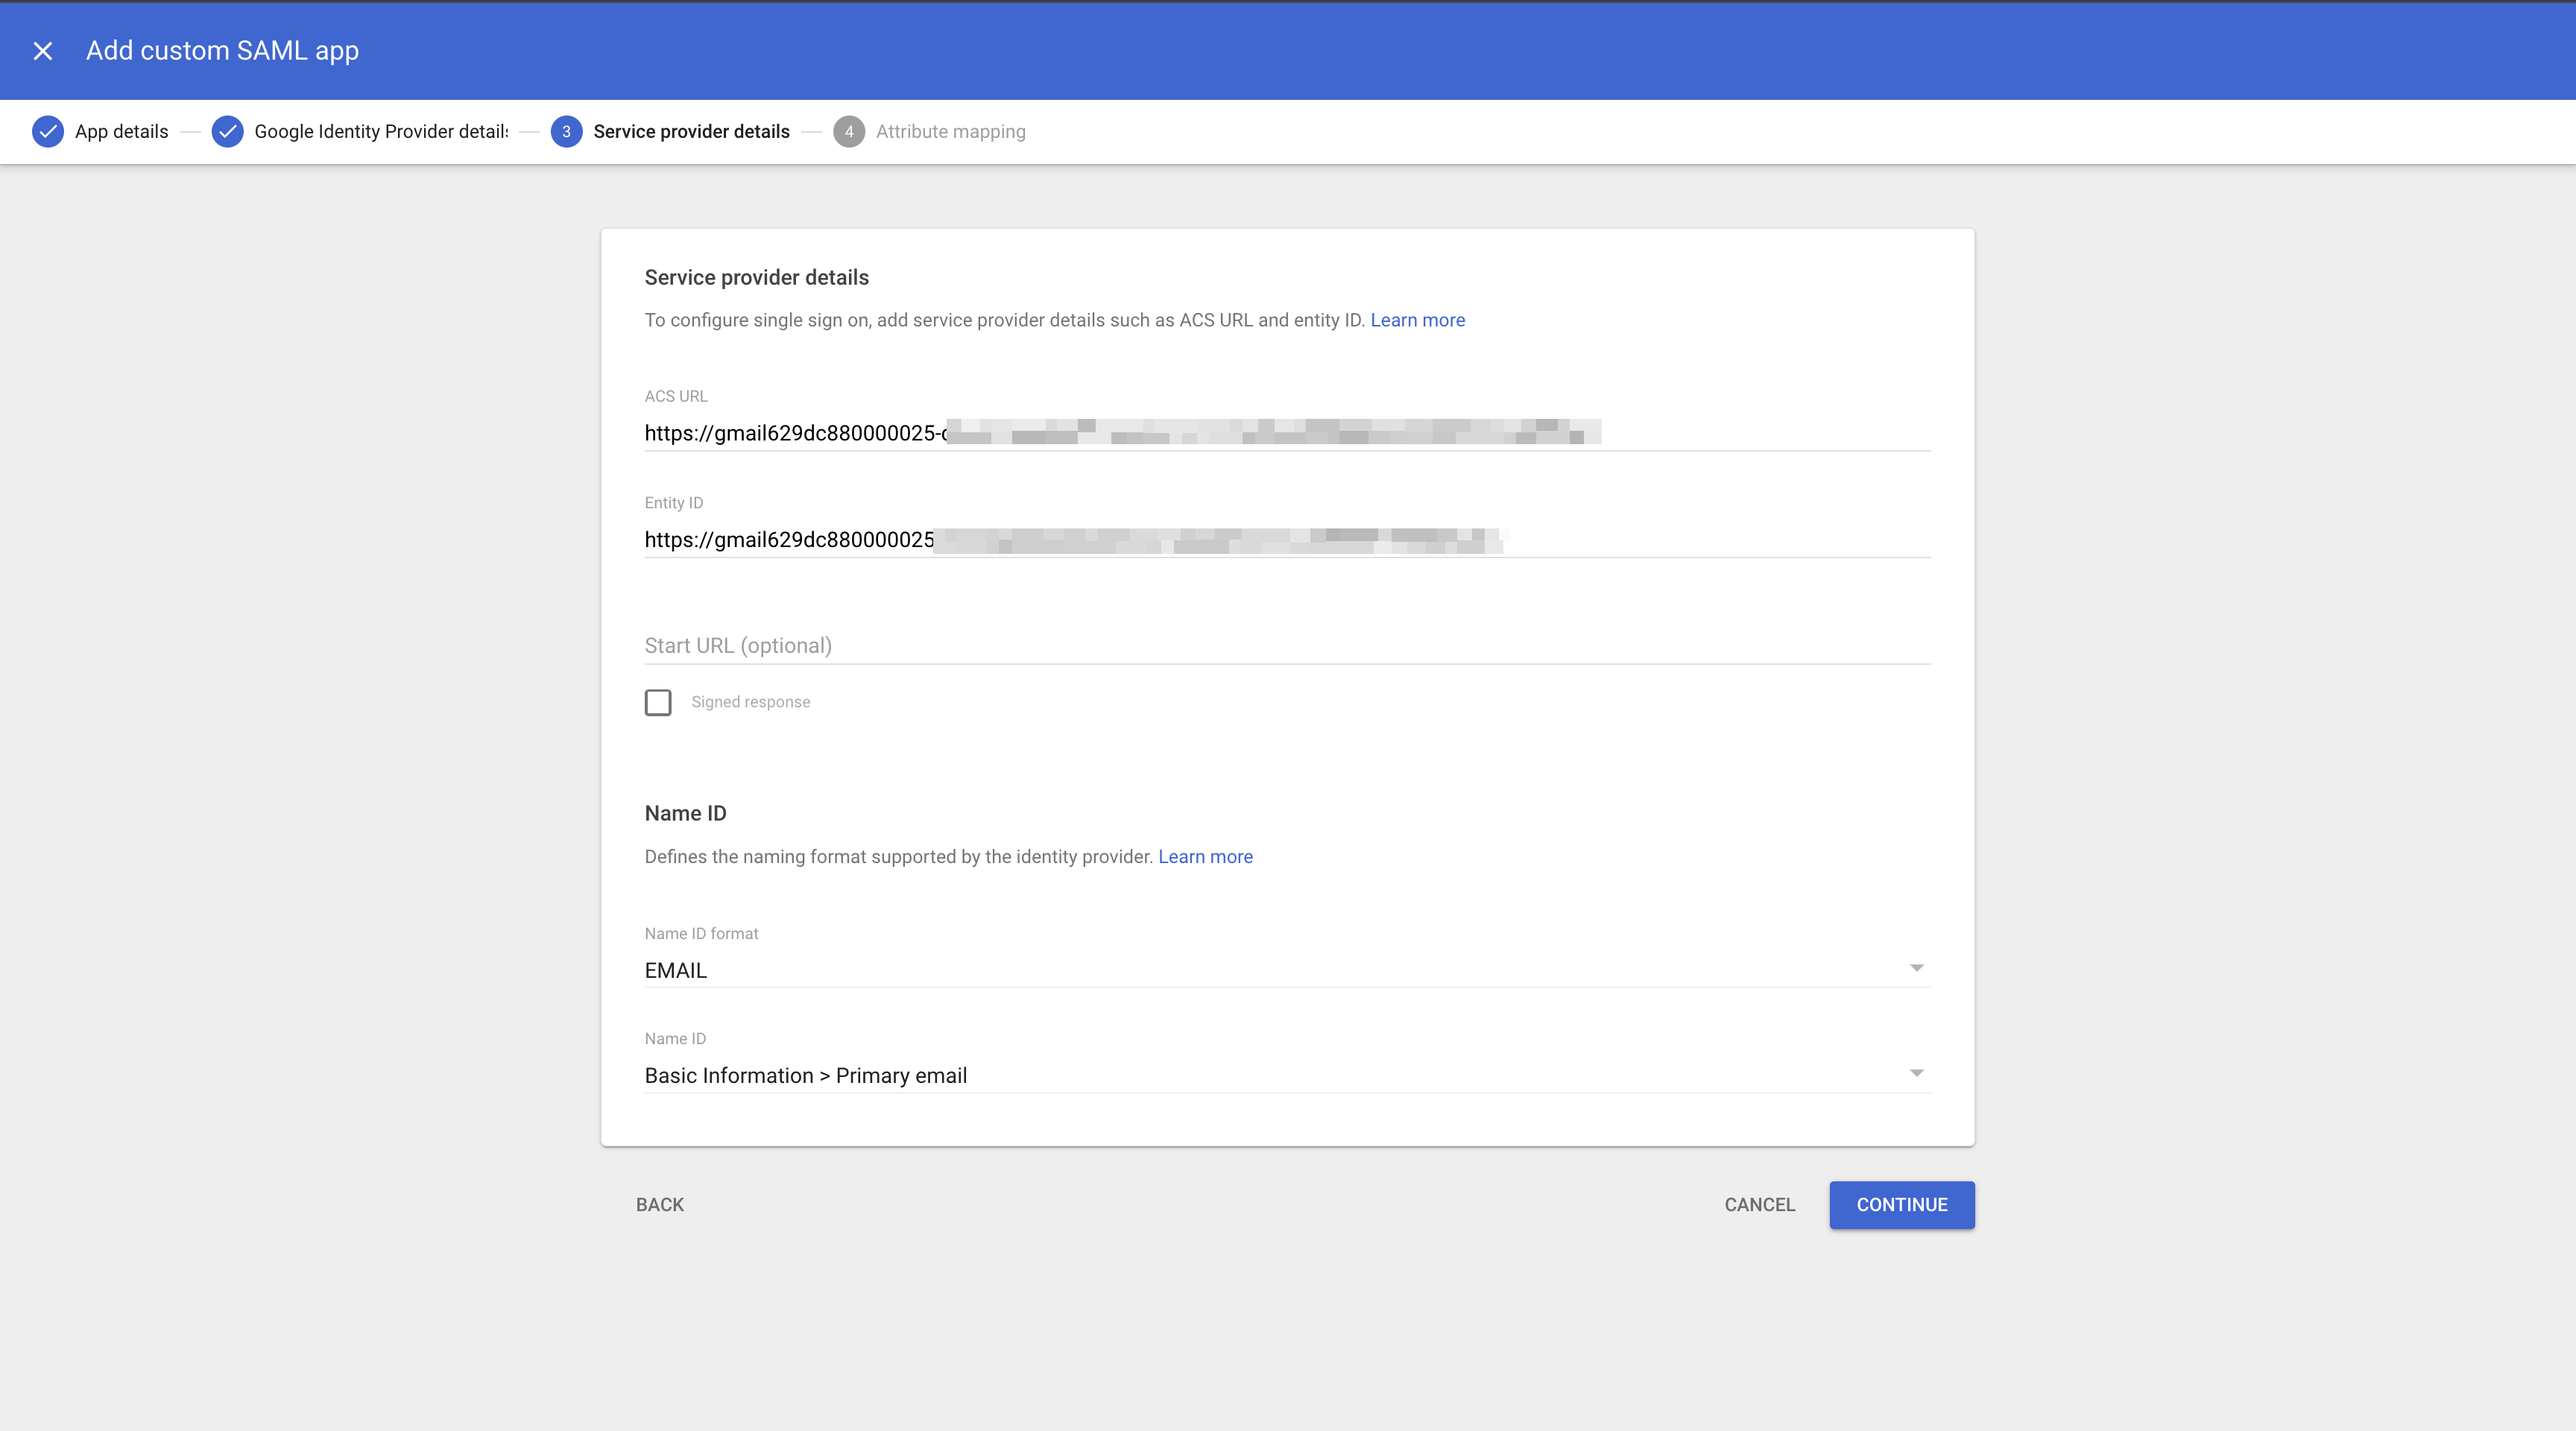
Configure the service provider in Google Admin console
Section titled “Configure the service provider in Google Admin console”In your SSO configuration portal:
- Navigate to Single sign-on (SSO) → Google Workspace → SAML 2.0
- Select the organization you want to configure
- Copy these critical details from the SSO settings:
- ACS URL (Assertion consumer service URL)
- SP Entity ID (Service provider entity ID)
- SP Metadata URL
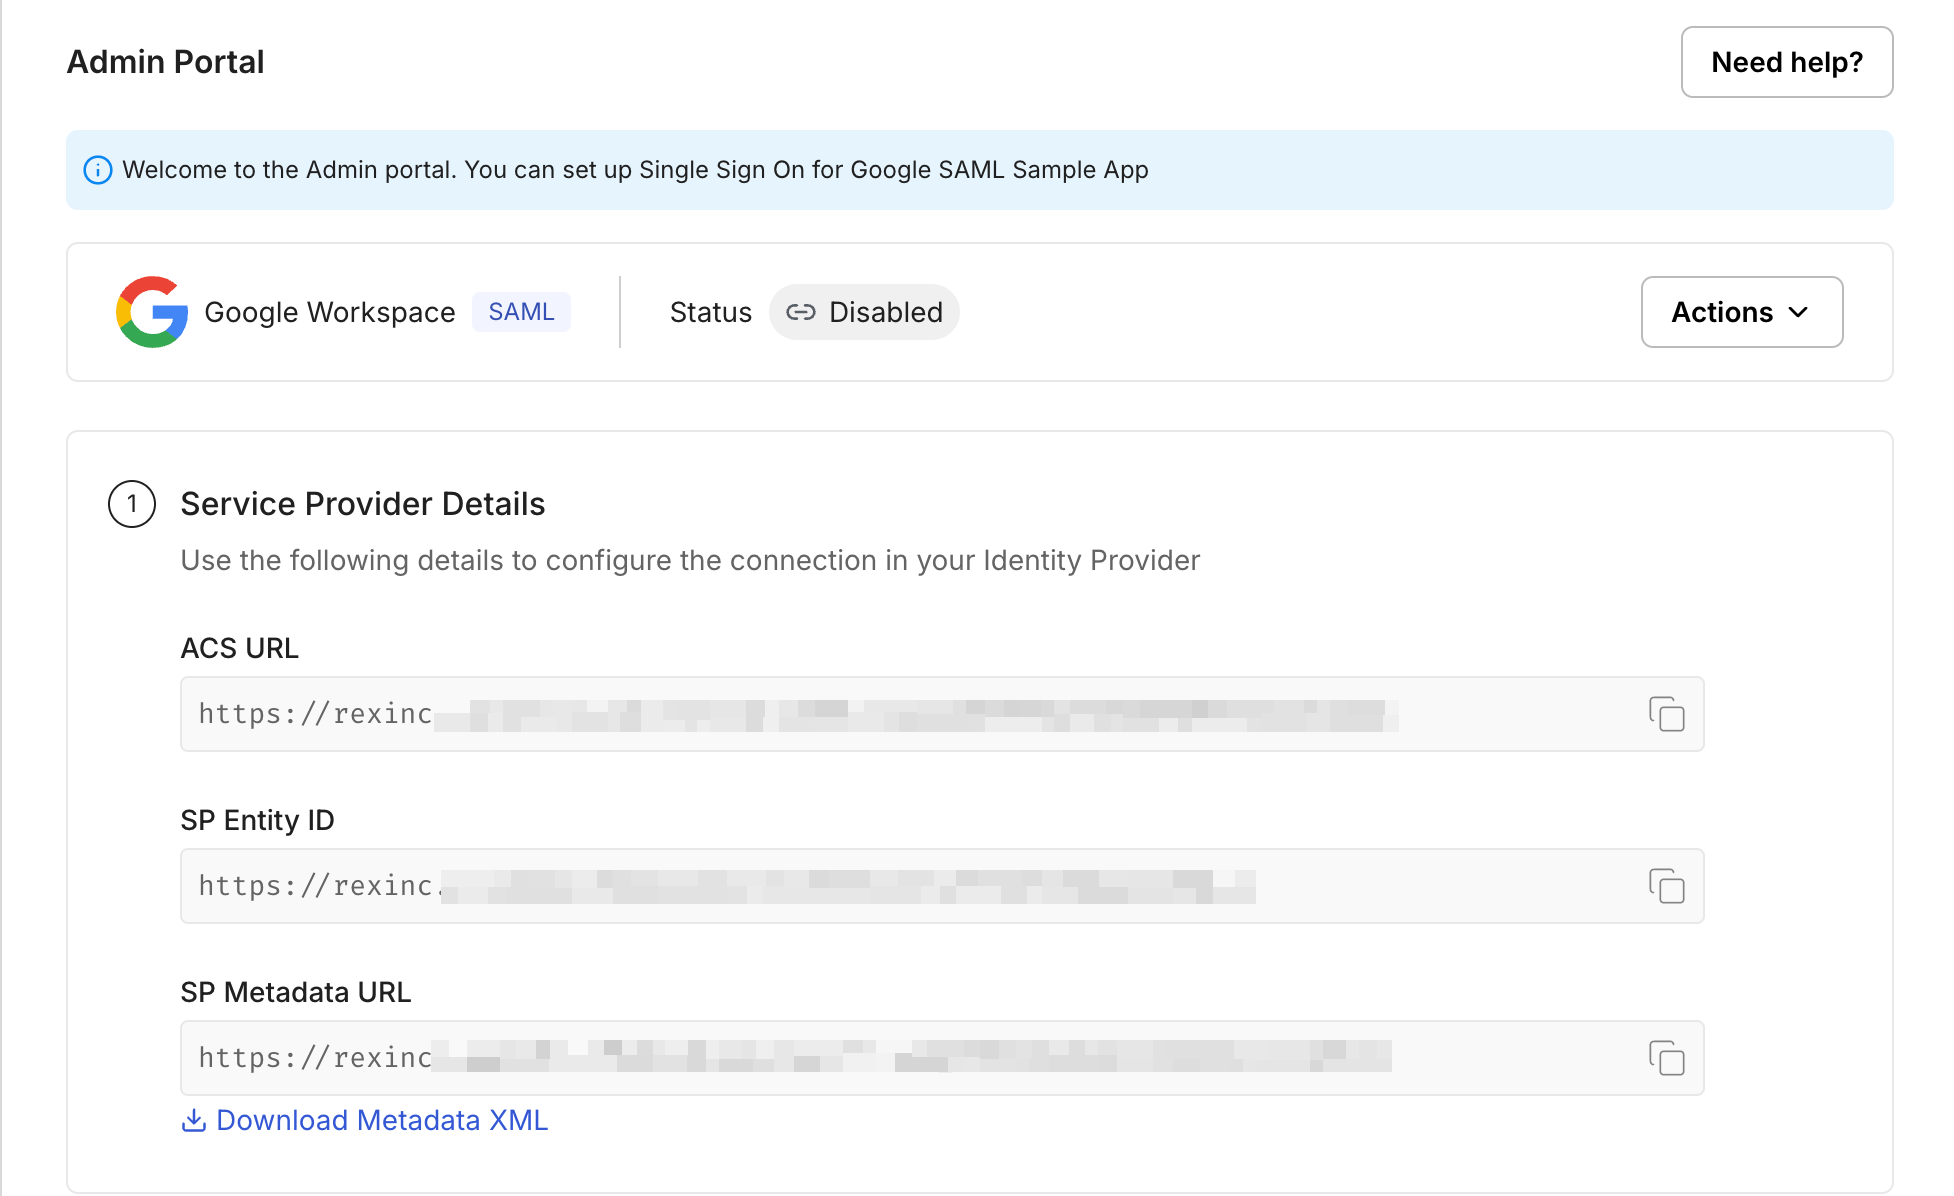
In Google Admin console:
- Paste the copied details into their respective fields
- Select “Email” as the NameID format (this serves as the primary user identifier during authentication)
- Click Continue
-
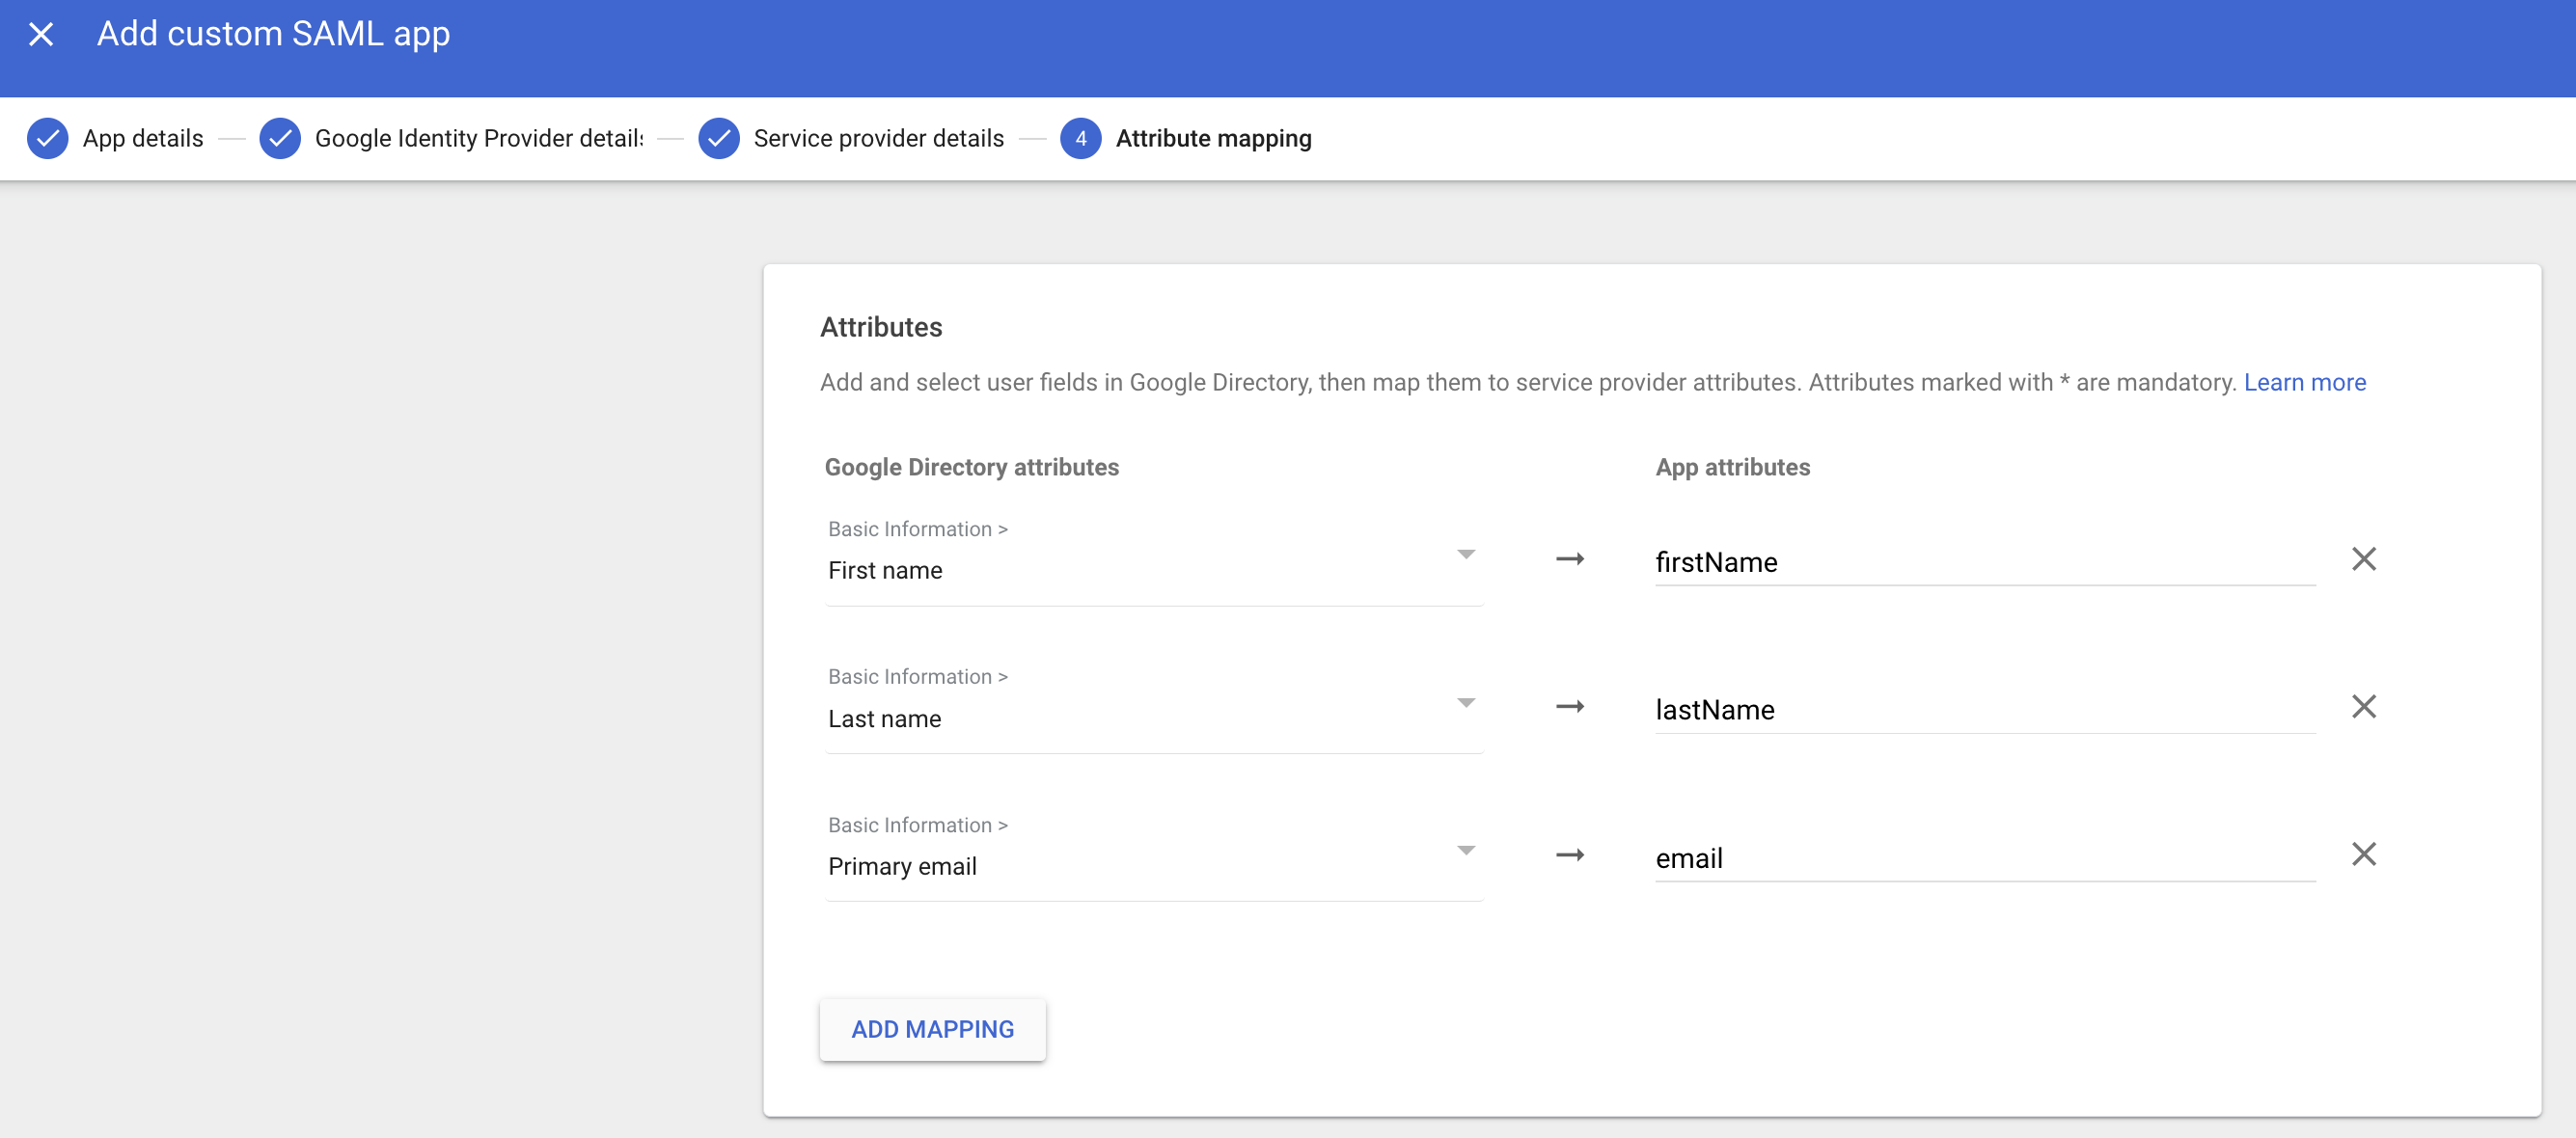
Configure attribute mapping
Section titled “Configure attribute mapping”User profile attributes in Google IdP need to be mapped to your application’s user attributes for seamless authentication. The essential attributes are:
- Email address
- First name
- Last name
To configure these attributes:
- Locate the Attribute mapping section in your identity provider’s application
- Map the Google attributes to your application attributes as shown below
-
Assign users and groups
Section titled “Assign users and groups”Control access to your application by assigning specific groups:
In the created app landing page click view details in the user access section.
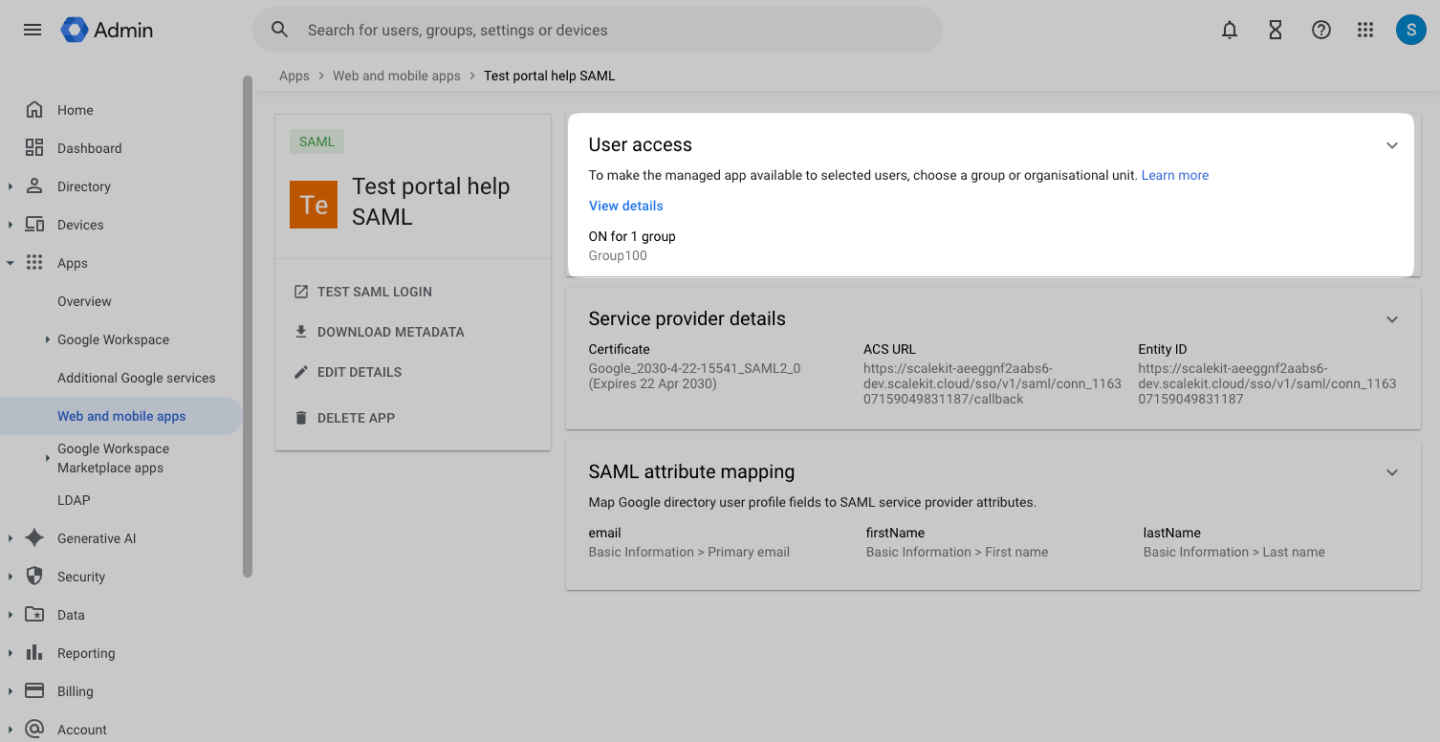
Here, you can either enable ON for everyone or assign a specific group to the application. To assign a group, search for the group name in the Search for a group field and select the correct group.
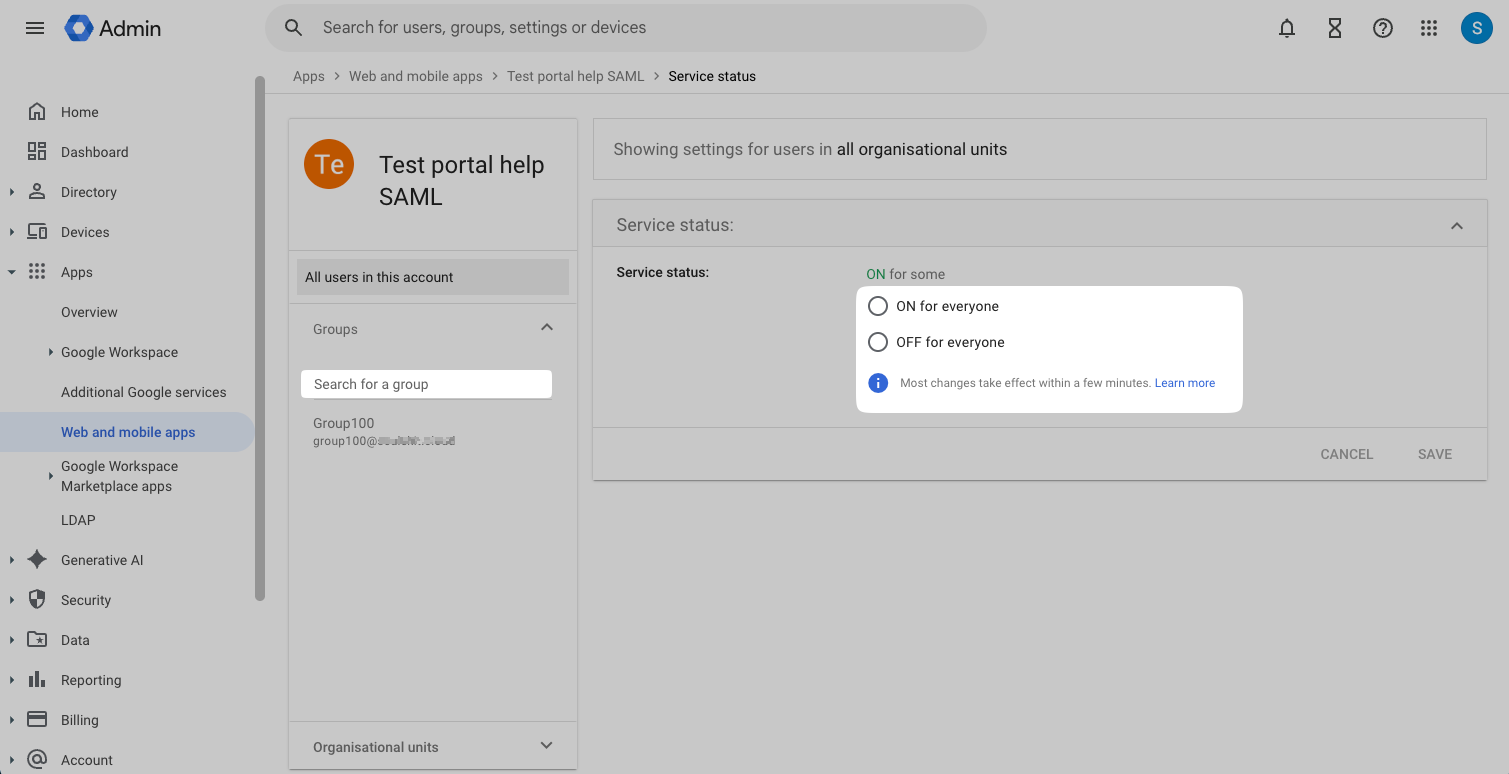
Assigning user groups for SSO access
-
Configure identity provider in SSO portal
Section titled “Configure identity provider in SSO portal”Copy Google identity provider details:
From your Google Workspace, copy the IdP details shown during custom app creation:
Update the SSO configuration:
In your SSO configuration portal, navigate to the Identity provider configuration section. Paste the Google IdP details into the appropriate fields: Entity ID, SSO URL, and x509 certificates.
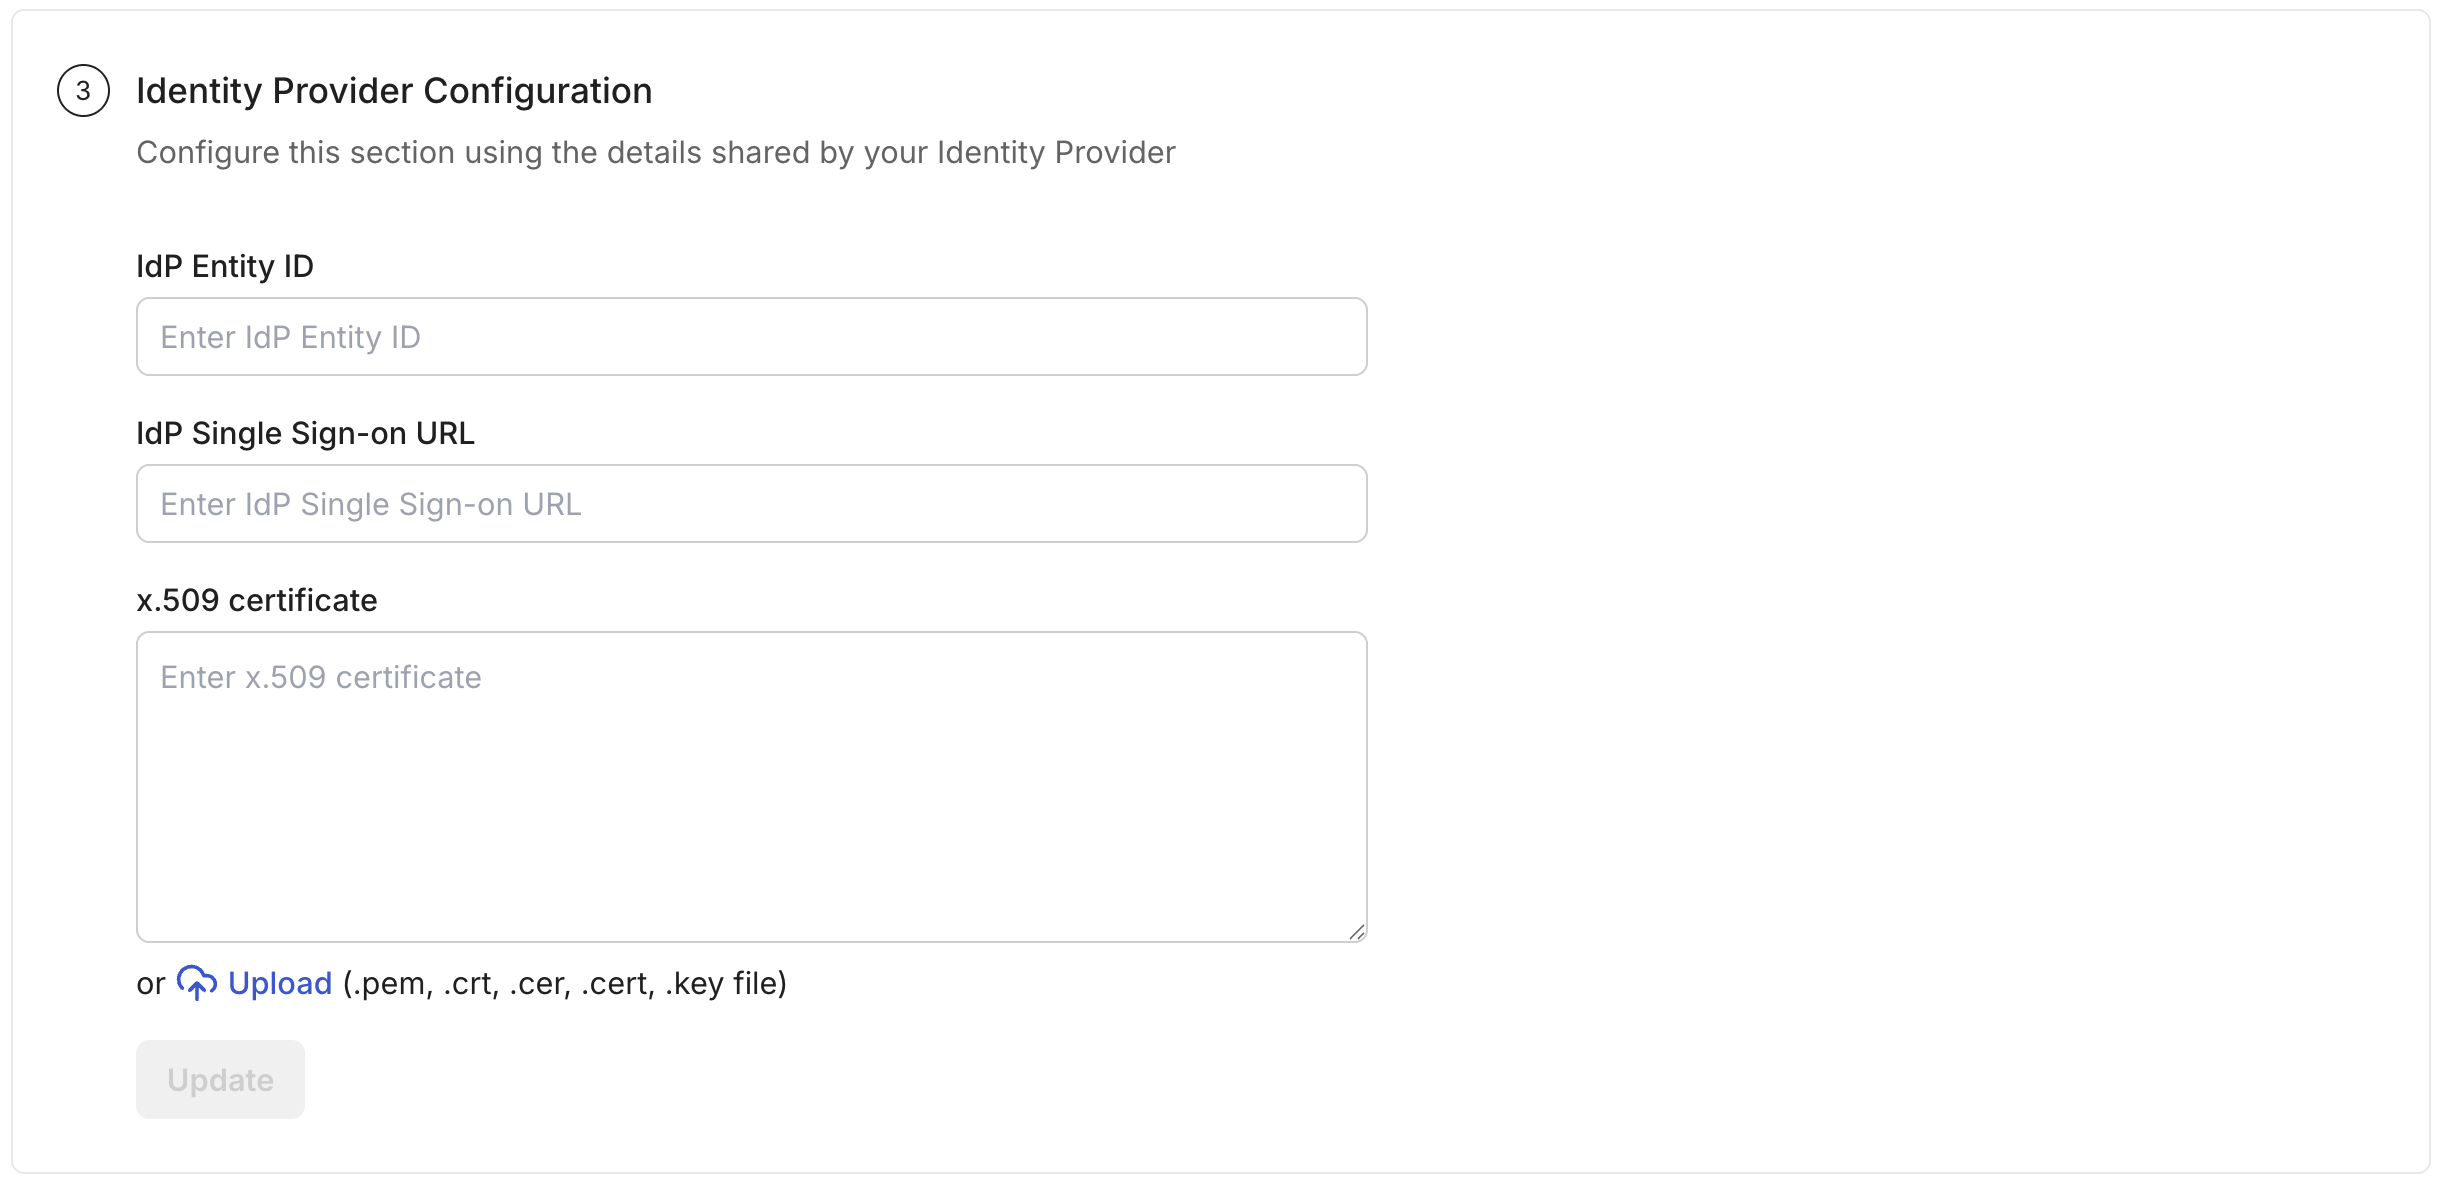
Click Update to save the configuration.
-
Test the connection
Section titled “Test the connection”Verify your SAML SSO configuration:
- Click Test connection in the SSO configuration portal
- If successful, you’ll see a confirmation message:

If there are any configuration issues, the test will identify them and provide guidance for correction.
-
Enable SSO connection
Section titled “Enable SSO connection”Once you’ve verified the configuration:
- Click Enable connection to activate SSO for your users

-
Test SSO functionality
Section titled “Test SSO functionality”After enabling the connection, test both types of SSO flows to ensure everything works correctly:
Identity provider (IdP) initiated SSO:
- In Google Admin console, go to Apps → Web and mobile apps
- Select your custom SAML app
- Click Test SAML login at the top left
- Your app should open in a separate tab with successful authentication
Service provider (SP) initiated SSO:
- Open the SSO URL for your SAML app
- You should be automatically redirected to the Google sign-in page
- Enter your Google Workspace credentials
- After successful authentication, you’ll be redirected back to your application
Troubleshooting: If either test fails, check the SAML app error messages and verify your IdP and SP settings match exactly.
Congratulations! You have successfully configured Google SAML for your application. Your users can now securely authenticate using their Google Workspace credentials through single sign-on.