OneLogin SAML
A step-by-step guide to setting up Single Sign-On with OneLogin as the Identity Provider, including creating an enterprise application, configuring SAML, attribute mapping, assigning users, uploading IdP metadata, testing the connection, and enabling SSO.
This guide walks you through configuring OneLogin as your SAML identity provider for the application you are onboarding, enabling secure single sign-on for your users. You’ll learn how to set up an enterprise application, configure SAML settings to the host application. By following these steps, your users will be able to seamlessly authenticate using their OneLogin credentials.
-
Creating enterprise application
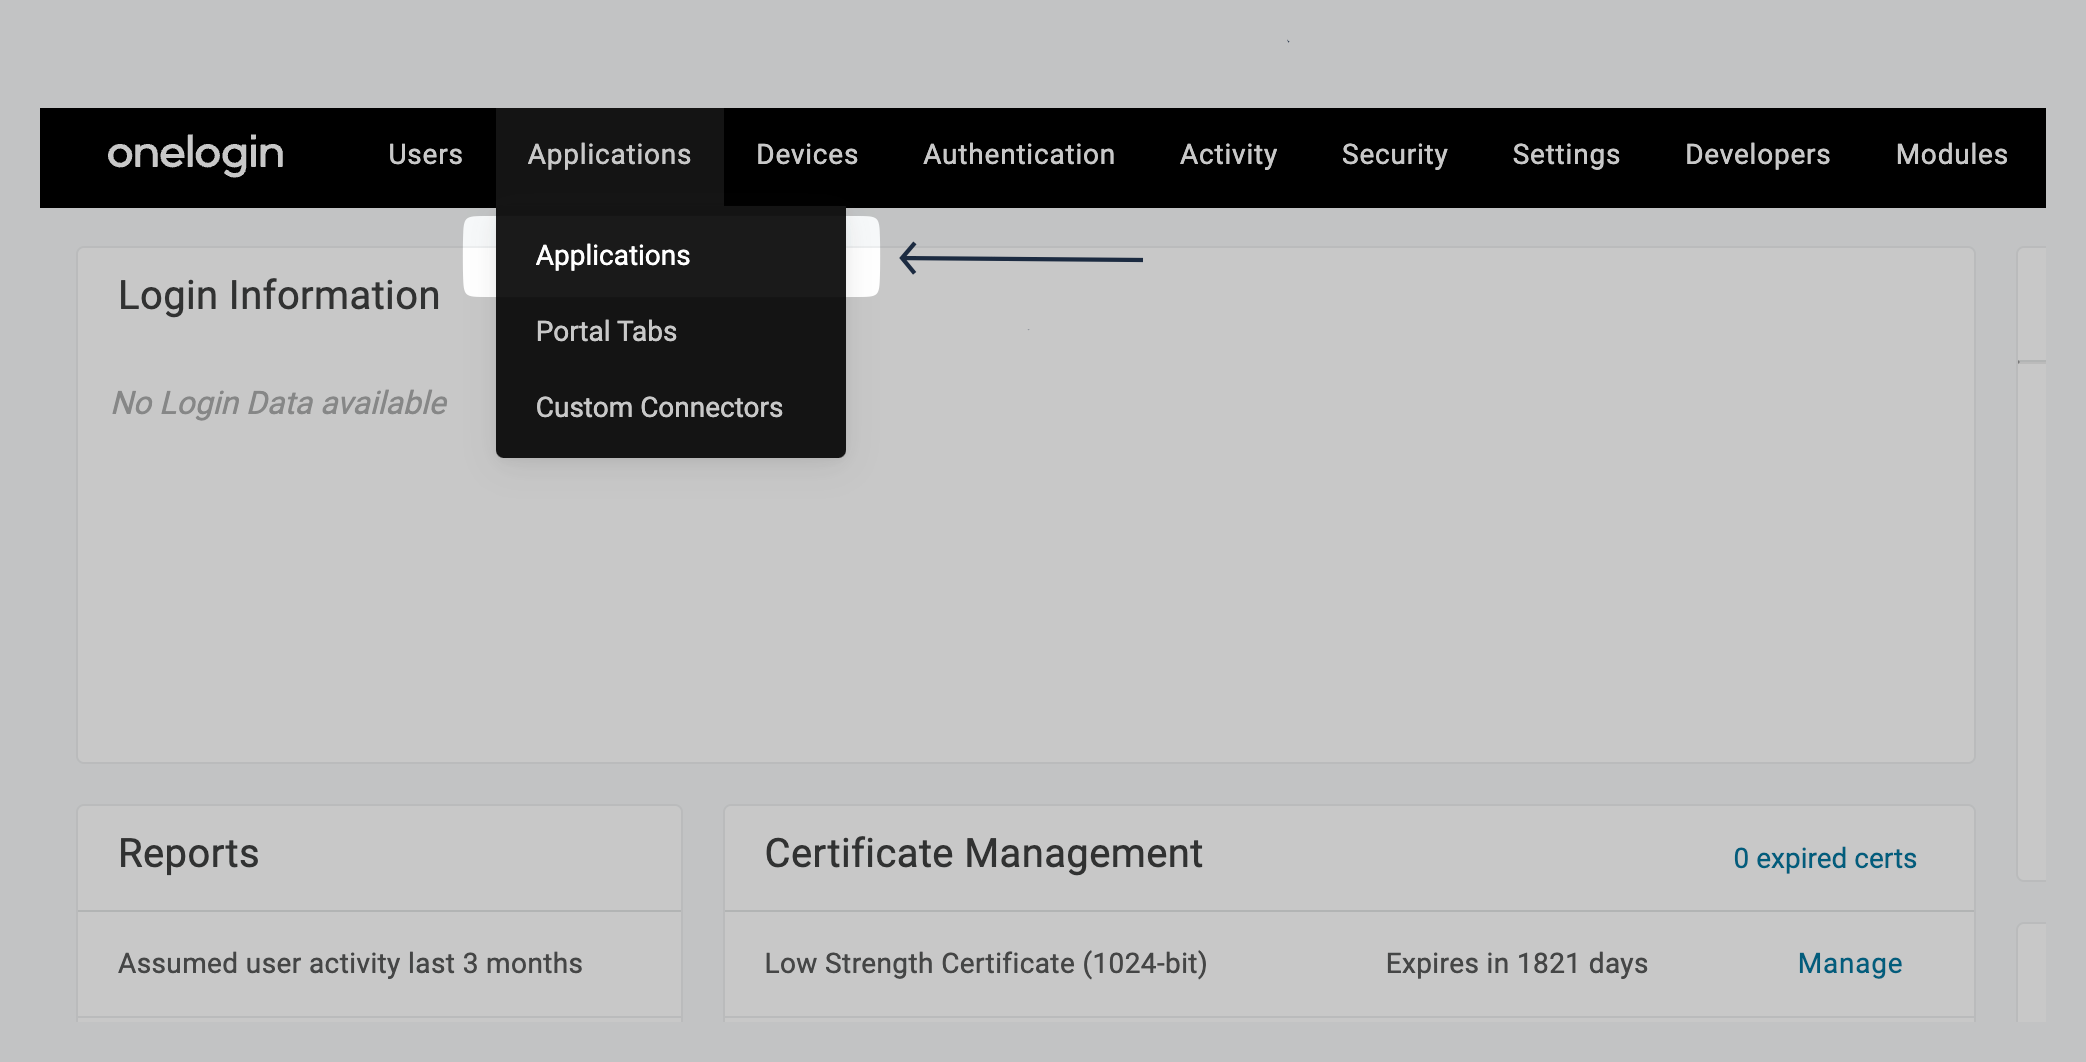
Section titled “Creating enterprise application”Login to your OneLogin Portal. Go to Applications→ Applications.
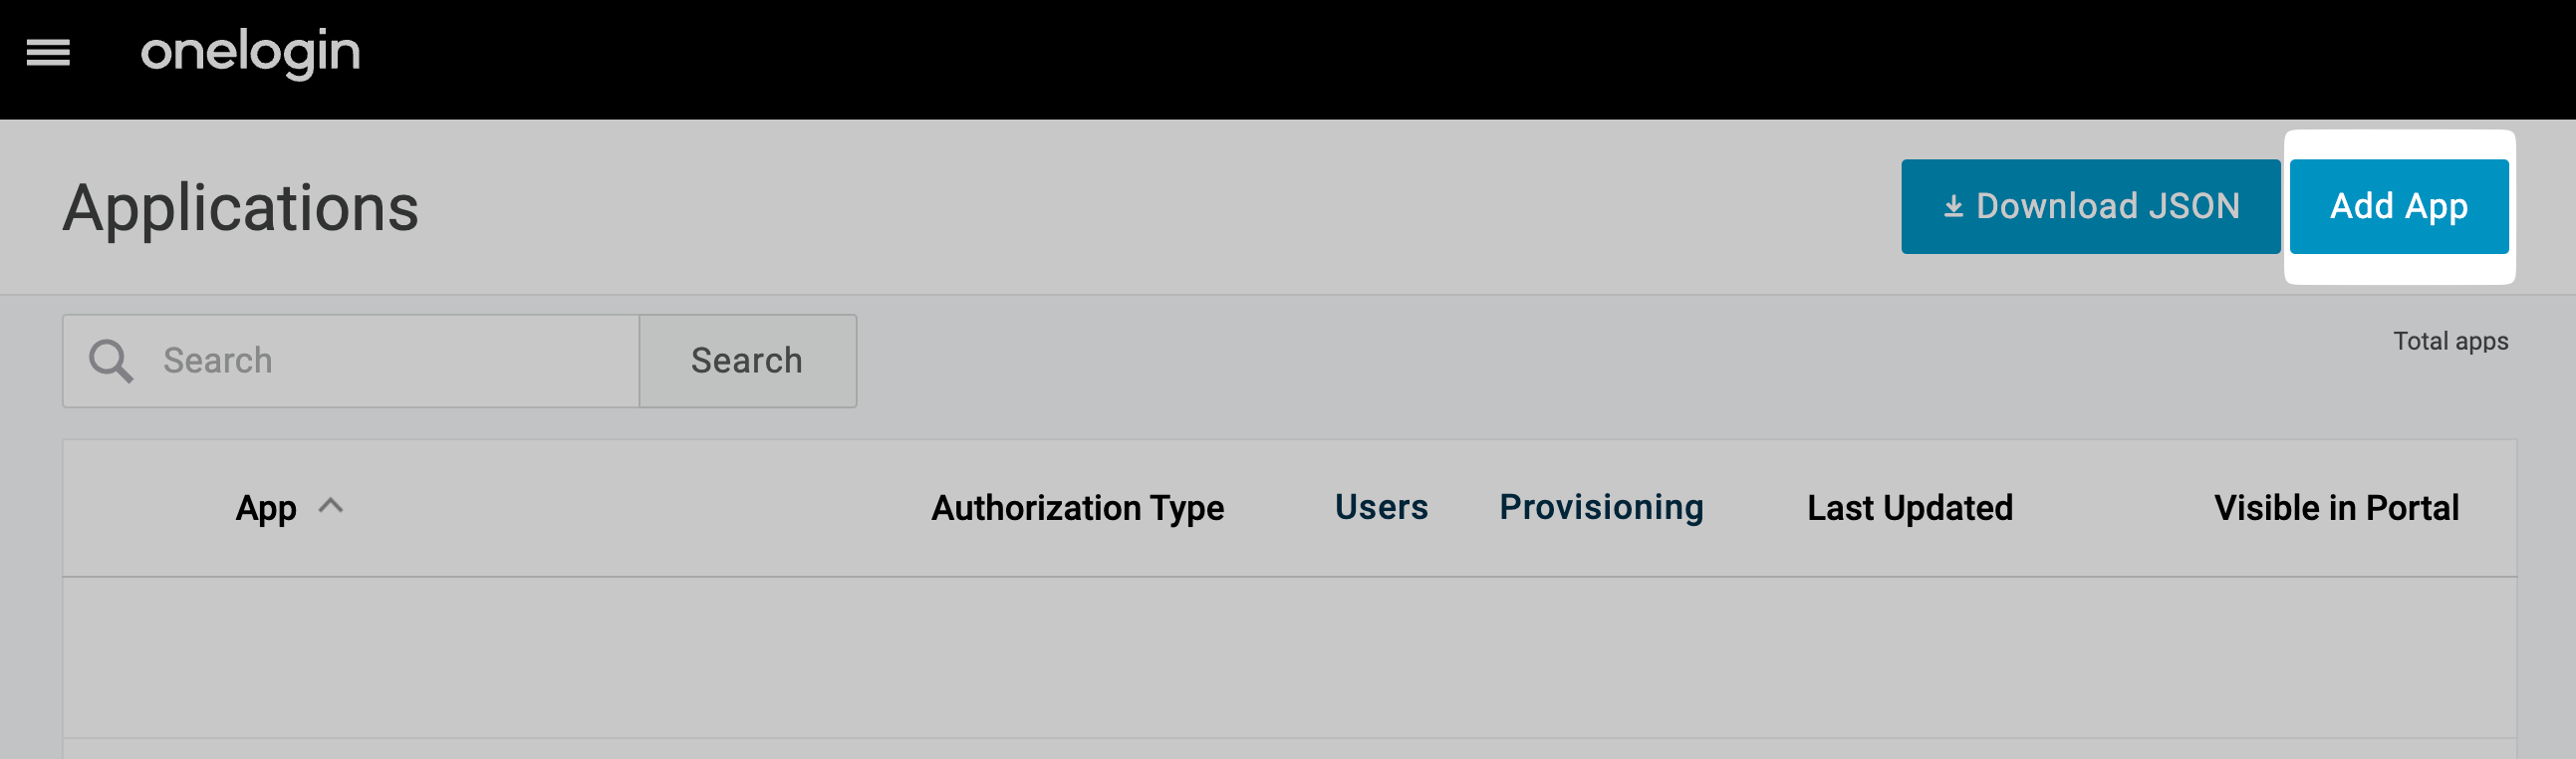
Click on Add App.
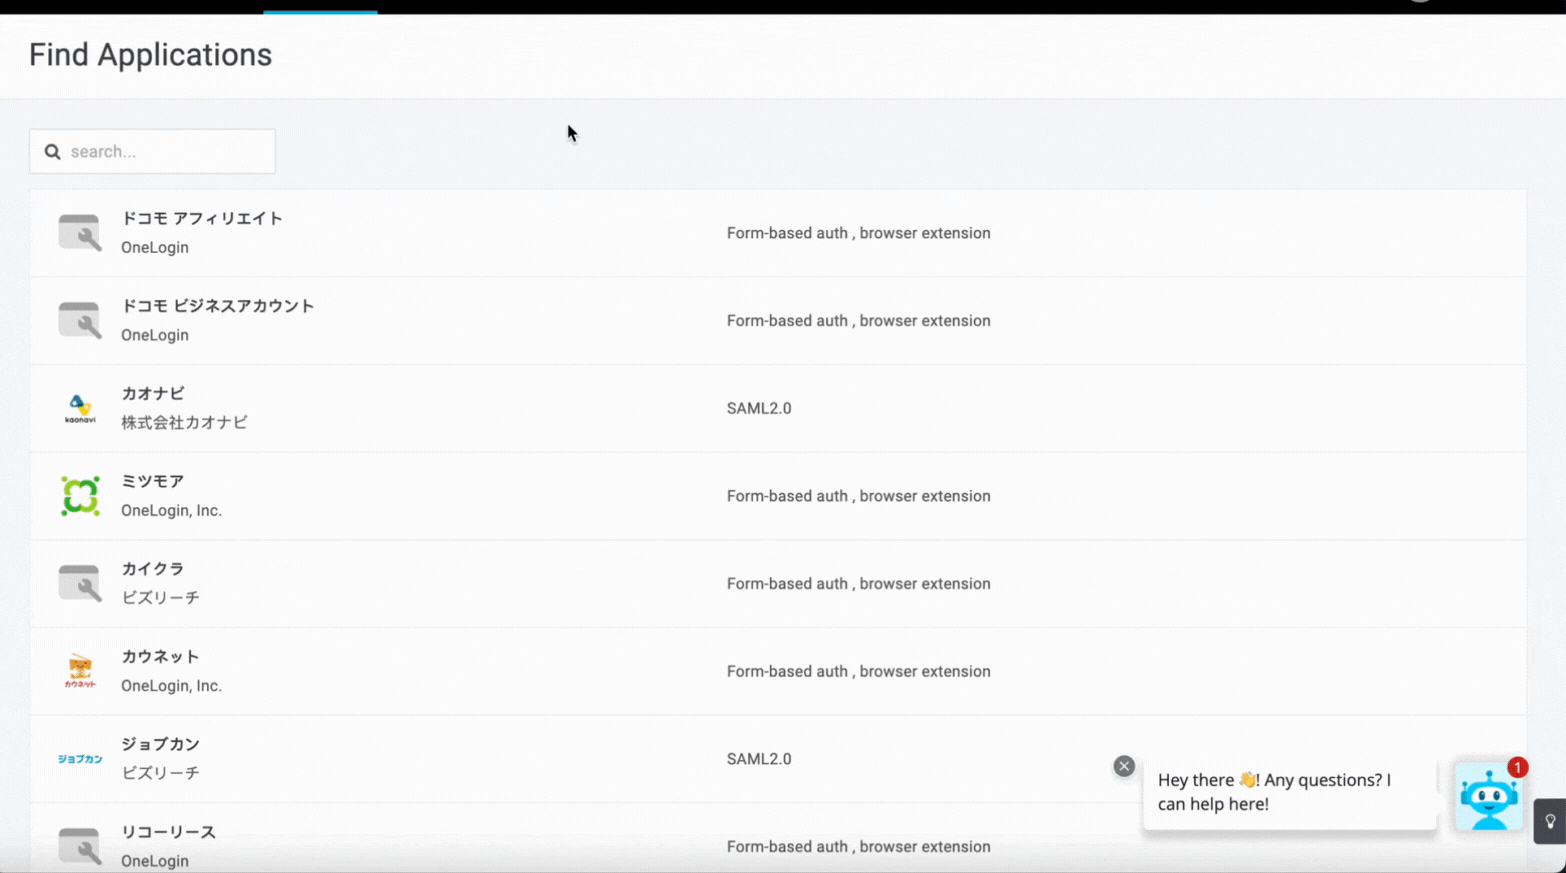
In the Find Application search box, type in SAML Custom Connector (Advanced), and select it from the drop down list.
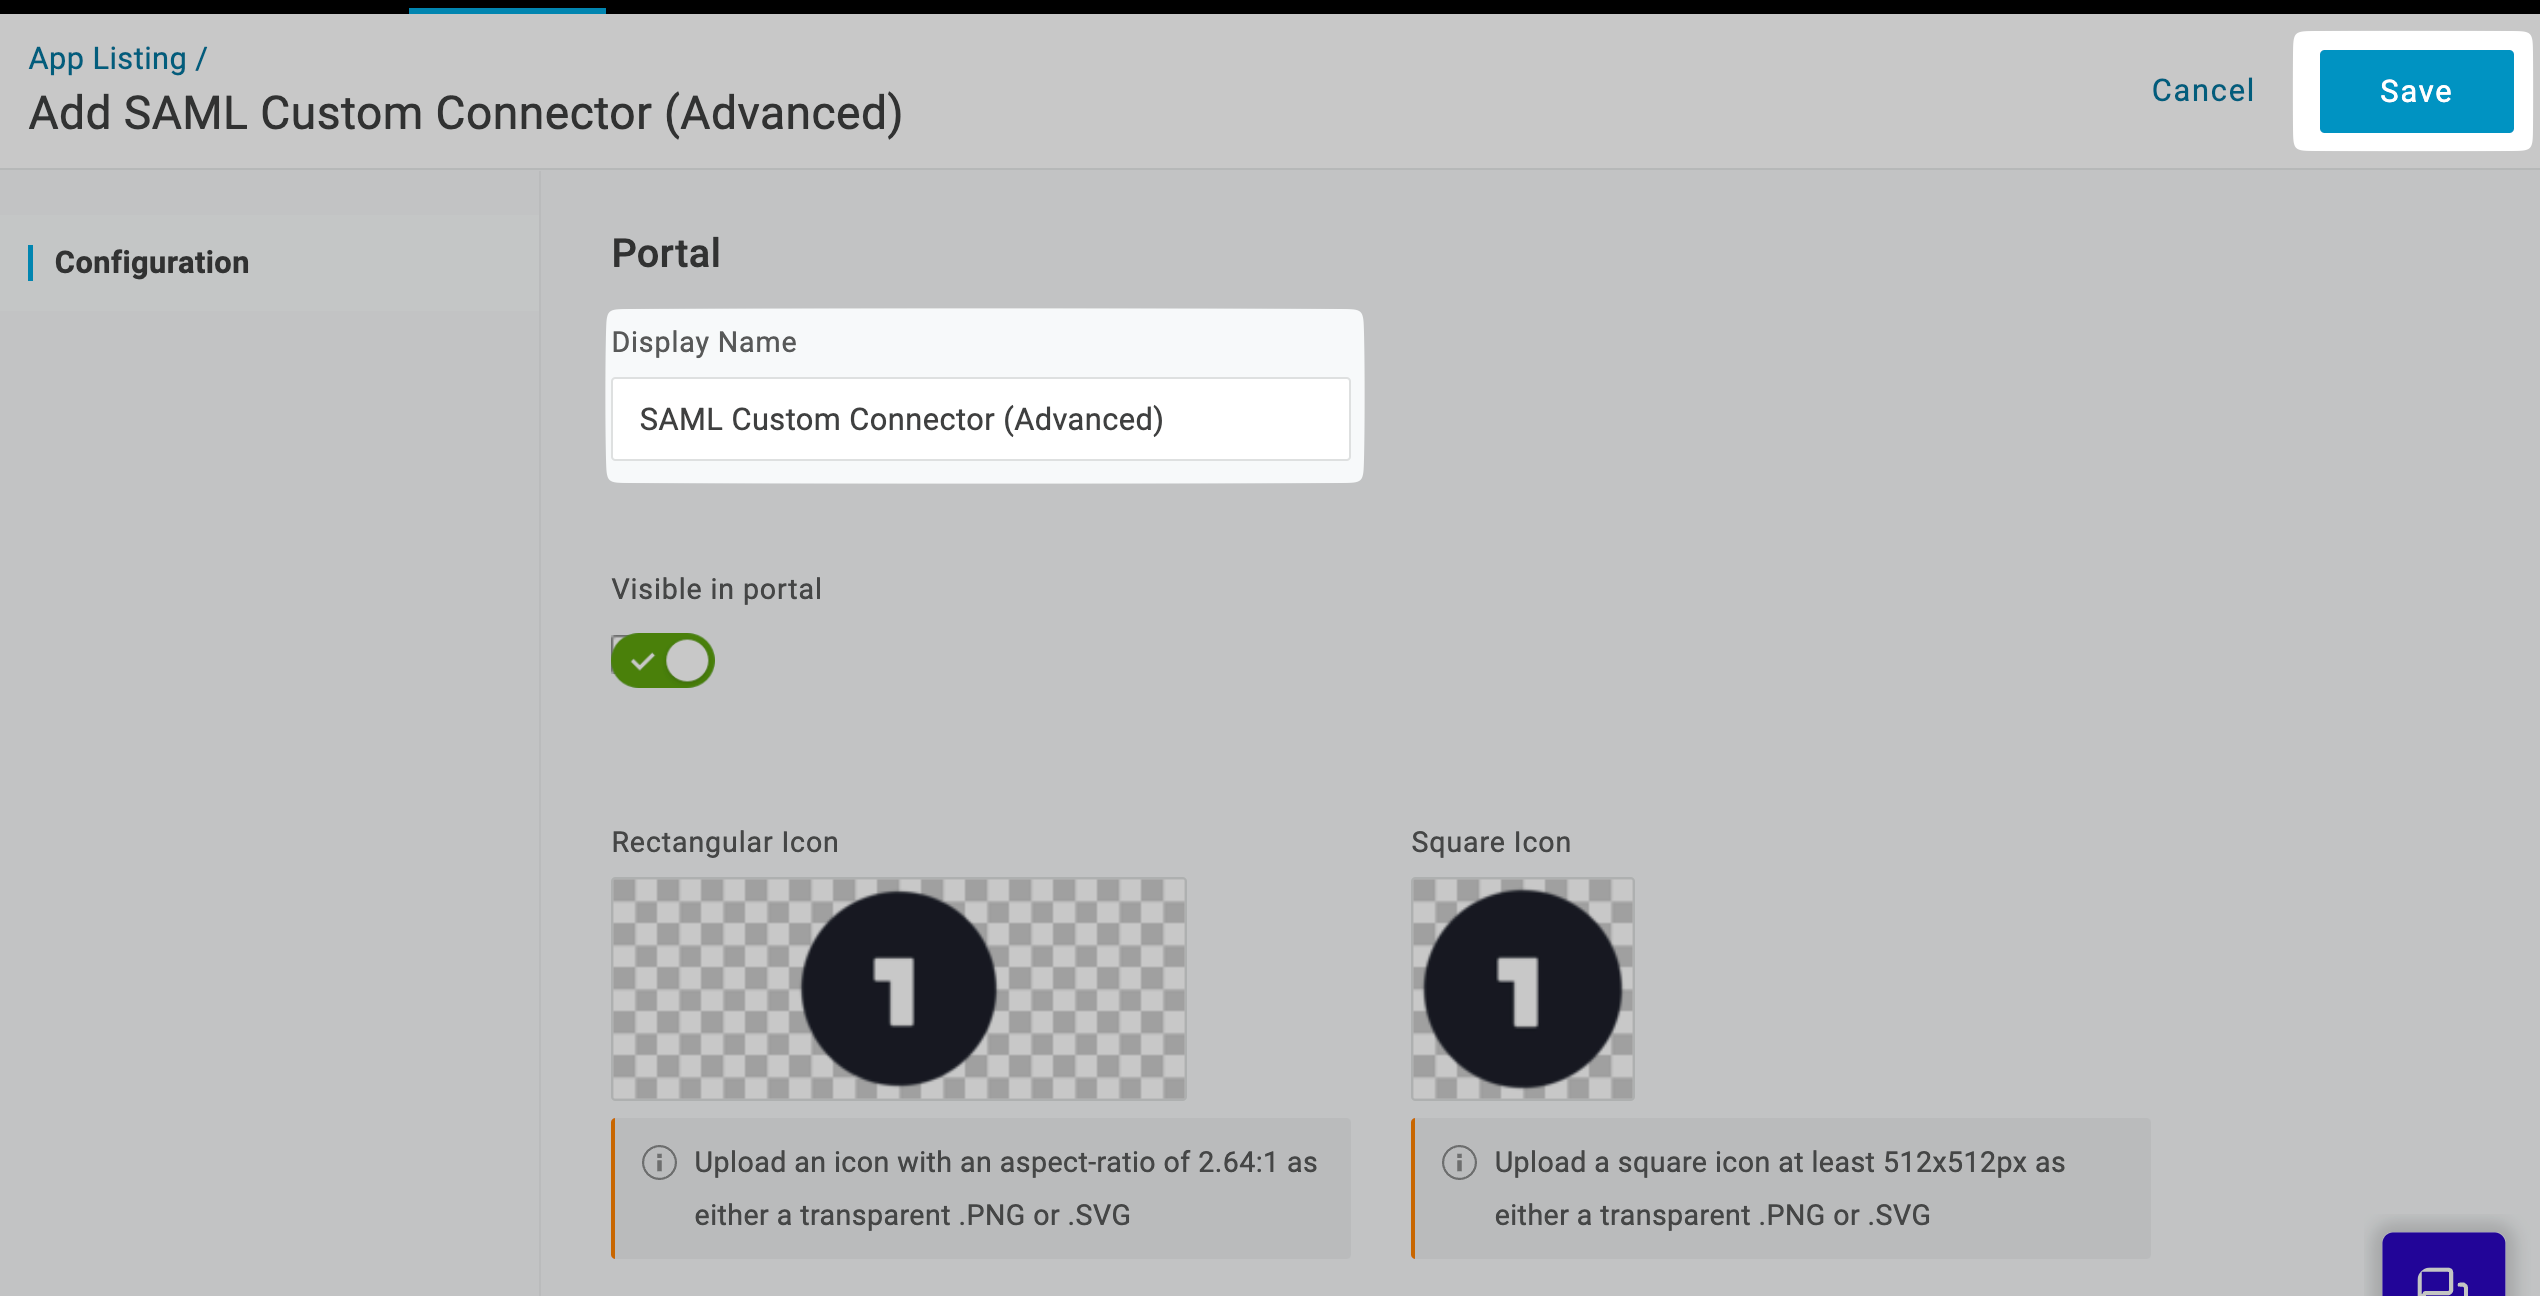
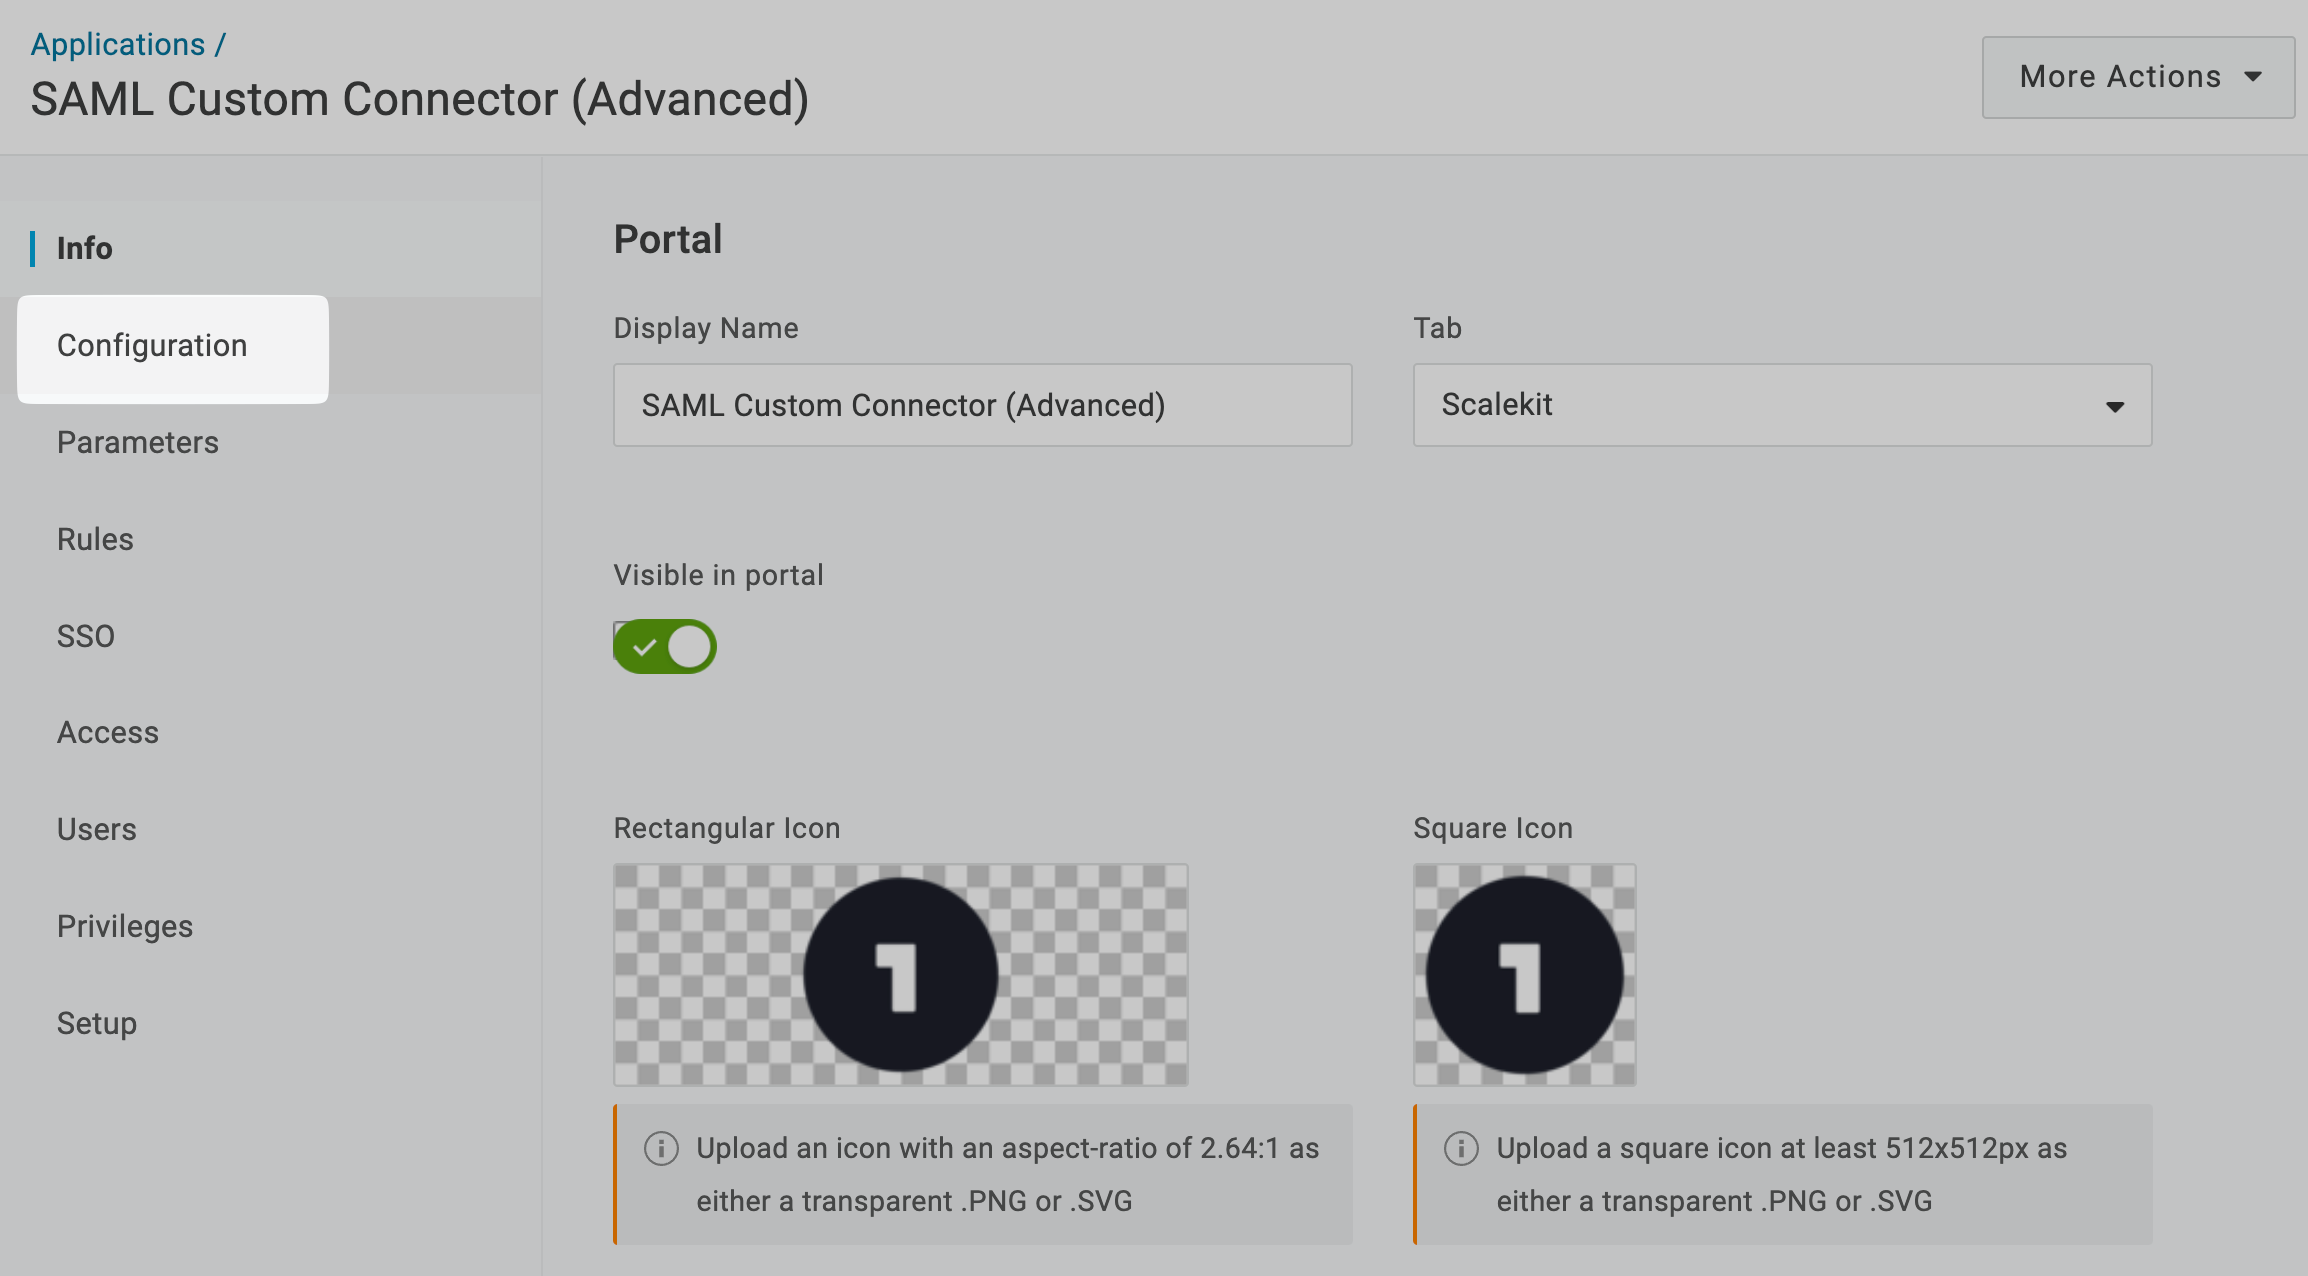
Give your app a name that reflects the application you’ll be connecting it to, so users can easily recognize it in their OneLogin portal., select your icon (optional) and then click on Save.
-
SAML configuration
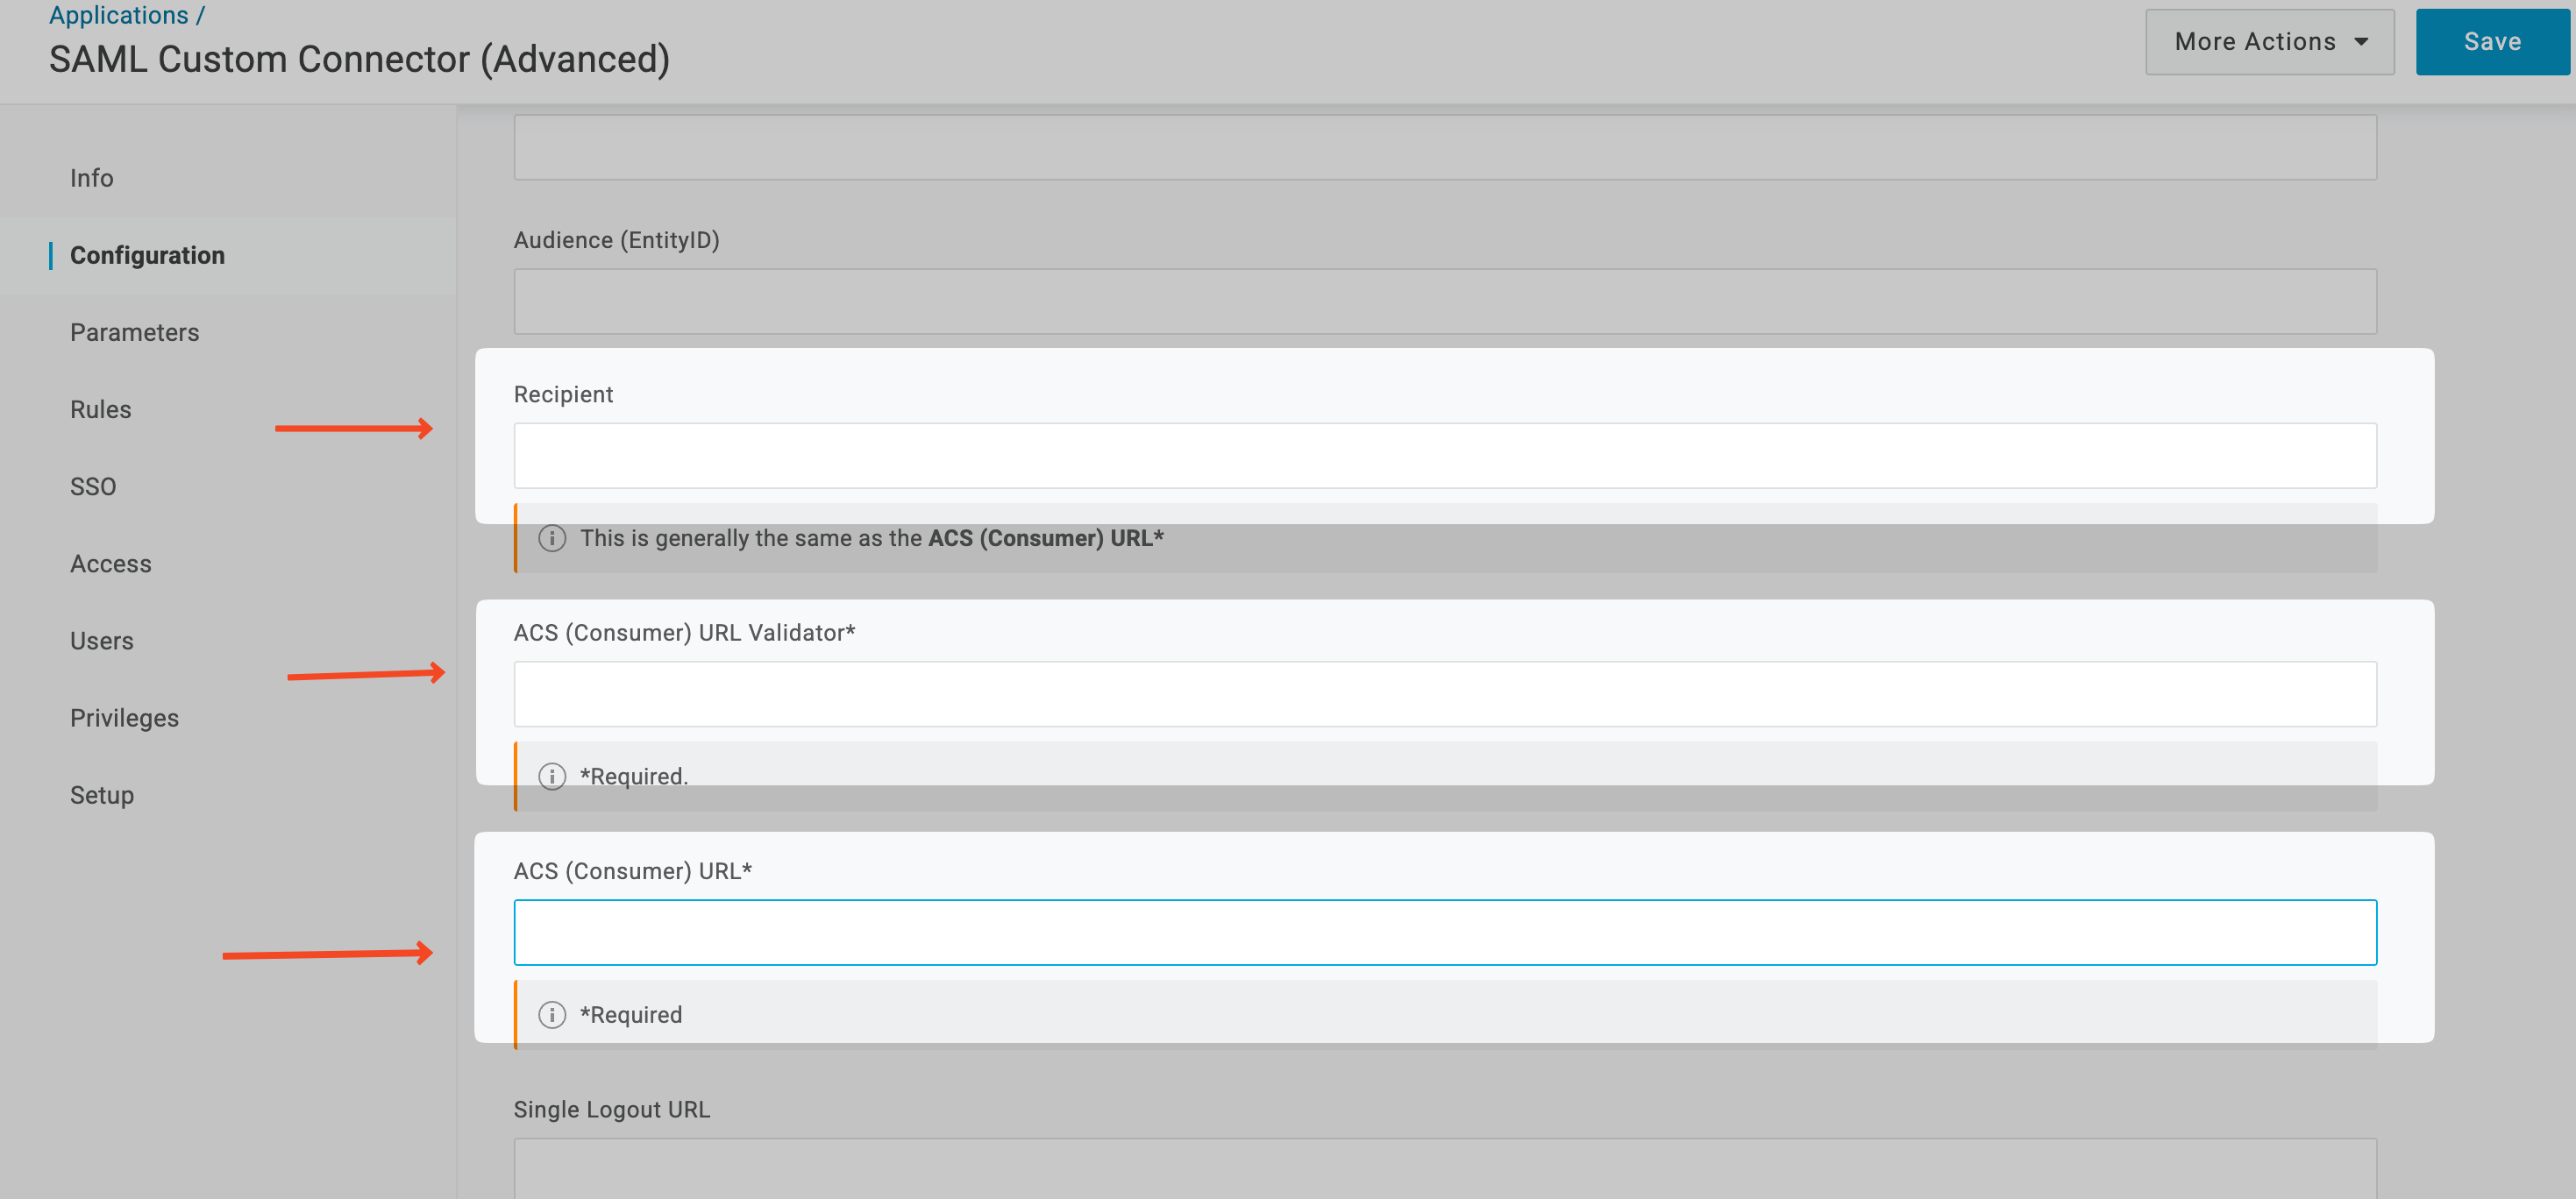
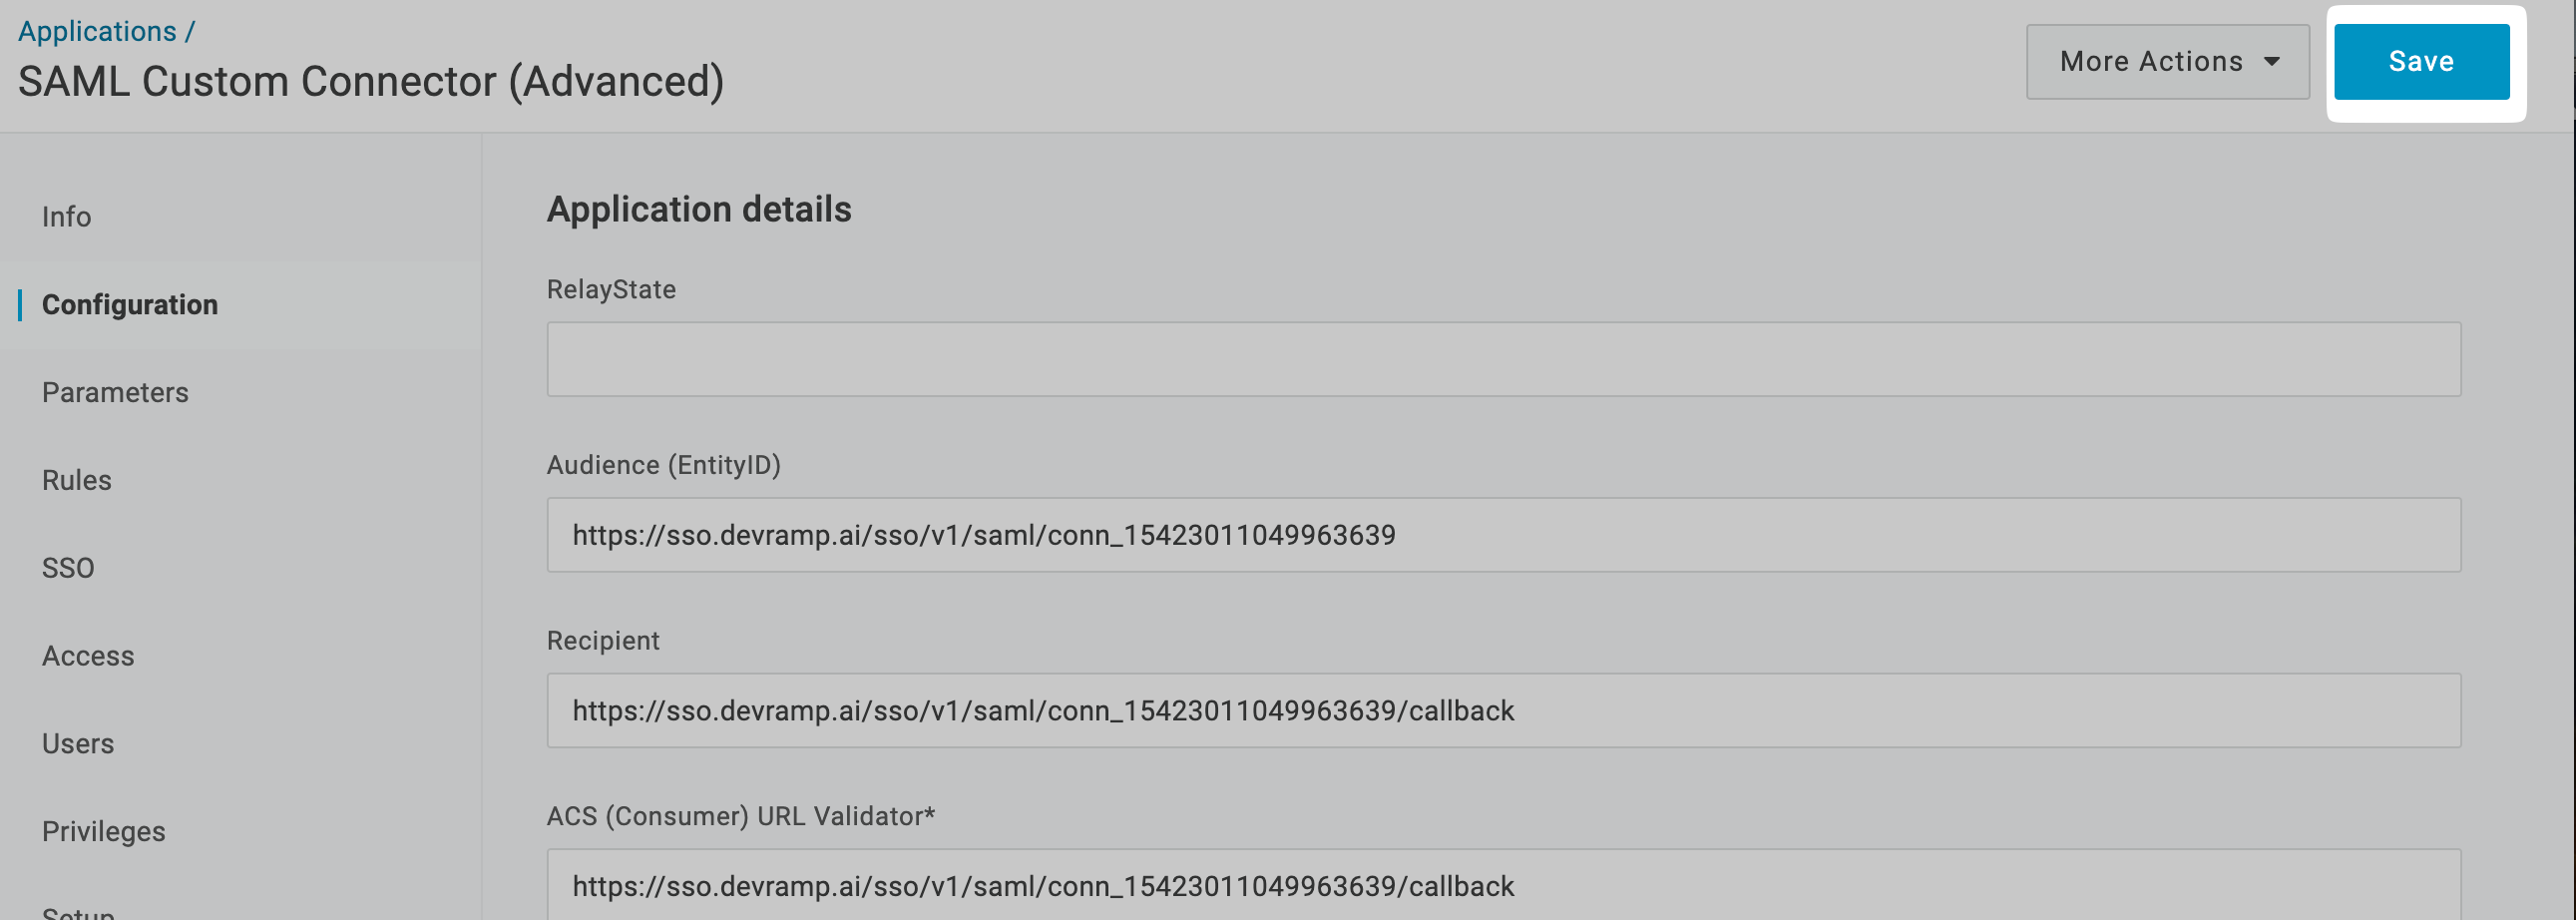
Section titled “SAML configuration”On the Application page click on Configuration.
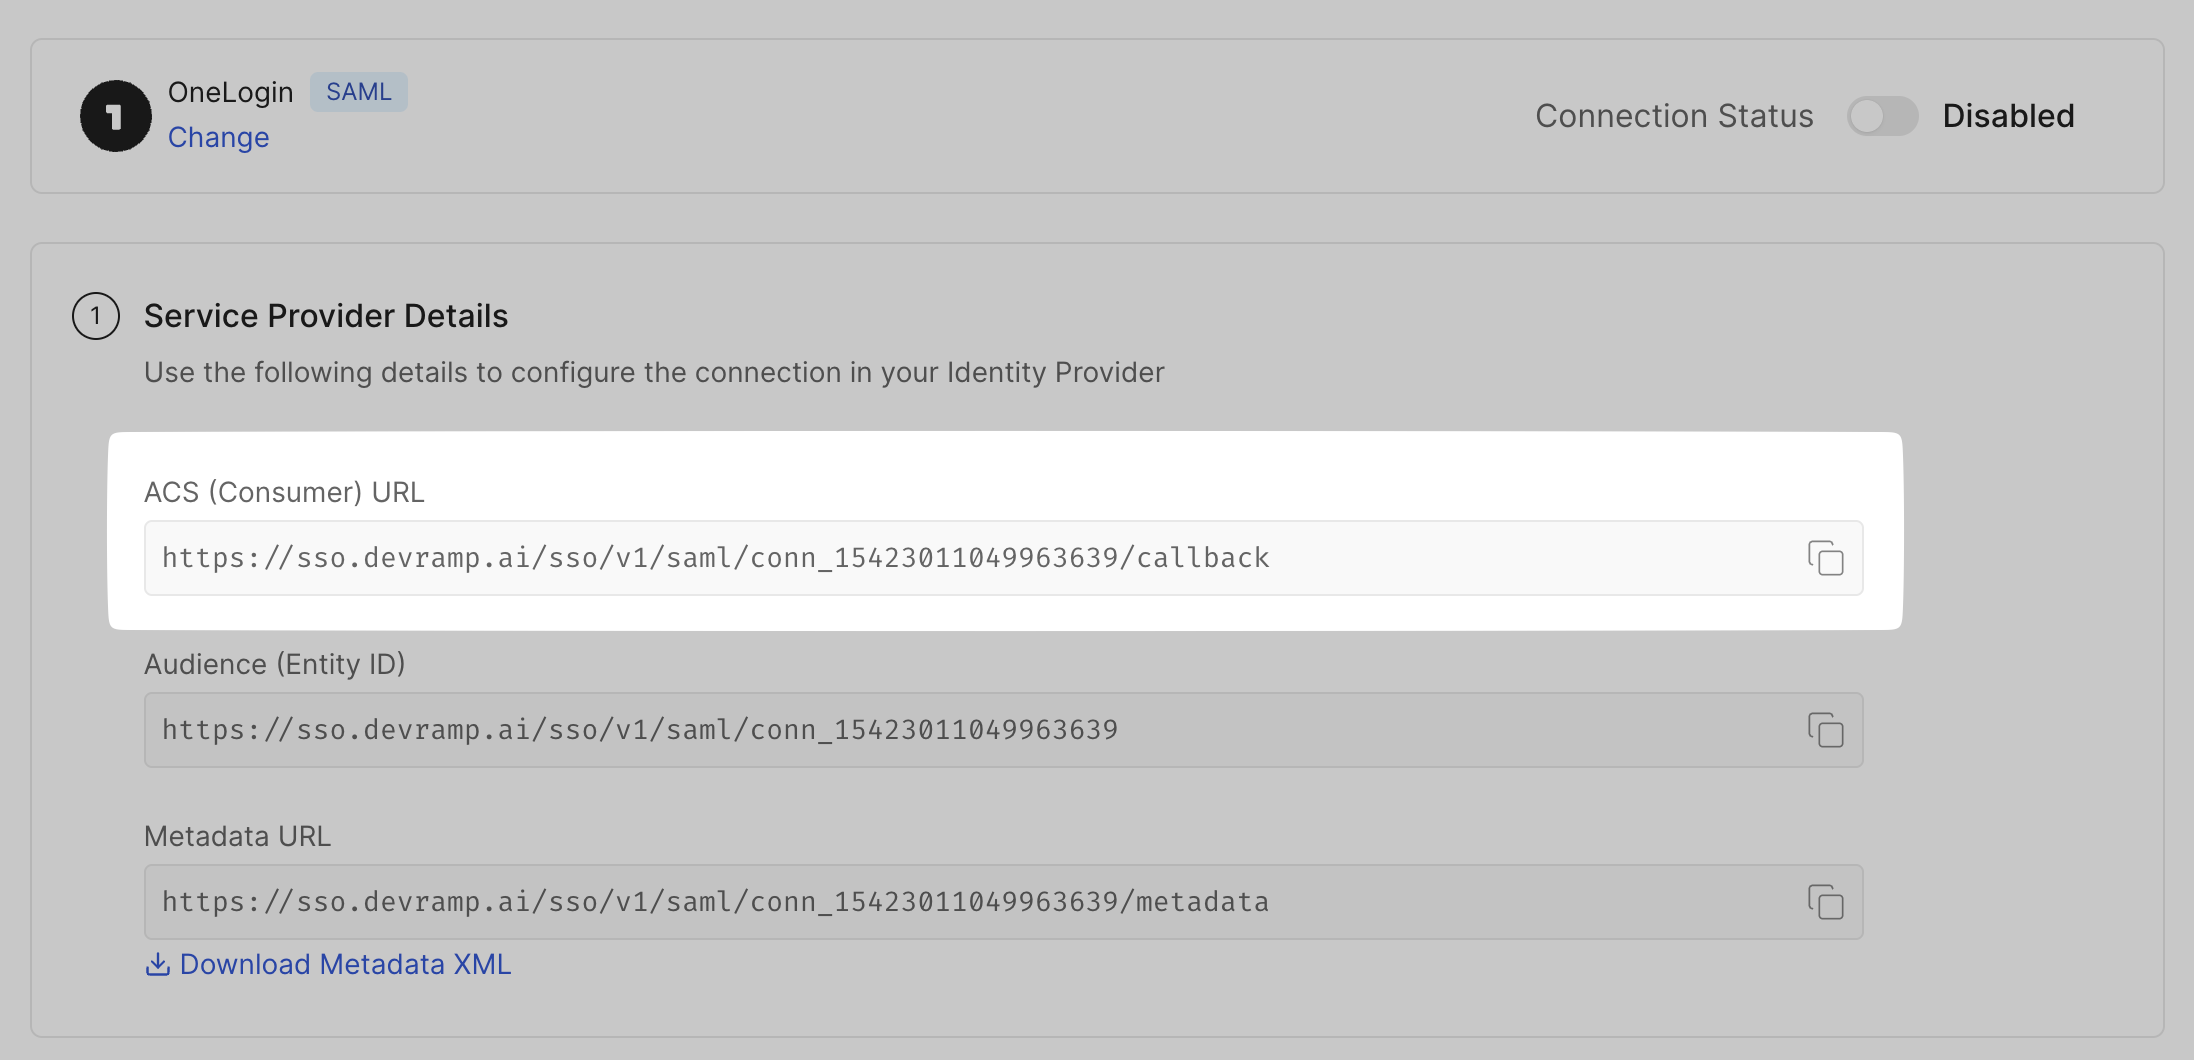
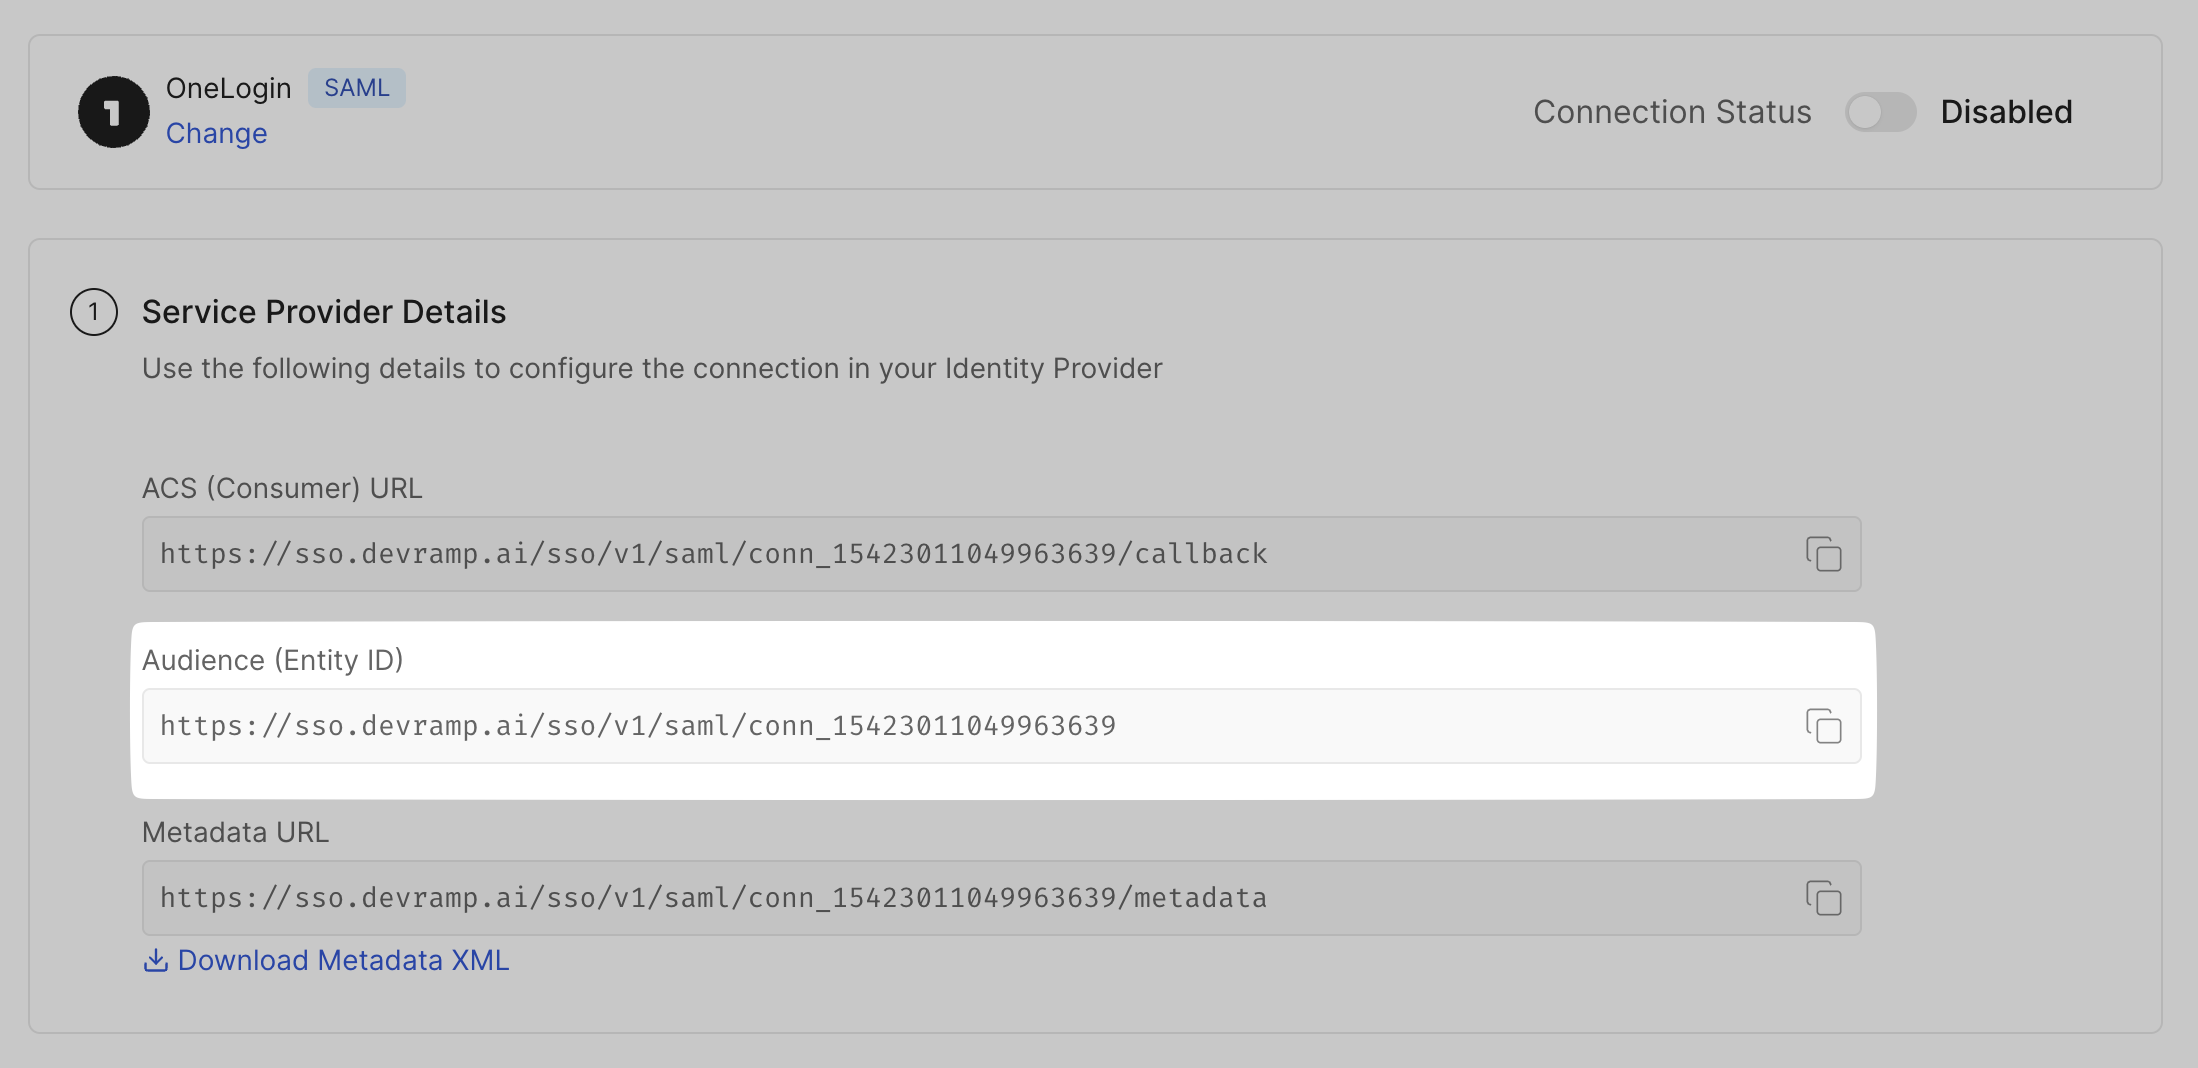
From your SSO Configuration Portal, copy the ACS (Consumer) URL. Go back to your OneLogin Admin Portal, and paste it in the Recipient, ACS (Consumer) URL Validator, and ACS(Consumer) URL fields.
OneLogin Admin Portal
Similarly, copy the Audience (Entity ID) from your SSO Configuration Portal. Go back to your OneLogin Admin Portal, and paste it in the Audience (EntityID).
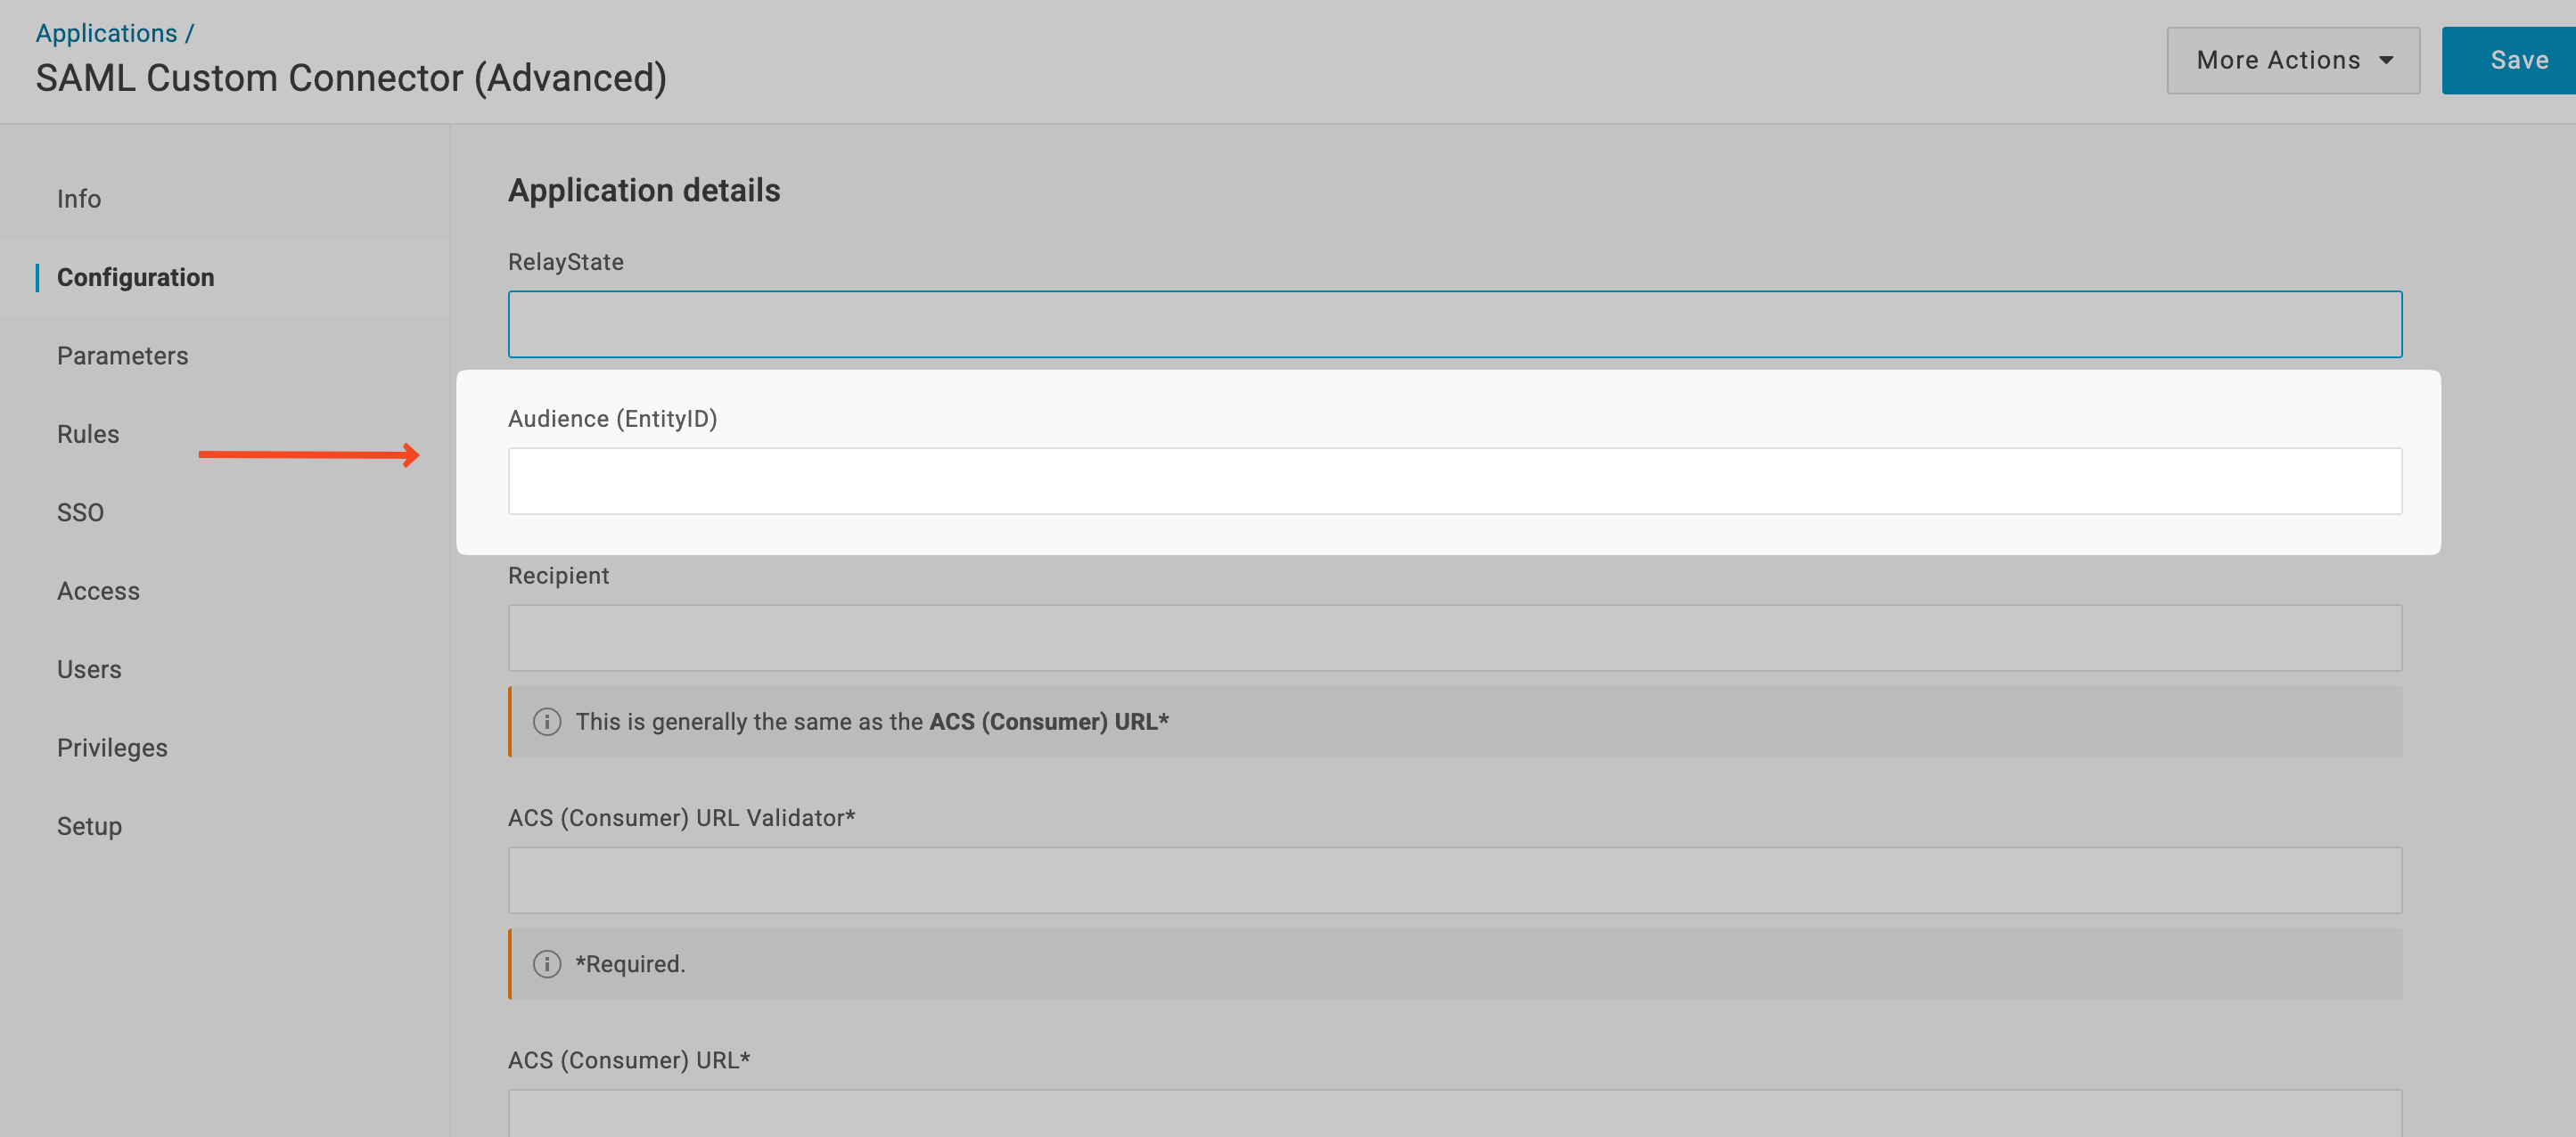
Click on Save.
-
Attribute mapping
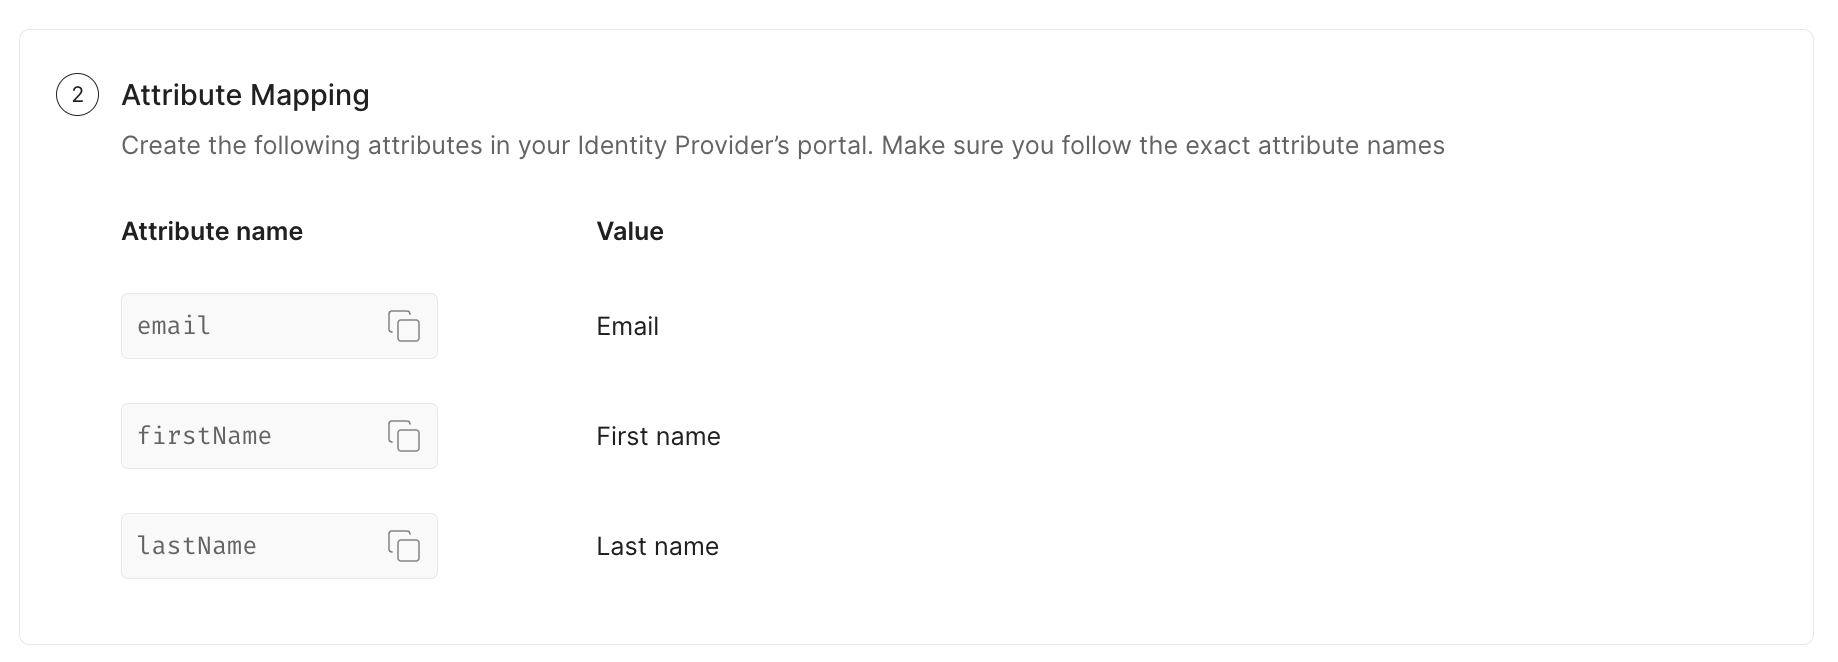
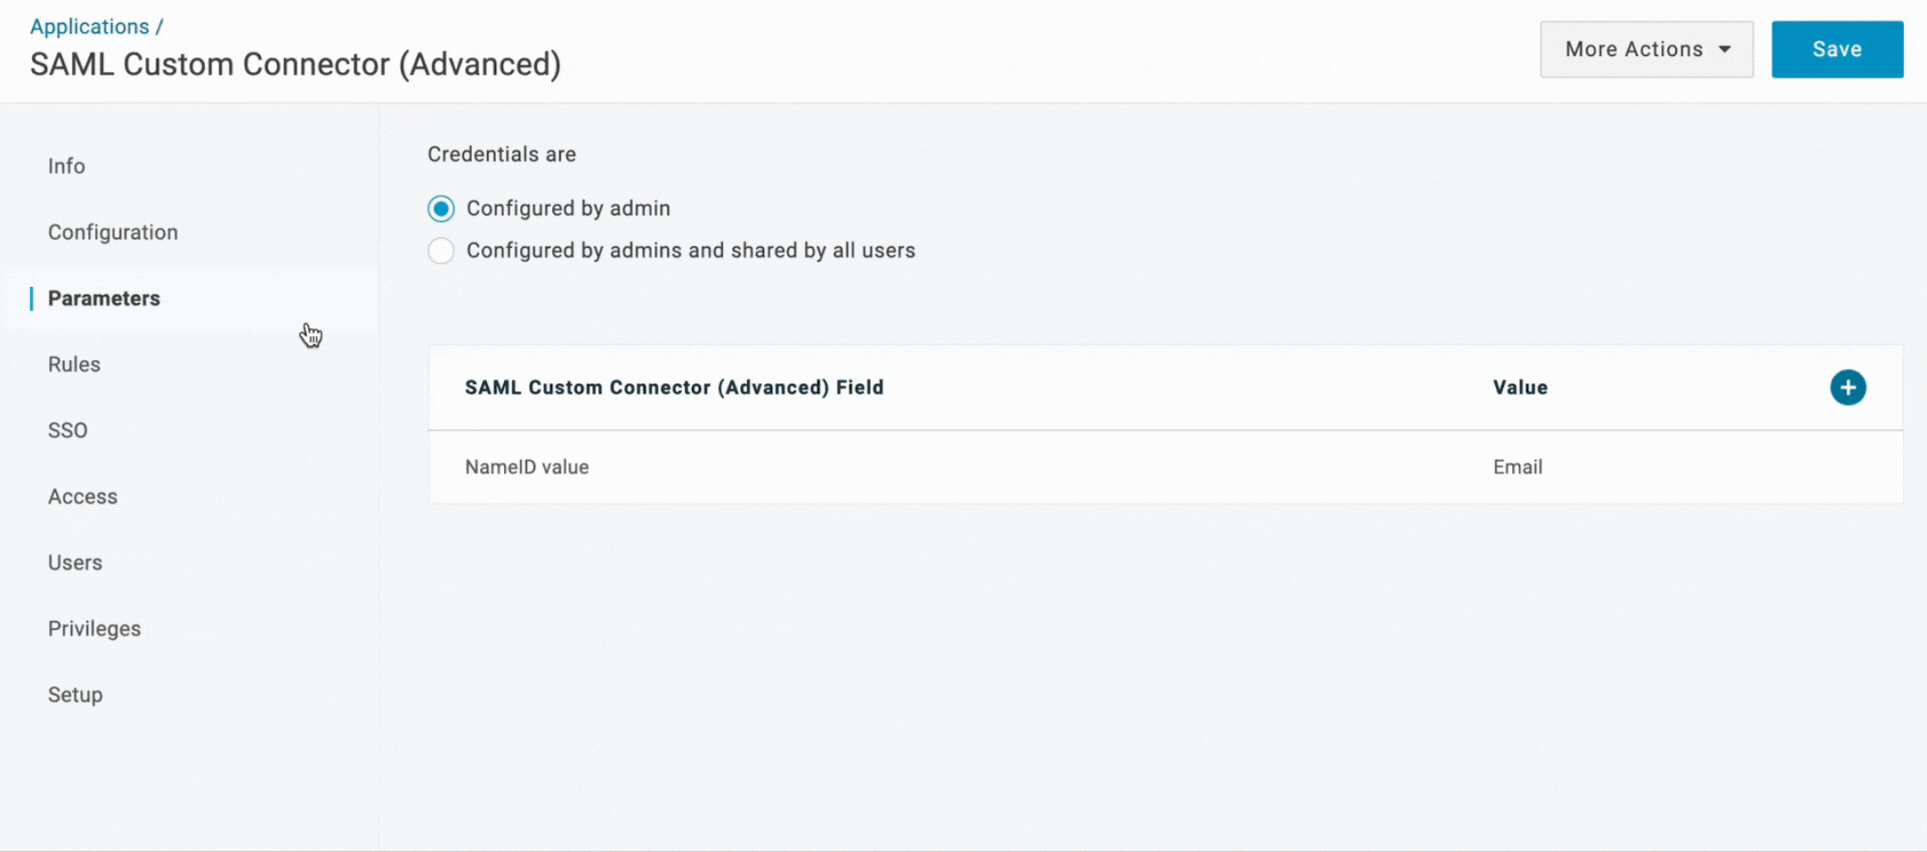
Section titled “Attribute mapping”Go to the Parameters tab on OneLogin Admin Portal, and click on the plus (+) sign to add attributes.
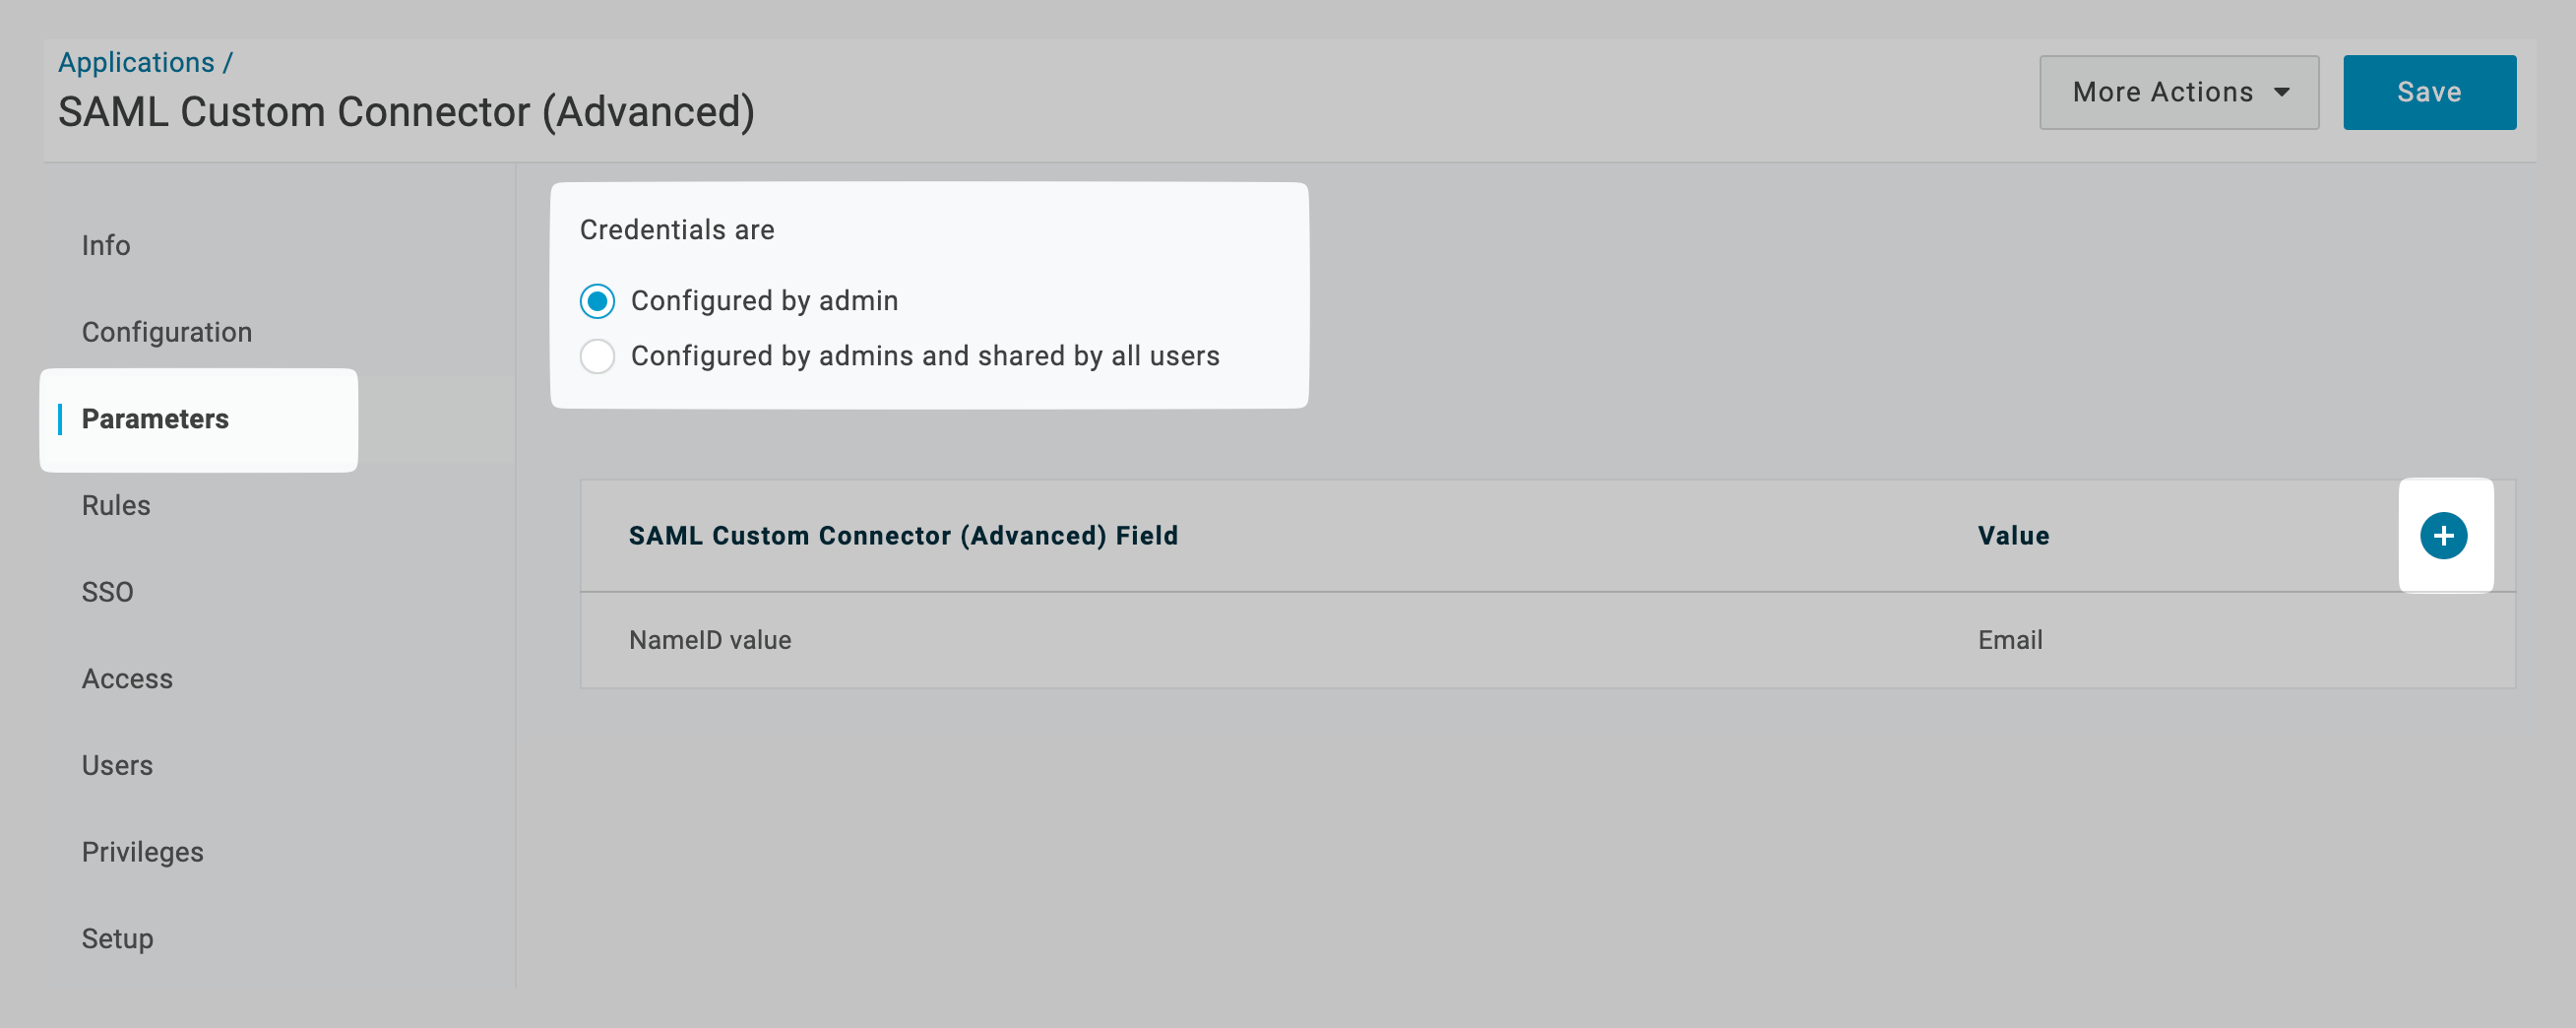
Check the Attribute Mapping section in the SSO Configuration Portal, and carefully map the exact same attributes on your OneLogin Admin Portal.
-
Assign user/group
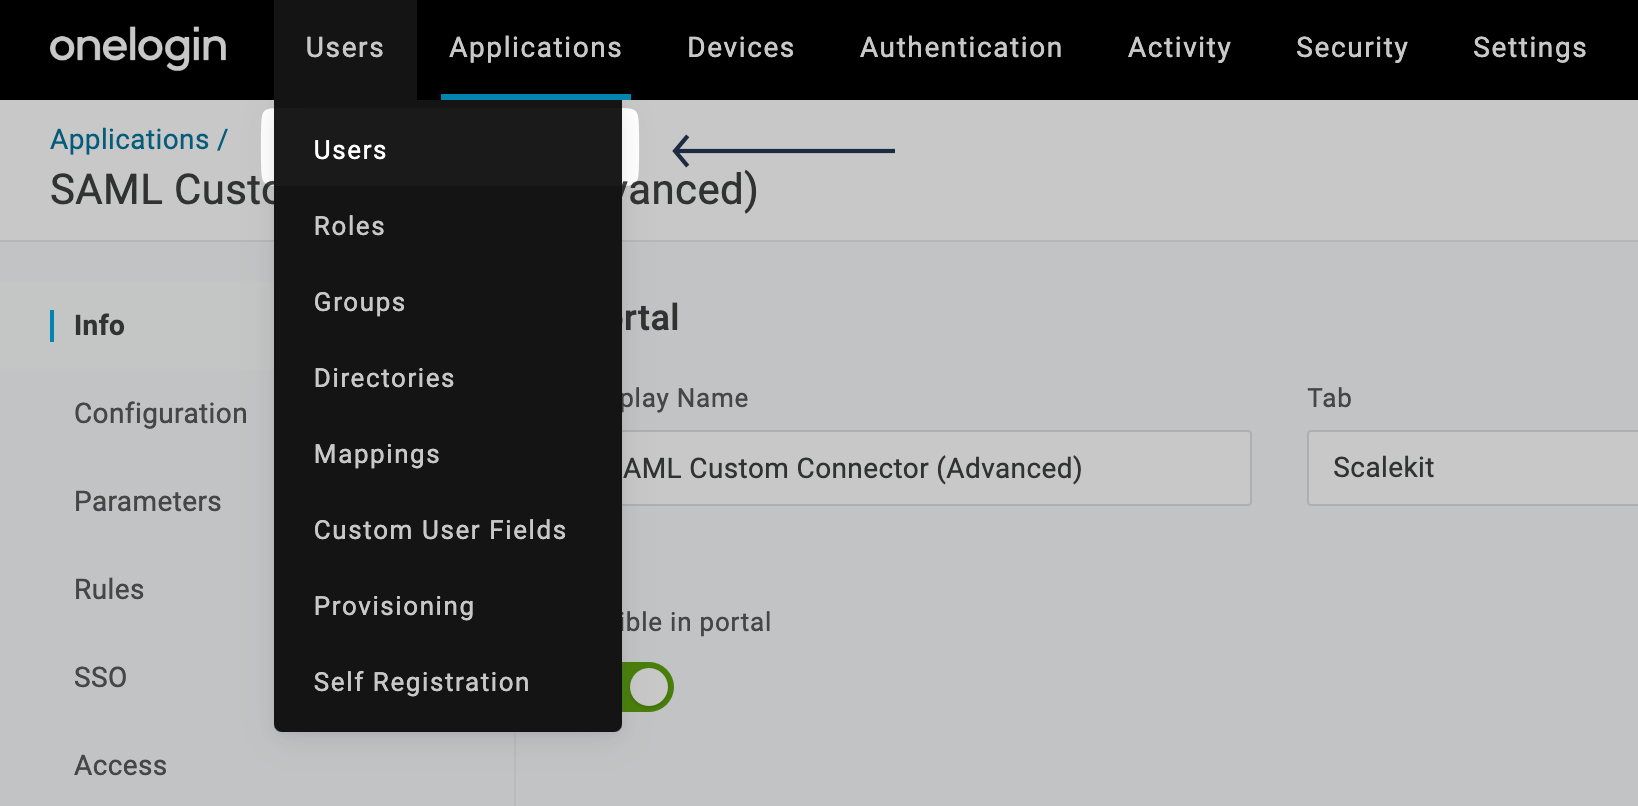
Section titled “Assign user/group”Go to the Users tab.
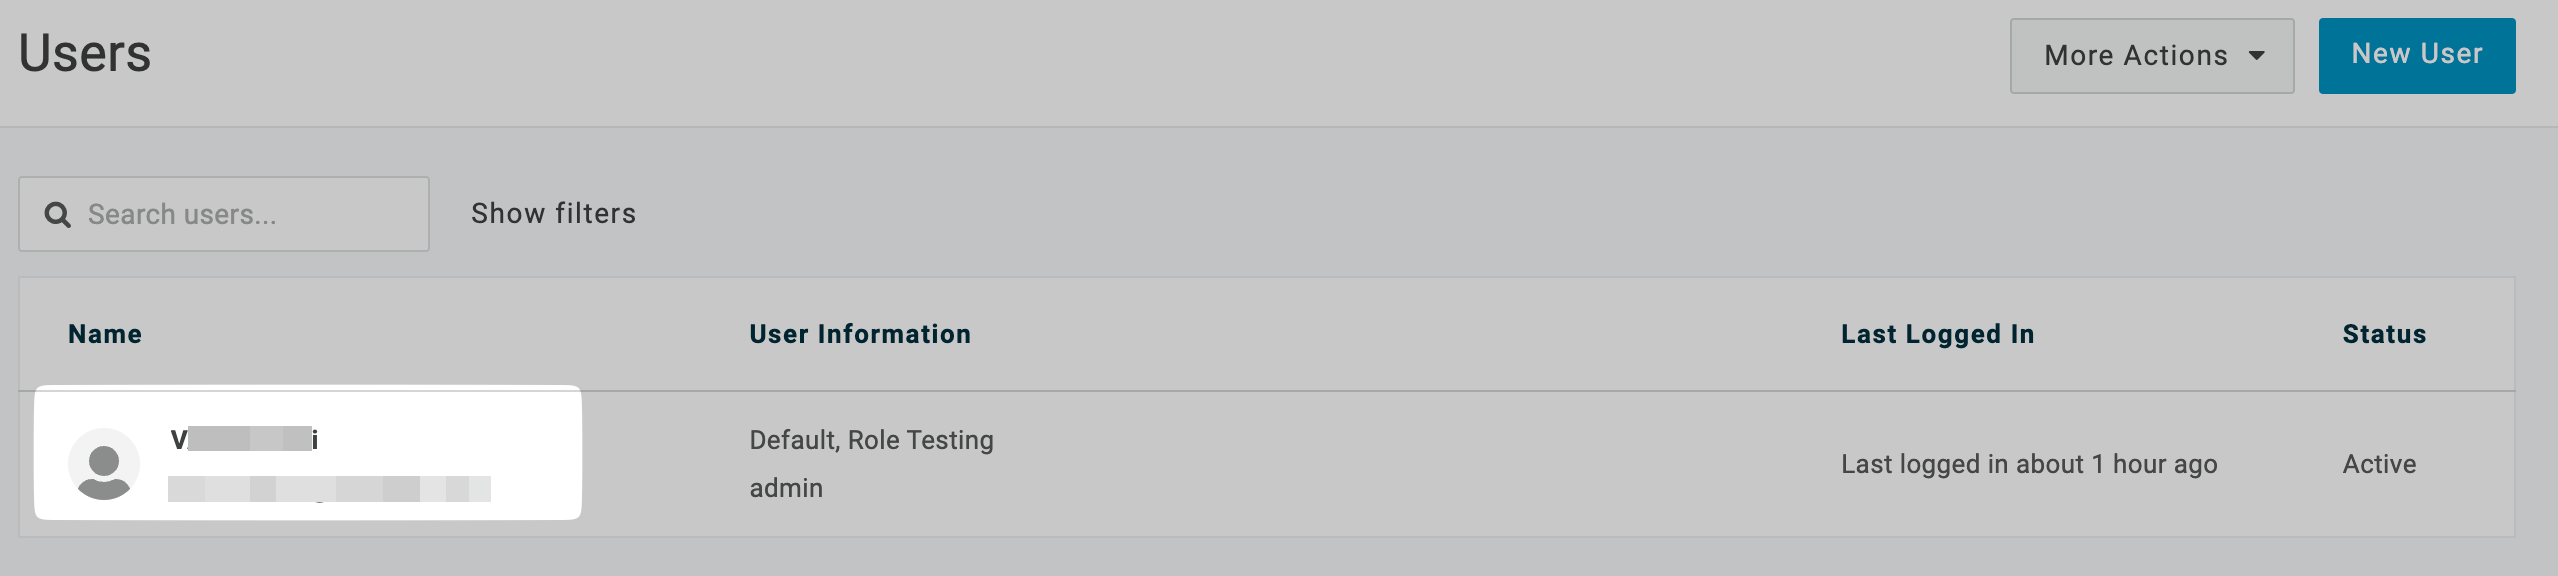
Click the user you want to assign to the application.
Click on the Applications tab. Click on the + sign to assign the newly created application.
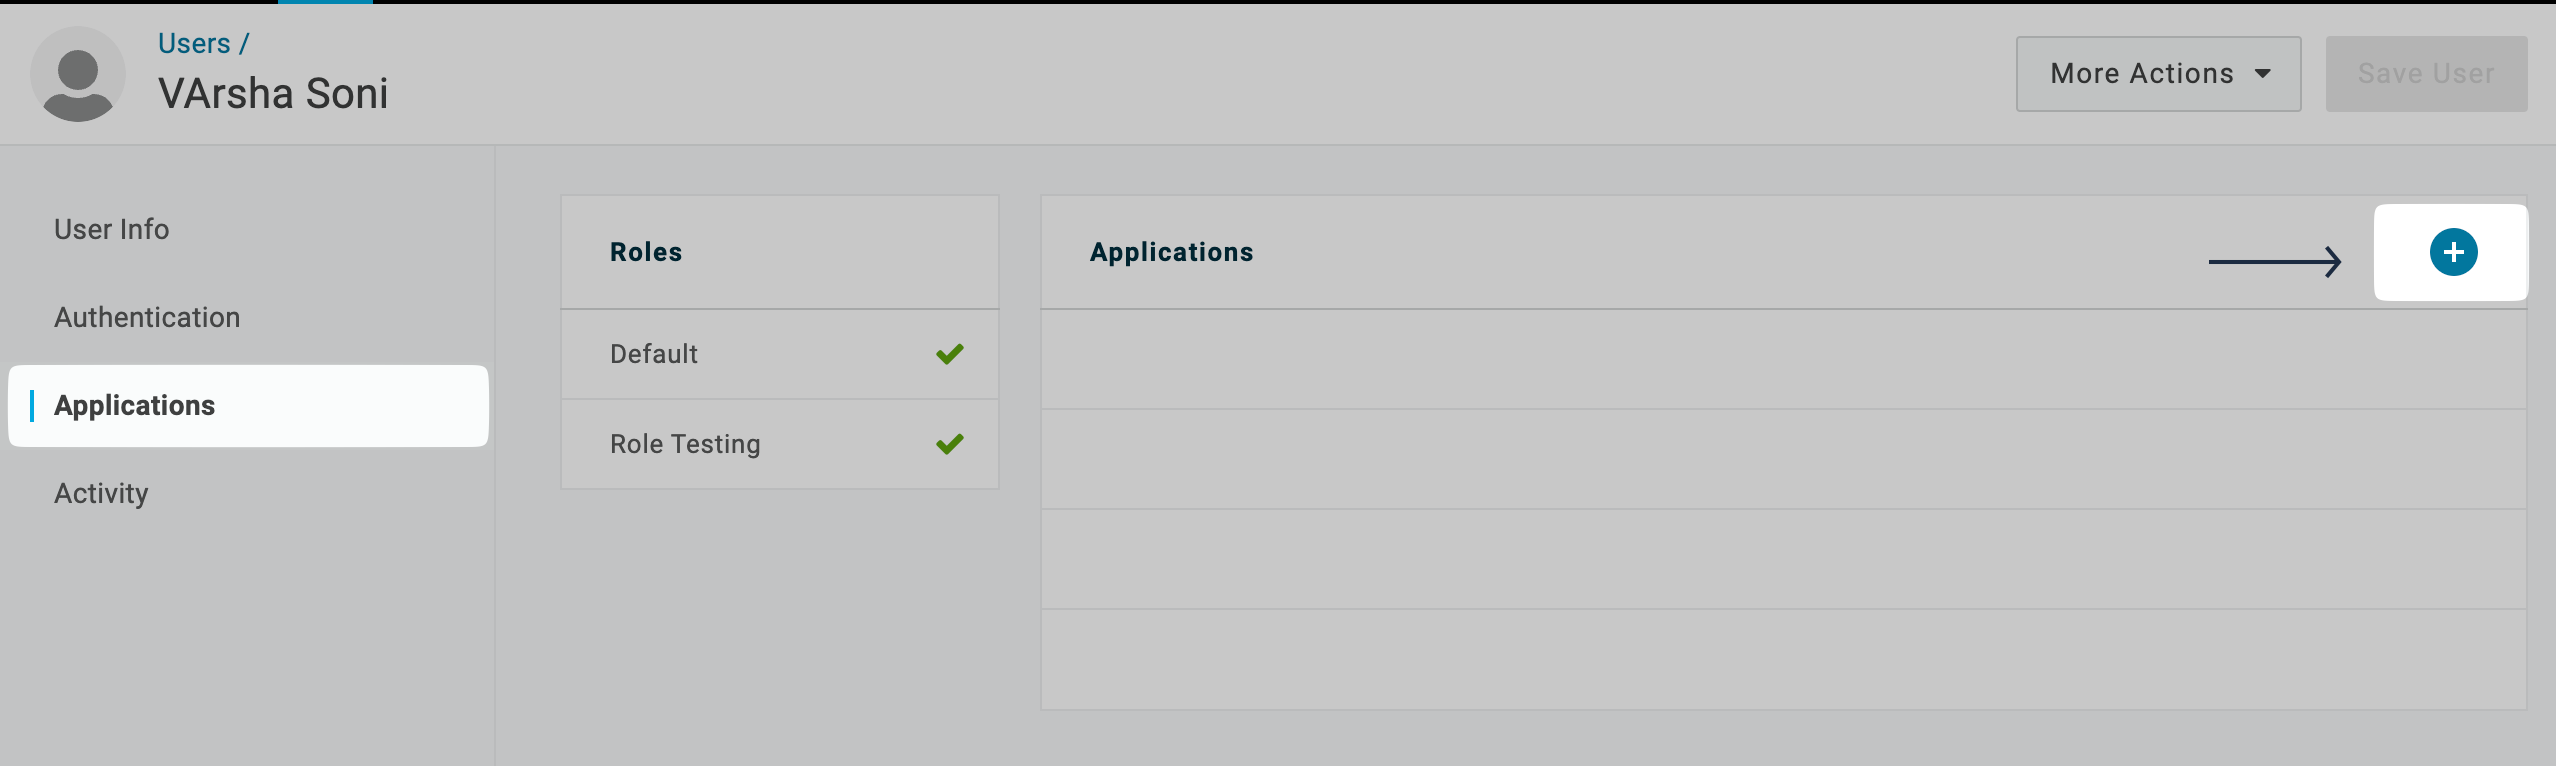
Select the newly created application from the drop down, and click on Continue.
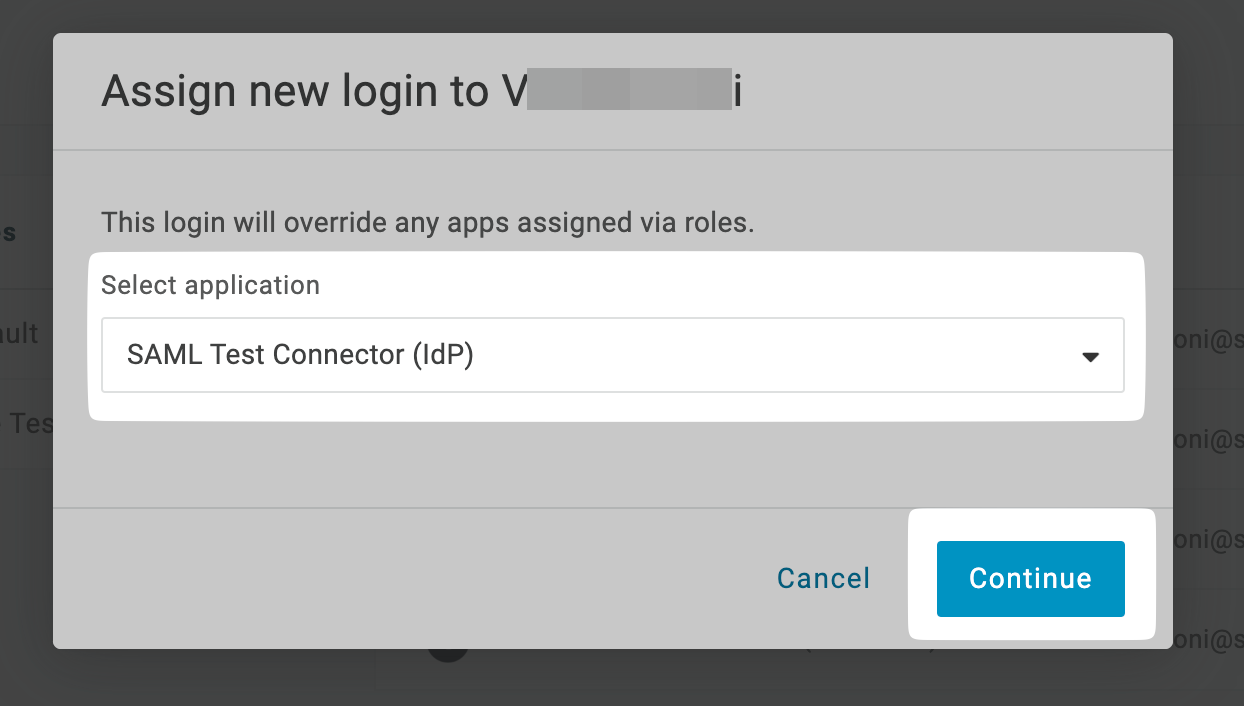
Click on Save.
-
Upload IdP metadata URL
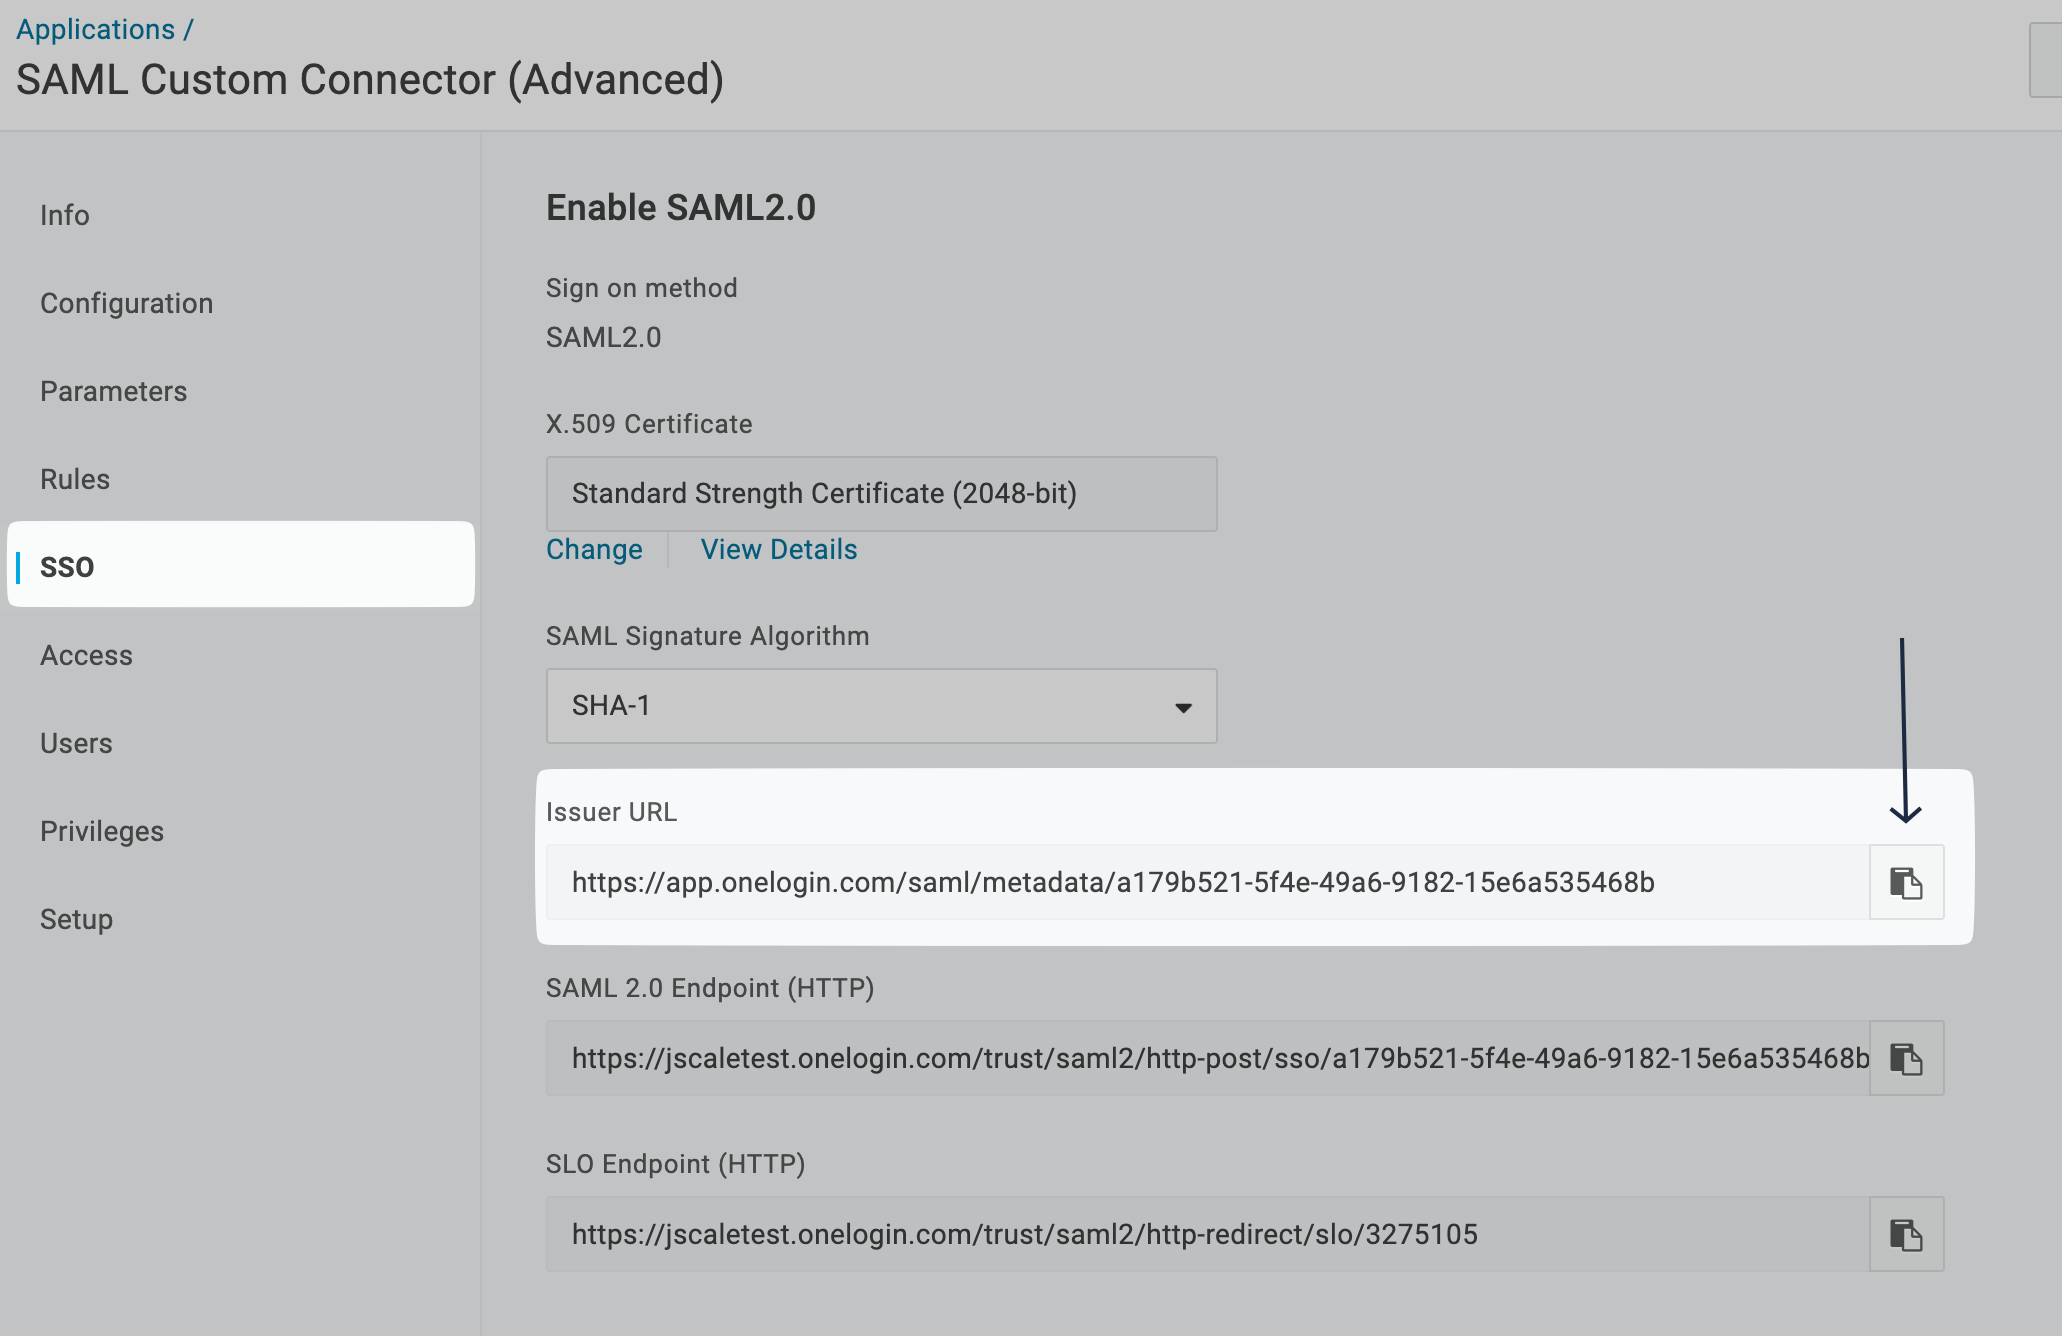
Section titled “Upload IdP metadata URL”On OneLogin Admin Portal, click on SSO. Copy the Issuer URL.
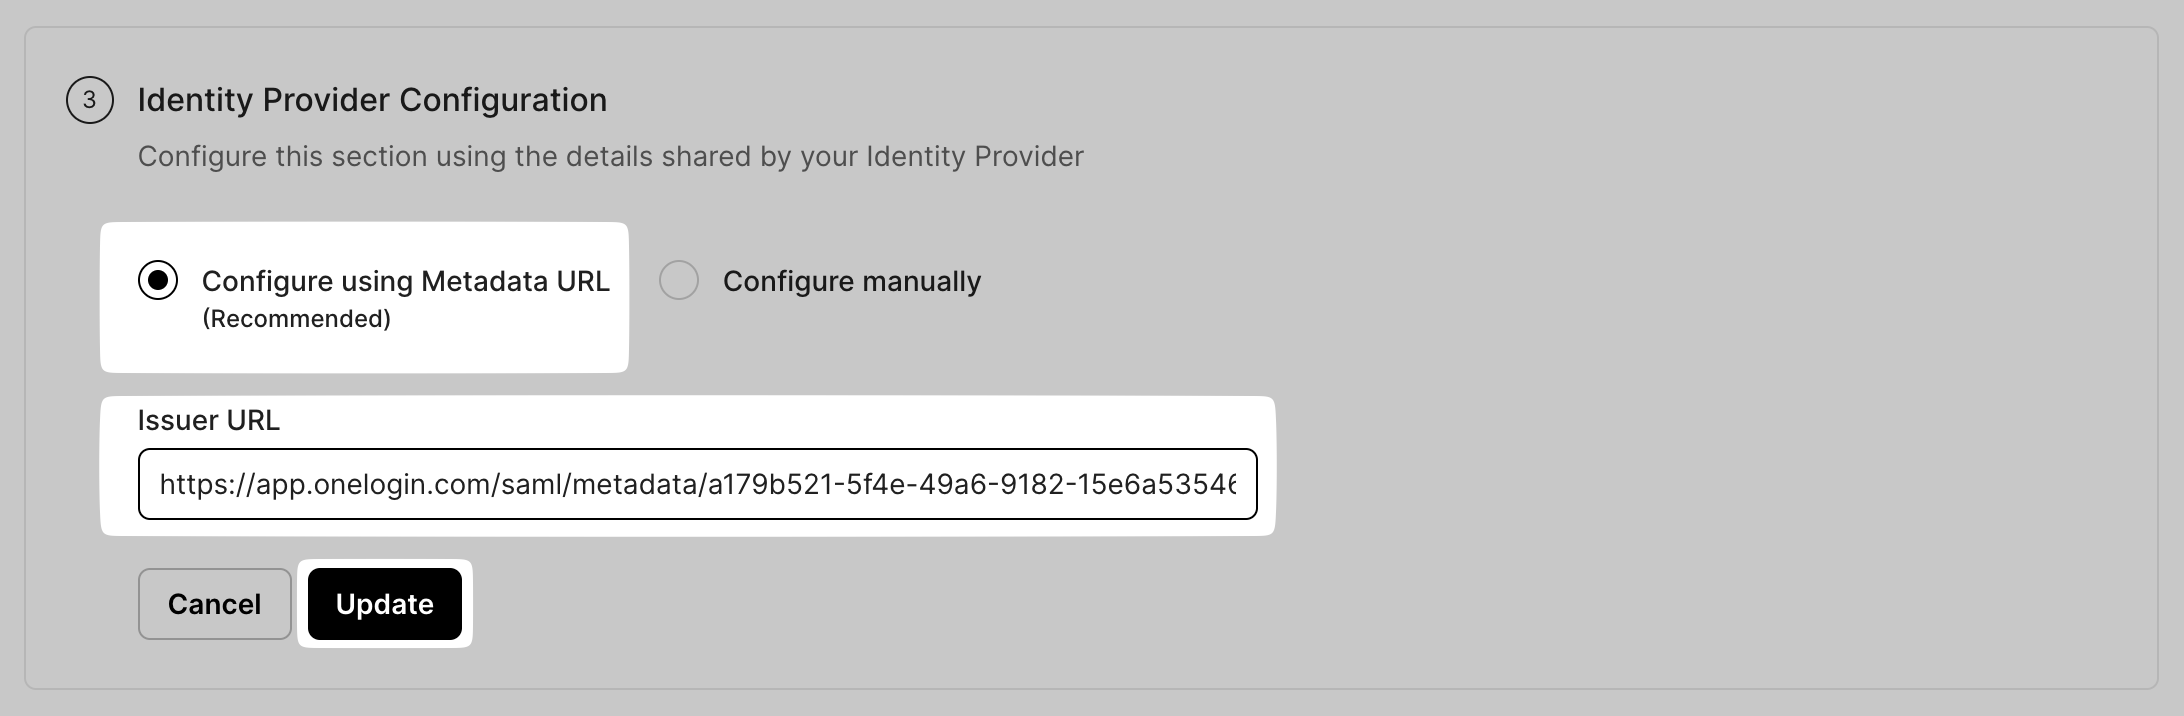
Under Identify Provider Configuration, select Configure using Metadata URL, and paste it under App Federation Metadata URL on the SSO Configuration Portal.
-
Test connection
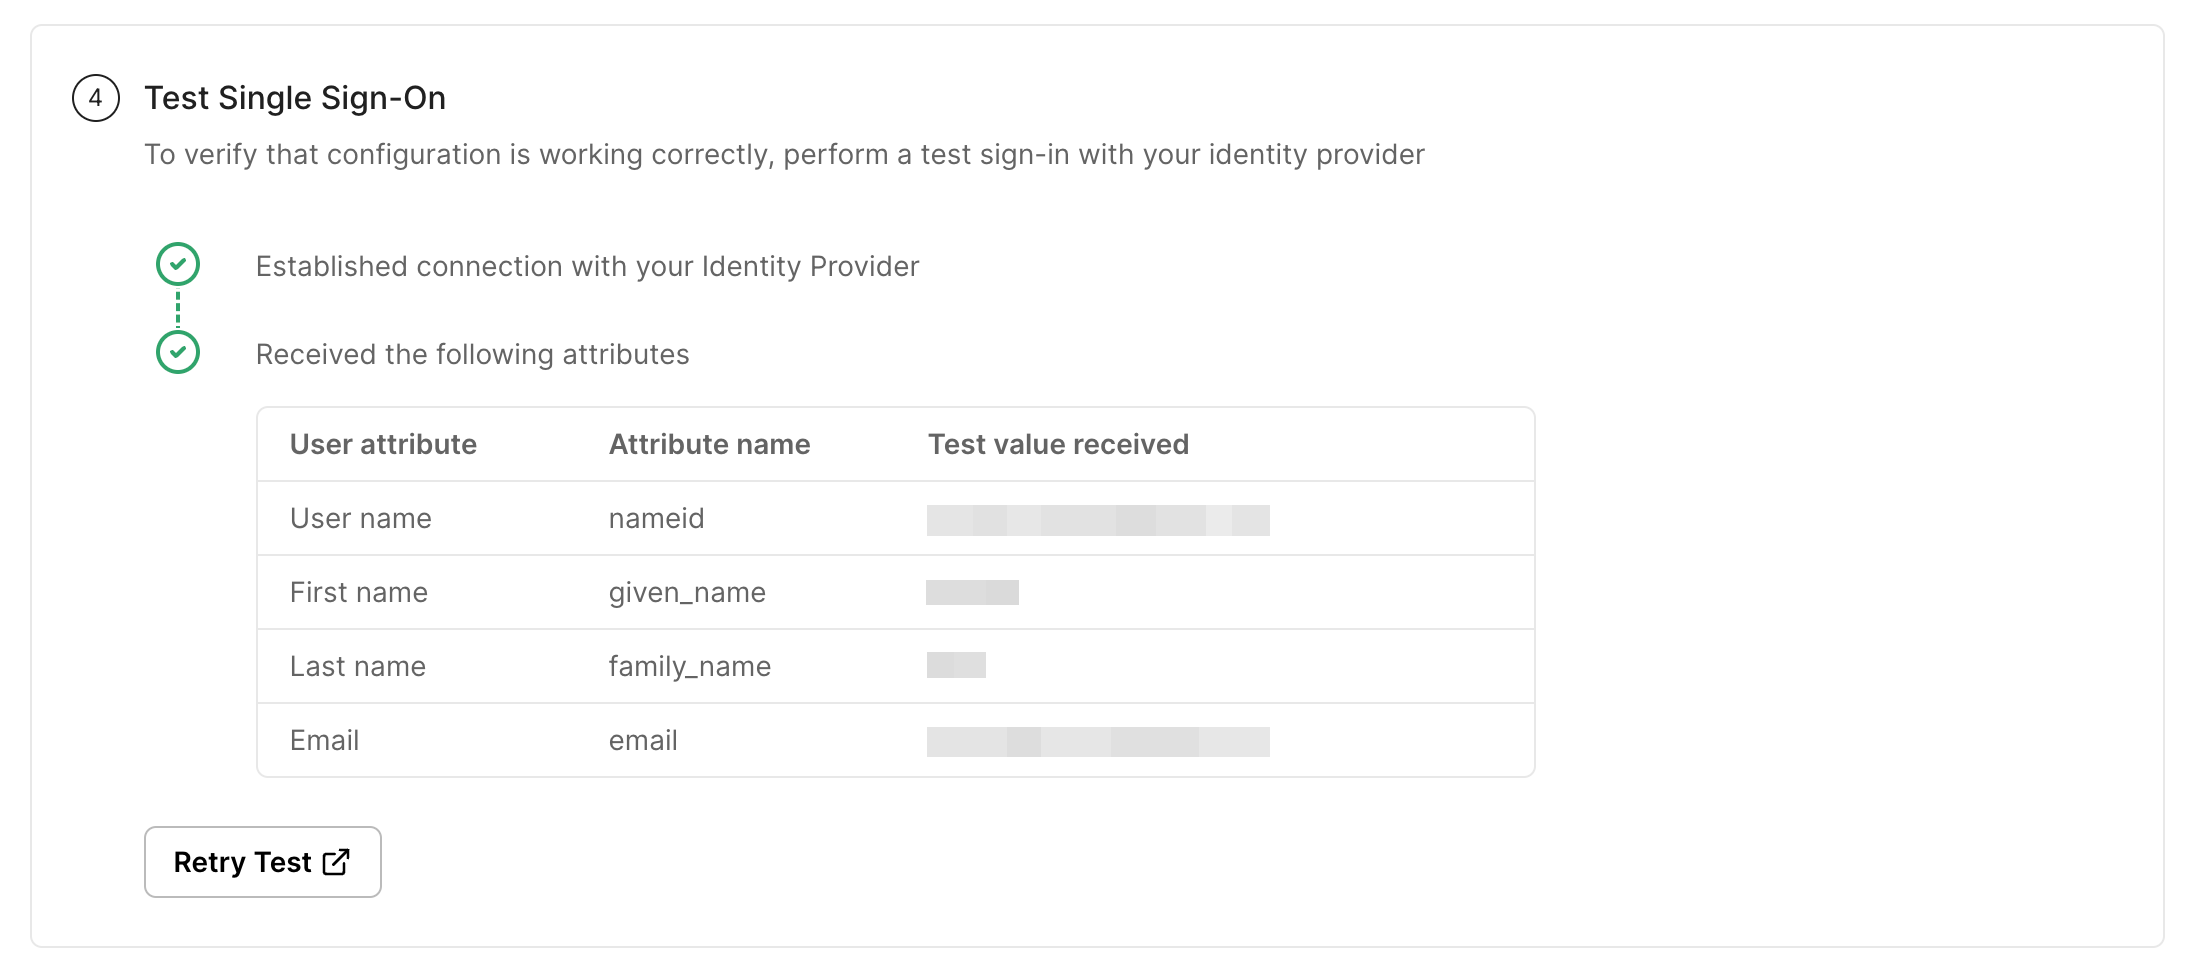
Section titled “Test connection”Click on Test Connection. If everything is done correctly, you will see a Success response as shown below.
If the connection fails, you’ll see an error, the reason for the error, and a way to solve that error right on the screen.
-
Enable connection
Section titled “Enable connection”Click on Enable Connection. This will let all your selected users login to the new application via your OneLogin Admin Portal SSO.

With this, we are done configuring your OneLogin Admin Portal application for an SSO login setup.