

Migrate to the new MCP spec
Migrate your MCP server's auth to the MCP 2026-07-28 spec with zero downtime. Trust both issuers, then enable Resource bound issuer.
Scalekit is changing the issuer of access tokens for MCP servers. The issuer is the iss claim inside a token, and it tells your MCP server who minted the token. Today the issuer is your environment URL. The new MCP specification (2026-07-28) asks clients to check the issuer on every authorization response and to keep credentials separate for each authorization server. To support this, Scalekit gives each MCP server its own issuer, <environment URL>/resources/<resource ID>. The dashboard option that turns this on is called Resource bound issuer.
This migration applies only to MCP servers registered in Scalekit in workspaces created before October 21, 2026.
To check, open your MCP server in the Scalekit dashboard. If you see the Resource bound issuer option, your MCP server requires the migration, and this guide is relevant for you. If you do not see it, your MCP server already has Resource bound issuer turned on and you do not need to do anything.
If you need any assistance or help, contact support@scalekit.com.
This migration guide helps you migrate your MCP server’s auth to the new MCP specification with zero downtime.
Migrate development first, then production
Section titled “Migrate development first, then production”Resource bound issuer is a setting on each MCP server. Complete every step for every MCP server in your development environment first. After you validate the result, repeat the same steps for every MCP server in your production environment.
What changes
Section titled “What changes”| Before the migration | After the migration | |
|---|---|---|
iss of new tokens | https://example.scalekit.cloud | https://example.scalekit.cloud/resources/res_123 |
| Tokens already issued | Keep their original iss until they expire | Keep their original iss until they expire |
Old and new tokens are both in circulation for a while, so your server must trust both issuers during the migration.
-
Trust both issuers in your token validation
Section titled “Trust both issuers in your token validation”Find the code in your MCP server that validates access tokens. In the quickstart, it is the call that passes
issuer. Today it passes only your environment URL. Update it to trust two issuers: your environment URL and<environment URL>/resources/<resource ID>. In the examples,ENV_URLis your environment URL andRESOURCE_IDis your resource ID.If you use a Scalekit SDK
Section titled “If you use a Scalekit SDK”Update your MCP server to use the latest Scalekit SDK version, which supports trusting multiple issuers. Then add both issuers while calling the validate method.
Trust both issuers await scalekit.validateToken(token, {// Before: issuer: ENV_URLissuer: [ENV_URL, `${ENV_URL}/resources/${RESOURCE_ID}`],audience: [RESOURCE_ID],});Trust both issuers options = TokenValidationOptions(# Before: issuer=ENV_URLissuer=[ENV_URL, f"{ENV_URL}/resources/{RESOURCE_ID}"],audience=[RESOURCE_ID],)scalekit_client.validate_token(token, options=options)Trust both issuers ok, err := scalekitClient.ValidateTokenWithOptions(ctx, token, &scalekit.ValidateTokenOptions{// Before: Issuer: envURLIssuers: []string{envURL, envURL + "/resources/" + RESOURCE_ID},Audience: []string{RESOURCE_ID},})if err != nil || !ok {// Reject the request}Trust both issuers TokenValidationOptions options = TokenValidationOptions.builder()// Before: .issuer(envUrl).issuers(List.of(envUrl, envUrl + "/resources/" + RESOURCE_ID)).audience(List.of(RESOURCE_ID)).build();boolean isValid = scalekitClient.authentication().validateAccessToken(token, options);if (!isValid) {// Reject the request}If you use FastMCP
Section titled “If you use FastMCP”The Scalekit provider in FastMCP already trusts both your environment URL and
<environment URL>/resources/<resource ID>, so you do not need to change your validation code. Continue with Enable Resource bound issuer. Make sure you are using the latest version of FastMCP.If you use your own JWT validator
Section titled “If you use your own JWT validator”Configure your validator to trust exactly two
issvalues, and reject any other issuer. Most JWT libraries accept a list of allowed issuers. -
Release your MCP server
Section titled “Release your MCP server”Release the change. Then check that both kinds of tokens work:
- A token issued before the release: call a tool from a session that was authorized before the release, without authorizing again. The request should still succeed.
- A new token: disconnect your MCP client, for example MCP Inspector, and connect again so that it authorizes again. Call a tool. The request should succeed.
Nothing changes for your users yet, because tokens still carry your environment URL.
-
Enable Resource bound issuer
Section titled “Enable Resource bound issuer”Enable the option in the Scalekit dashboard:
- Go to MCP servers and select your MCP server.
- Enable Resource bound issuer.
- Read the confirmation dialog. It explains that tokens issued from now on carry
<environment URL>/resources/<resource ID>as theissclaim. Confirm after you have read this guide.
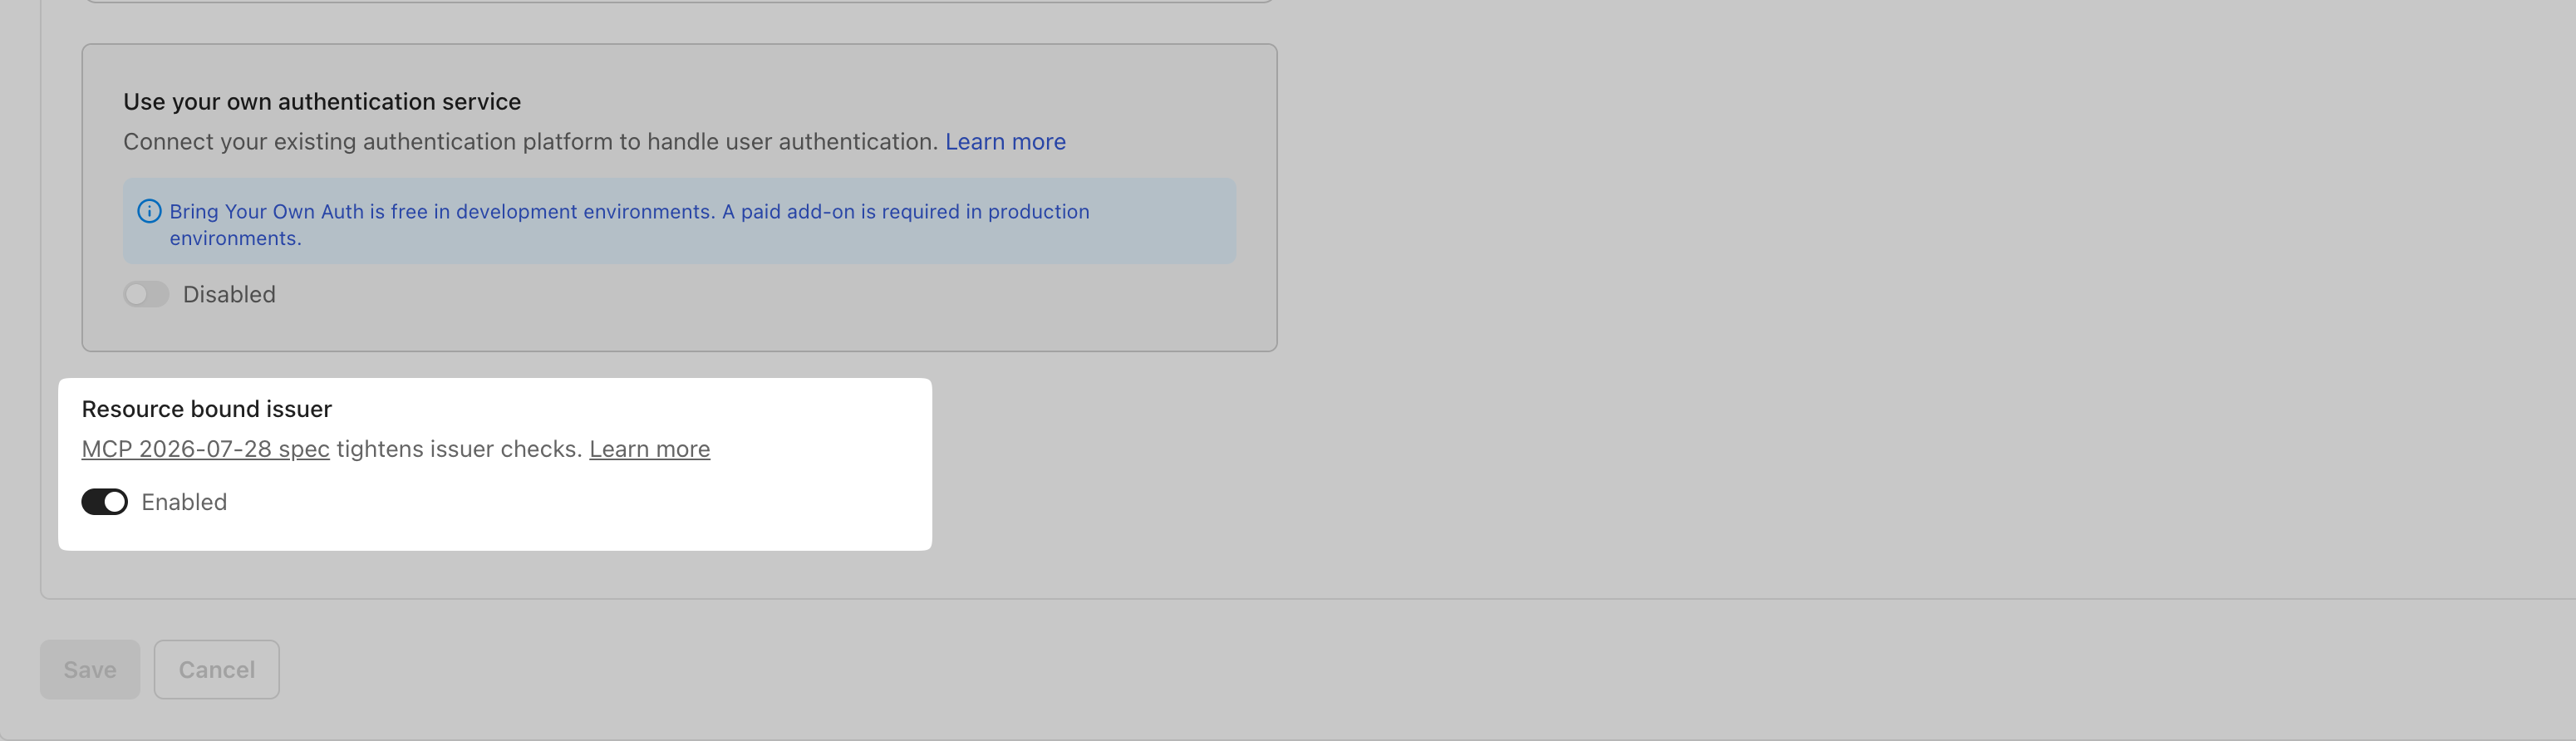
Repeat the checks from the previous step. Existing tokens must still work. For a new token, the
issclaim should be<environment URL>/resources/<resource ID>, and your MCP server should accept it.
Optional: Trust only the server’s own issuer
Wait until every token that was issued before you enabled the option has expired. After that, every token carries the server’s own issuer, and you can clean up your code to trust only that issuer. If you are not sure whether older tokens are still in use, skip this section. Trusting both issuers is safe.
await scalekit.validateToken(token, { issuer: `${ENV_URL}/resources/${RESOURCE_ID}`, audience: [RESOURCE_ID],});options = TokenValidationOptions( issuer=f"{ENV_URL}/resources/{RESOURCE_ID}", audience=[RESOURCE_ID],)scalekit_client.validate_token(token, options=options)ok, err := scalekitClient.ValidateTokenWithOptions(ctx, token, &scalekit.ValidateTokenOptions{ Issuer: envURL + "/resources/" + RESOURCE_ID, Audience: []string{RESOURCE_ID},})if err != nil || !ok { // Reject the request}TokenValidationOptions options = TokenValidationOptions.builder() .issuer(envUrl + "/resources/" + RESOURCE_ID) .audience(List.of(RESOURCE_ID)) .build();boolean isValid = scalekitClient.authentication().validateAccessToken(token, options);if (!isValid) { // Reject the request}If you use your own JWT validator, remove the environment URL from its list of trusted issuers in the same way.
If you use FastMCP, skip this section. The Scalekit provider keeps trusting both issuers.
Frequently asked questions
Section titled “Frequently asked questions”Do my users need to sign in again?
No. Tokens issued before you enable the option keep their original iss and work until they expire, as long as your MCP server trusts both issuers.
Do I need to enable the option for every MCP server?
Yes. The option is set on each MCP server. Enable it for every MCP server in your development environment first, and then for every MCP server in your production environment.
Can I turn the option off again?
Leave it enabled on every MCP server. If you need to change it, contact support@scalekit.com.
Why Scalekit is making this change
Section titled “Why Scalekit is making this change”The Model Context Protocol (MCP) 2026-07-28 specification strengthens issuer checks. Authorization servers should return the iss parameter per RFC 9207, and clients must validate it before redeeming a code. This closes an authorization-server mix-up hole. The specification also binds client credentials to the issuer that minted them.
To support these checks, each MCP server in Scalekit has its own issuer. That is why your MCP server must trust the server’s own issuer.
If a token is rejected unexpectedly, see Troubleshooting MCP auth.