
SSO simulator
Test SSO flows end to end using Scalekit’s built-in IdP simulator and a pre-configured test organization.
Scalekit provides an SSO simulator so you can test SSO flows before you connect to real enterprise identity providers. You use it when you are implementing SSO with Scalekit and want to verify your application’s behavior end to end.
Without the simulator, you often need to configure multiple providers—such as Microsoft Entra ID, PingIdentity, and Okta—and create test tenants and users just to prove that your SSO flow works. Instead, the SSO simulator lets you trigger the authentication flow with test email domains like @example.com and verify how your application handles successful logins and failures, without doing any external IdP configuration.
Before you use the SSO simulator, make sure you have:
- SSO flow integrated in your app with Scalekit. For example, you have completed setup that generates an authorization URL and handles the callback either with Modular SSO or Full stack Authentication.
- Access to the Scalekit Dashboard for viewing organizations and connection details.
Your development environment includes a Test Organization that has connection already setup to the SSO simulator. This organization is safe to use for SSO testing and does not affect real customers.
-
Locate the test organization
Open Dashboard → Organizations and look for an entry named Test Organization.
The details page shows the test organization’s identifier (for example,
org_32656XXXXXX0438) and any connected SSO integrations.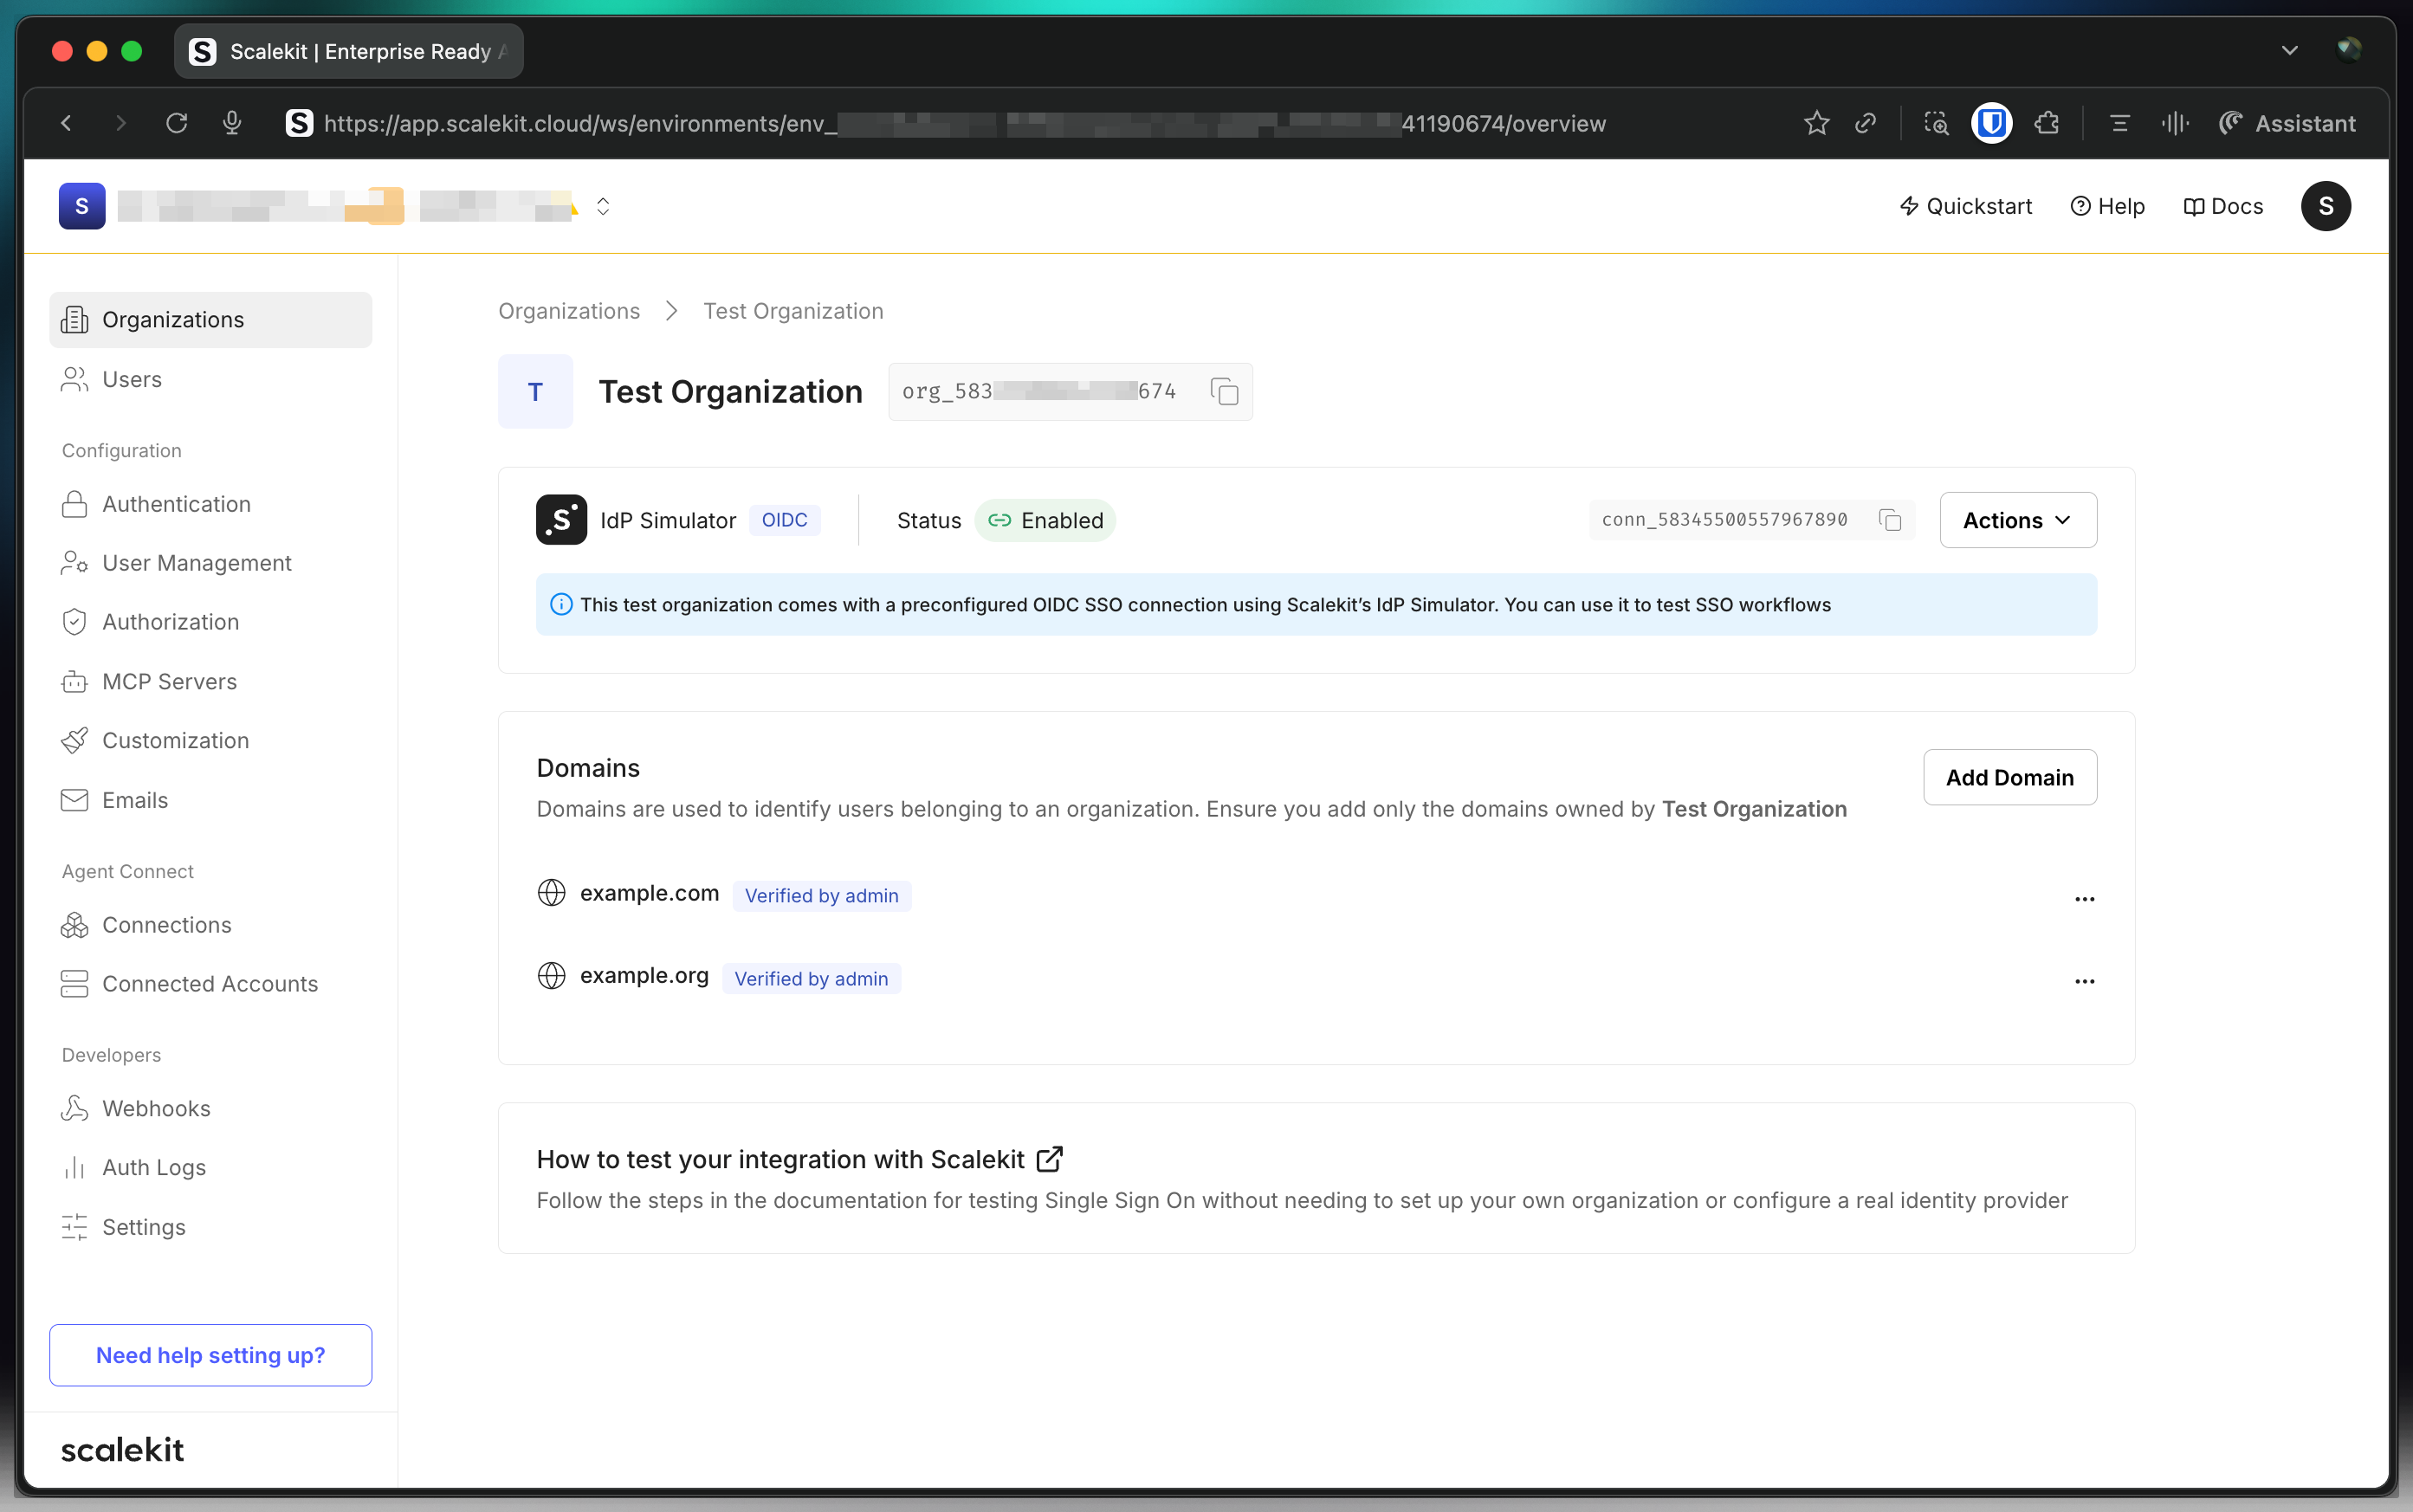
-
Copy the organization ID
From the Test Organization details page, copy the Organization ID. You pass this value to the SDK when you generate an SSO authorization URL.
Express.js const options = {organizationId: 'org_32656XXXXXX0438',}const authorizationUrl = await scalekit.getAuthorizationUrl('https://your-app.example.com/auth/callback',options,)Flask options = {"organizationId": "org_32656XXXXXX0438",}authorization_url = scalekit_client.get_authorization_url("https://your-app.example.com/auth/callback",options,)Gin options := scalekit.AuthorizationUrlOptions{OrganizationId: "org_32656XXXXXX0438",}authorizationURL, err := scalekitClient.GetAuthorizationUrl("https://your-app.example.com/auth/callback",options,)Spring Boot AuthorizationUrlOptions options = new AuthorizationUrlOptions();options.setOrganizationId("org_32656XXXXXX0438");URI authorizationUrl = scalekitClient.authentication().getAuthorizationUrl("https://your-app.example.com/auth/callback", options);Authorization URL <SCALEKIT_ENVIRONMENT_URL>/oauth/authorize?response_type=code&client_id=<SCALEKIT_CLIENT_ID>&redirect_uri=<REDIRECT_URI>&scope=openid%20profile%20email&organization_id=org_32656XXXXXX0438 -
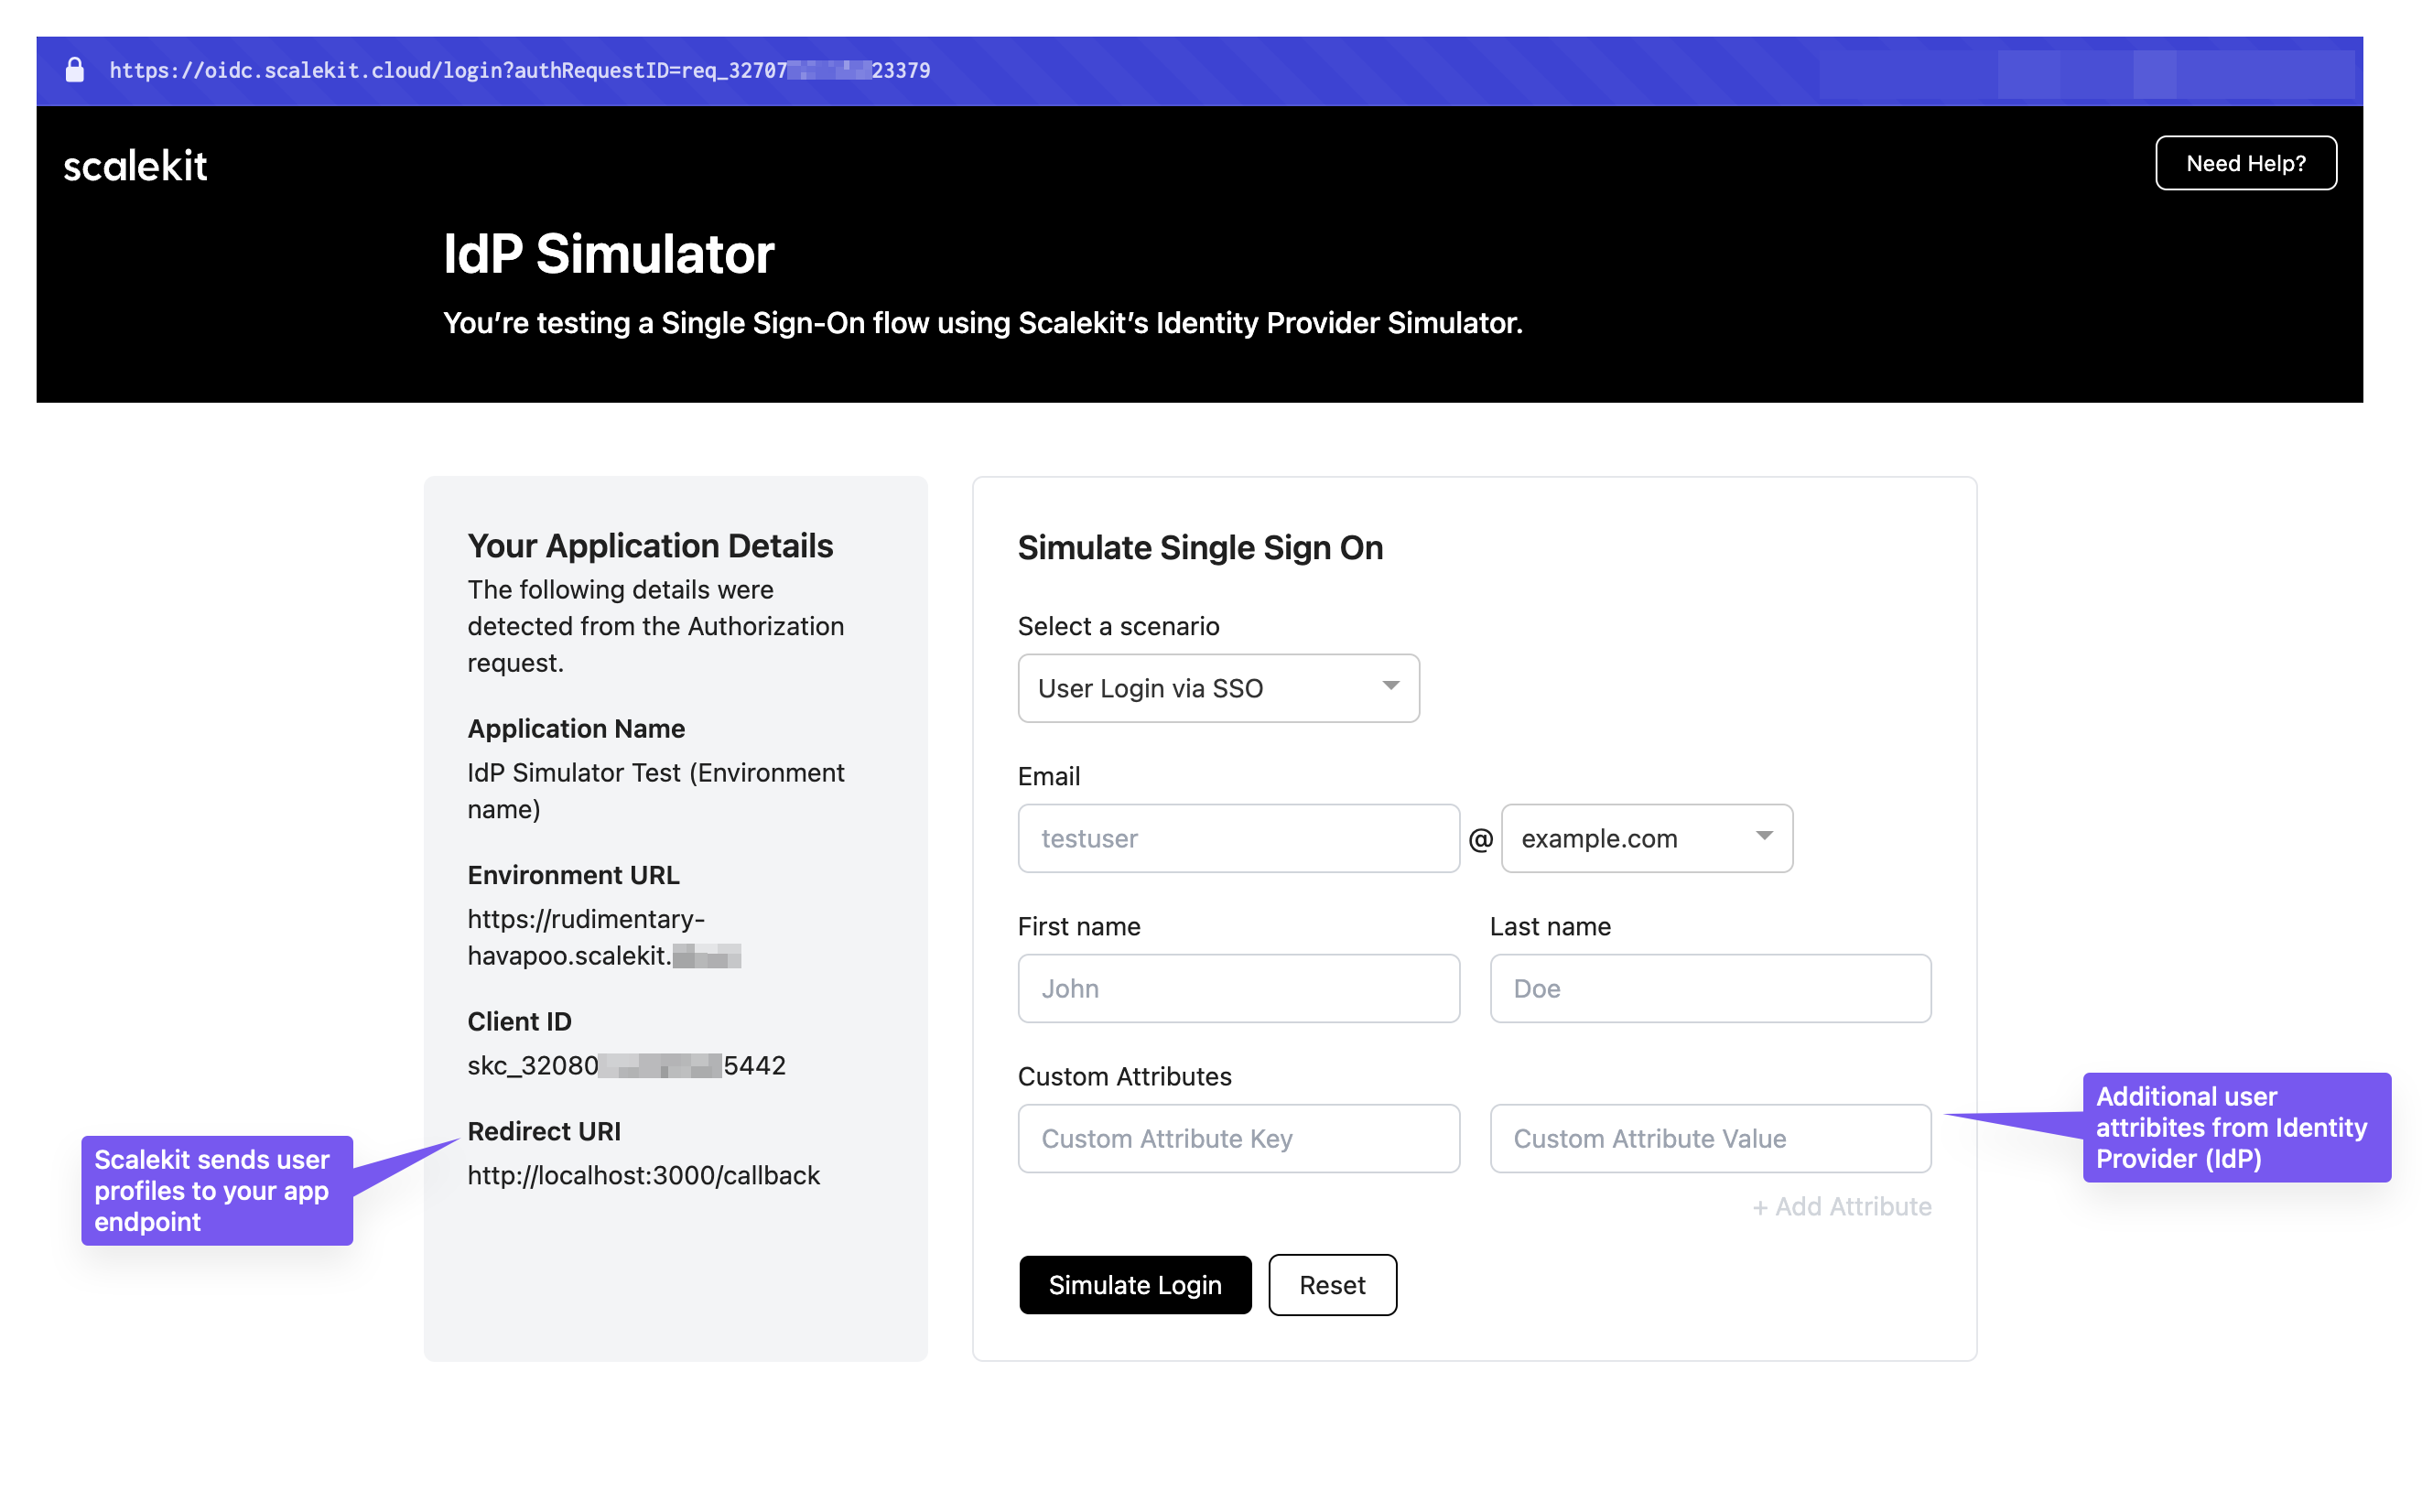
Simulate a SSO login
Generated authorization URL redirects the users to SSO simulator.
- Select User login via SSO from the dropdown menu
- Enter test user details (email, name, etc.) to simulate authentication
- Click Submit to complete the simulation
After submitting the form, your application receives an
idTokencontaining the user details you entered: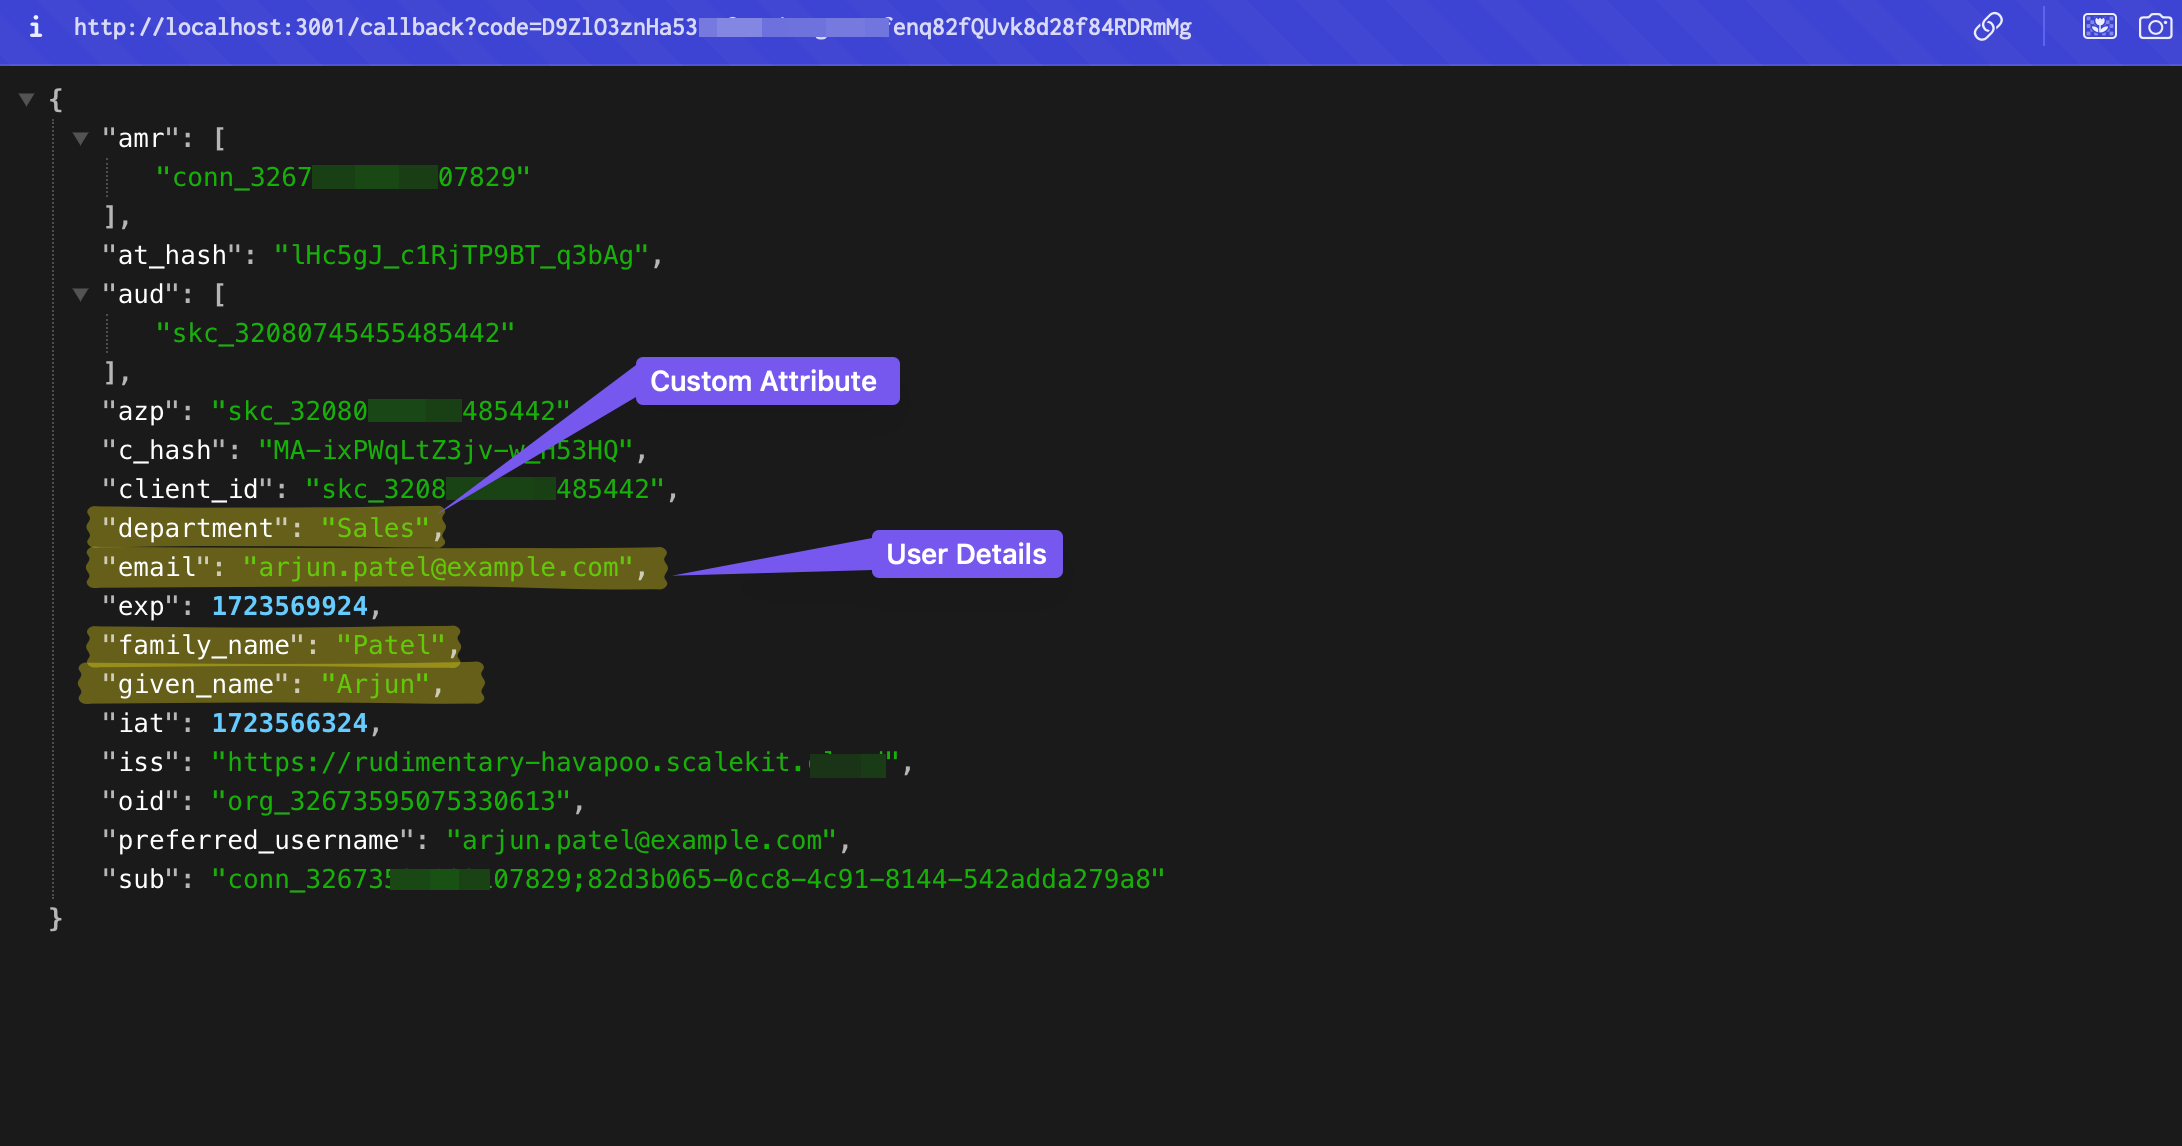
Full stack authentication vs modular SSO
Section titled “Full stack authentication vs modular SSO”How you reach the SSO simulator depends on how you use Scalekit:
- Modular SSO: You can route users to the SSO simulator by including
login_hint=name@example.com(ororganization_id=<test_org_id>) in the authorization URL. You are not limited to passing only the organization ID. - Full stack authentication: You do not need to pass any parameters when creating the authorization URL. Redirect users to Scalekit’s hosted login page; when they enter an email with a domain such as
example.comorexample.org, the login screen automatically sends them to the SSO simulator.