Microsoft Azure AD
Integrate Microsoft Entra ID with the host application for seamless user management
This guide helps administrators sync their EntraID directory with an application they want to onboard to their organization. Integrating your application with Entra ID automates user management tasks and ensures access rights stay up-to-date.
This registration sets up the following:
- Endpoint: This is the URL where EntraID sends requests to the onboarded app, acting as a communication point between them.
- Bearer Token: Used by EntraID to authenticate its requests to the endpoint, ensuring security and authorization.
These components enable seamless synchronization between your application and the EntraID directory.
-
Create an endpoint and API token
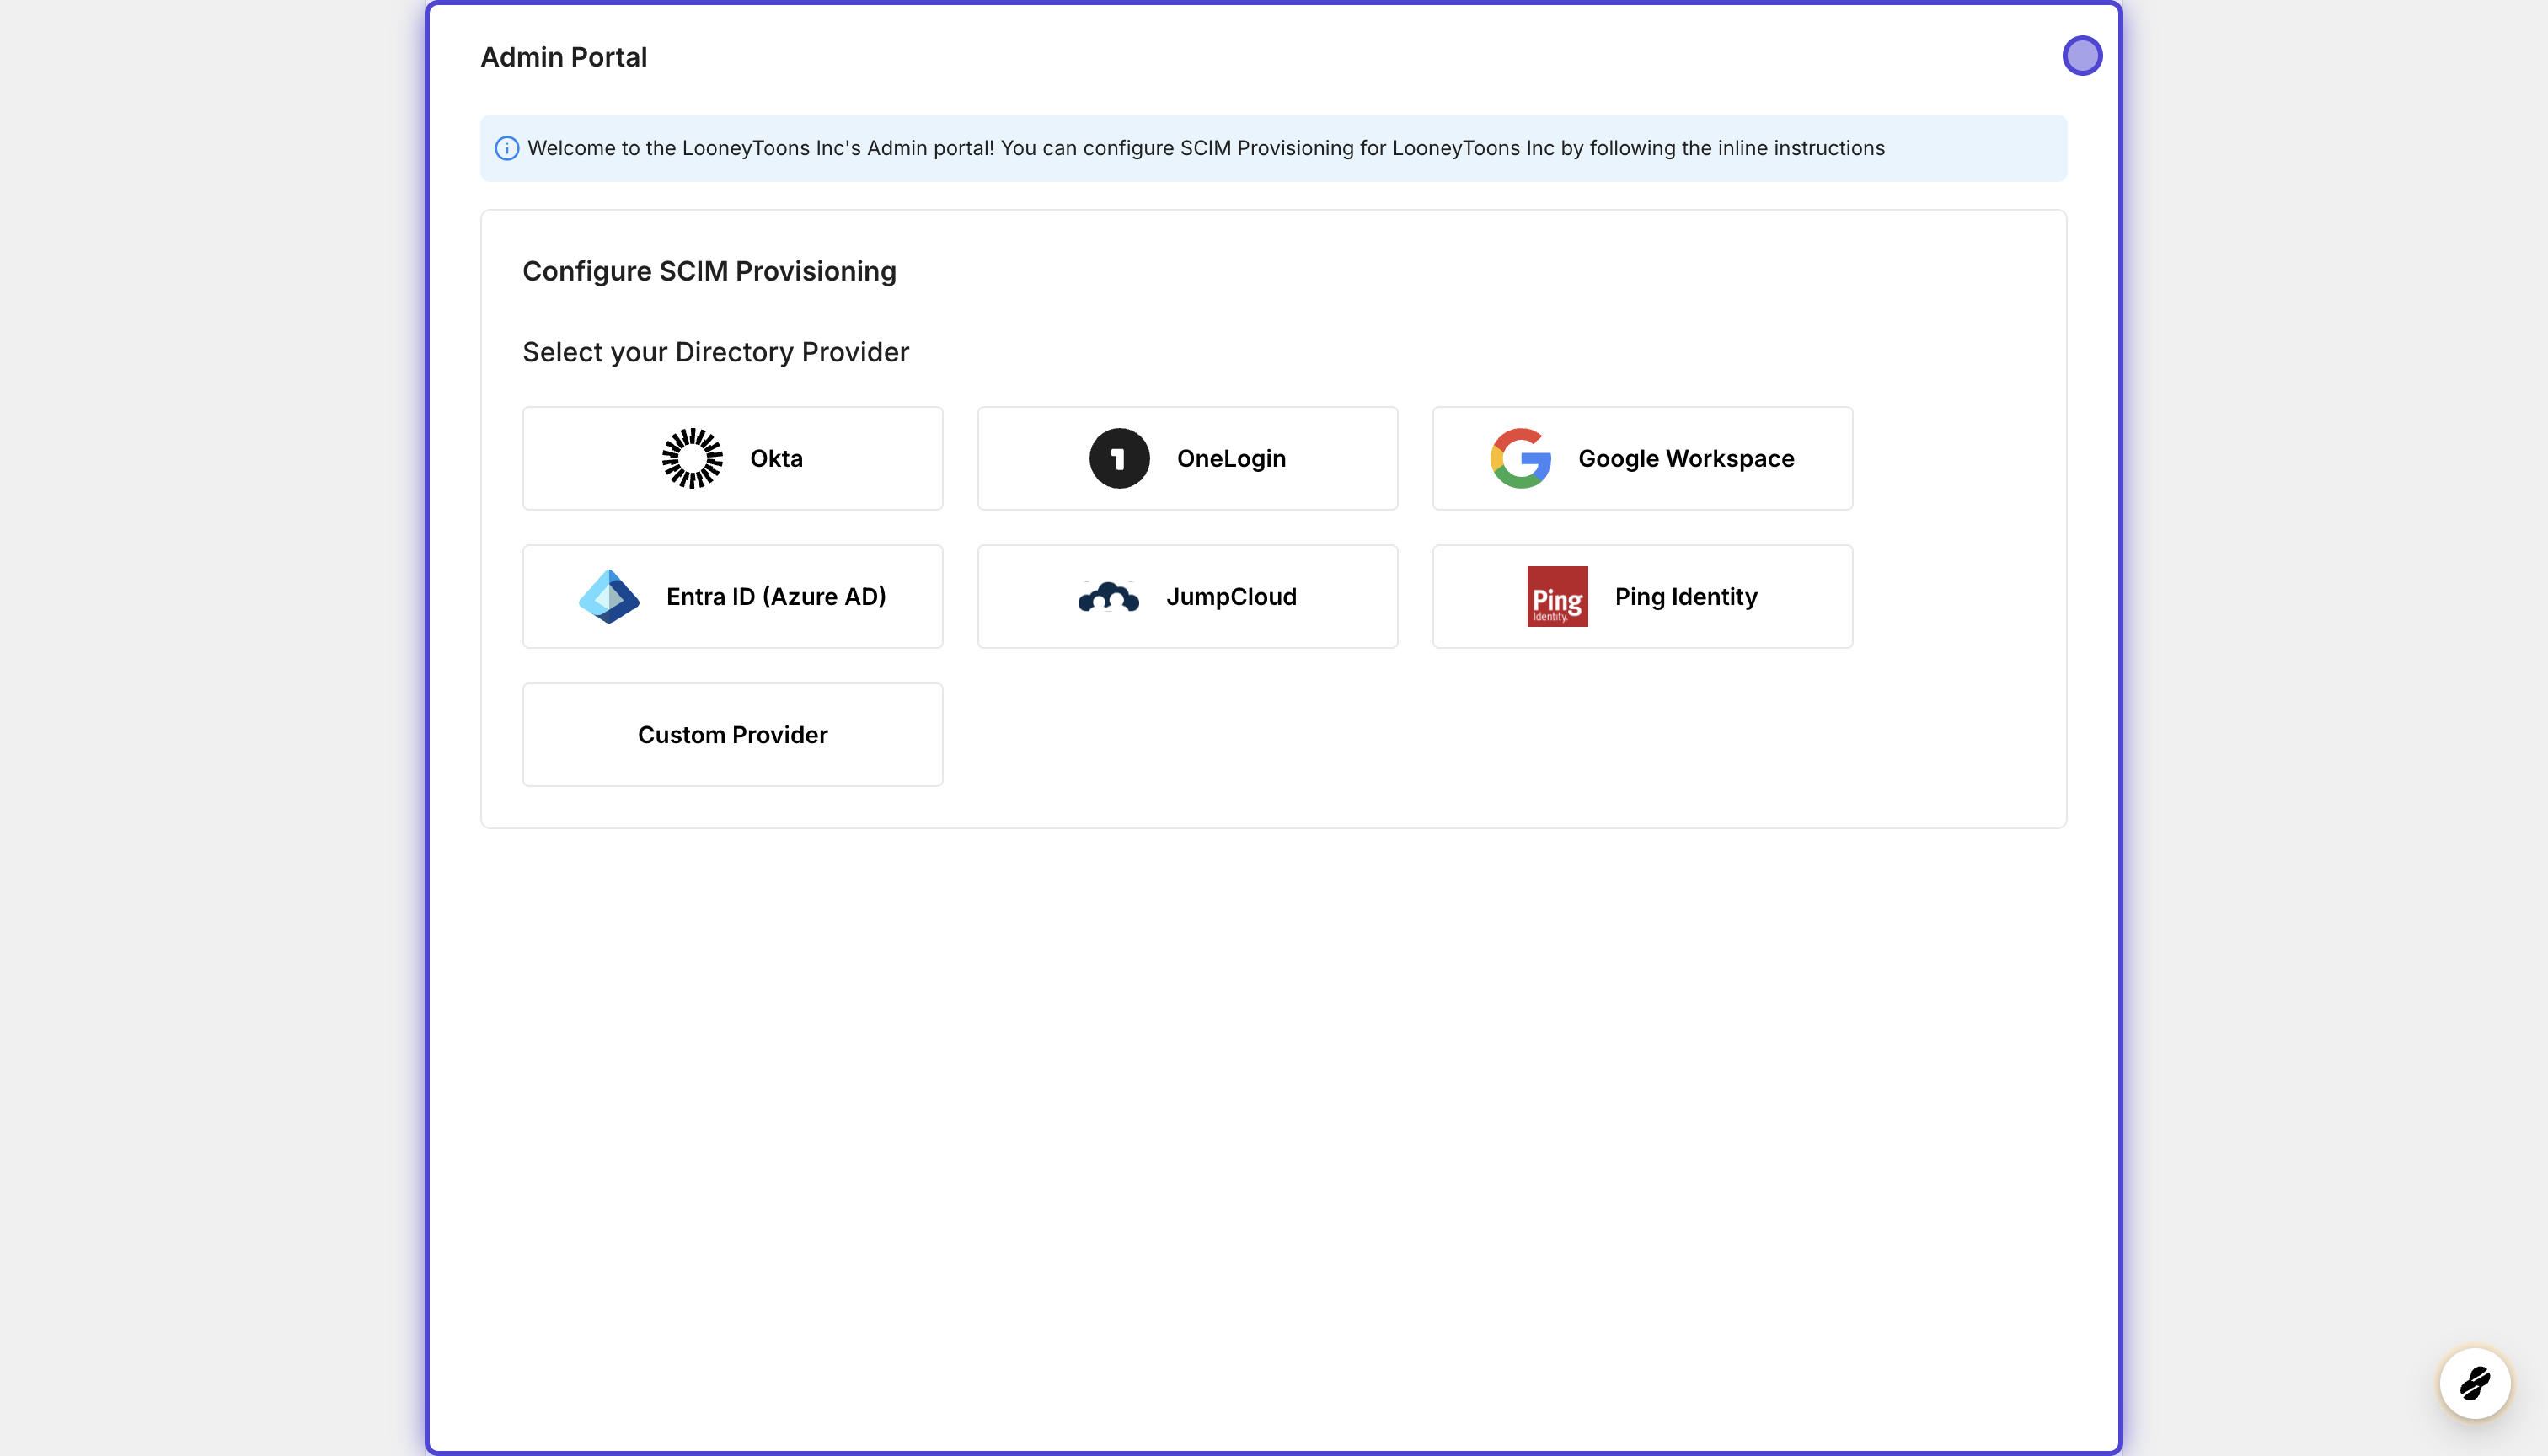
Section titled “Create an endpoint and API token”Select the “SCIM Provisioning” tab to display a list of Directory Providers. Choose “Entra ID” as your Directory Provider. If the Admin Portal is not accessible from the app, request instructions from the app owner.
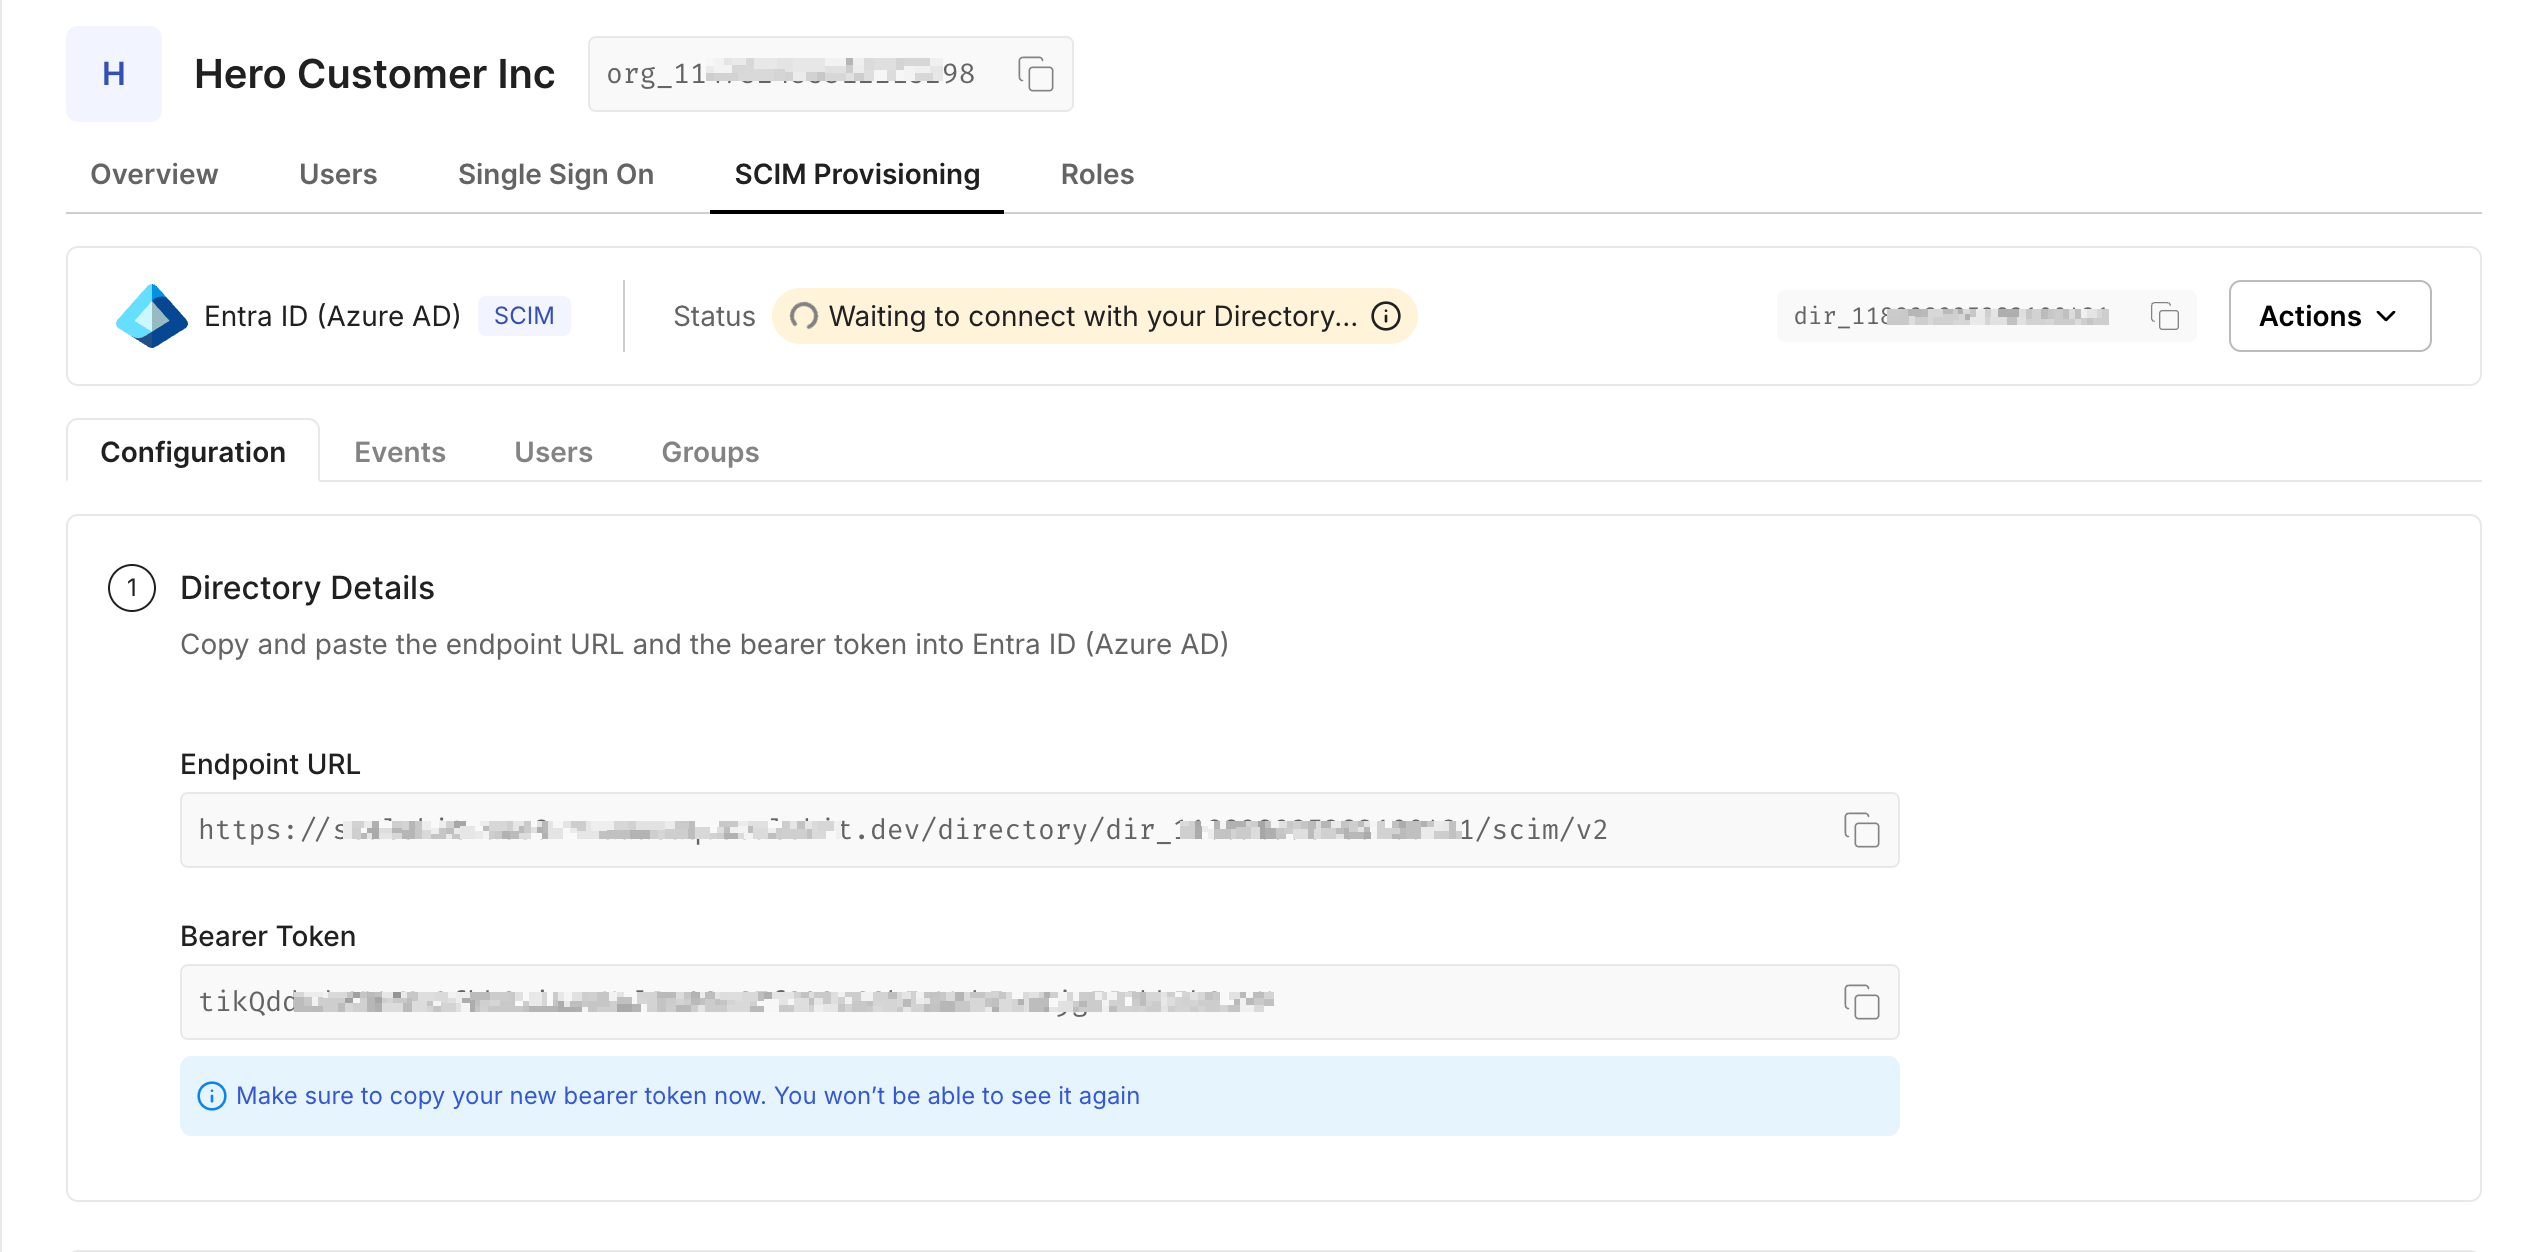
Click “Configure” after selecting “EntraID” to generate an Endpoint URL and Bearer token for your organization, allowing the app to listen to events and maintain synchronization.
-
Add a new application in Entra ID
Section titled “Add a new application in Entra ID”To send user-related updates to the app you want to onboard, create a new app in Microsoft Entra ID.
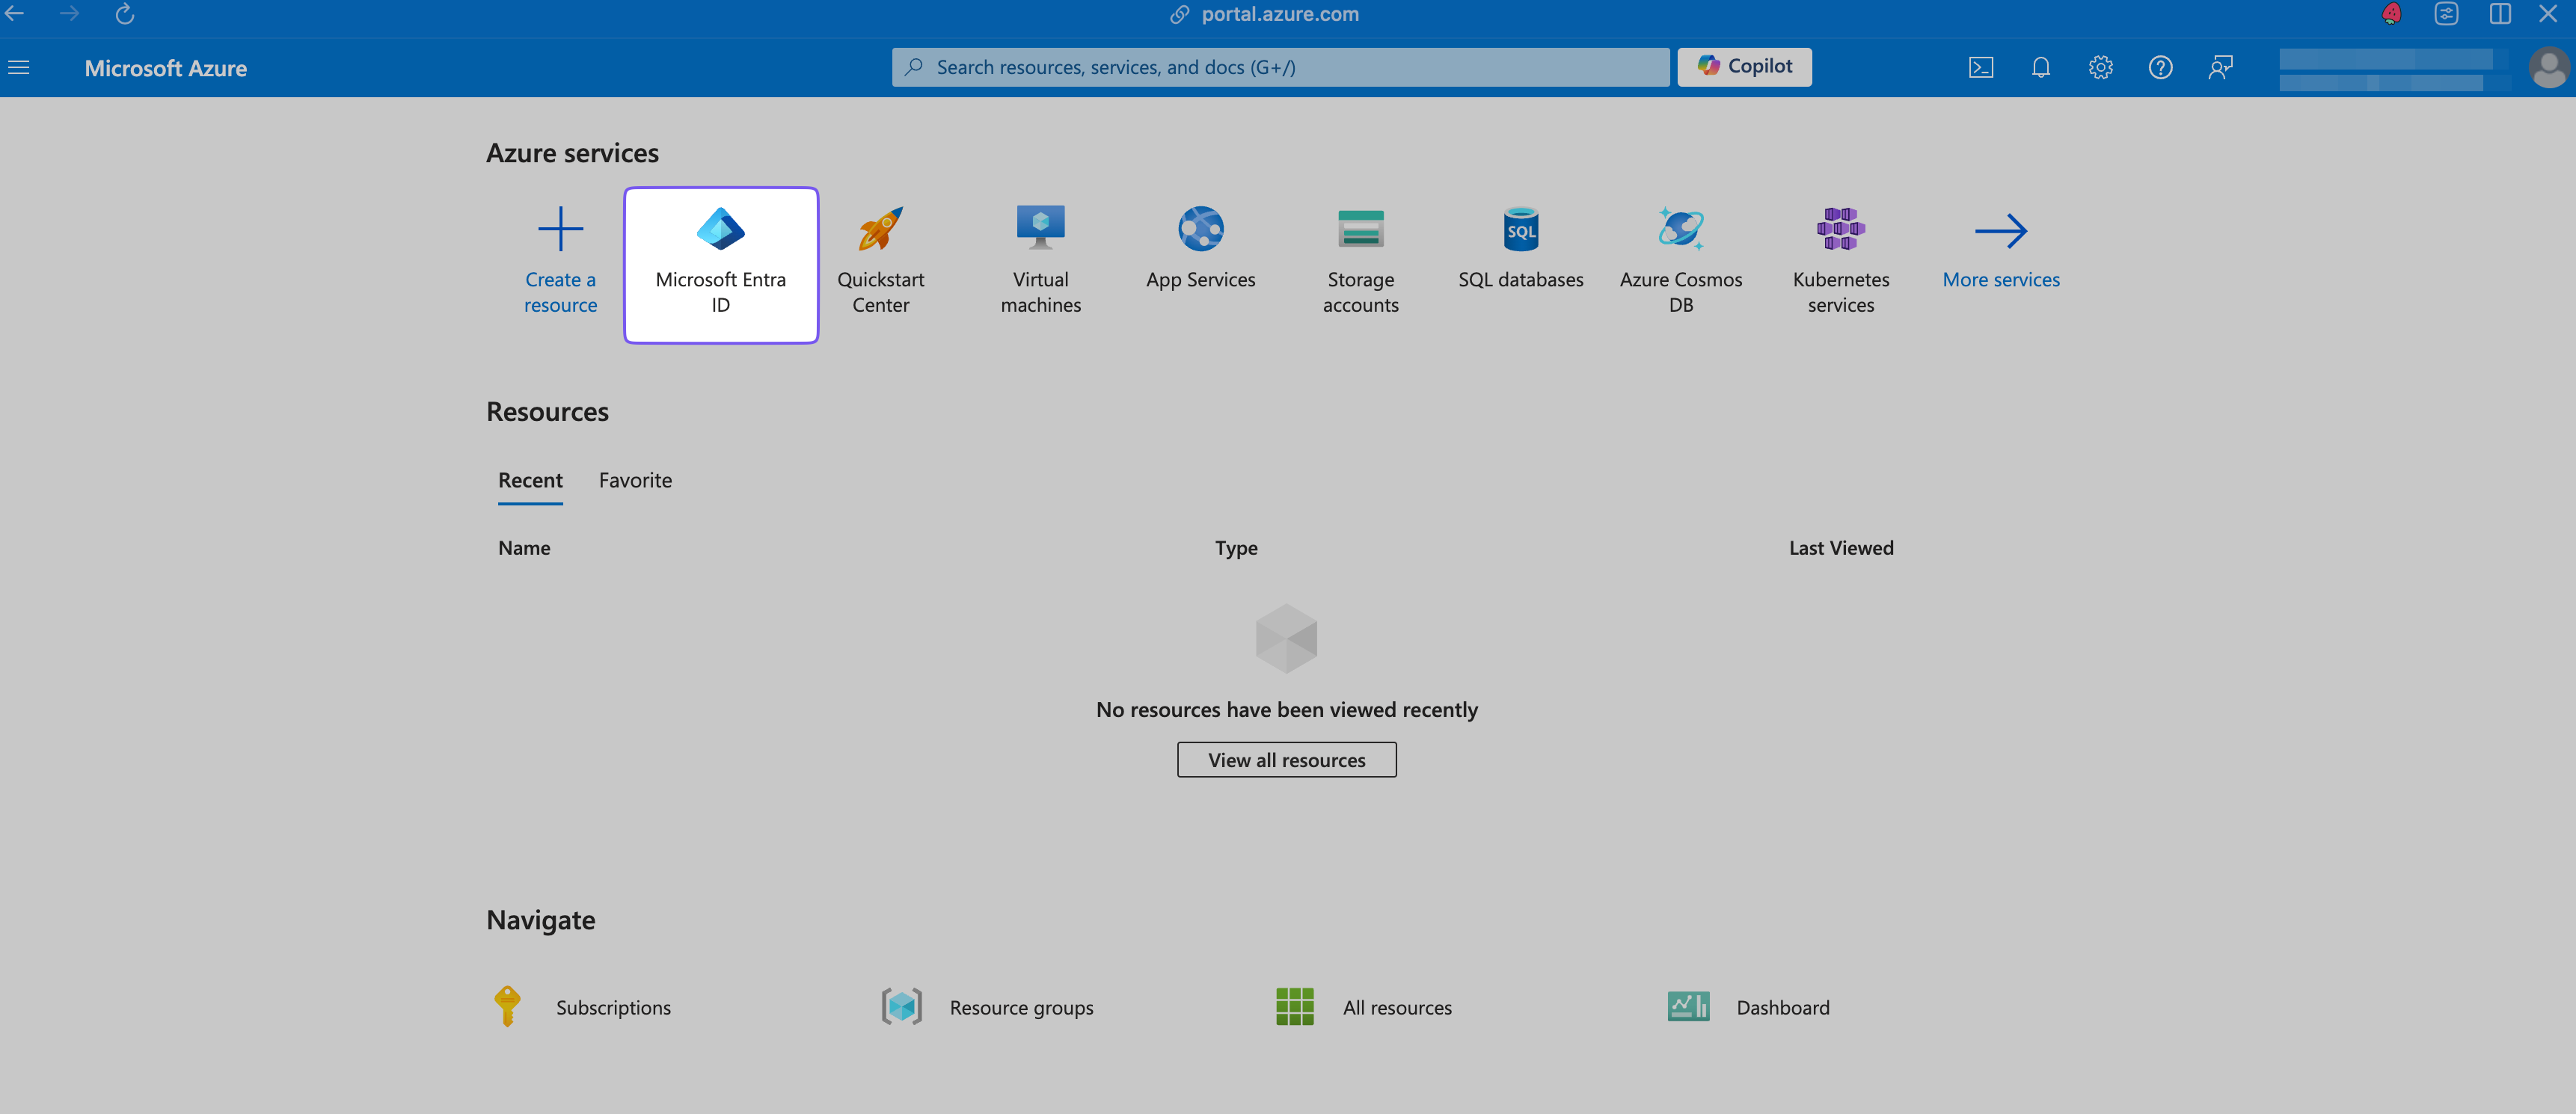
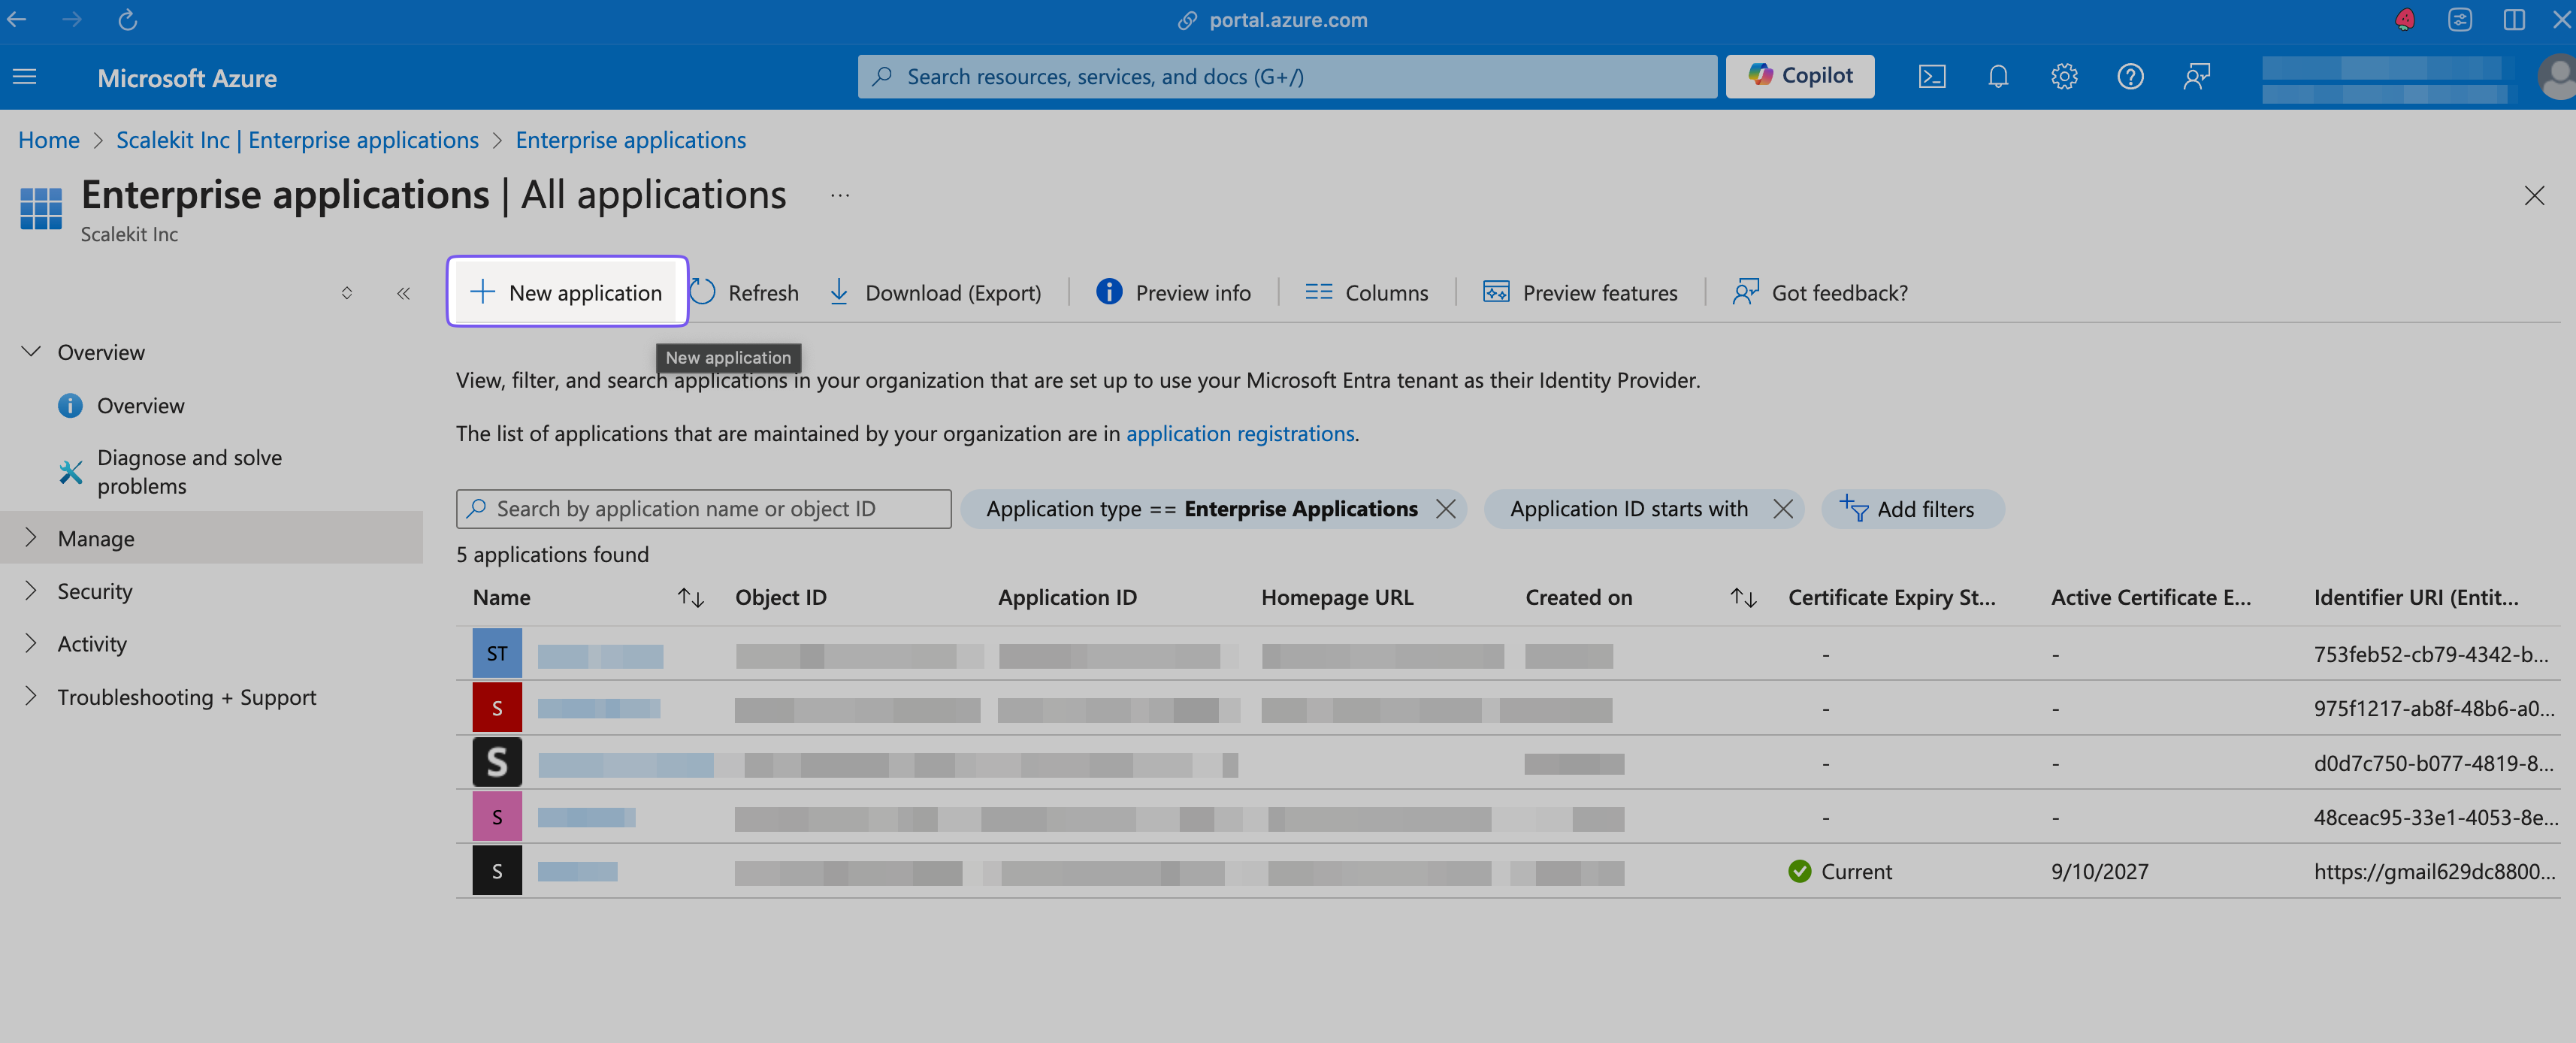
Go to the Microsoft Azure portal and select “Microsoft Entra ID”.
In the “Manage > Enterprise applications” tab, click ”+ New application”.
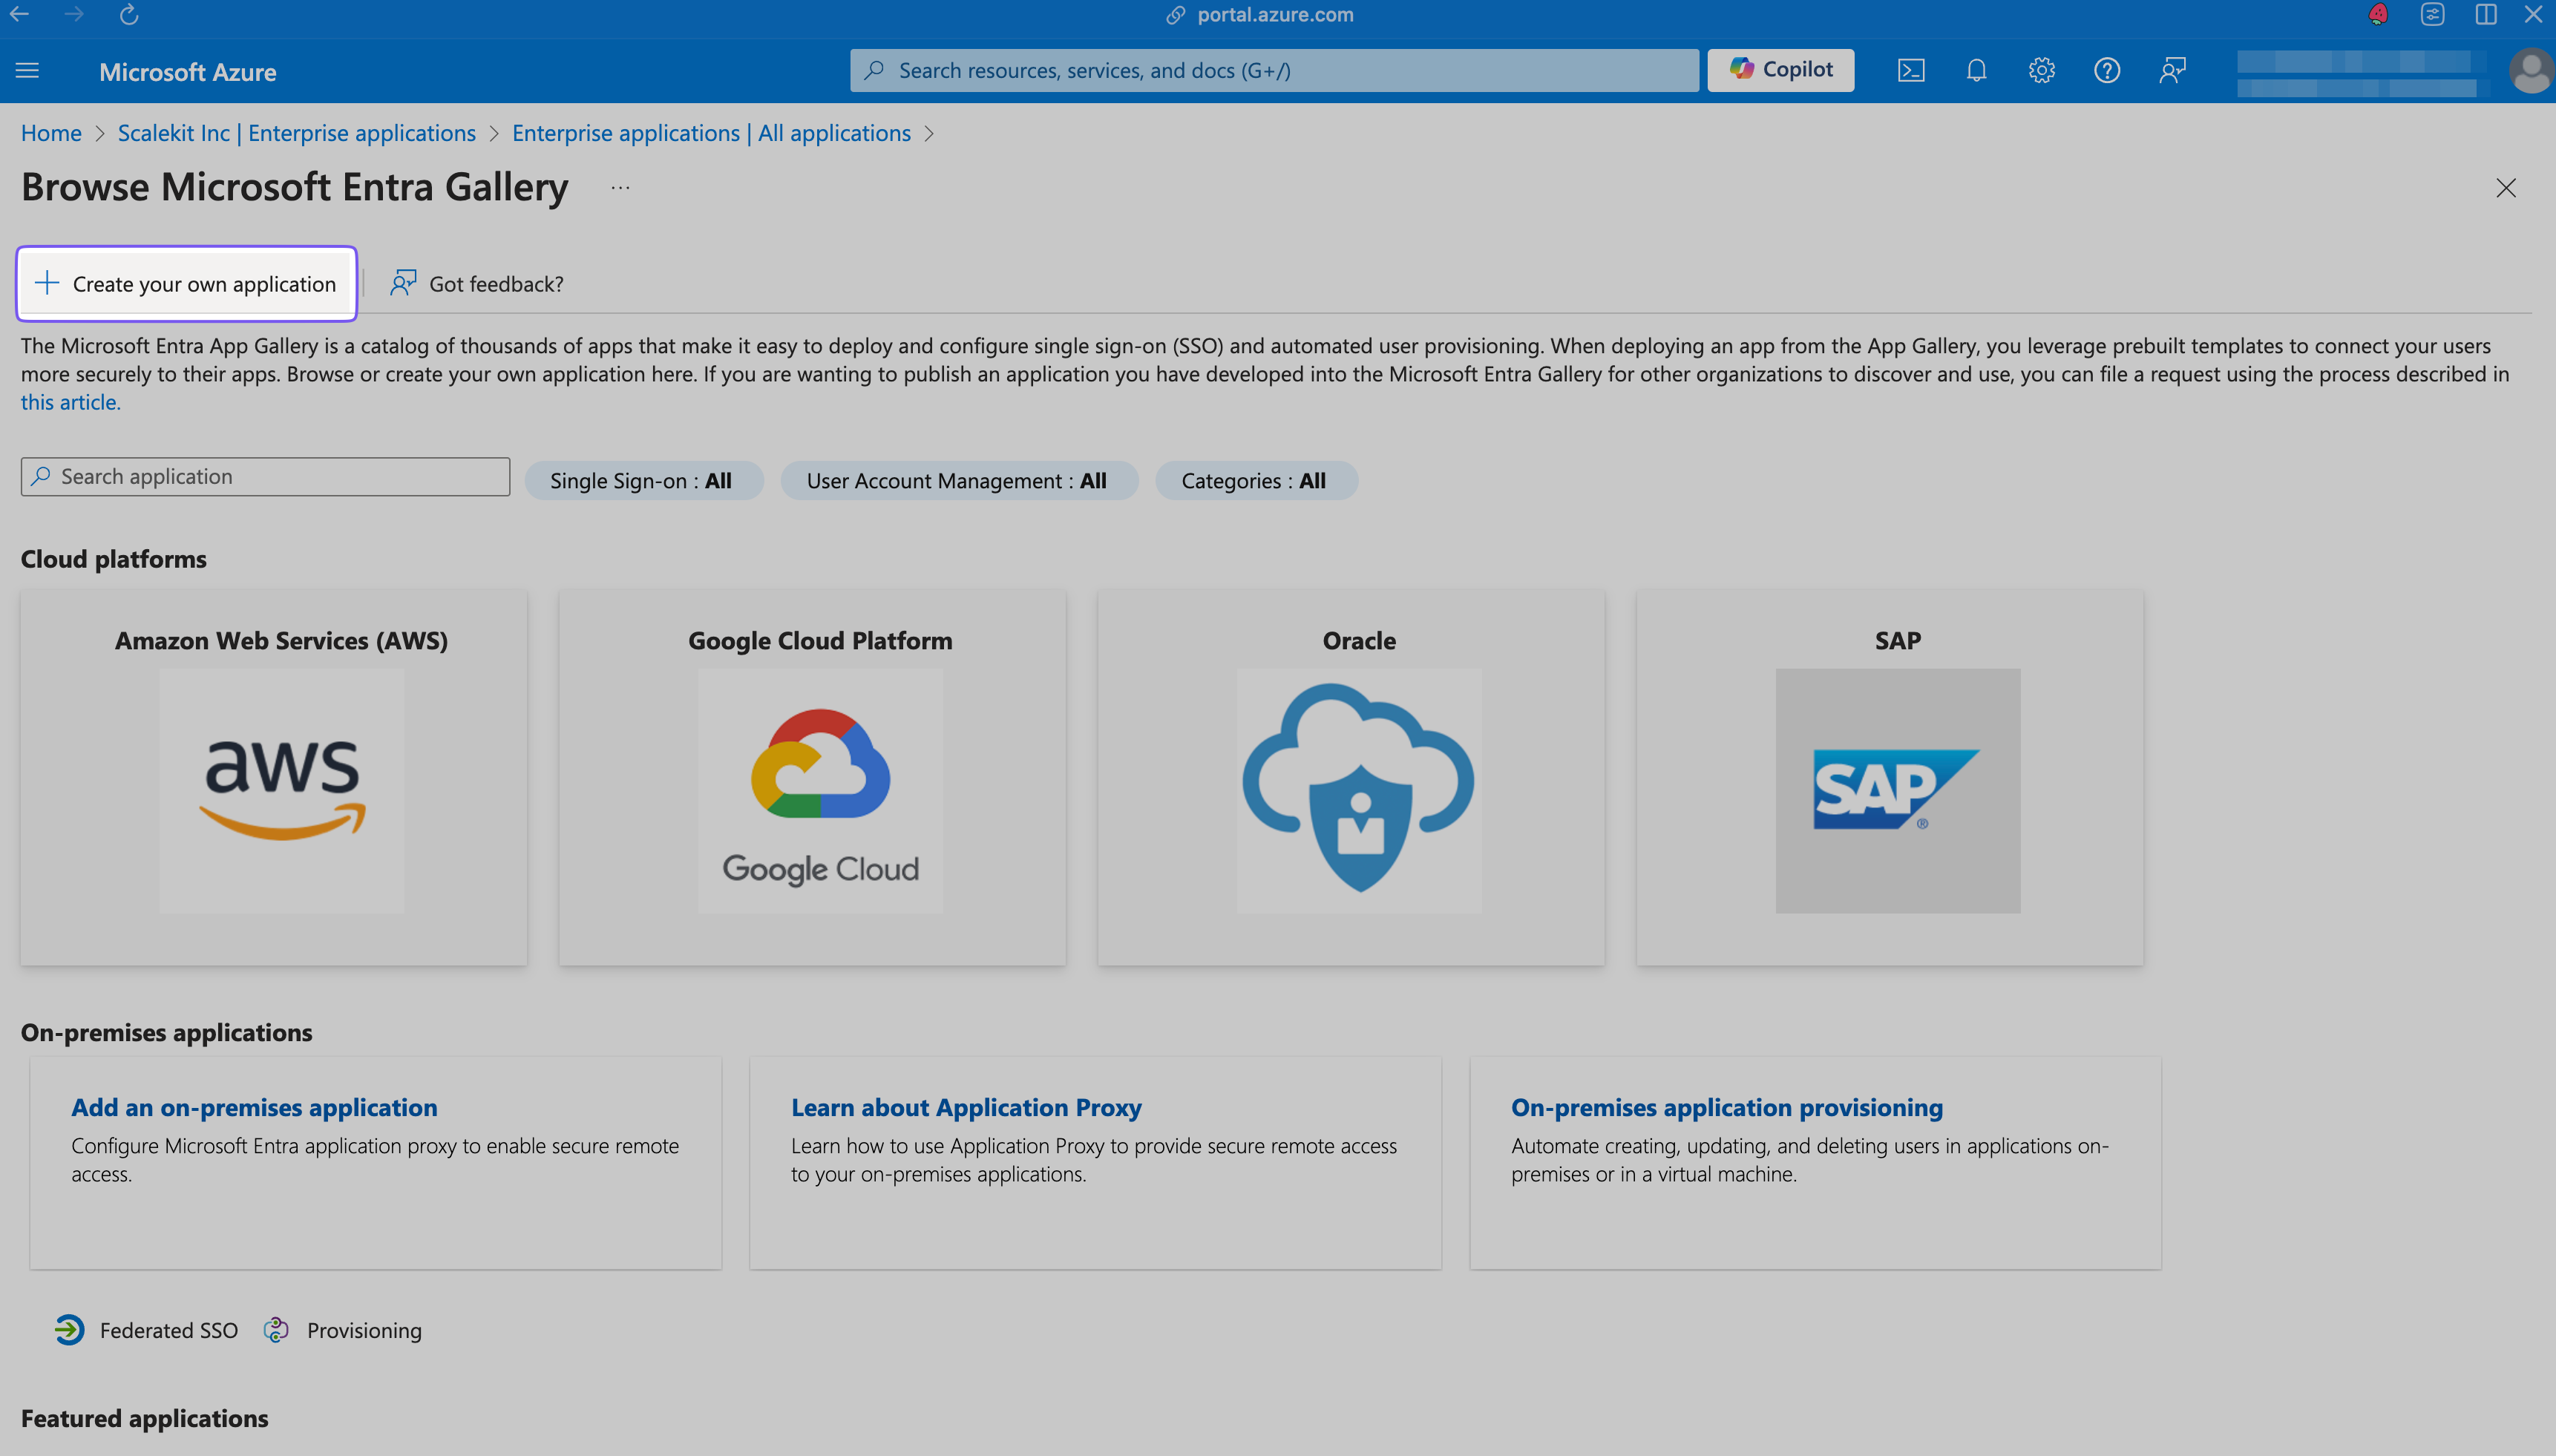
Click ”+ Create your own application” in the modal that opens on the right.
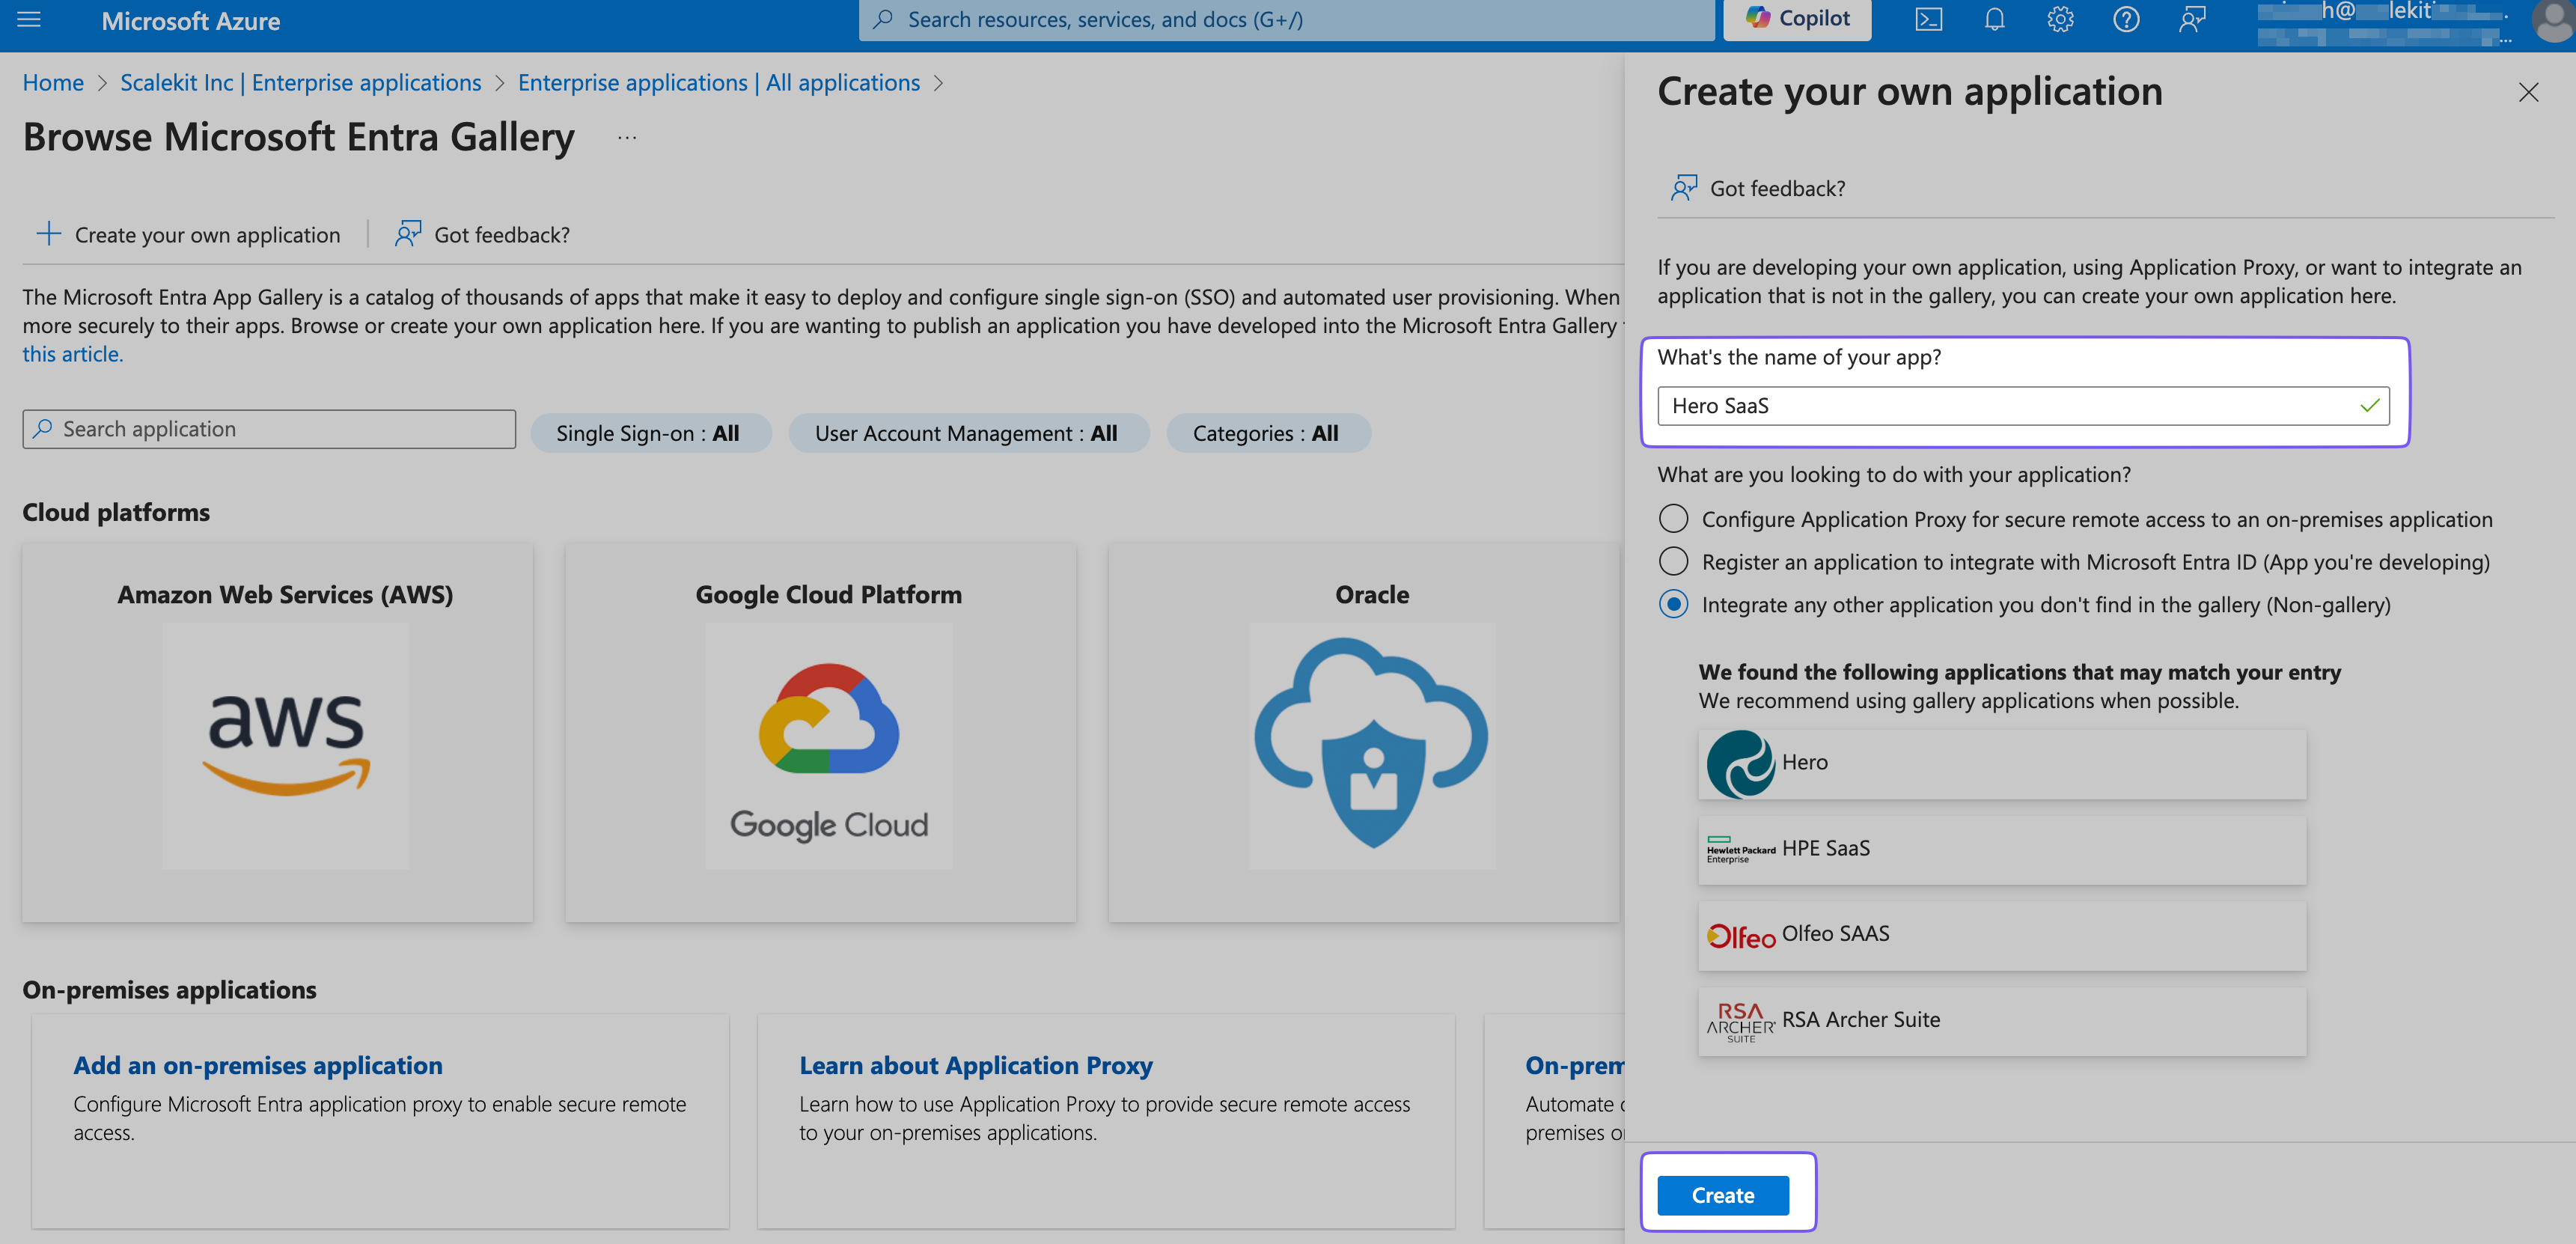
Name the app you want to onboard (e.g., “Hero SaaS”) and click “Create”, leaving other defaults as-is.
-
Configure provisioning settings
Section titled “Configure provisioning settings”In the created application go to “Manage → Provisioning”
In the “Hero SaaS” app’s overview, select “Manage > Provisioning” from the left sidebar.
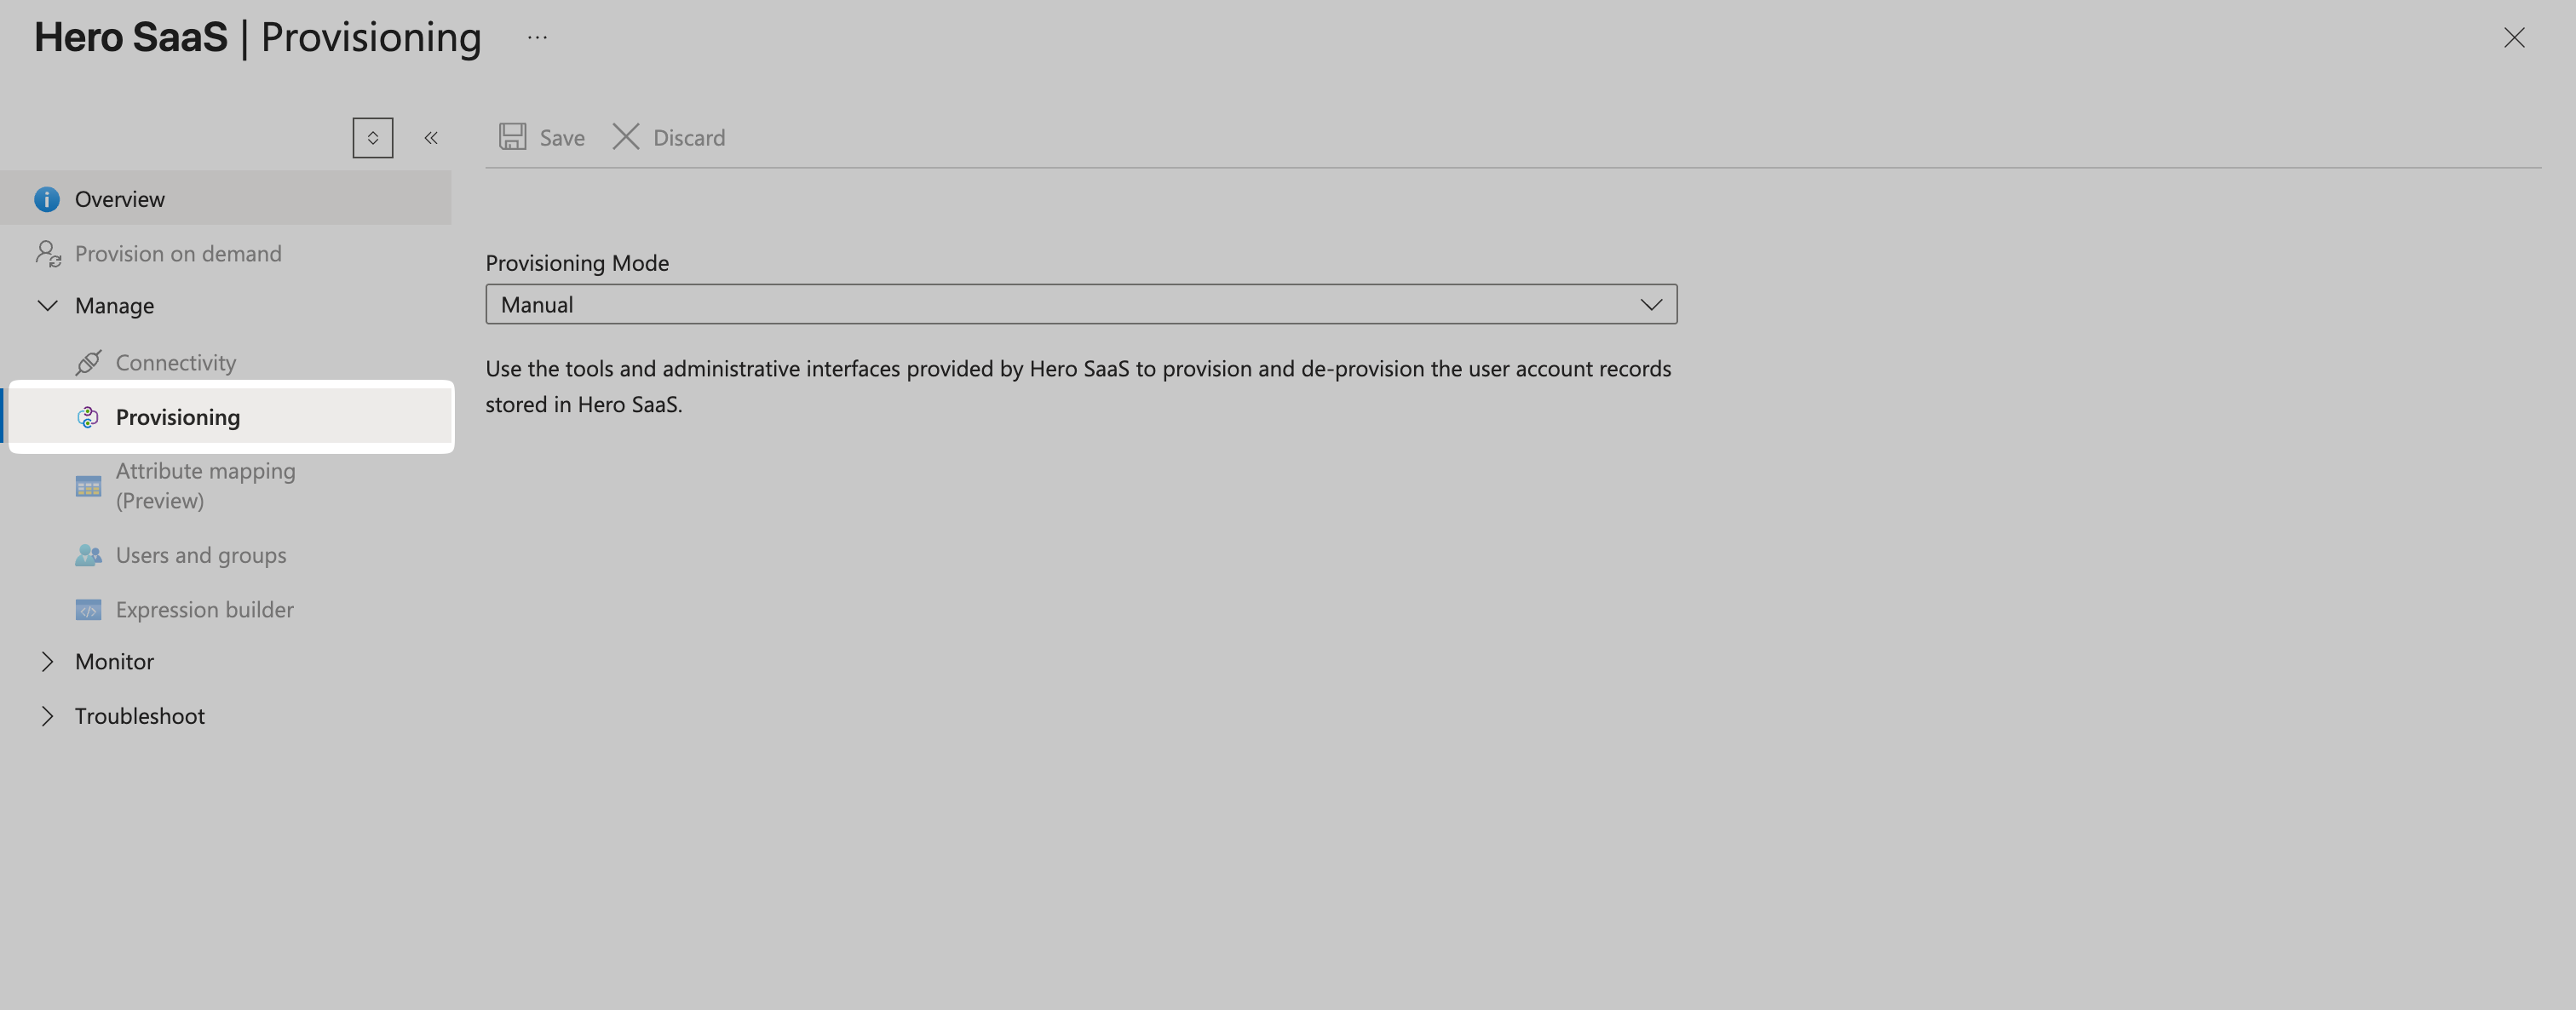
Set the Provisioning Mode to “Automatic”.
In the Admin Credentials section, set:
- Tenant URL: Endpoint
- Secret Token: Bearer Token generated previously
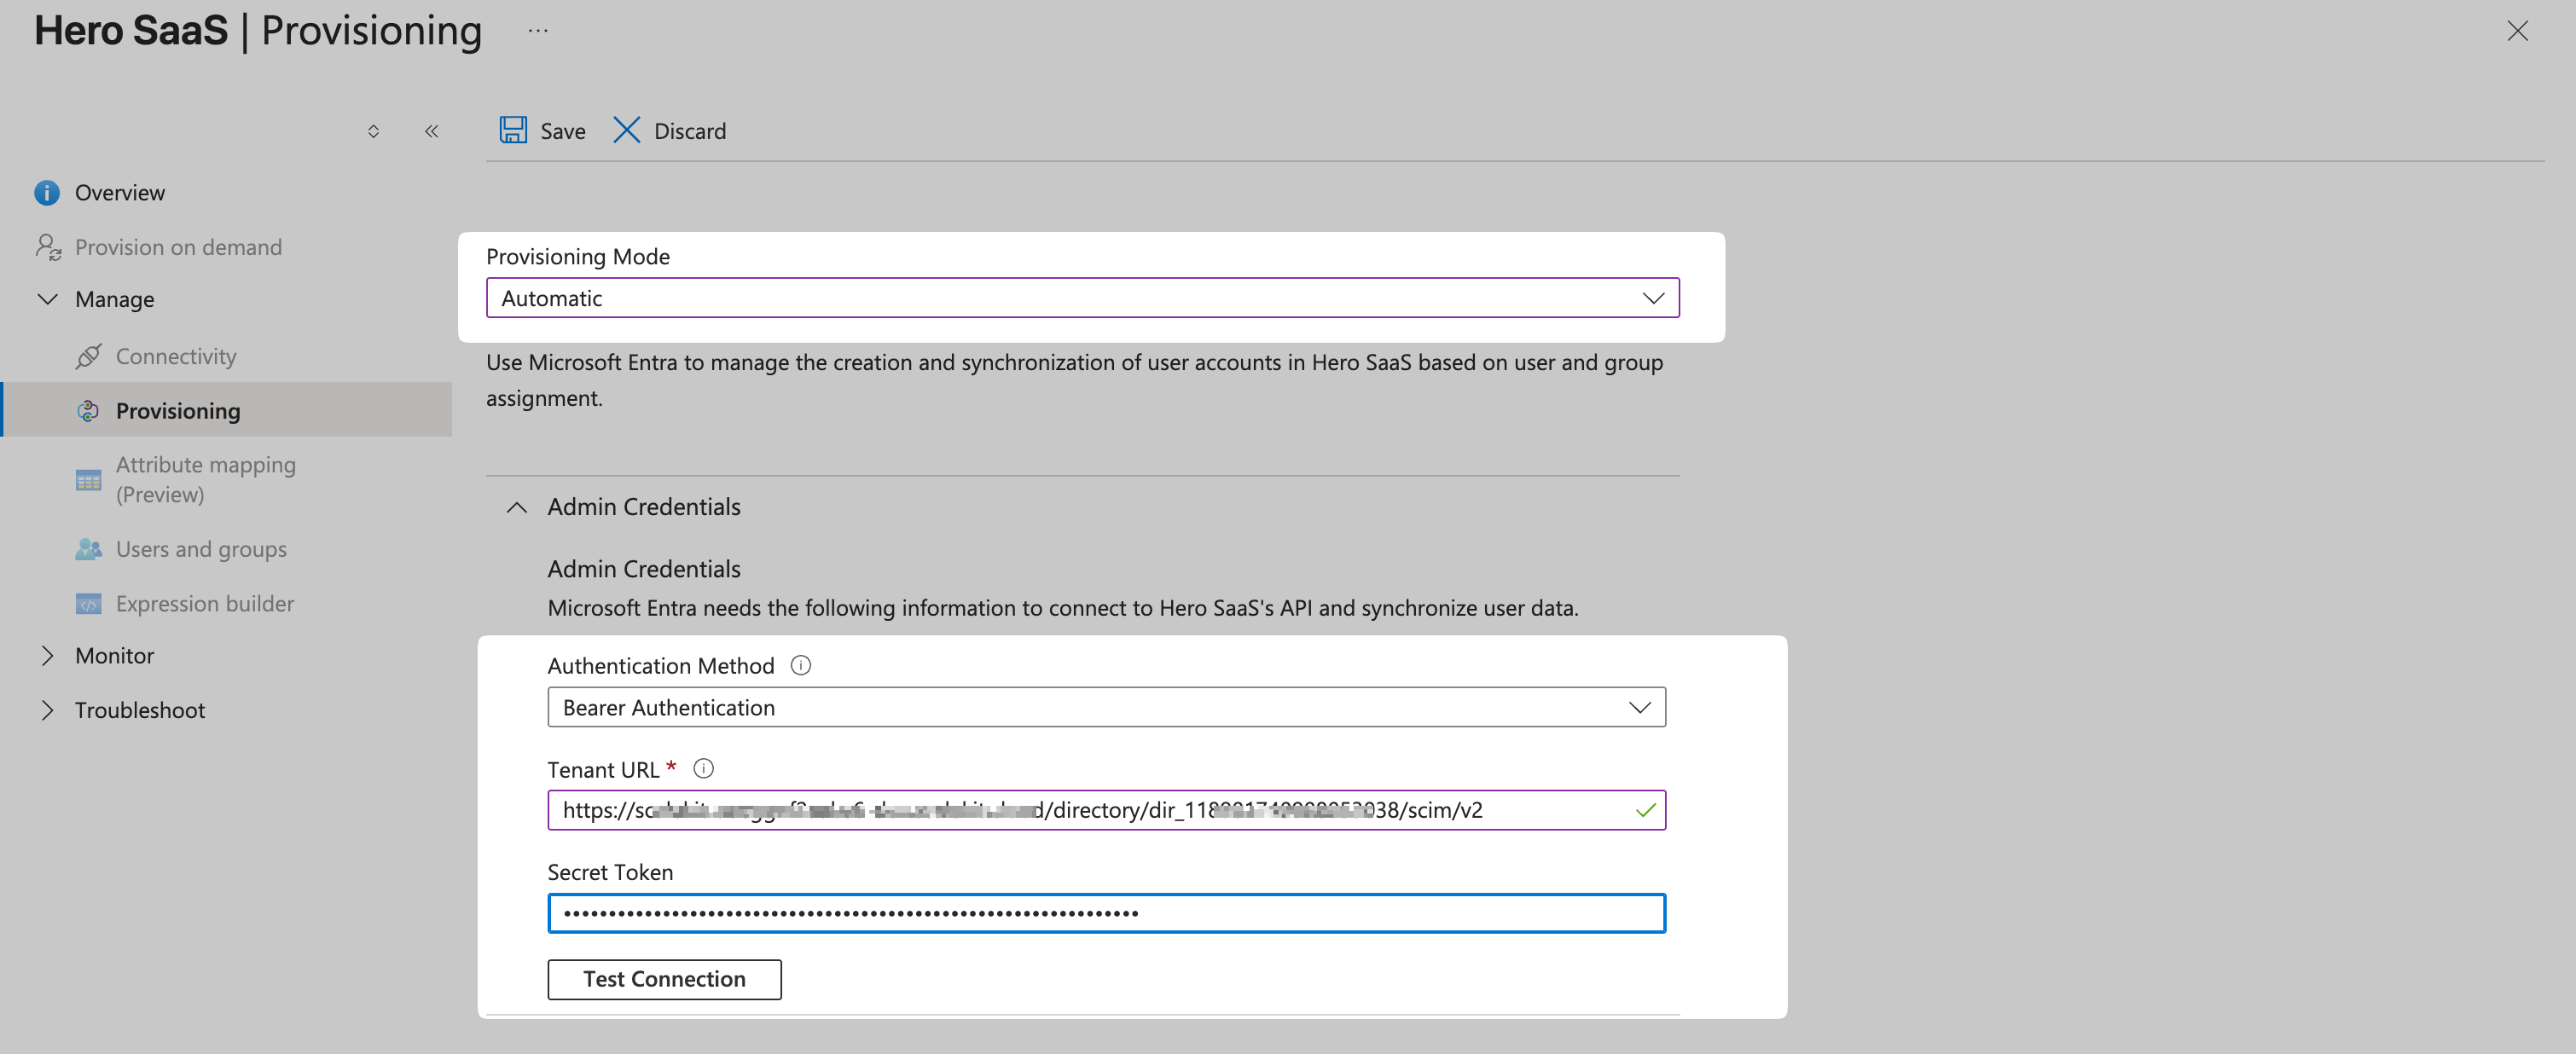
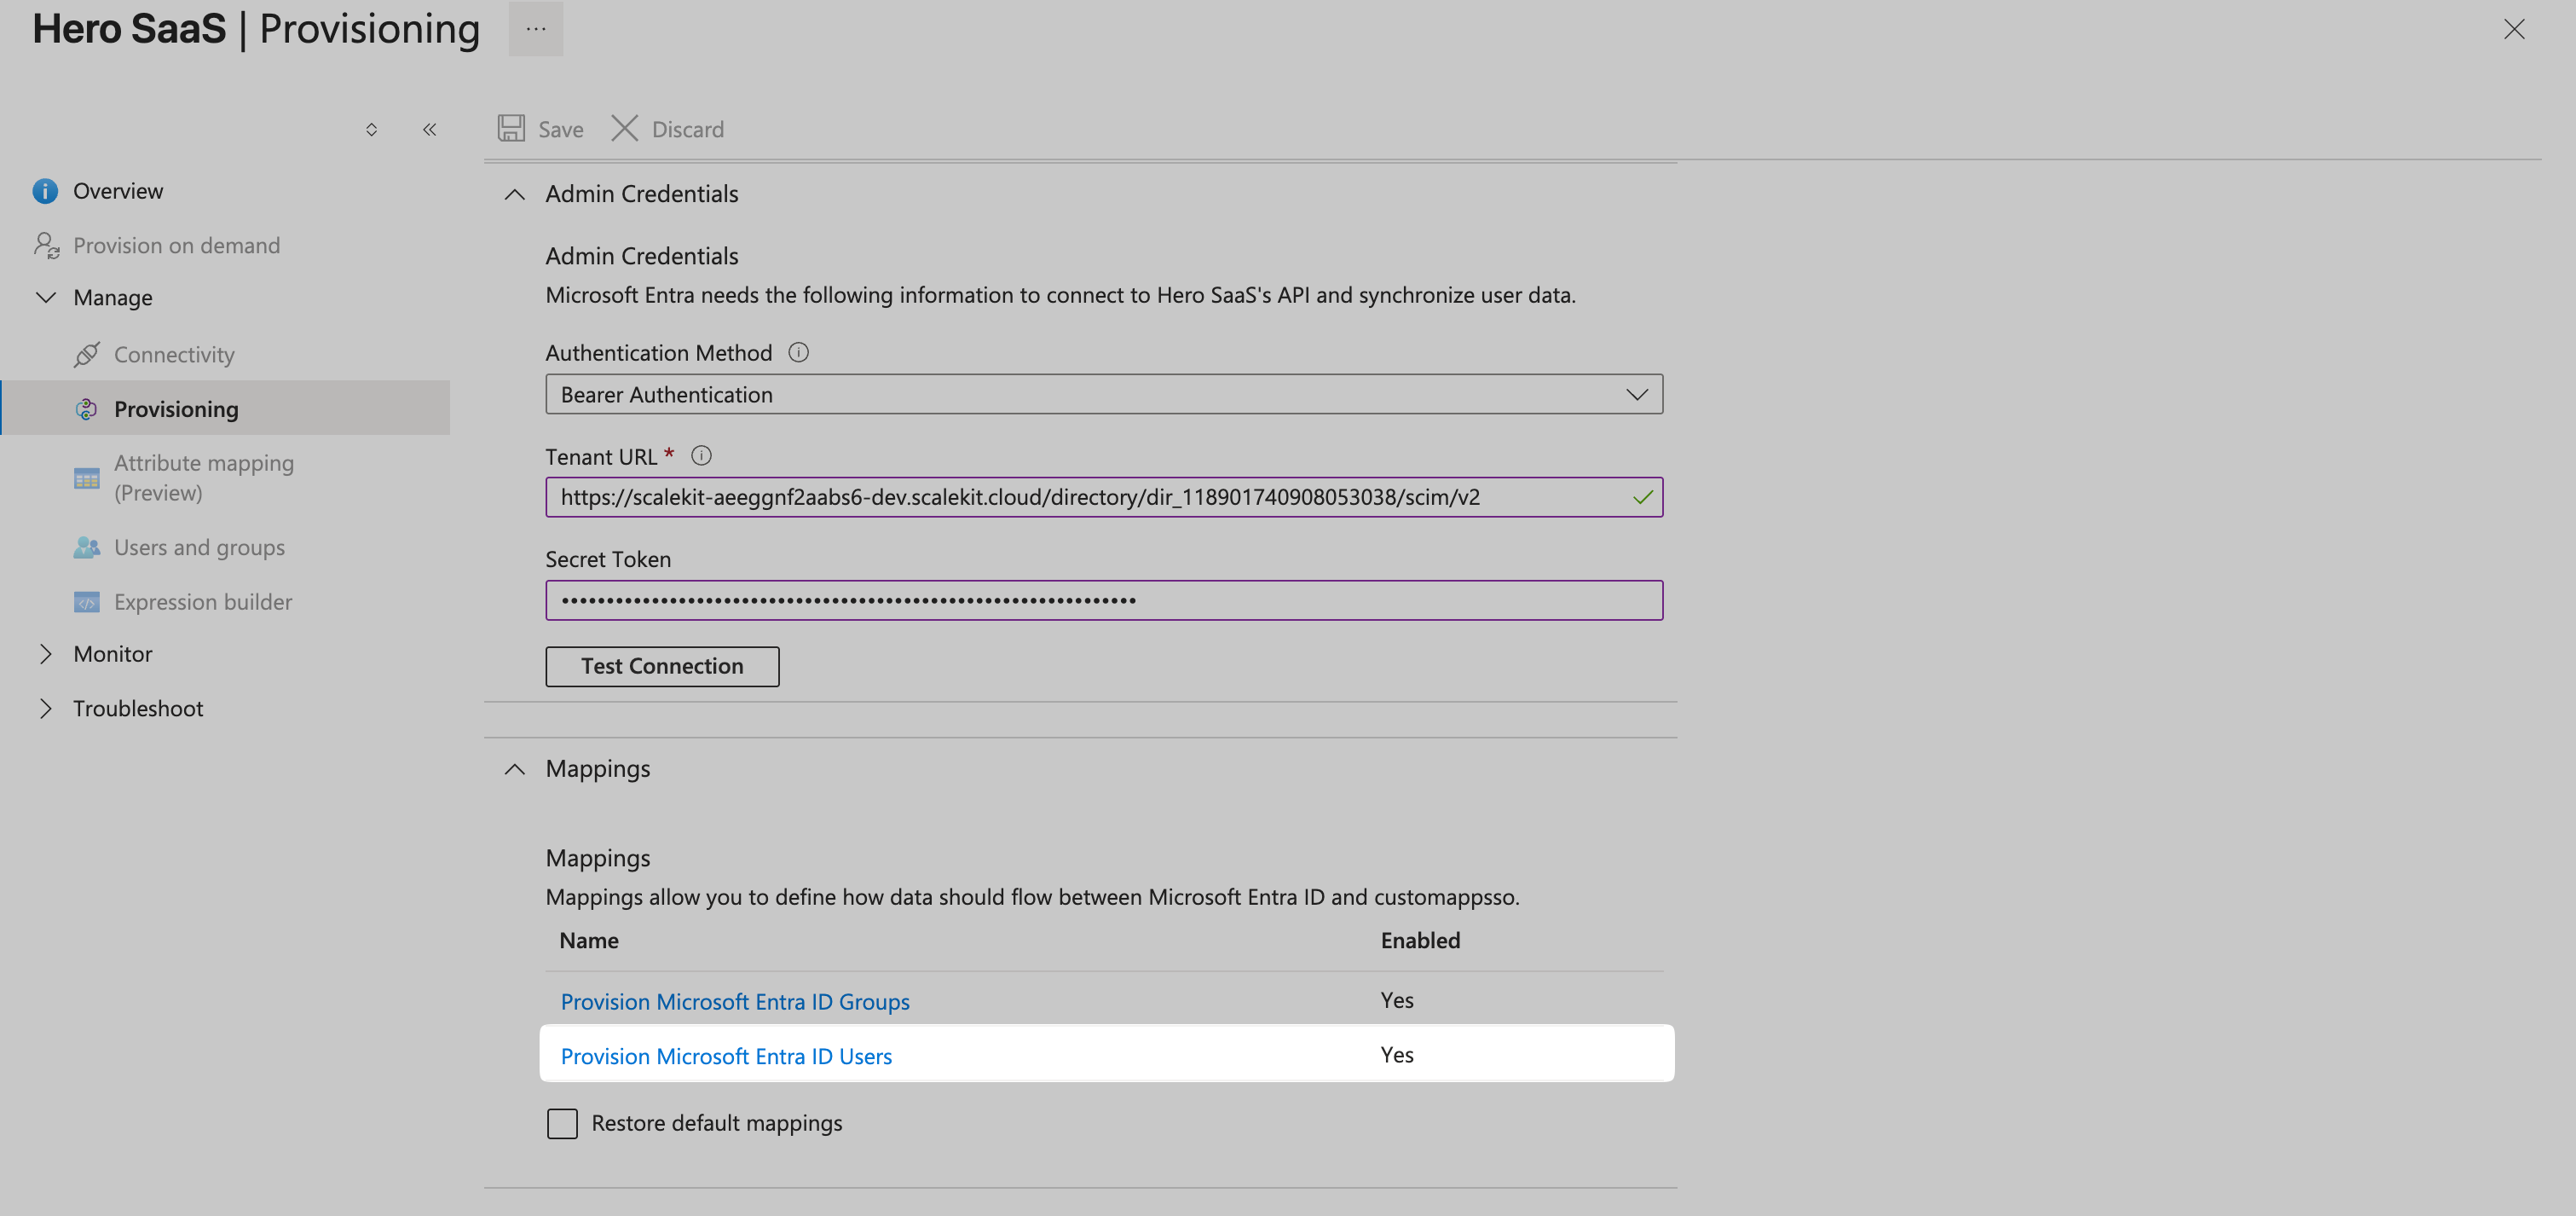
Once the credentials are configured, Test your connection and click “Save”.
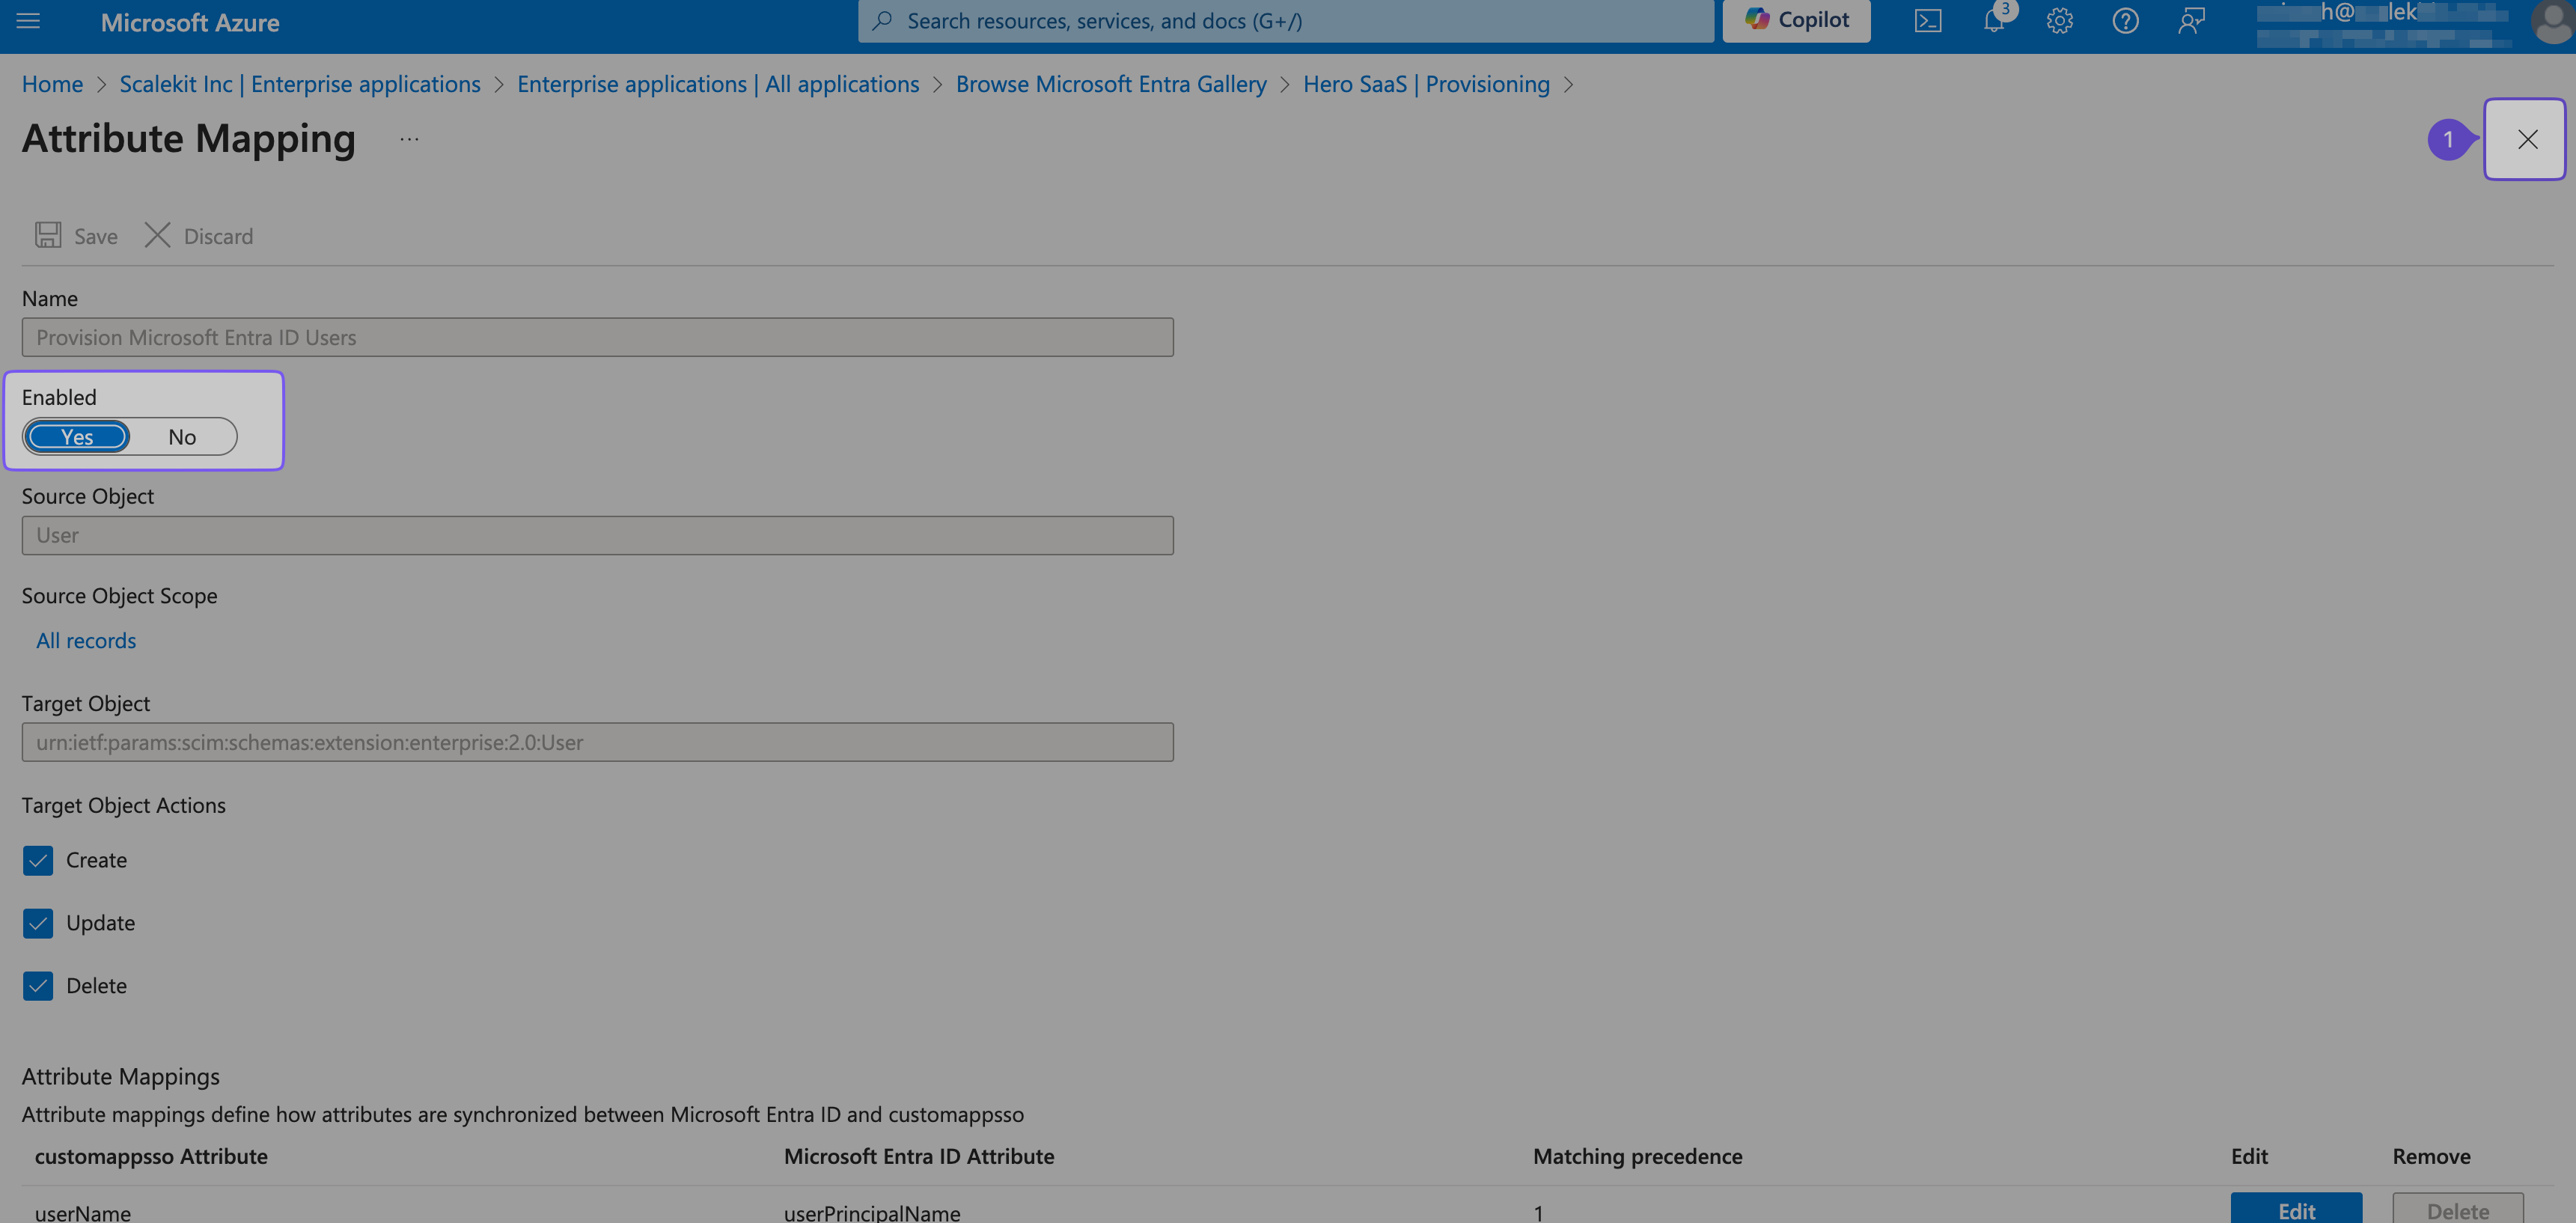
In the Mappings section, click “Provision Microsoft Entra ID Users” and toggle “Enabled” to “Yes”.
Close the modal and reload the page for changes to take effect.
Go to “Overview > Manage > Provisioning” and ensure “Provisioning Status” is toggled “On”.
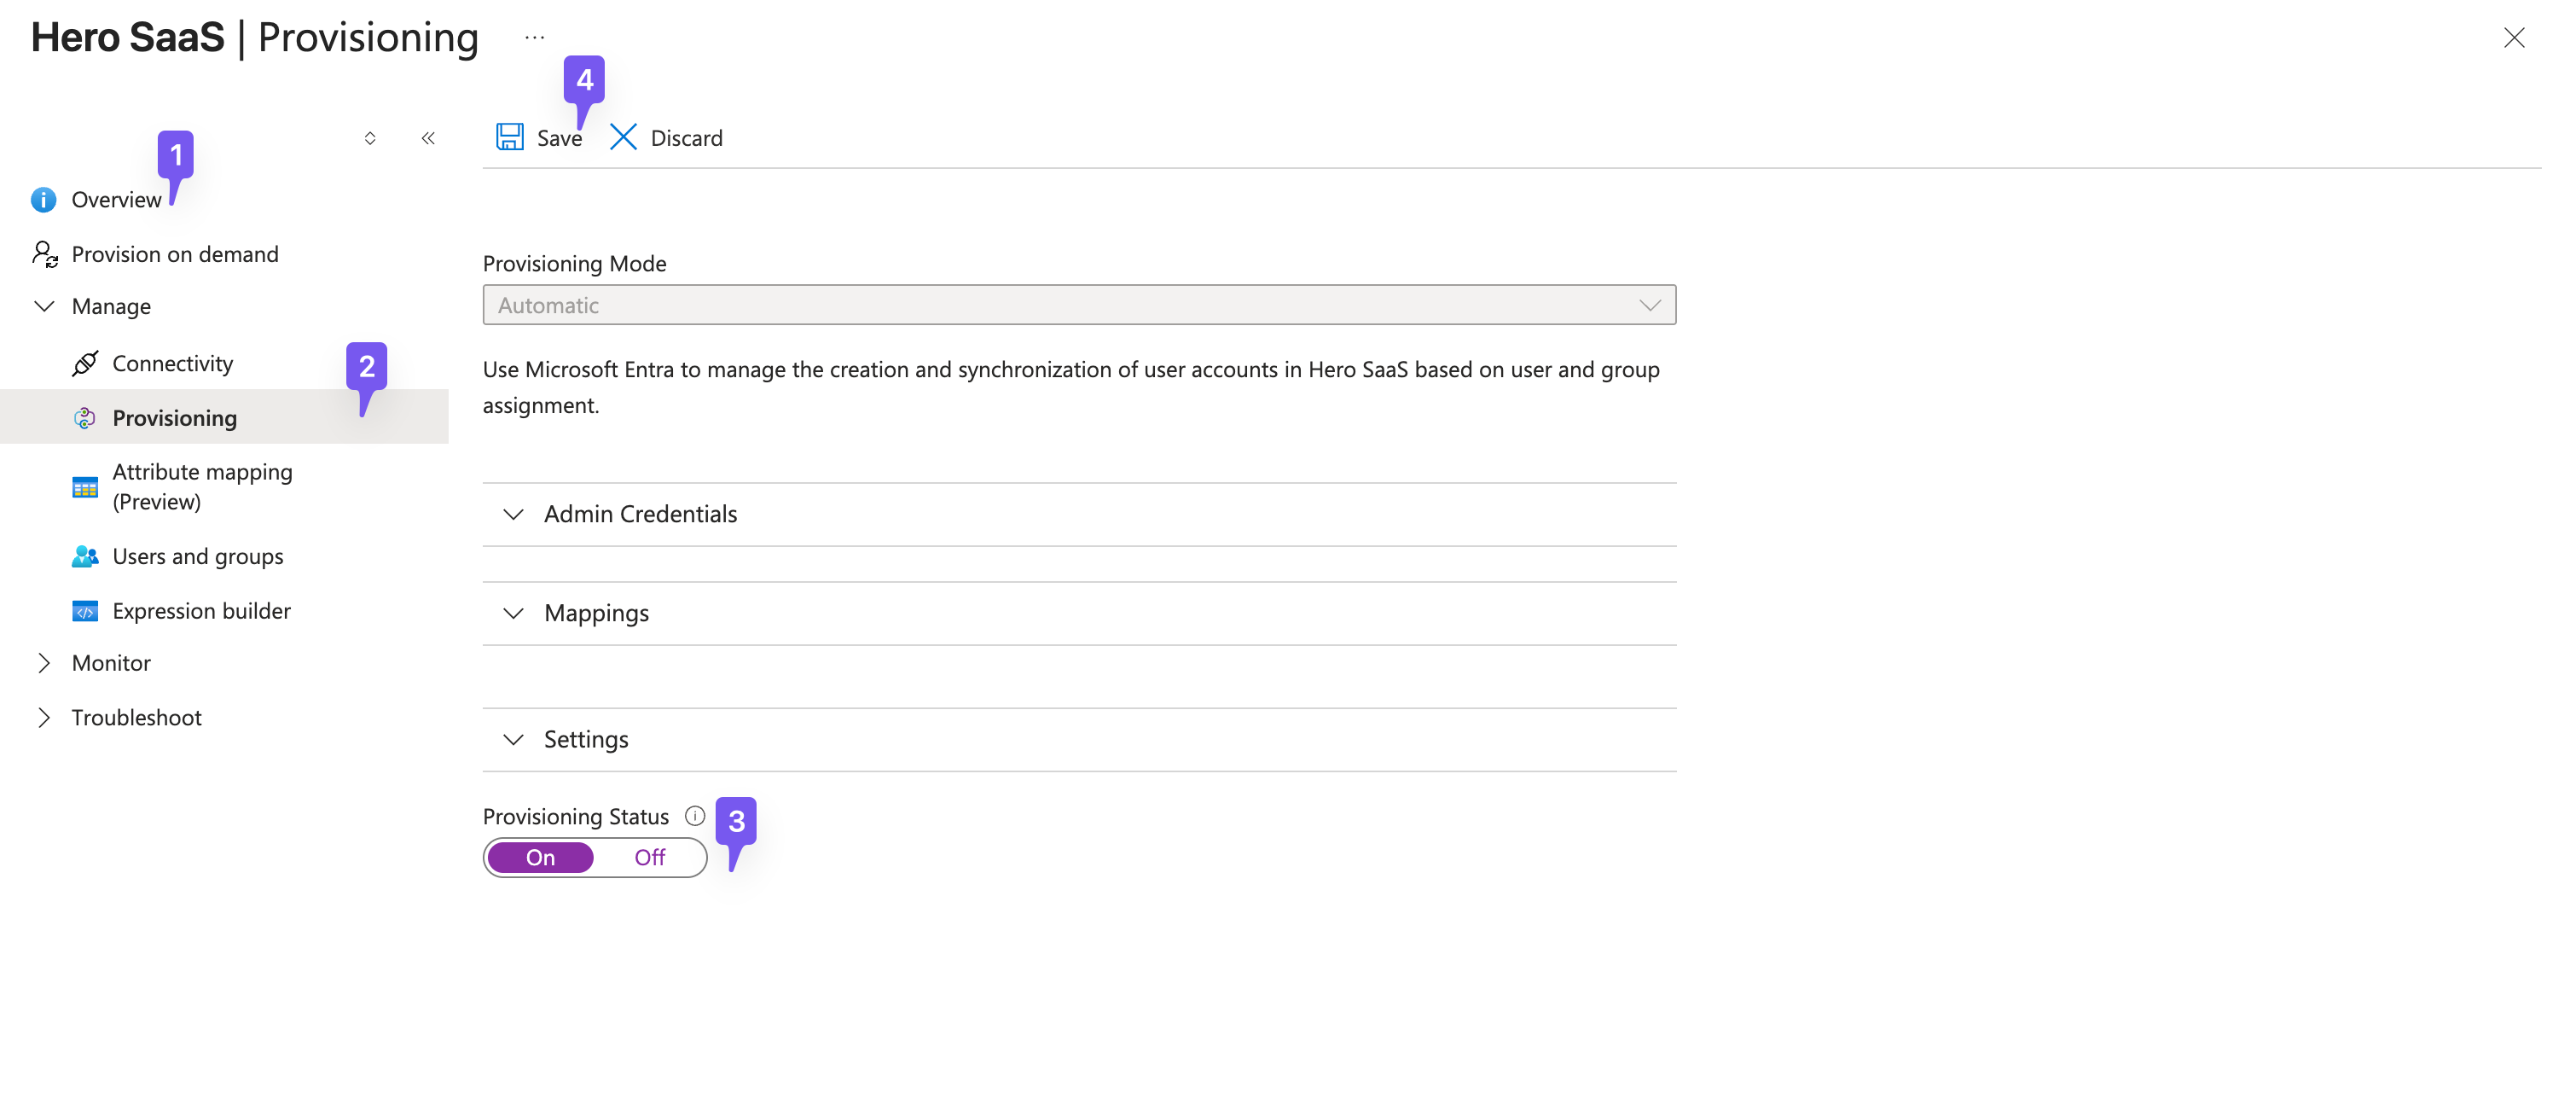
Entra ID is now set up to send events to Hero SaaS when users are added or removed.
-
Map custom attributes (optional)
Section titled “Map custom attributes (optional)”By default, Entra ID syncs standard attributes such as email, first name, last name, and display name. To sync a custom attribute (for example, a department code or employee ID), you must map it explicitly in the provisioning configuration.
In your app’s Provisioning settings, click Edit attribute mappings under the Mappings section.
At the bottom of the page, select Show advanced options, then click Edit attribute list for [app name]. Add the custom target attribute as a new SCIM extension schema field (for example,
urn:ietf:params:scim:schemas:extension:enterprise:2.0:User:employeeNumber). This ensures the attribute exists for mapping.In the attribute mapping list, click Add new mapping at the bottom.
Configure the mapping:
- Mapping type: Select Direct.
- Source attribute: Select the Entra ID attribute that contains the value you want to sync (for example,
employeeIdor a custom extension attribute likeextension_<appId>_<attributeName>). - Target attribute: Select or type the matching SCIM attribute name as configured in Scalekit (for example,
urn:ietf:params:scim:schemas:extension:enterprise:2.0:User:employeeNumber).
Click Ok, then save the provisioning configuration.
-
Assign User and Group
Section titled “Assign User and Group”In the created application, go to “Users and groups” and click ”+ Add user/group”
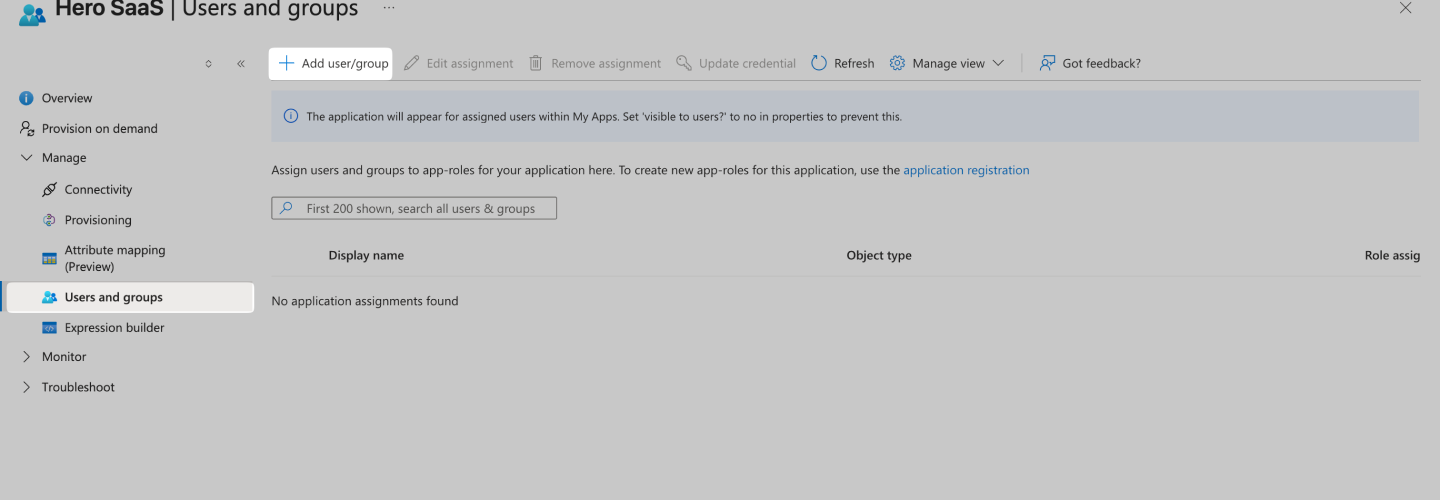
Click the button under the “Users and Groups”. In the menu, select the users and groups that you want to add to the SCIM application, and click “Select”.
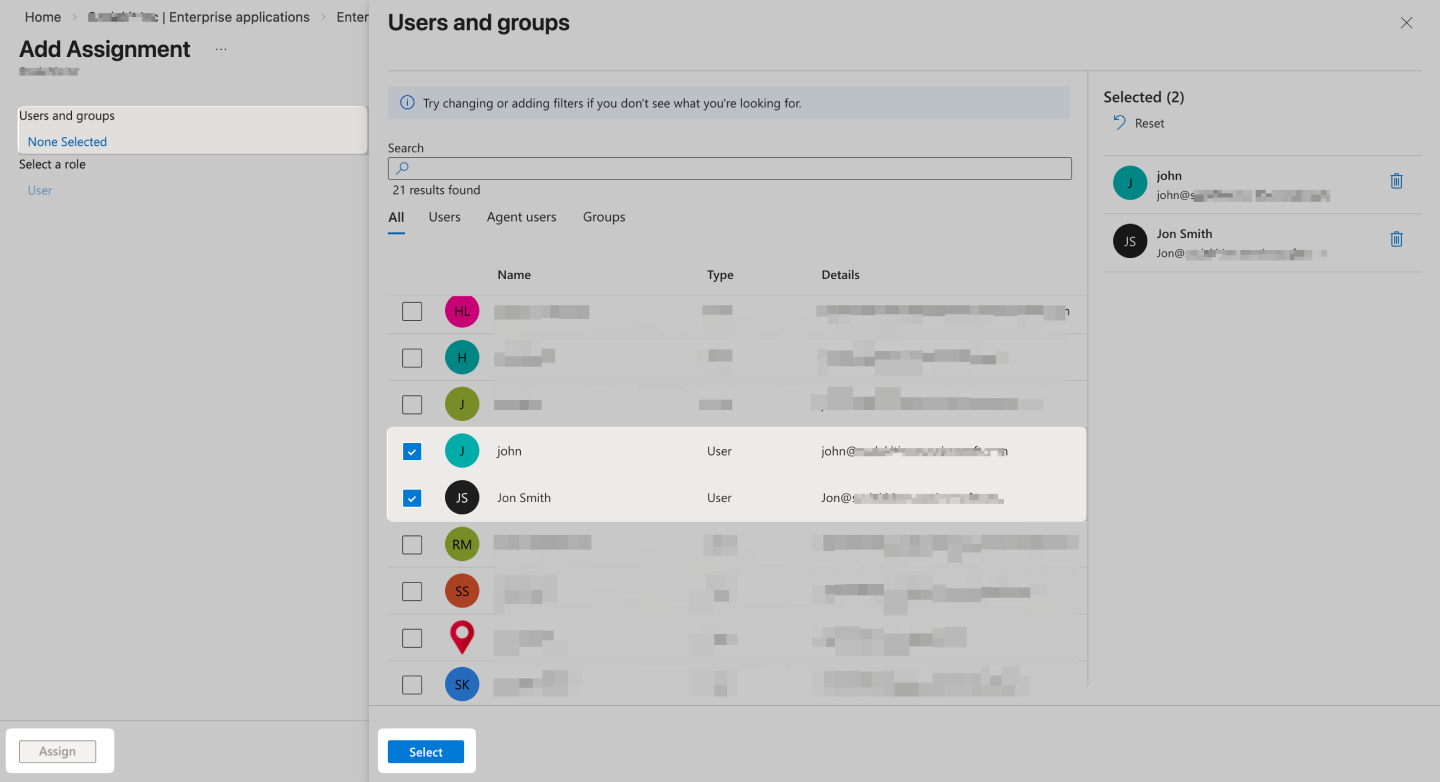
Once the users are selected, the “Assign” button is automatically enabled. Click “Assign”.
-
Test user and group provisioning
Section titled “Test user and group provisioning”In the Hero SaaS Application, go to “Provision on demand”. Input a user name from your user list and click “Provision”.
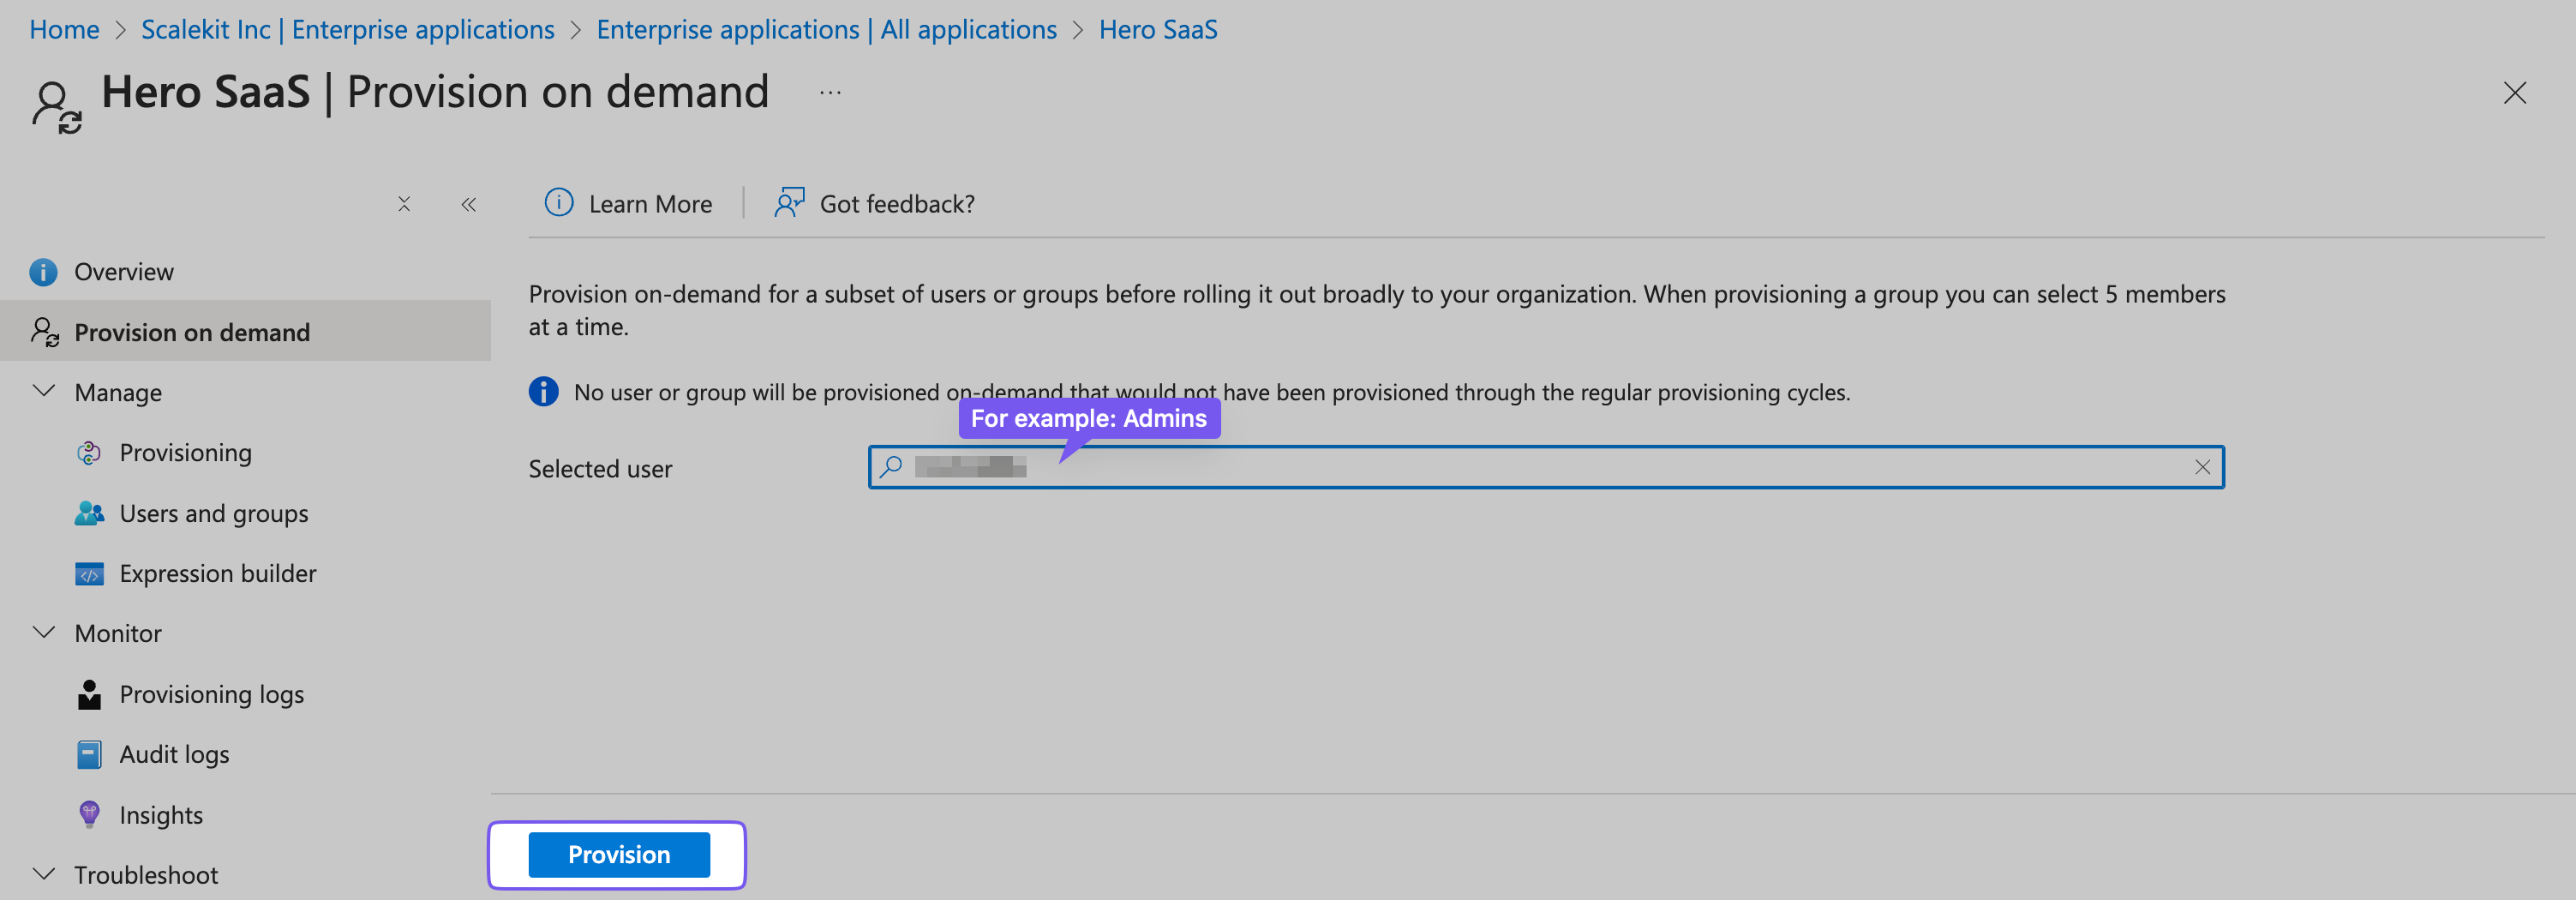
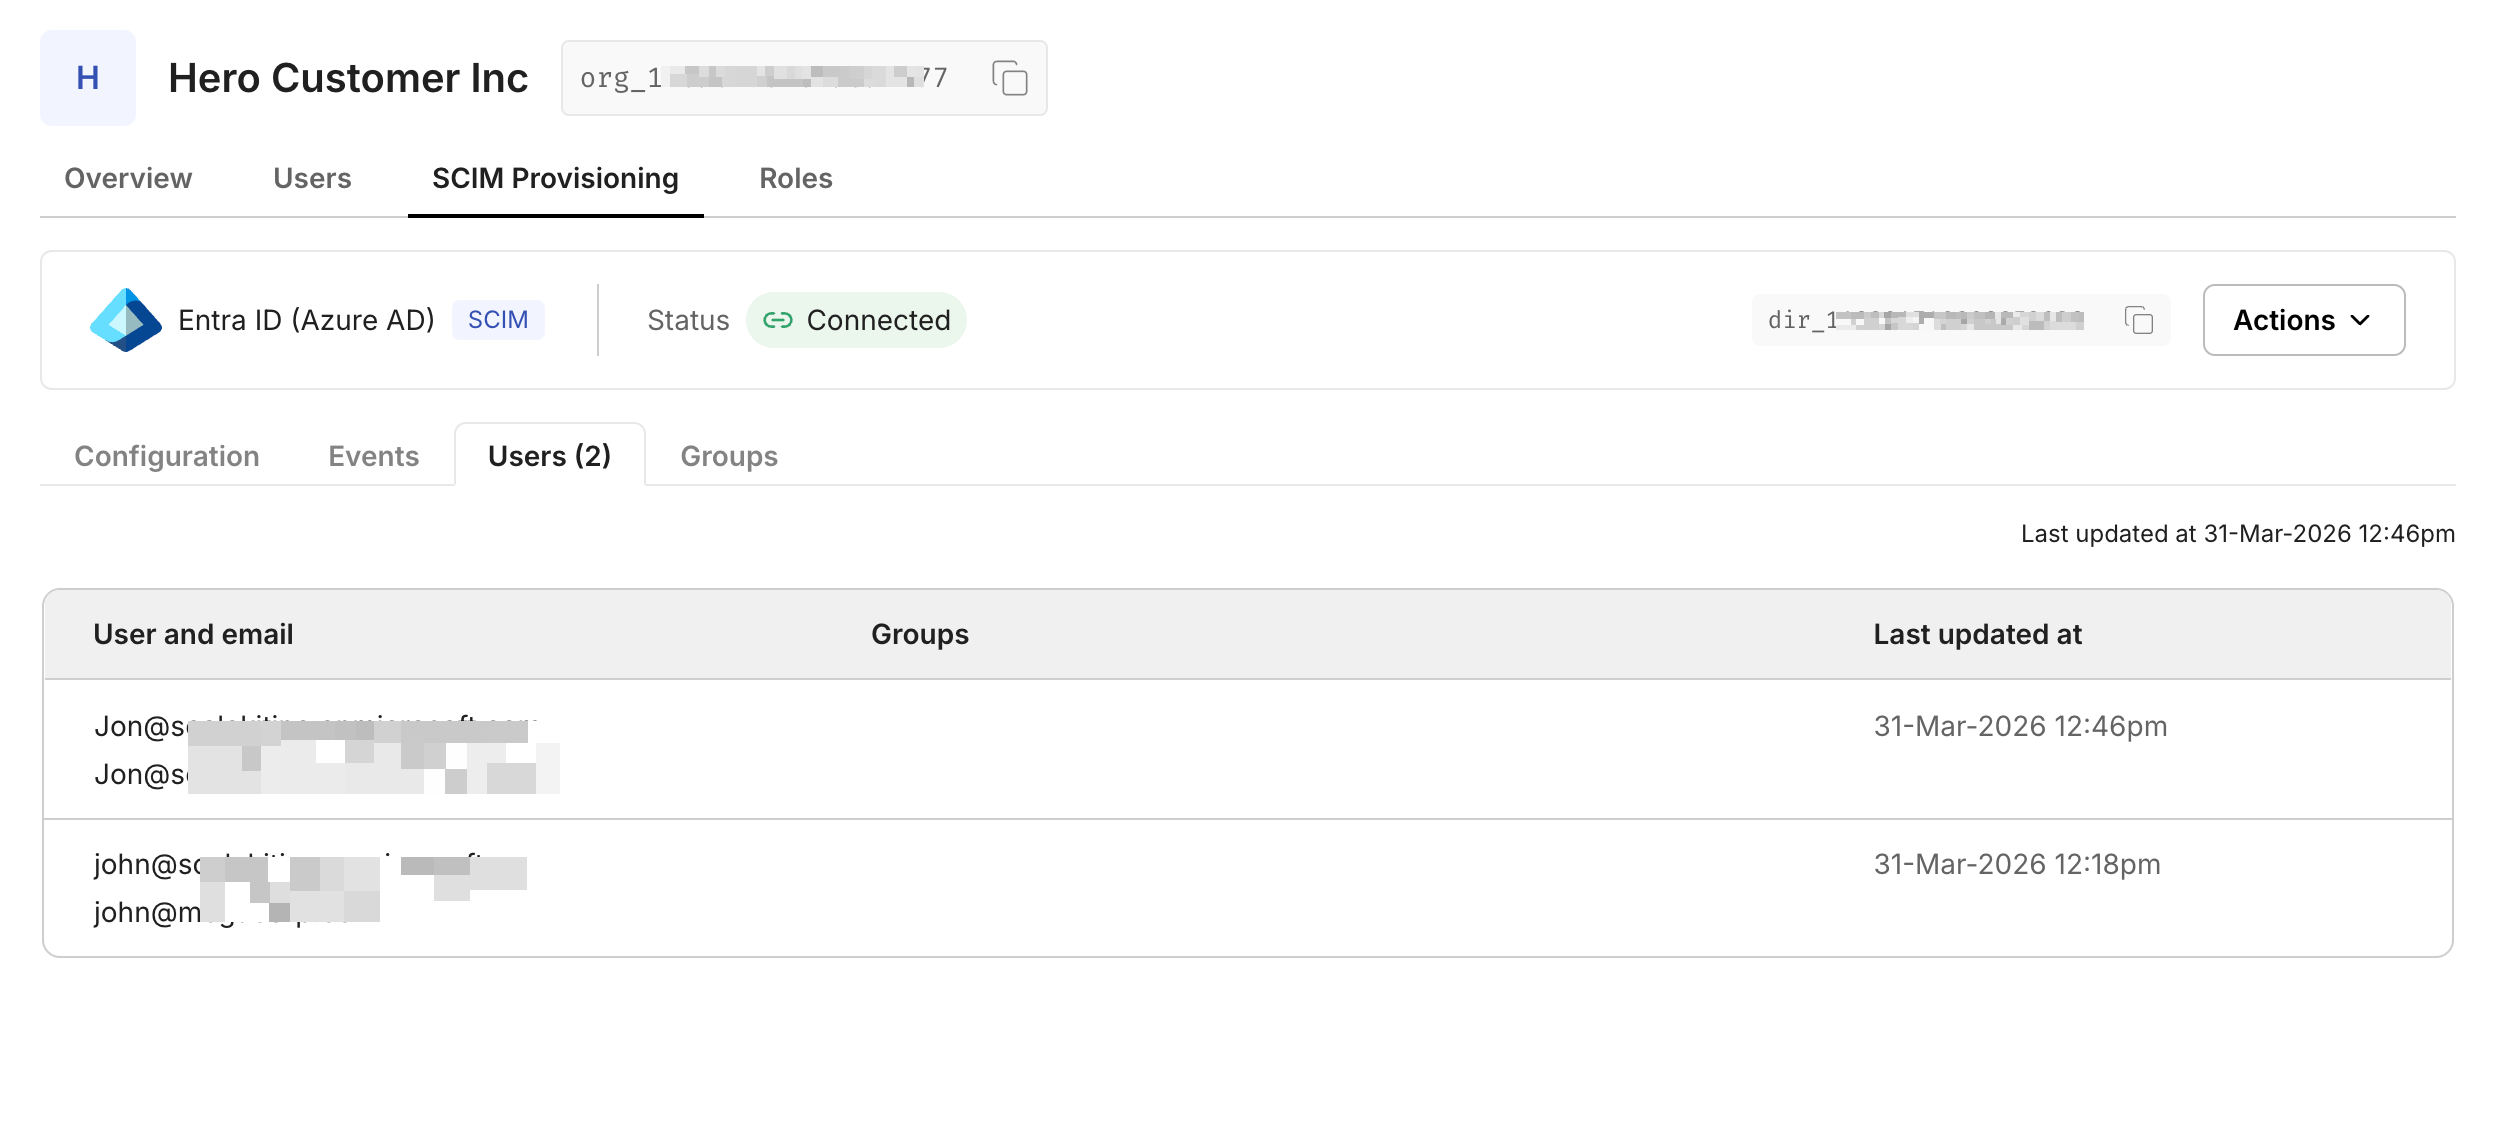
Once provisioned, the user should appear in the admin portal, showing how many users have access to the Hero SaaS app.