JumpCloud Directory
Learn how to sync your JumpCloud directory with your application for automated user provisioning and management using SCIM.
This guide helps administrators sync their JumpCloud directory with an application they want to onboard to their organization. Integrating your application with JumpCloud automates user management tasks and ensures access rights stay up-to-date.
This registration sets up the following:
- Endpoint: This is the URL where JumpCloud sends requests to the onboarded app, acting as a communication point between them.
- Bearer Token: Used by JumpCloud to authenticate its requests to the endpoint, ensuring security and authorization.
These components enable seamless synchronization between your application and the JumpCloud directory.
-
Create an endpoint and API token
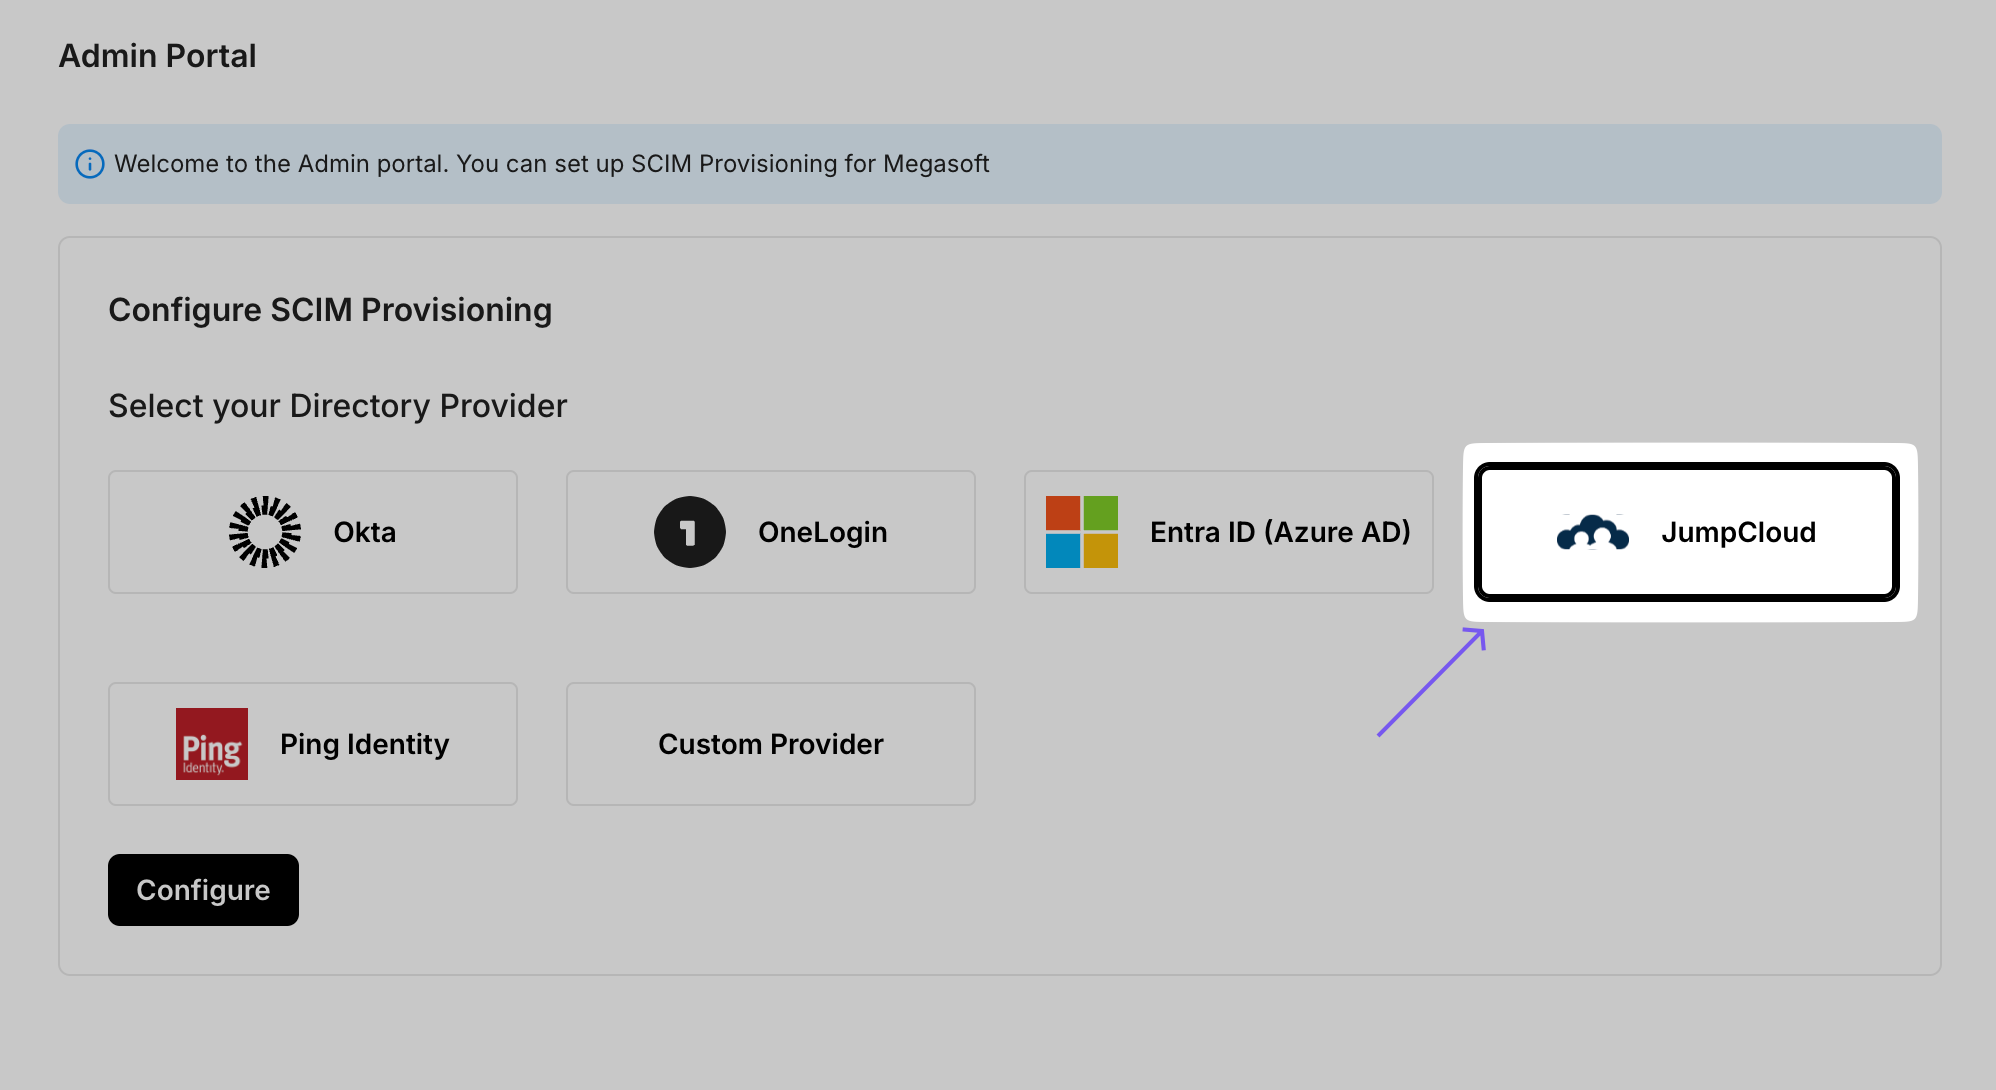
Section titled “Create an endpoint and API token”Open the Admin Portal and select the “SCIM Provisioning” tab. A list of Directory Providers will be displayed. Choose “JumpCloud” as your Directory Provider. If the Admin Portal is not accessible from the app, request instructions from the app owner.
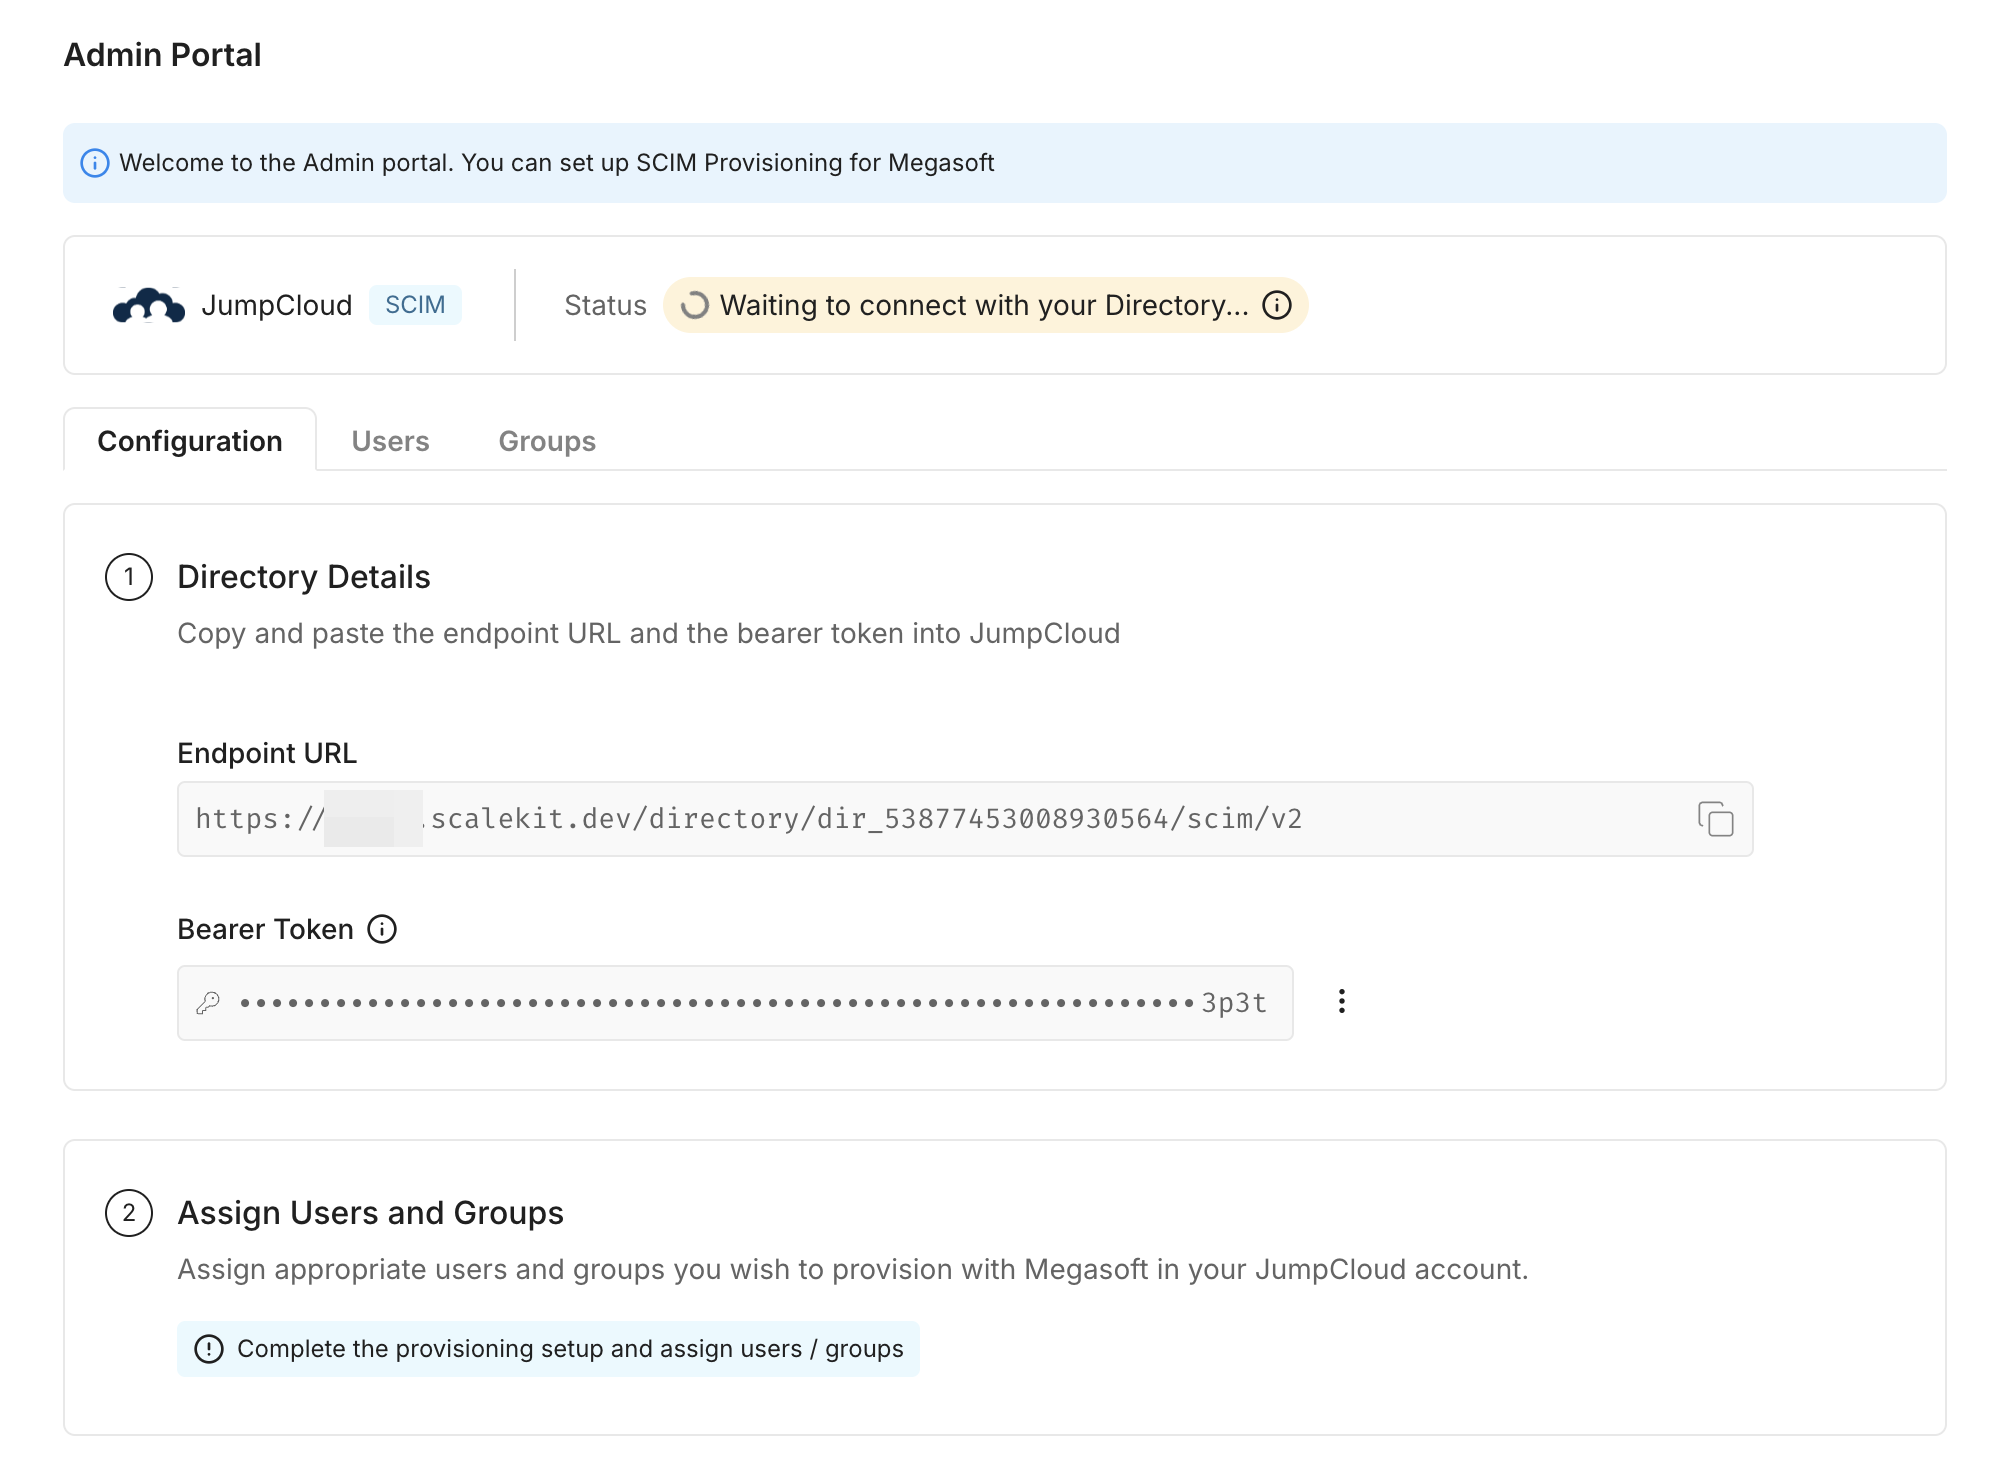
This action will generate an Endpoint URL and Bearer token for your organization, allowing the app to listen to events and maintain synchronization with your organization.
-
Add a new application in JumpCloud
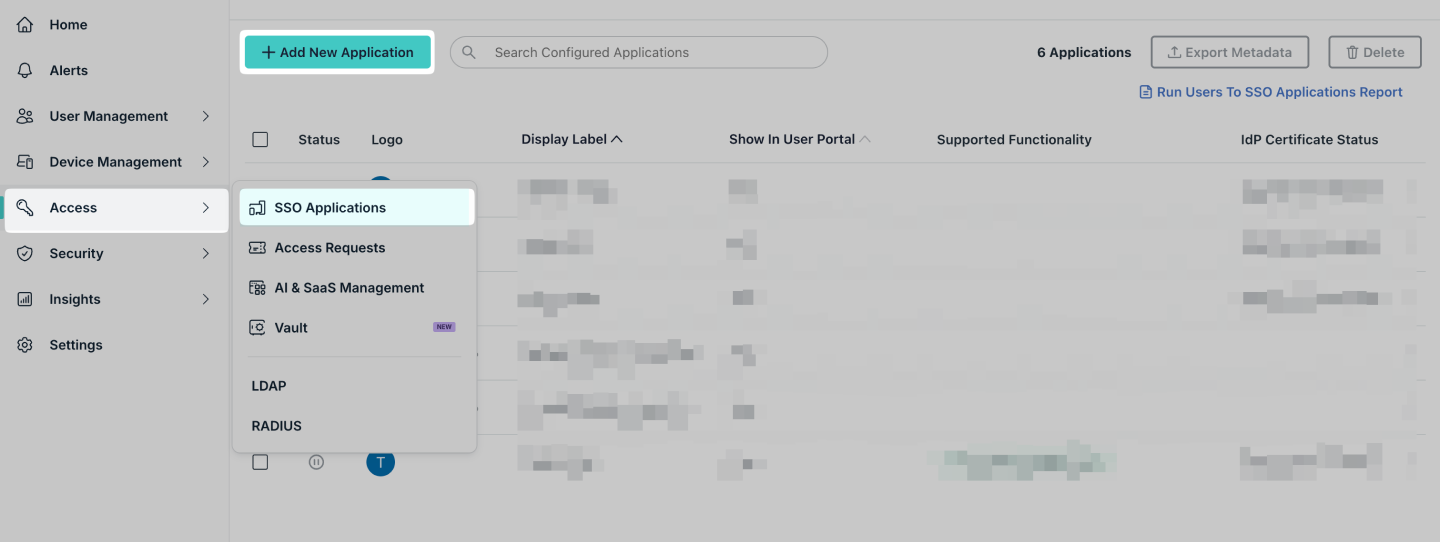
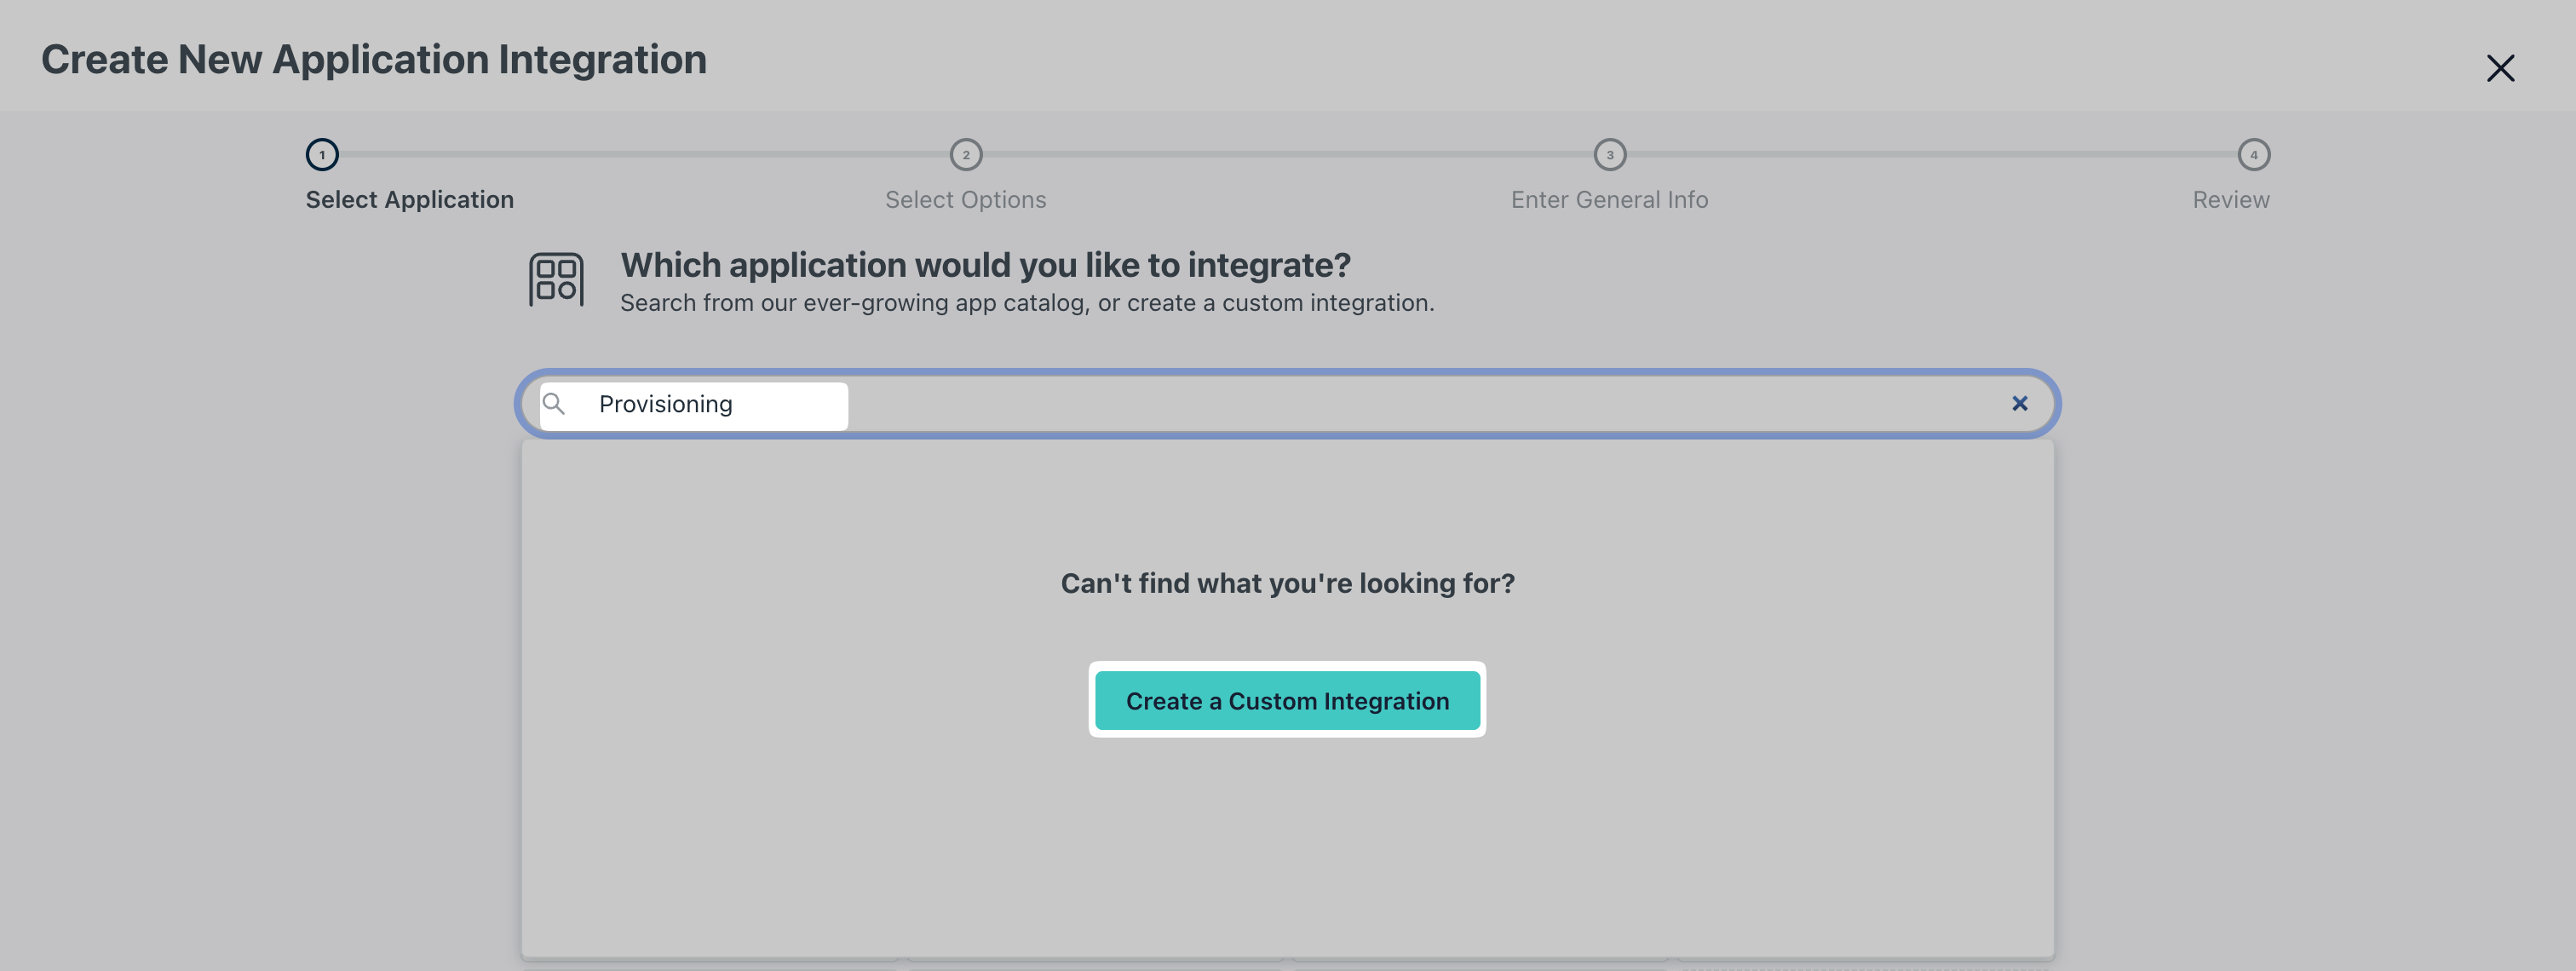
Section titled “Add a new application in JumpCloud”Go to the JumpCloud Admin Portal > SSO Applications and click on ”+ Add New Application.”
Create a custom application by trying to do an non-existent application search.
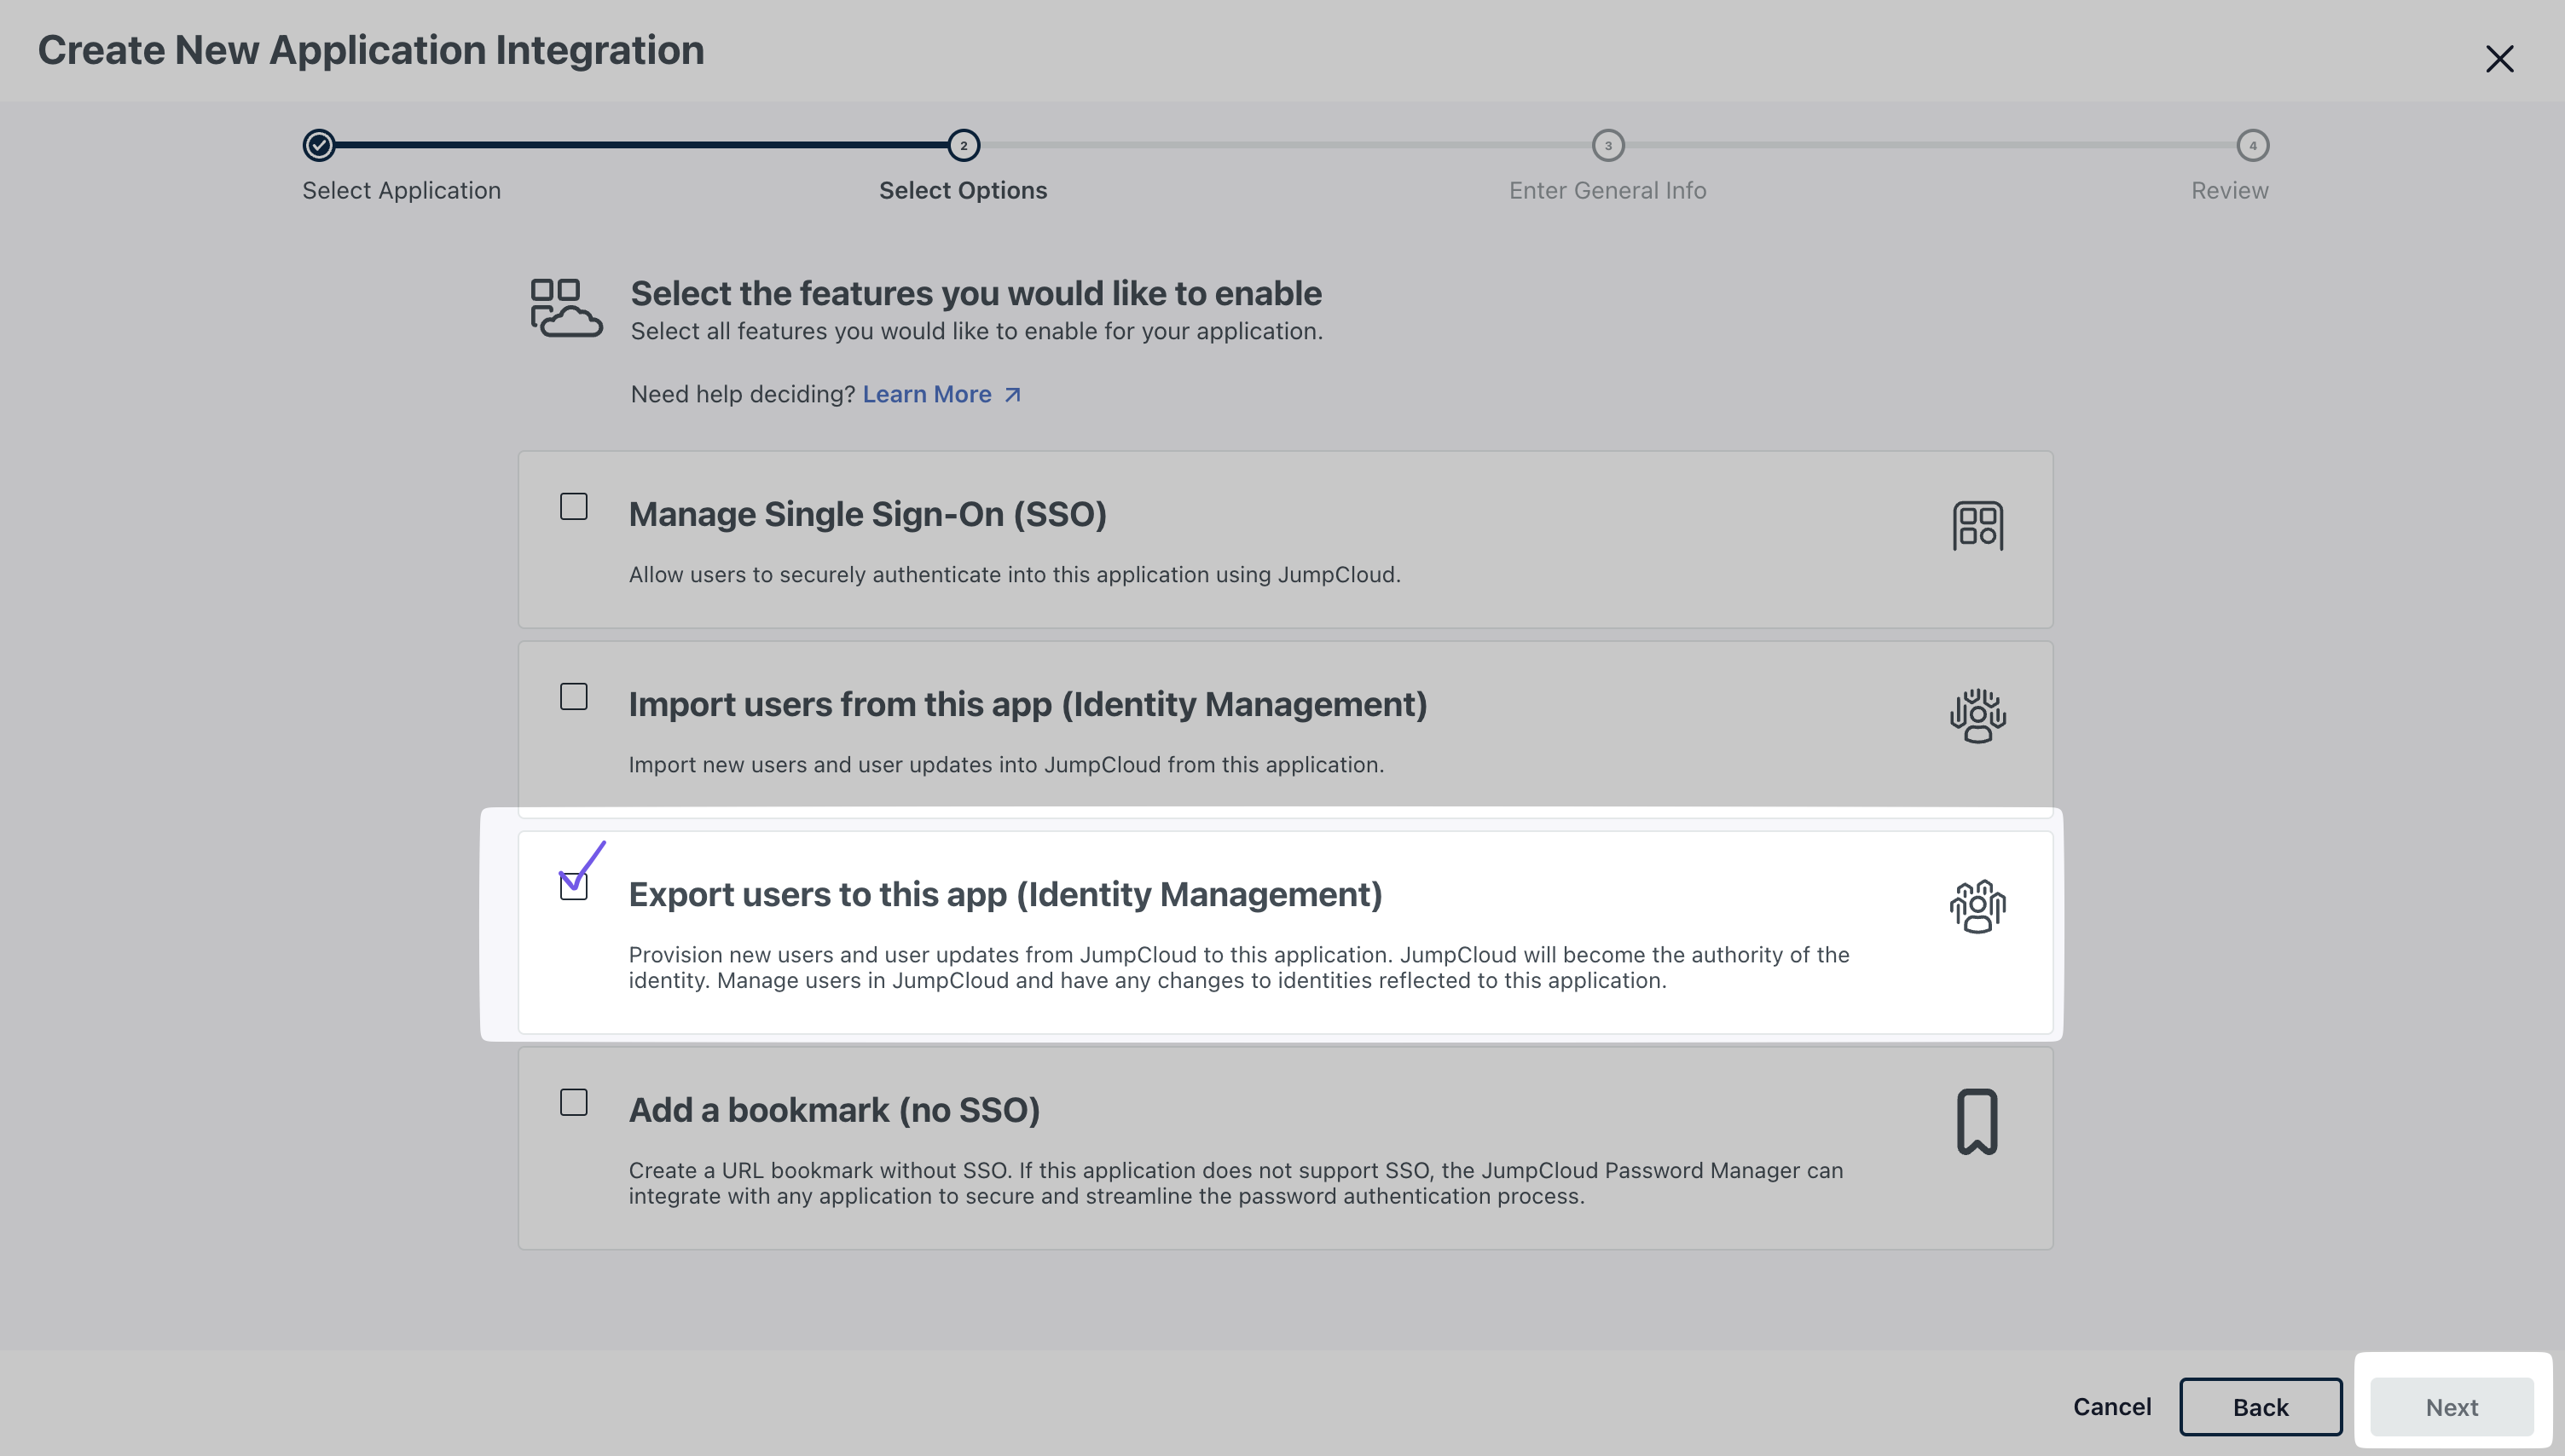
Click “Next” and choose the features you would like to enable. Since your application wants to provision new users and user updates from JumpCloud, select “Export users to this app (Identity Management)”
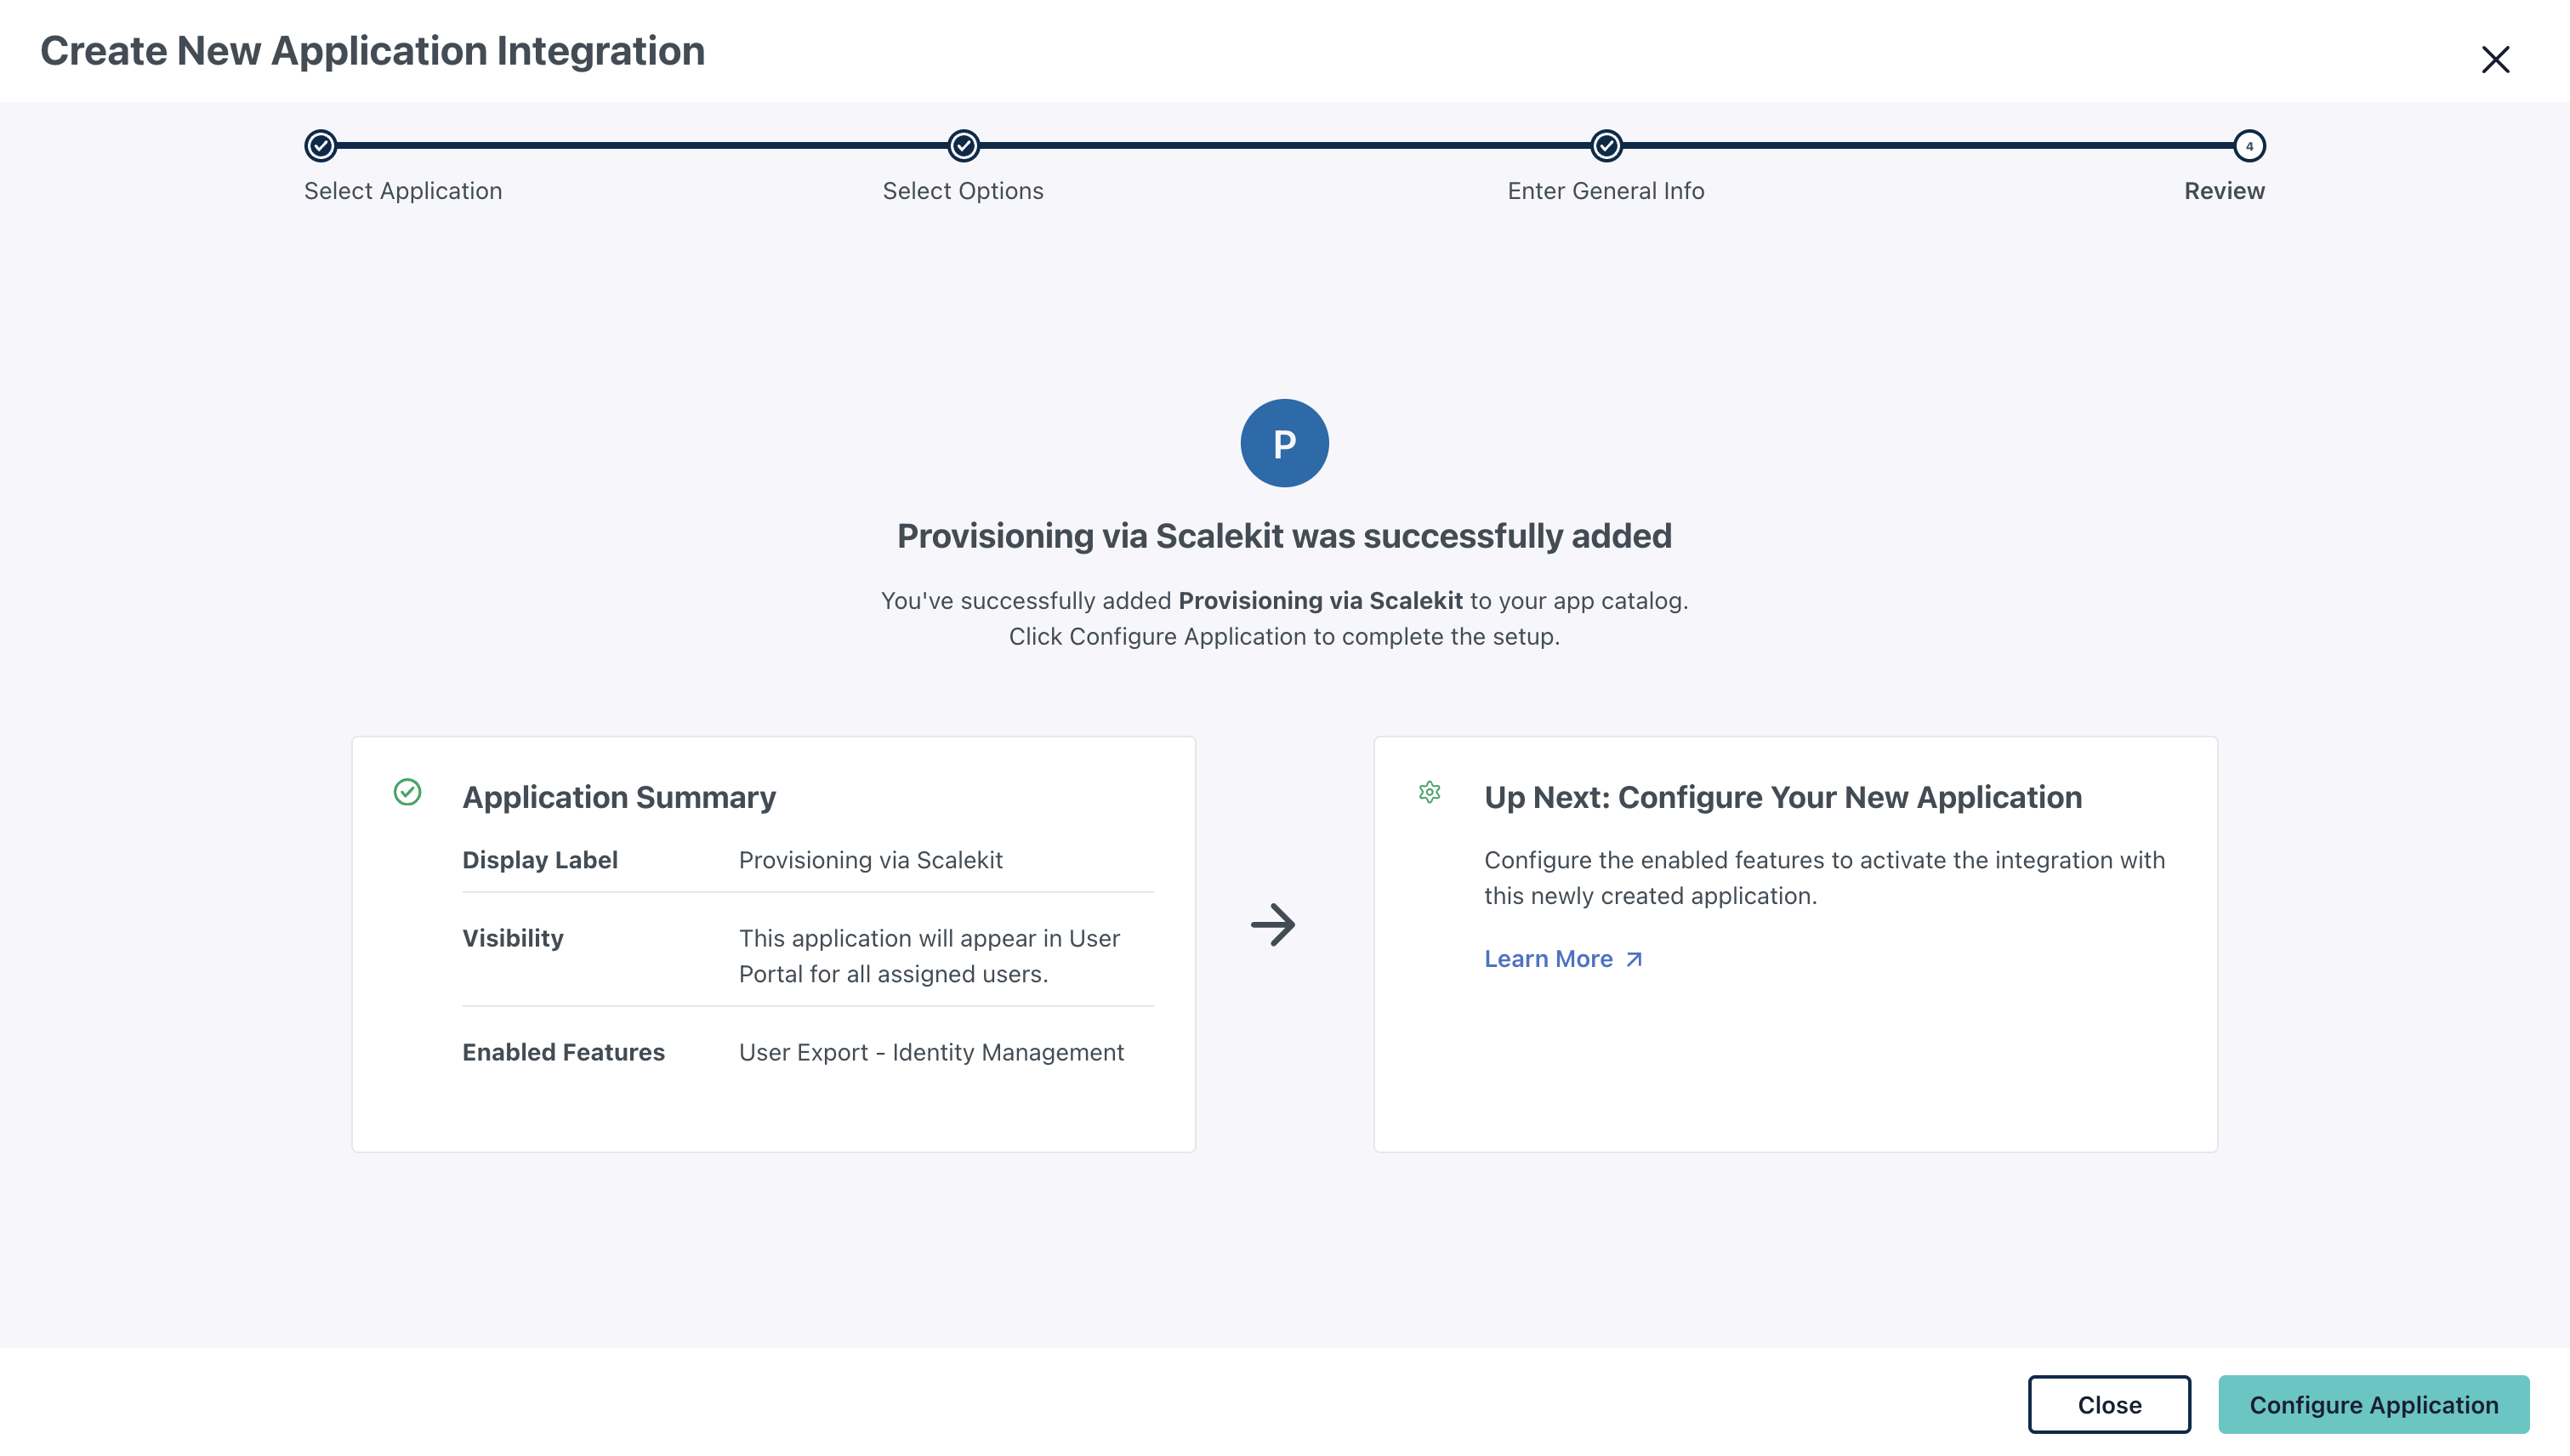
Finally, enter the general info such as display name (this example uses “YourApp”) and click “Save Application”
-
Configure provisioning settings
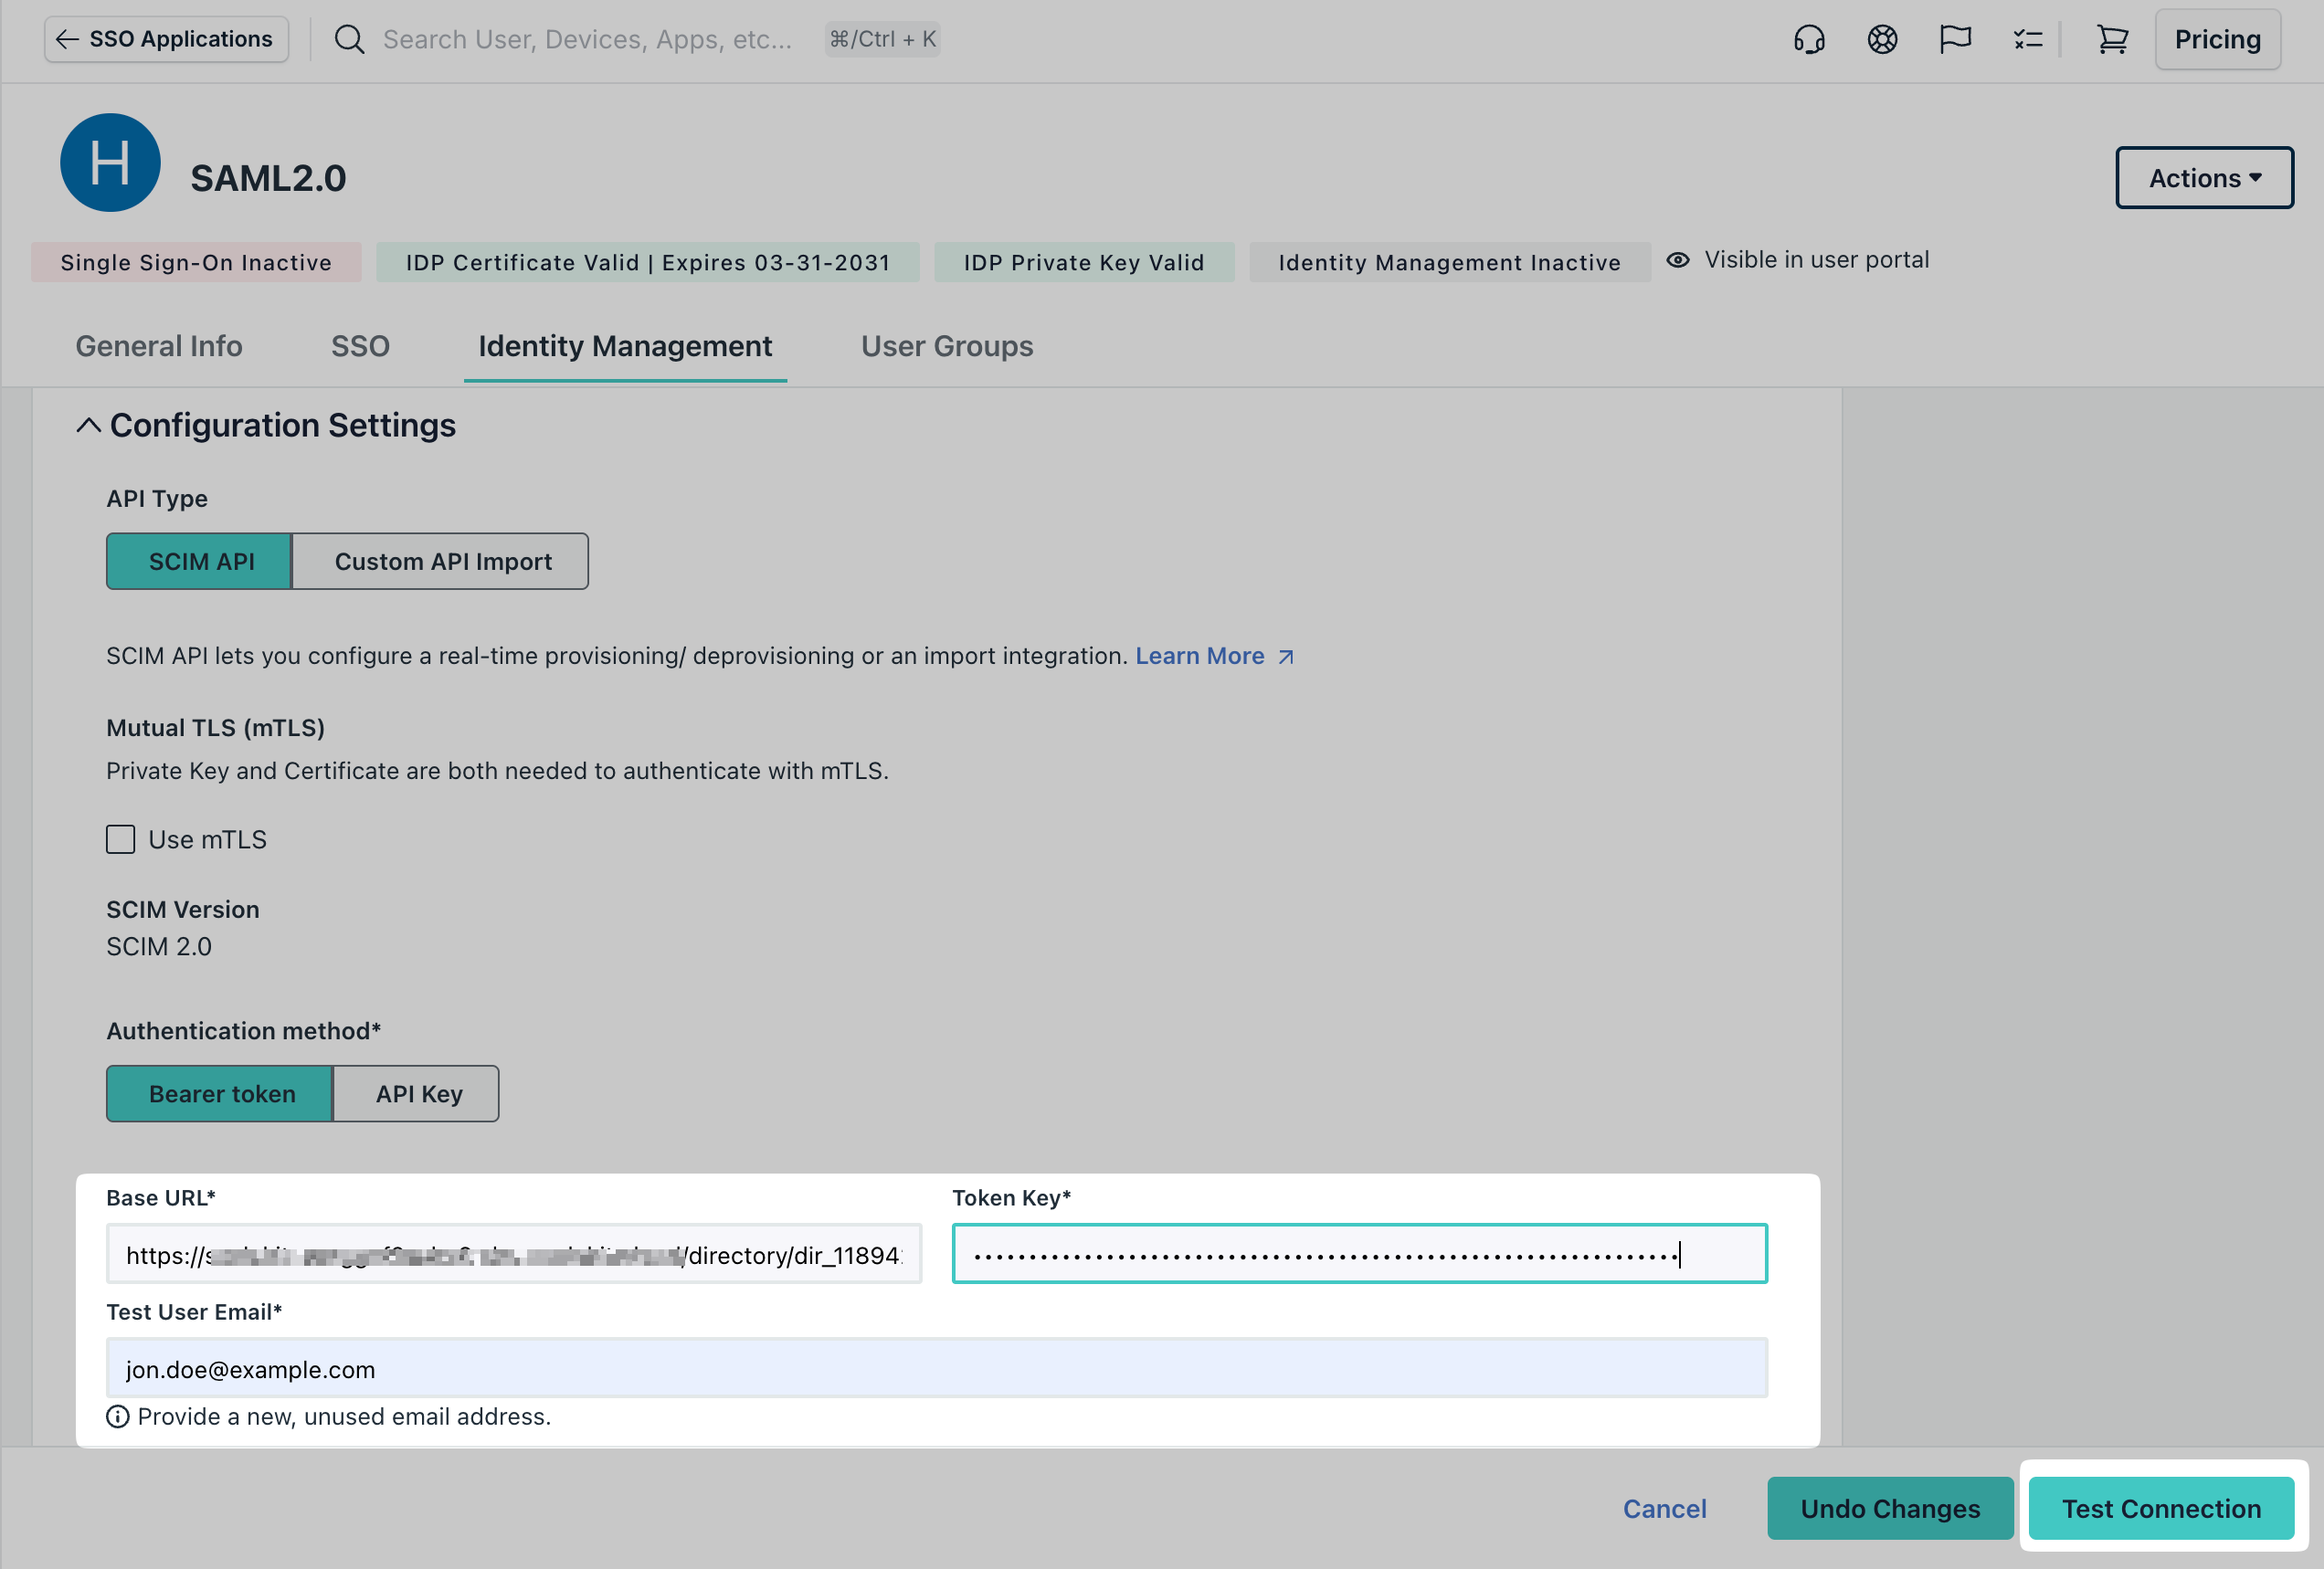
Section titled “Configure provisioning settings”Click on “Configure Application” and proceed to configure the application settings. This opens a modal with “Identity Management” selected. Enter the Endpoint URL and Bearer Token provided in the Step 1.
-
Configure group management
Section titled “Configure group management”JumpCloud uses groups as the primary way provision users to your application.

Click “Activate”.
-
Assign users and groups
Section titled “Assign users and groups”To assign groups and users to the newly integrated application:
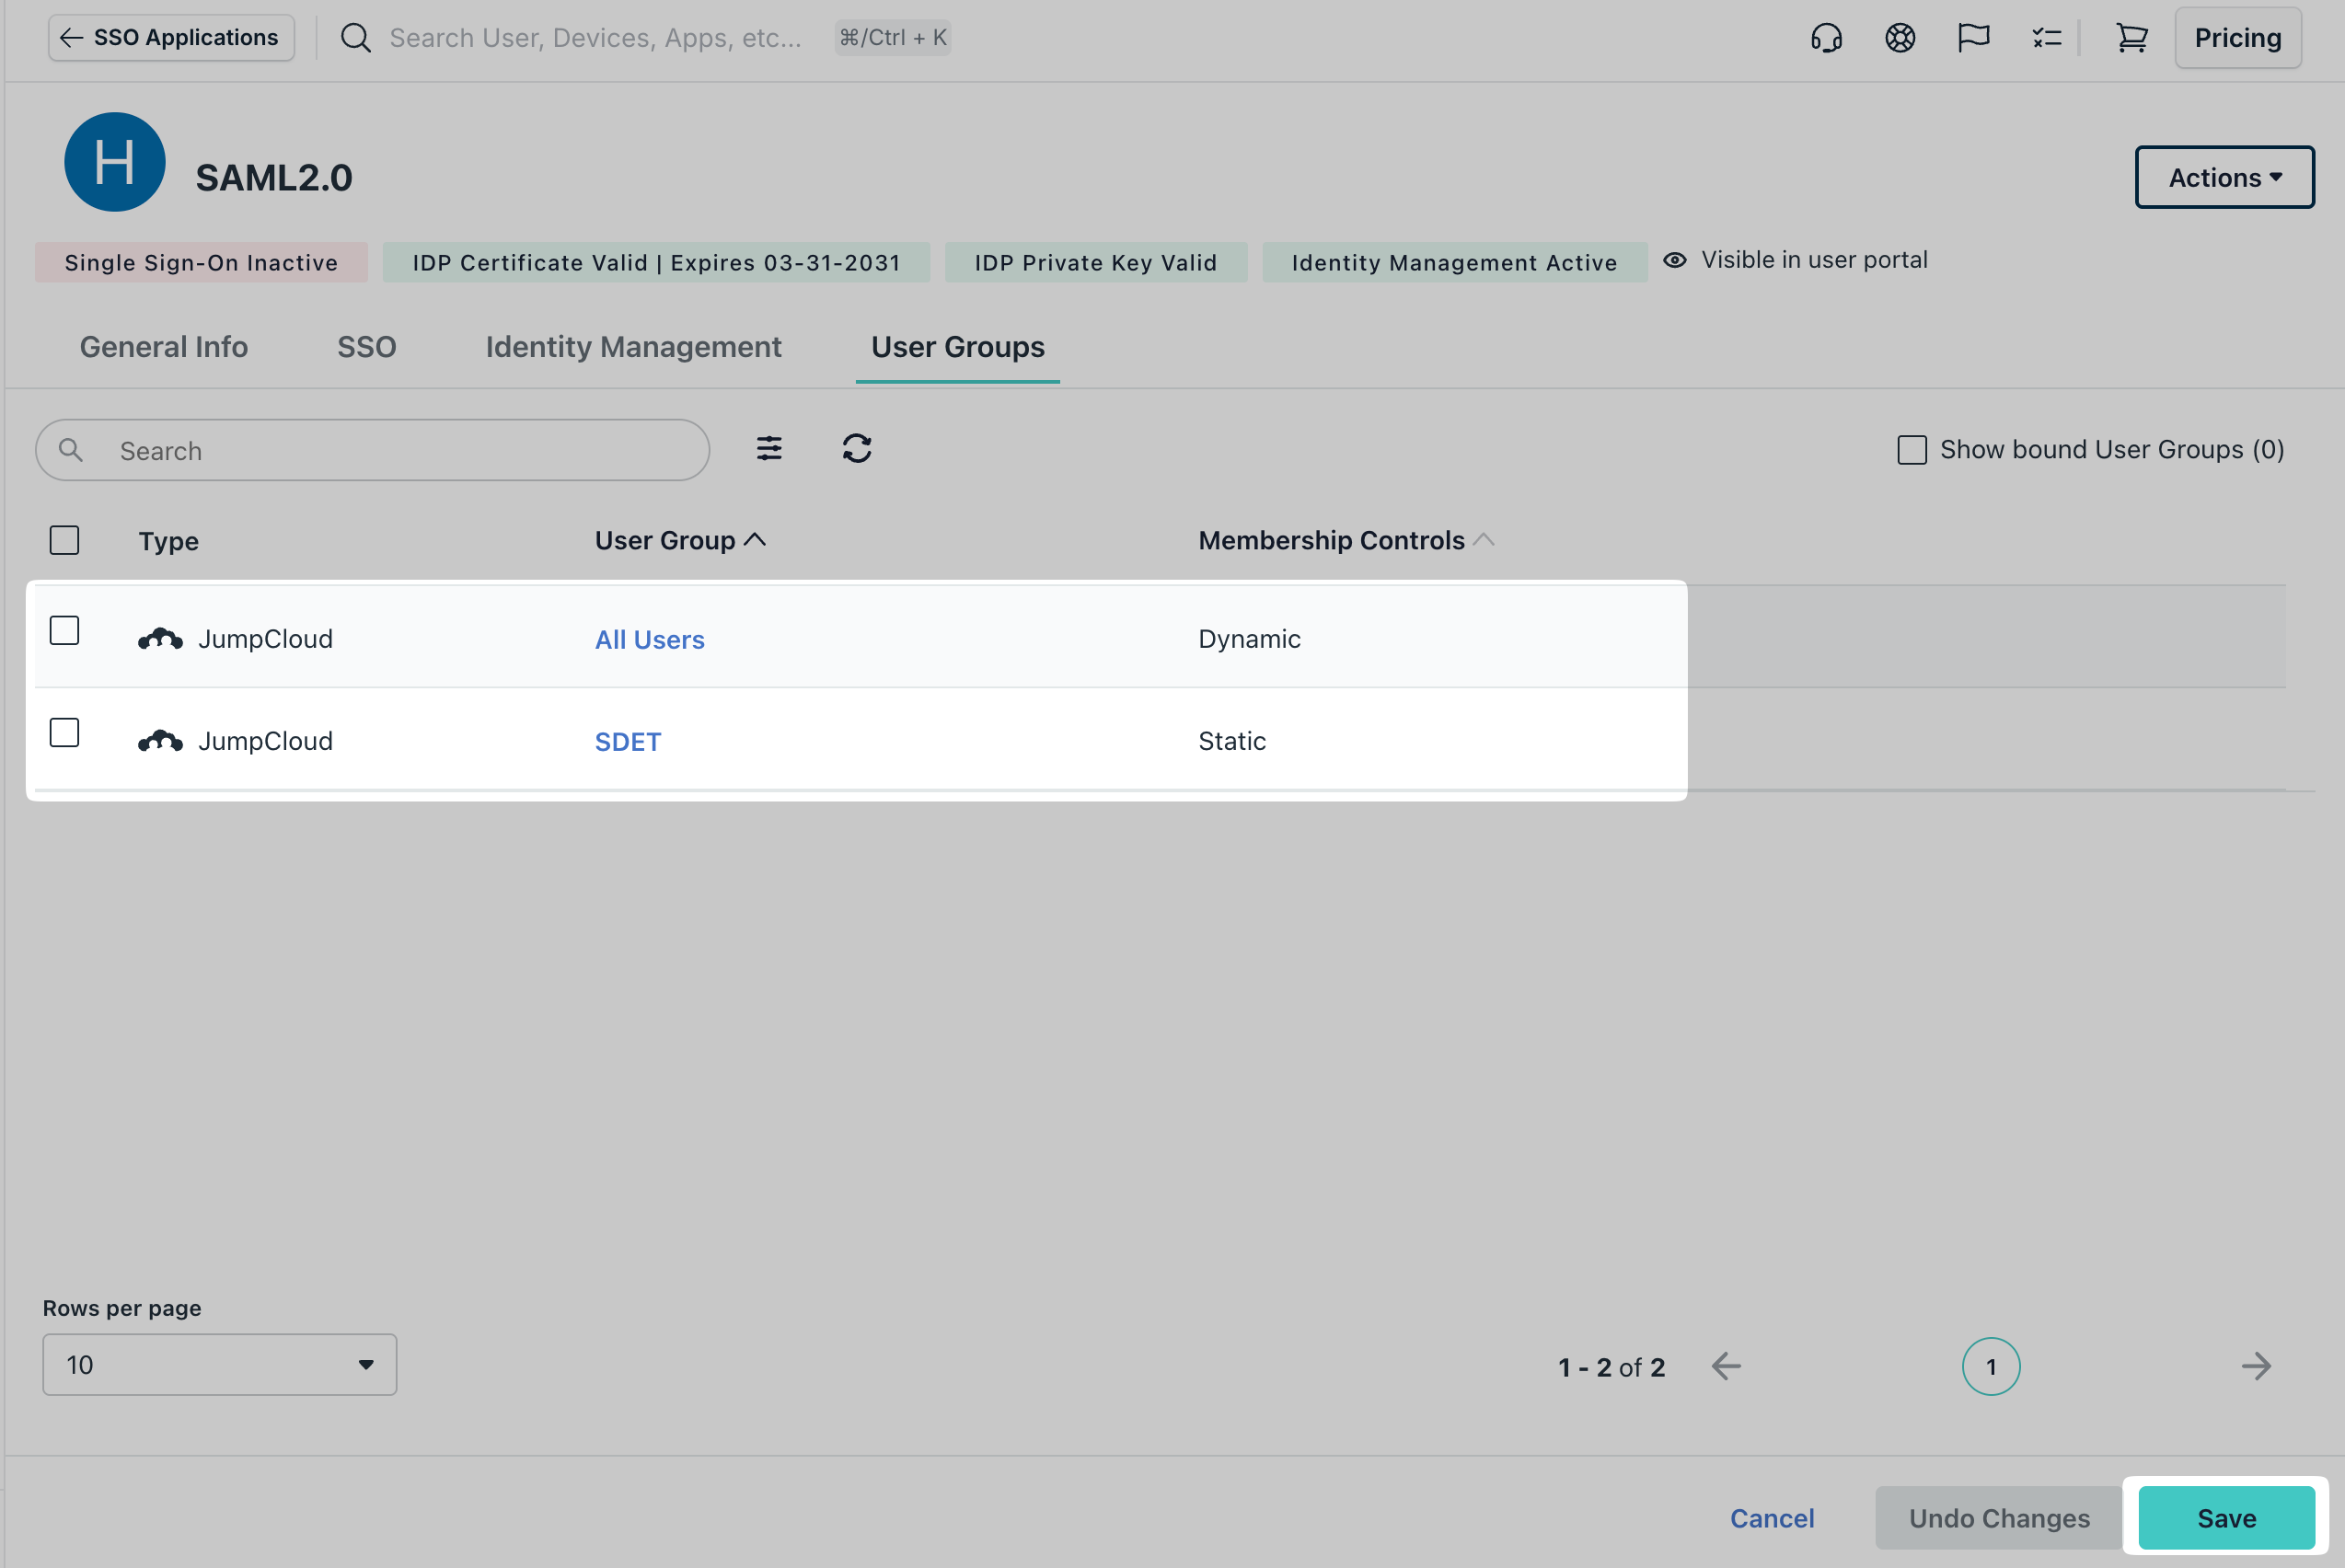
- Navigate to “User Groups” from the top navigation panel.
- If required, create a new group under “User Management” → “User Groups”.
- Add users to the group. If no users exist, create them under “User Management” → “Users”.
- Select the group to be assigned to the application and click “Save”.
- Confirm the newly created group is assigned to the application.
-
Group based Role Assignment Configuration
Section titled “Group based Role Assignment Configuration”To automatically assign roles to users based on their group membership, configure appropriate group to role mapping in the SCIM Configuration Portal.
-
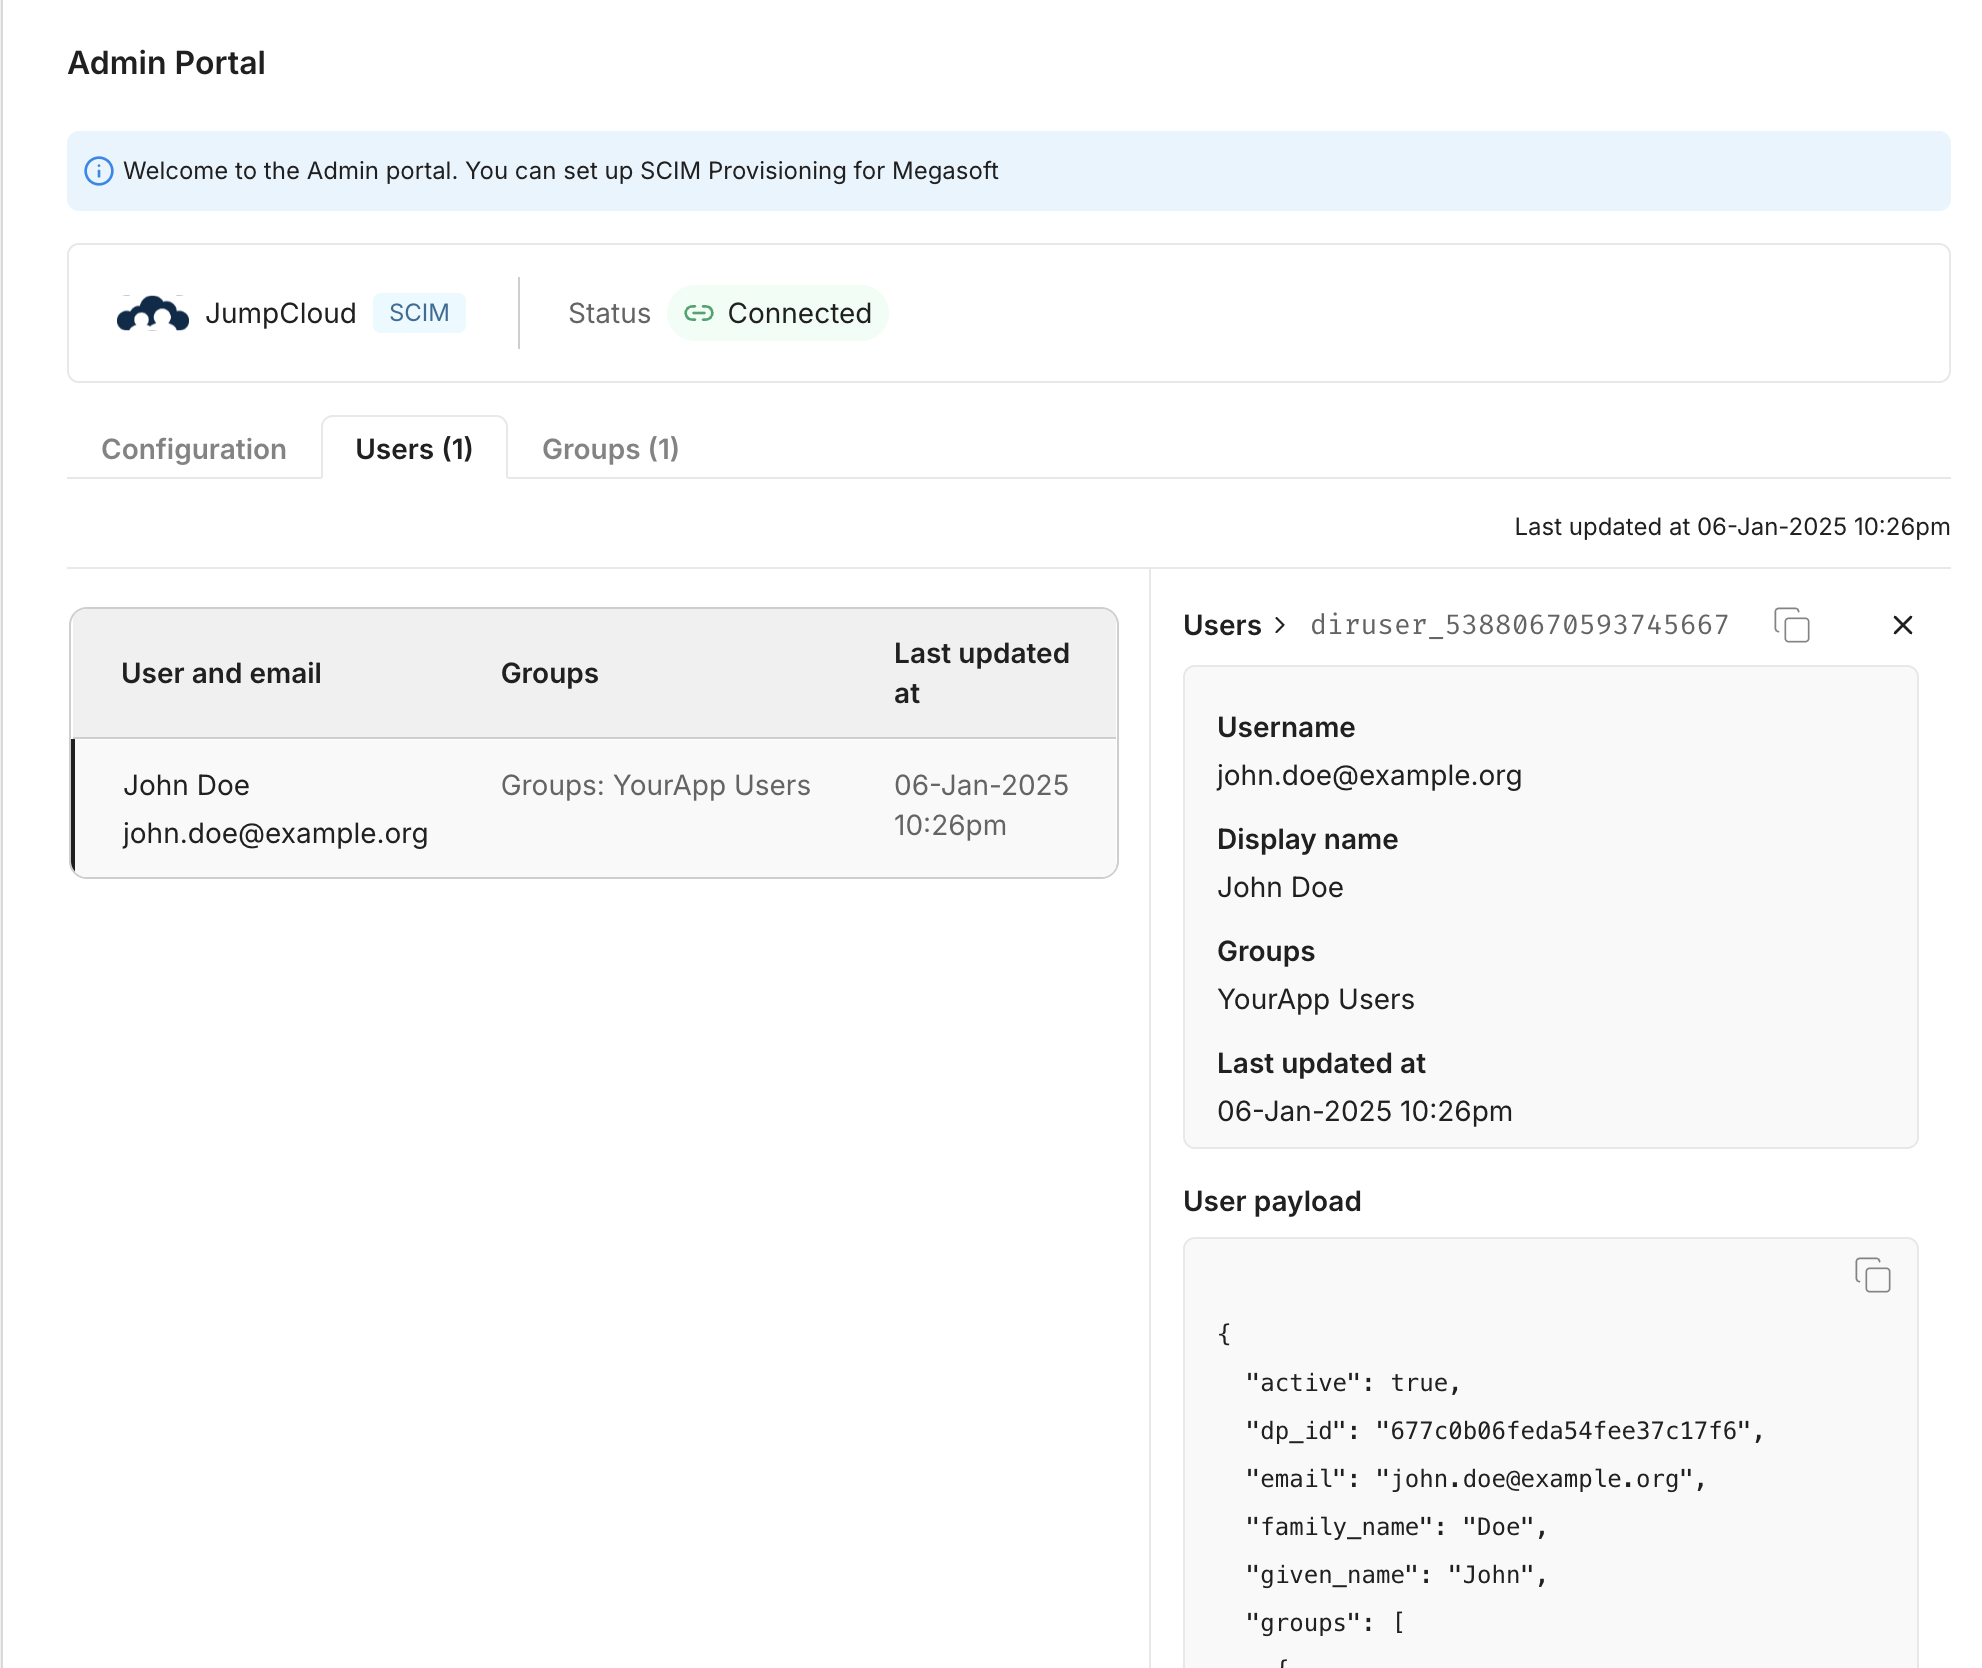
Verify successful connection
Section titled “Verify successful connection”After completing these steps, verify that the users and groups are successfully synced by visiting Users and Groups tab in the Admin Portal.