Okta Directory
Learn how to sync your Okta Directory with your application for automated user provisioning and management using SCIM.
This guide is designed to help administrators seamlessly sync their Okta Directory with an application they want to onboard to their organization. By integrating your application with Okta, you can automate user management tasks and ensure that access rights are consistently up-to-date.
This registration sets up the following:
- Endpoint: This is the URL where Okta will send requests to the app you are onboarding. It acts as a communication point between Okta and your application.
- Bearer Token: This token is used by Okta to authenticate its requests to the endpoint. It ensures that the requests are secure and authorized.
By setting up these components, you enable seamless synchronization between your application and the Okta directory.
-
Create an endpoint and API token
Section titled “Create an endpoint and API token”Open the Admin Portal from the app being onboarded and select the “SCIM Provisioning” tab. A list of Directory Providers will be displayed. Choose “Okta” as your Directory Provider. If the Admin Portal is not accessible from the app, request instructions from the app owner.
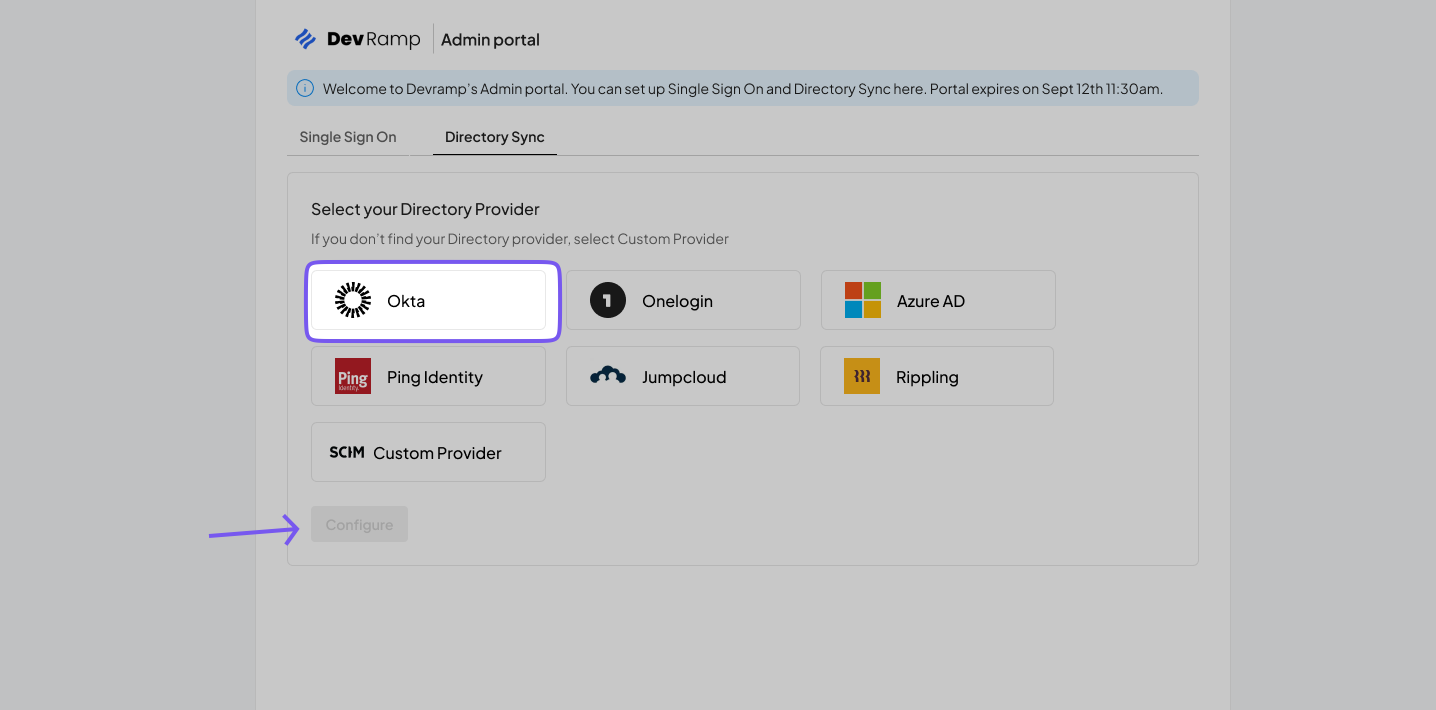
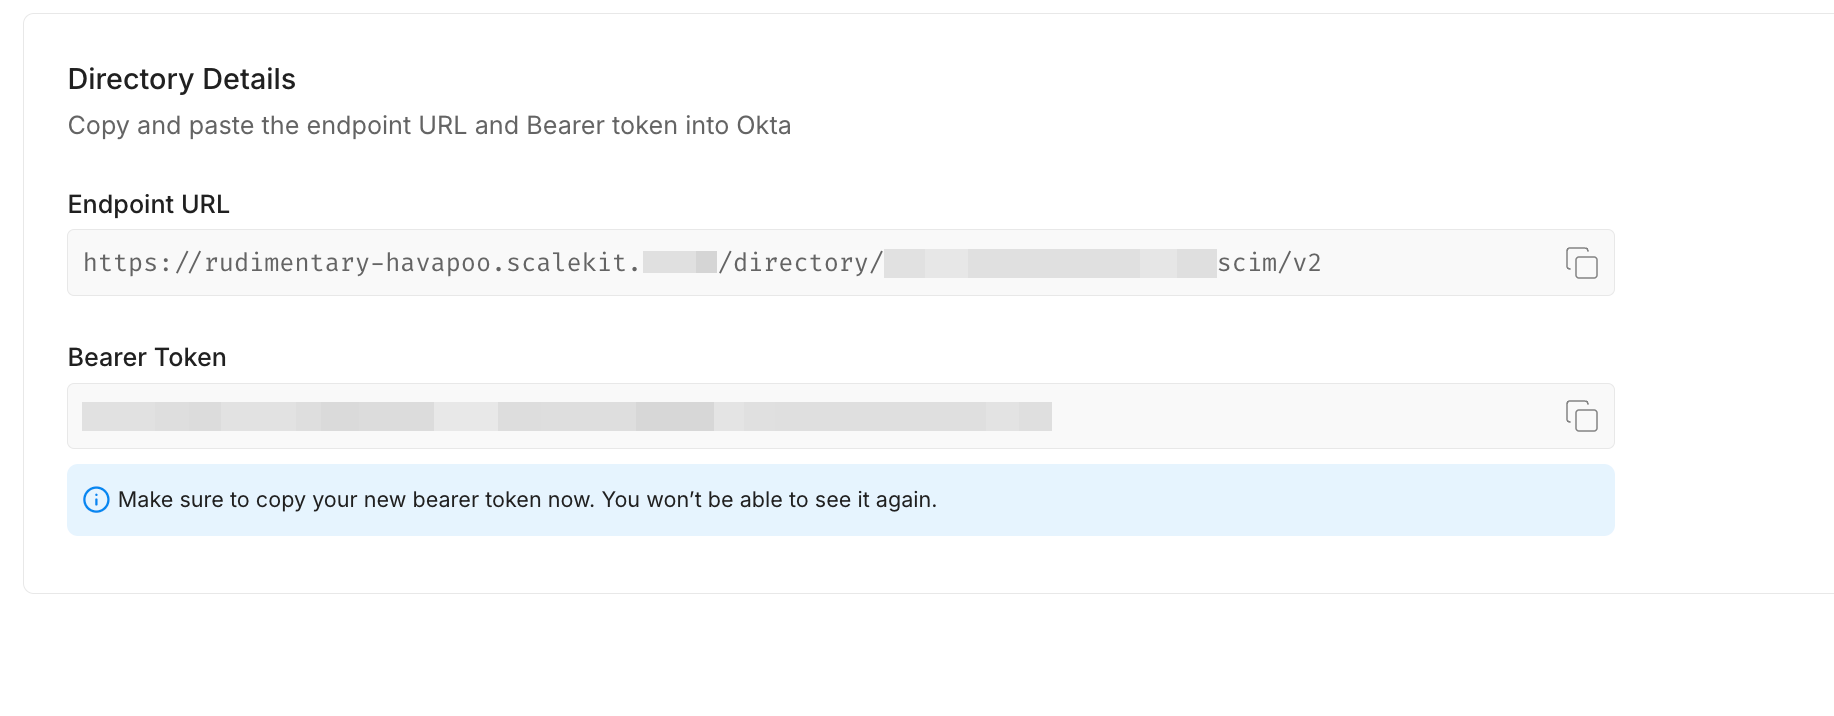
After selecting “Okta,” click “Configure.” This action will generate an Endpoint URL and Bearer token for your organization, allowing the app to listen to events and maintain synchronization with your organization.
-
Add a new application in Okta
Section titled “Add a new application in Okta”Log in to the Okta admin dashboard and navigate to “Applications” in the main menu.
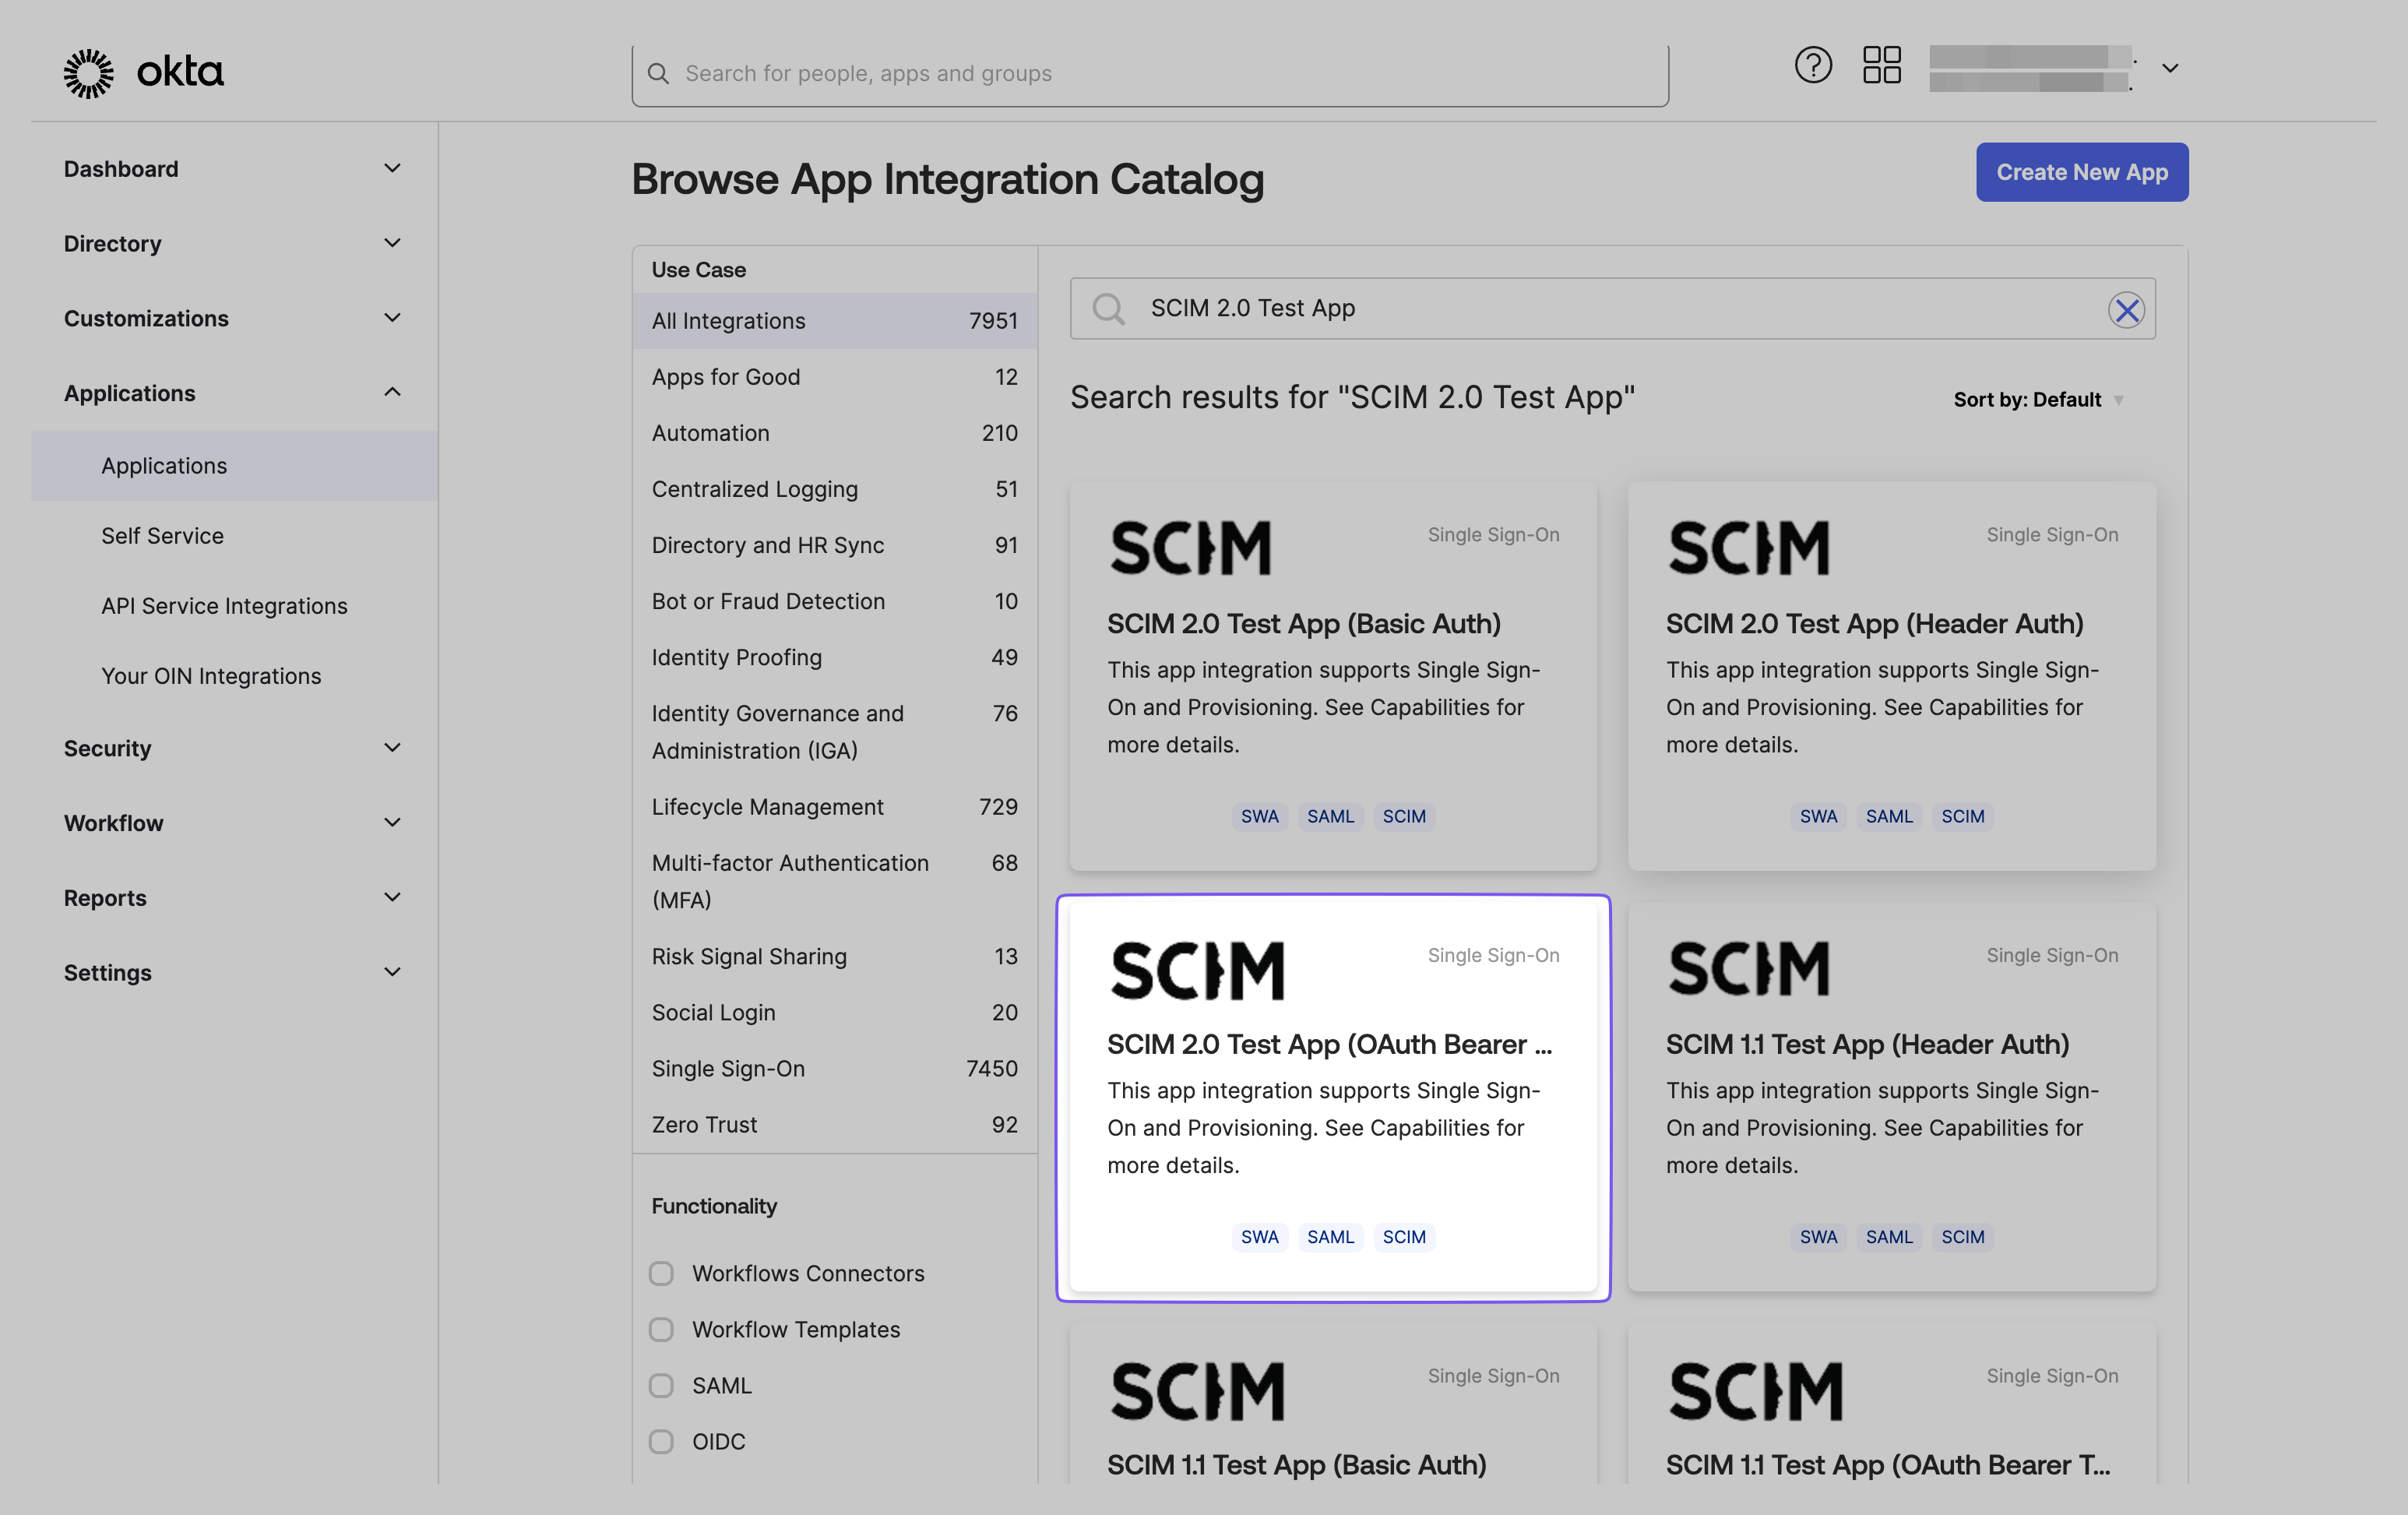
If you haven’t previously created a SCIM application in Okta, select “Browse App Catalog.” Otherwise, choose it from your existing list of applications. In the Okta Application dashboard, search for “SCIM 2.0 Test App (OAuth Bearer Token)” and select the corresponding result.
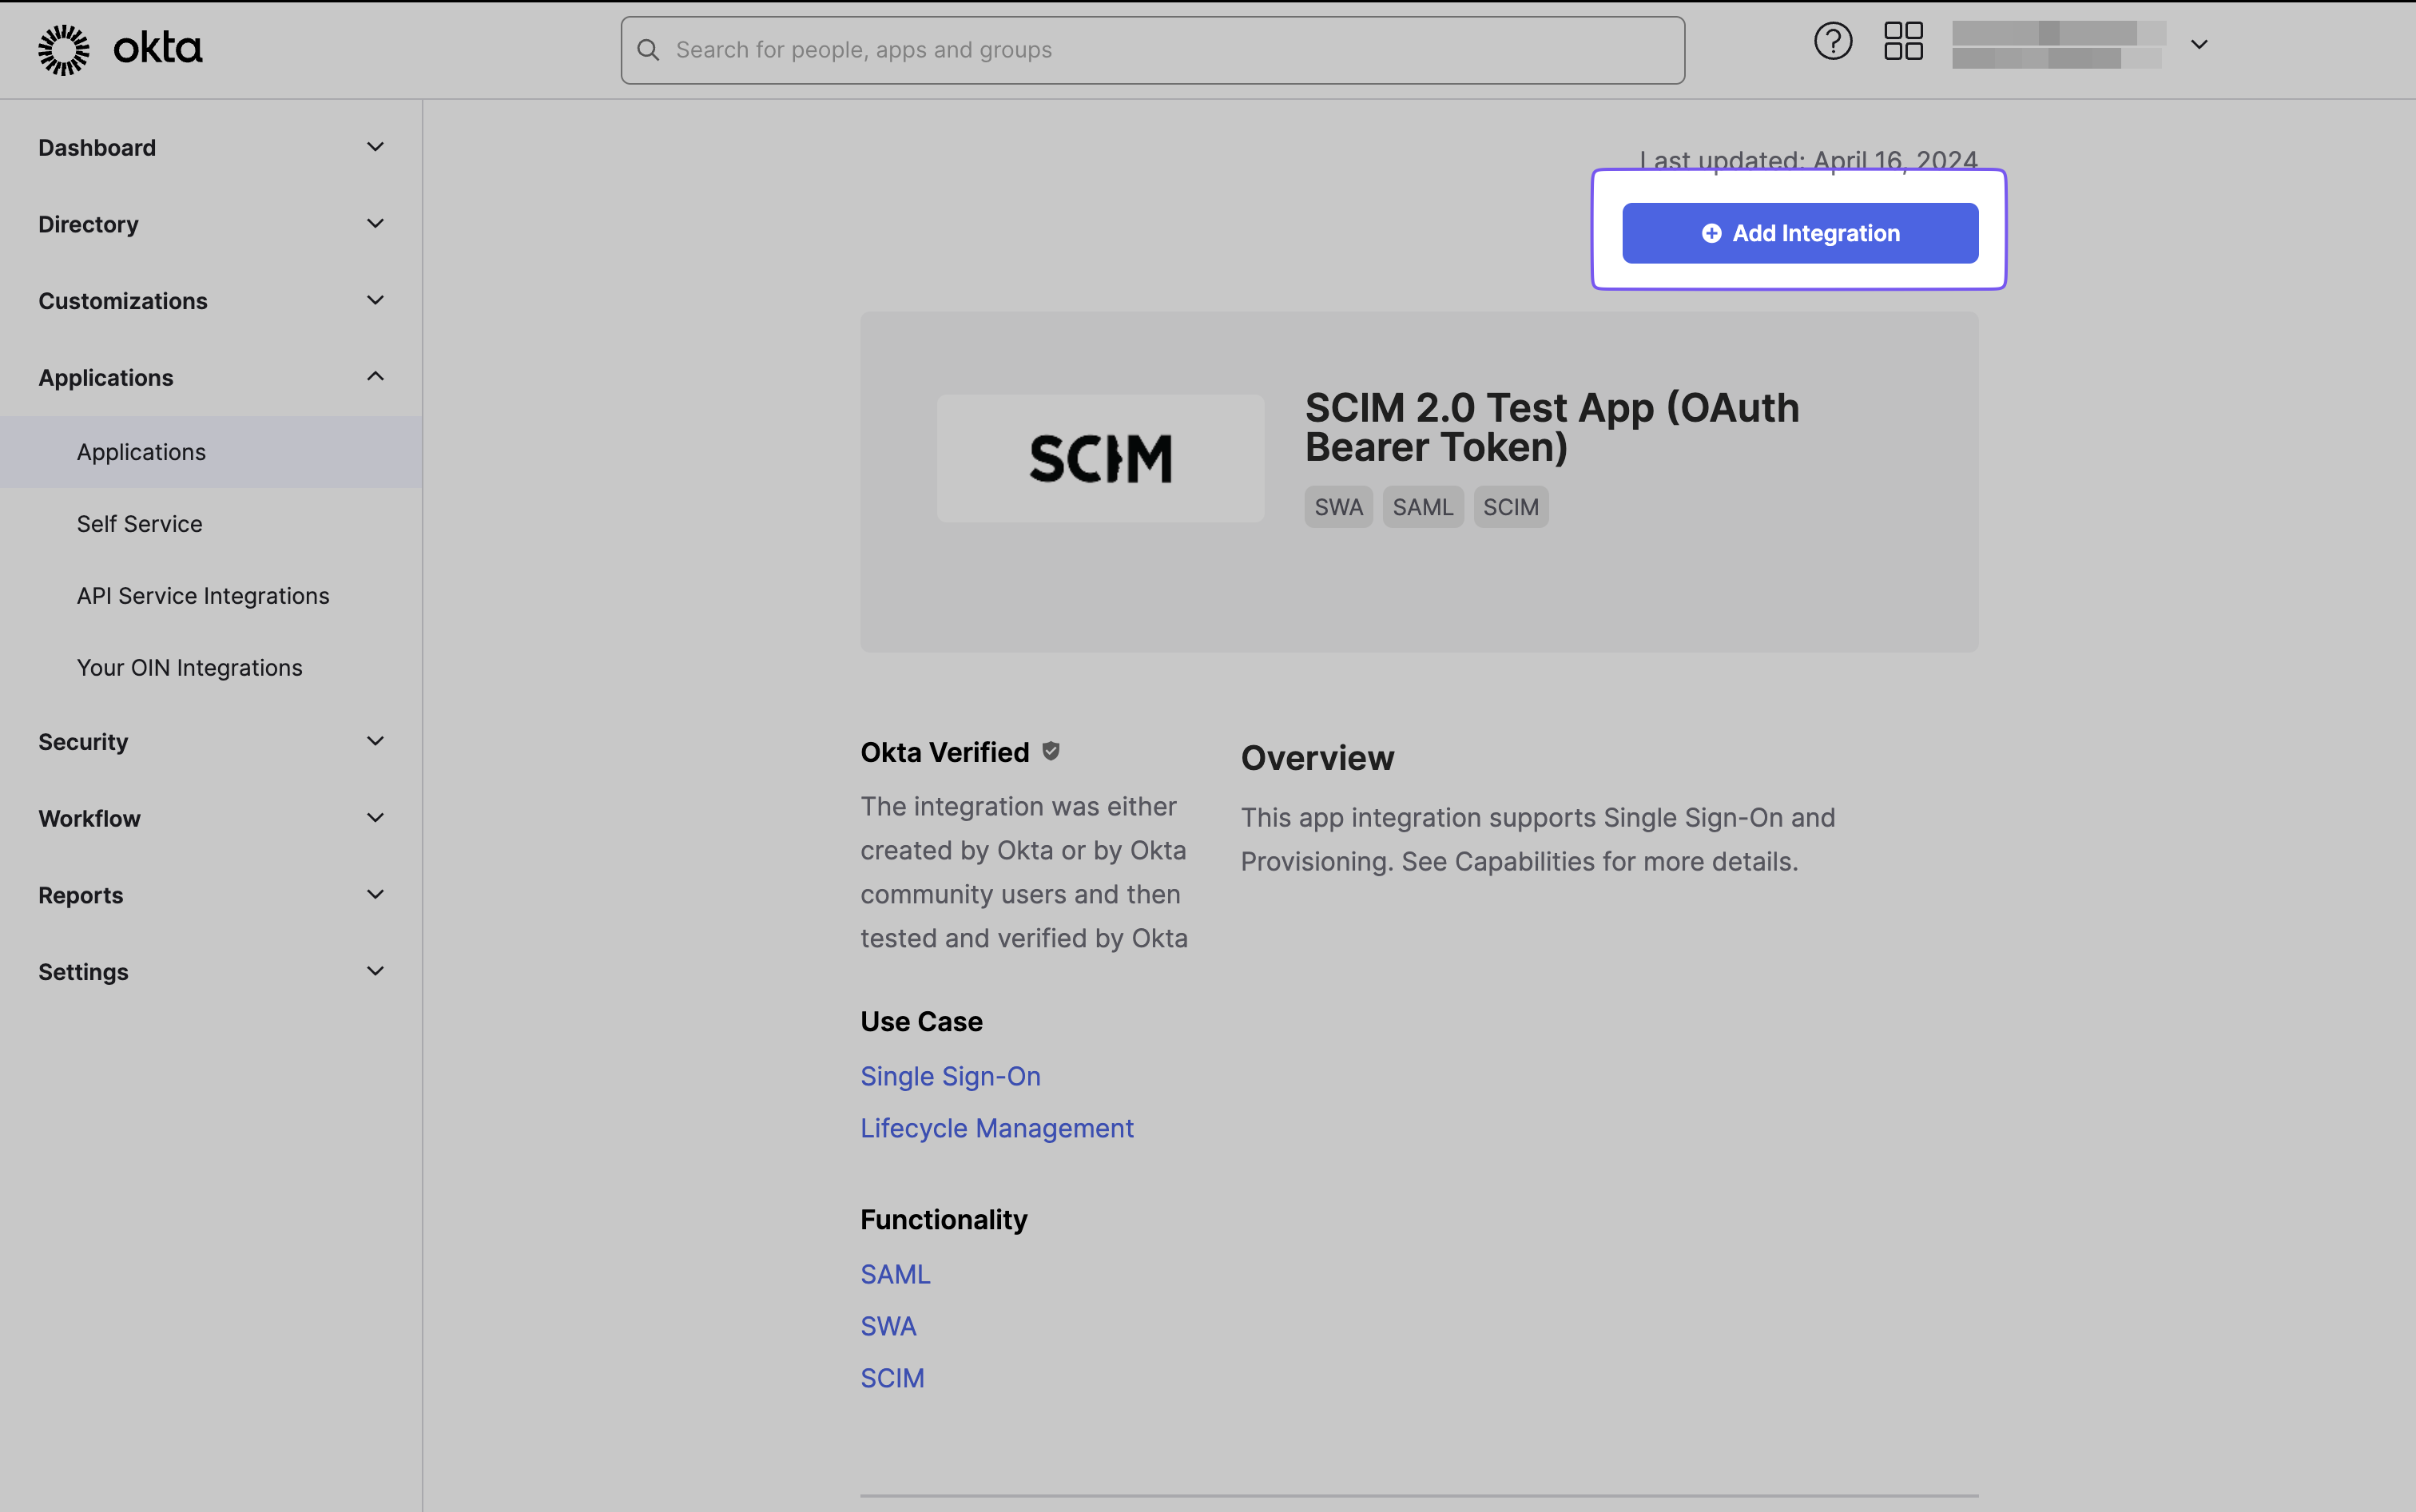
Click “Add Integration” on the subsequent page.
Provide a descriptive name for the app, then proceed by clicking “Next.”
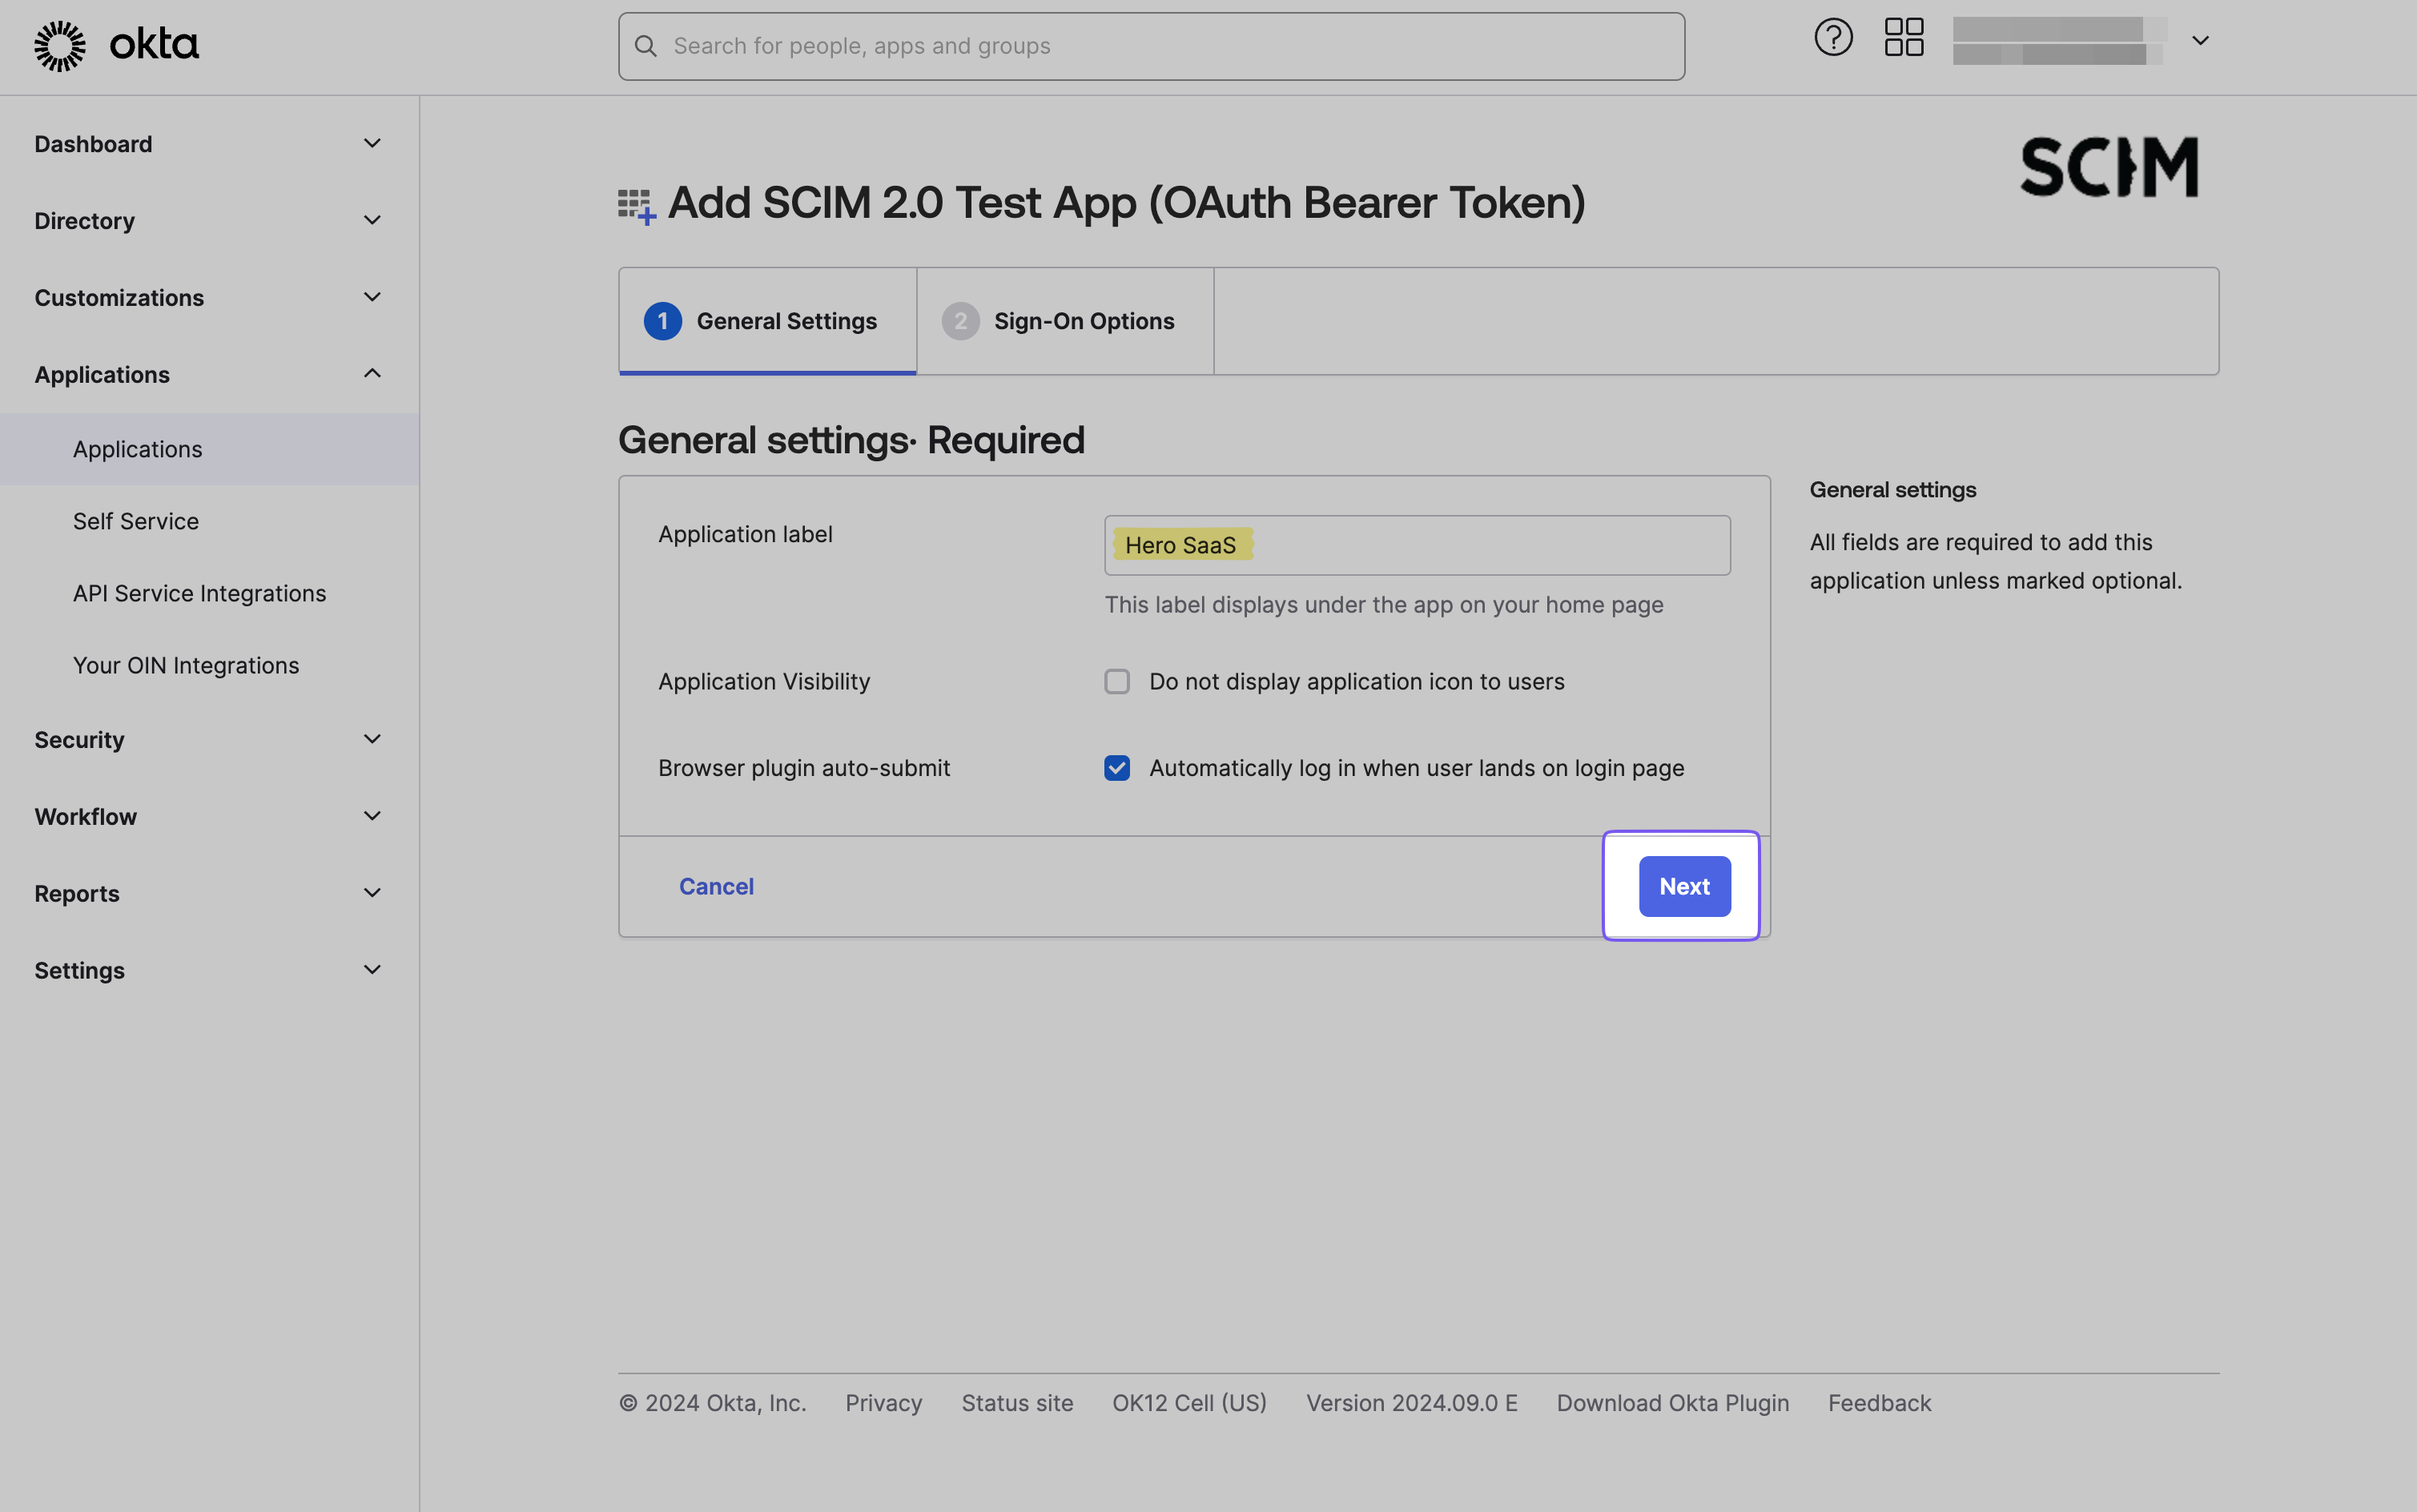
The default configuration is typically sufficient for most applications. However, if your directory requires additional settings, such as Attribute Statements, configure these on the Sign-On Options page. Complete the application creation process by clicking “Done.”
-
Enable sending and receiving events in provisioning settings
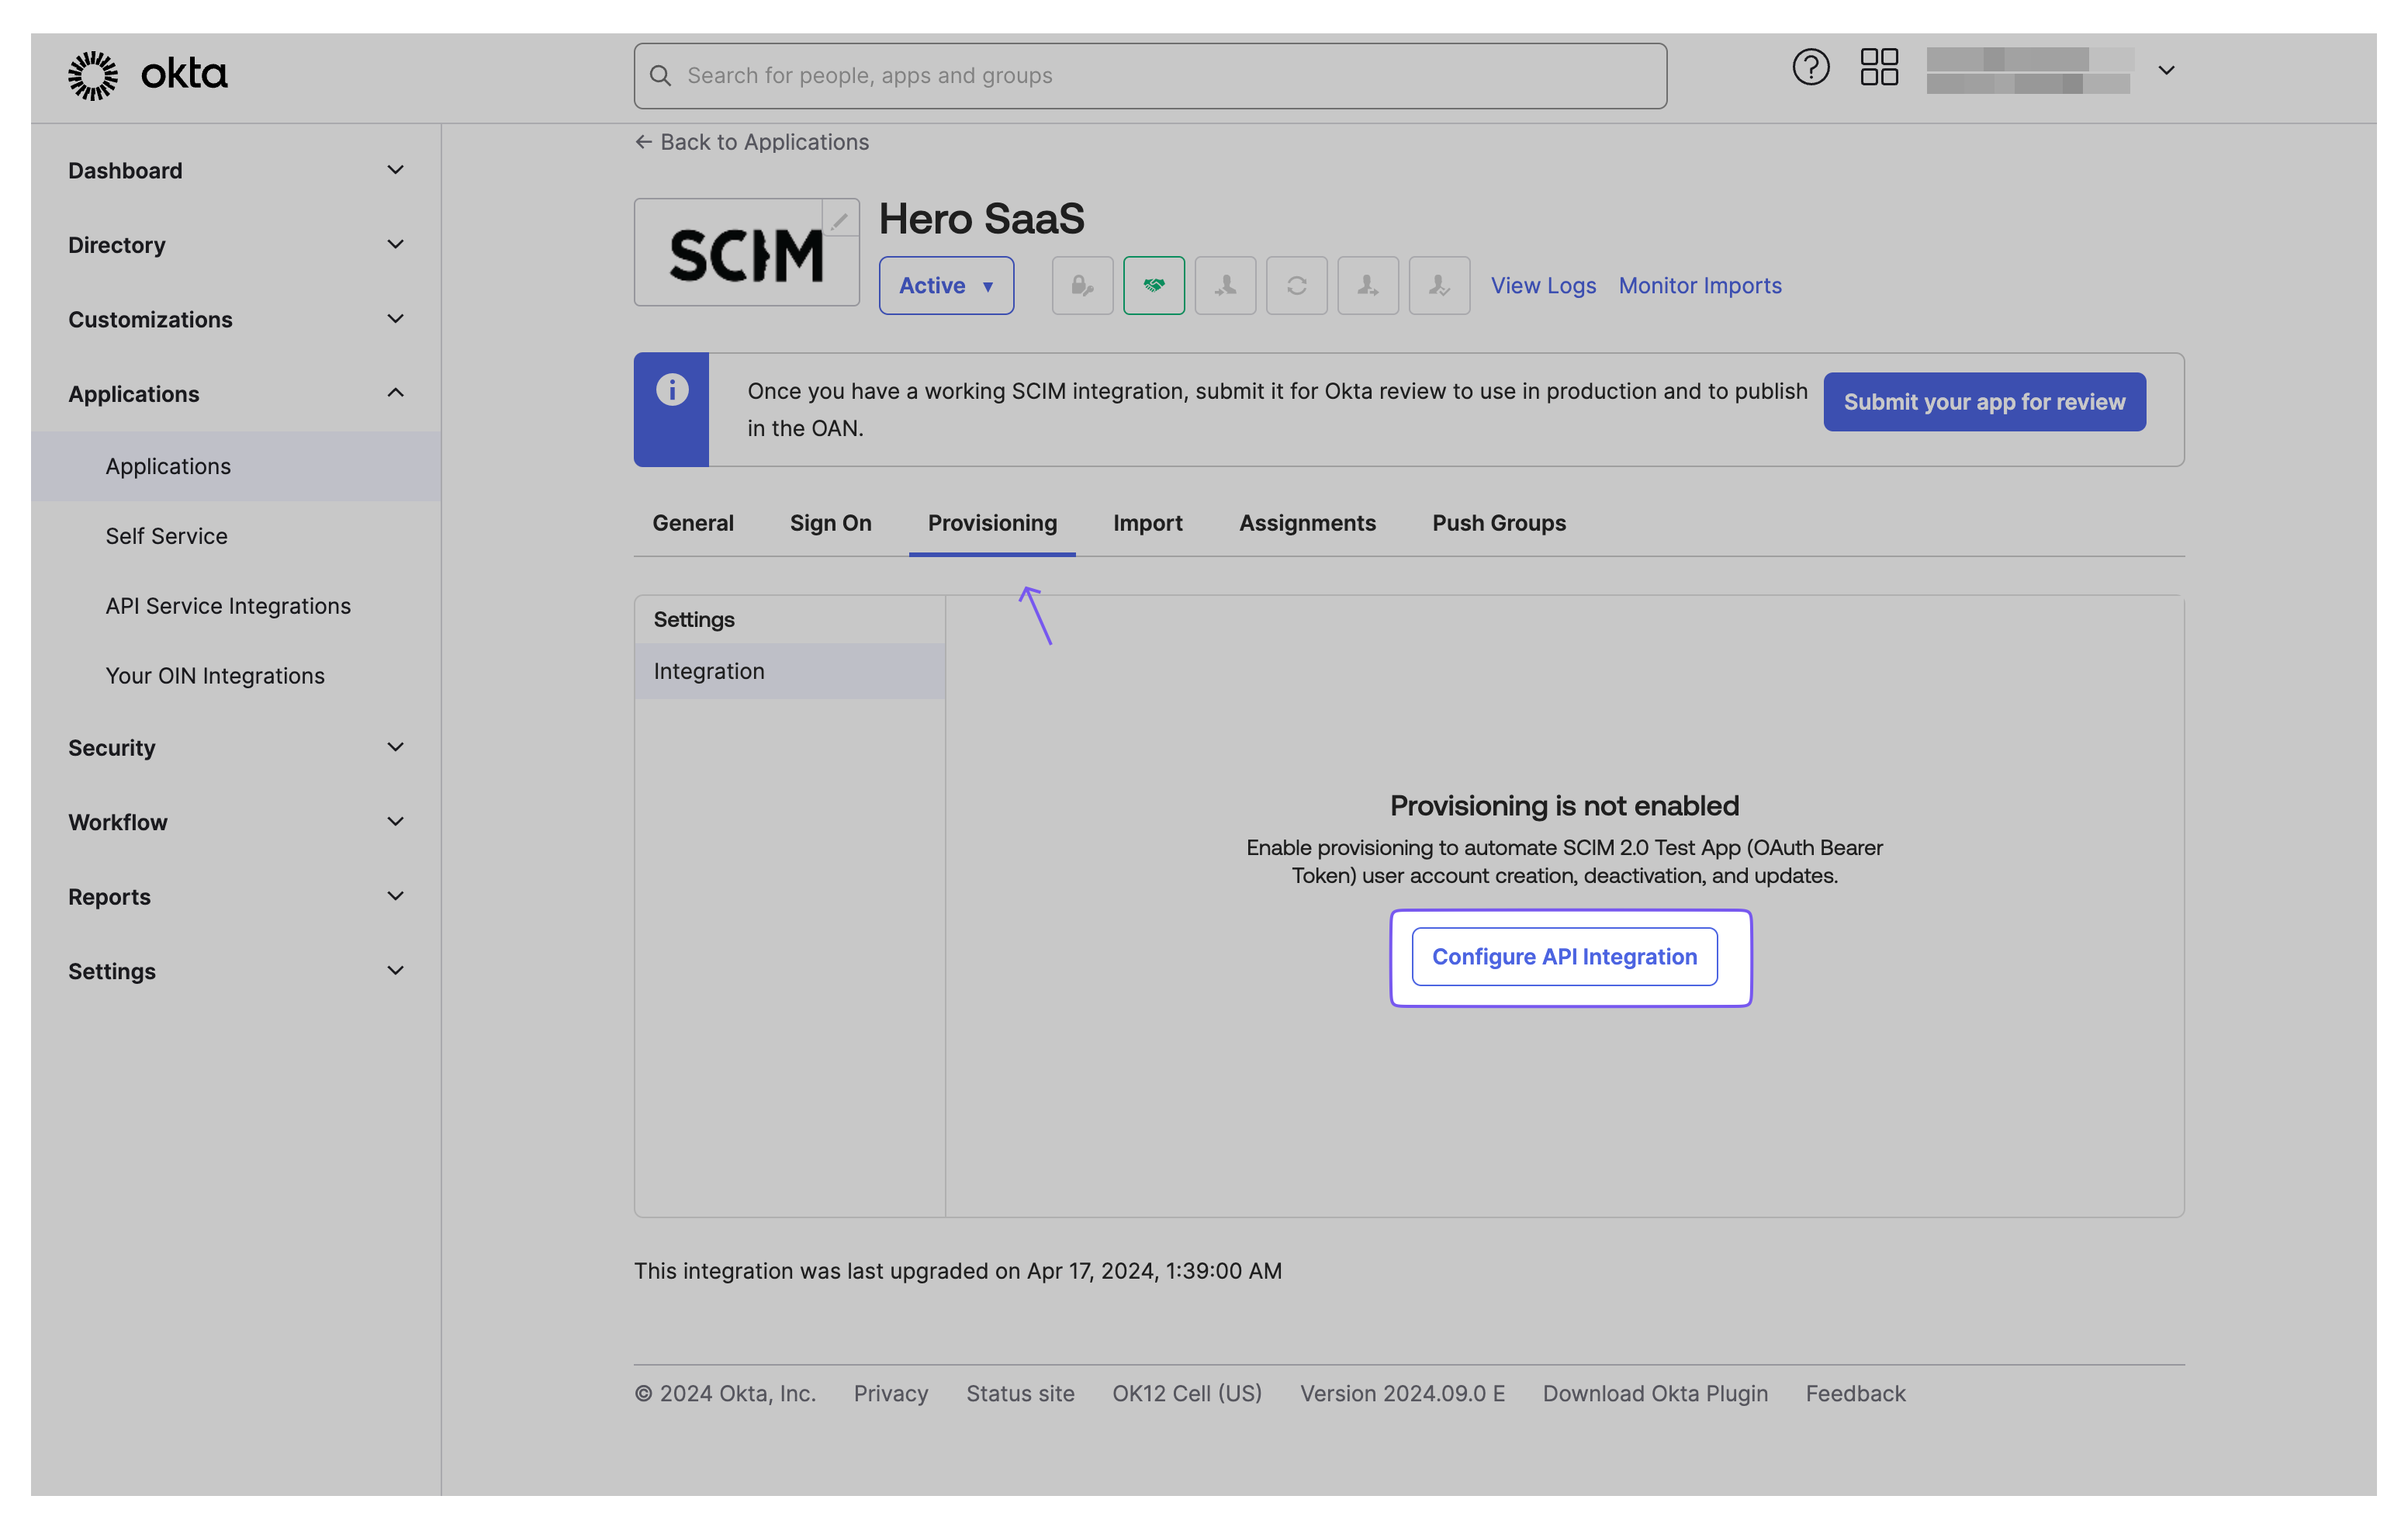
Section titled “Enable sending and receiving events in provisioning settings”In your application’s Enterprise Okta admin panel, navigate to the “Provisioning” tab and select “Configure API Integration.”
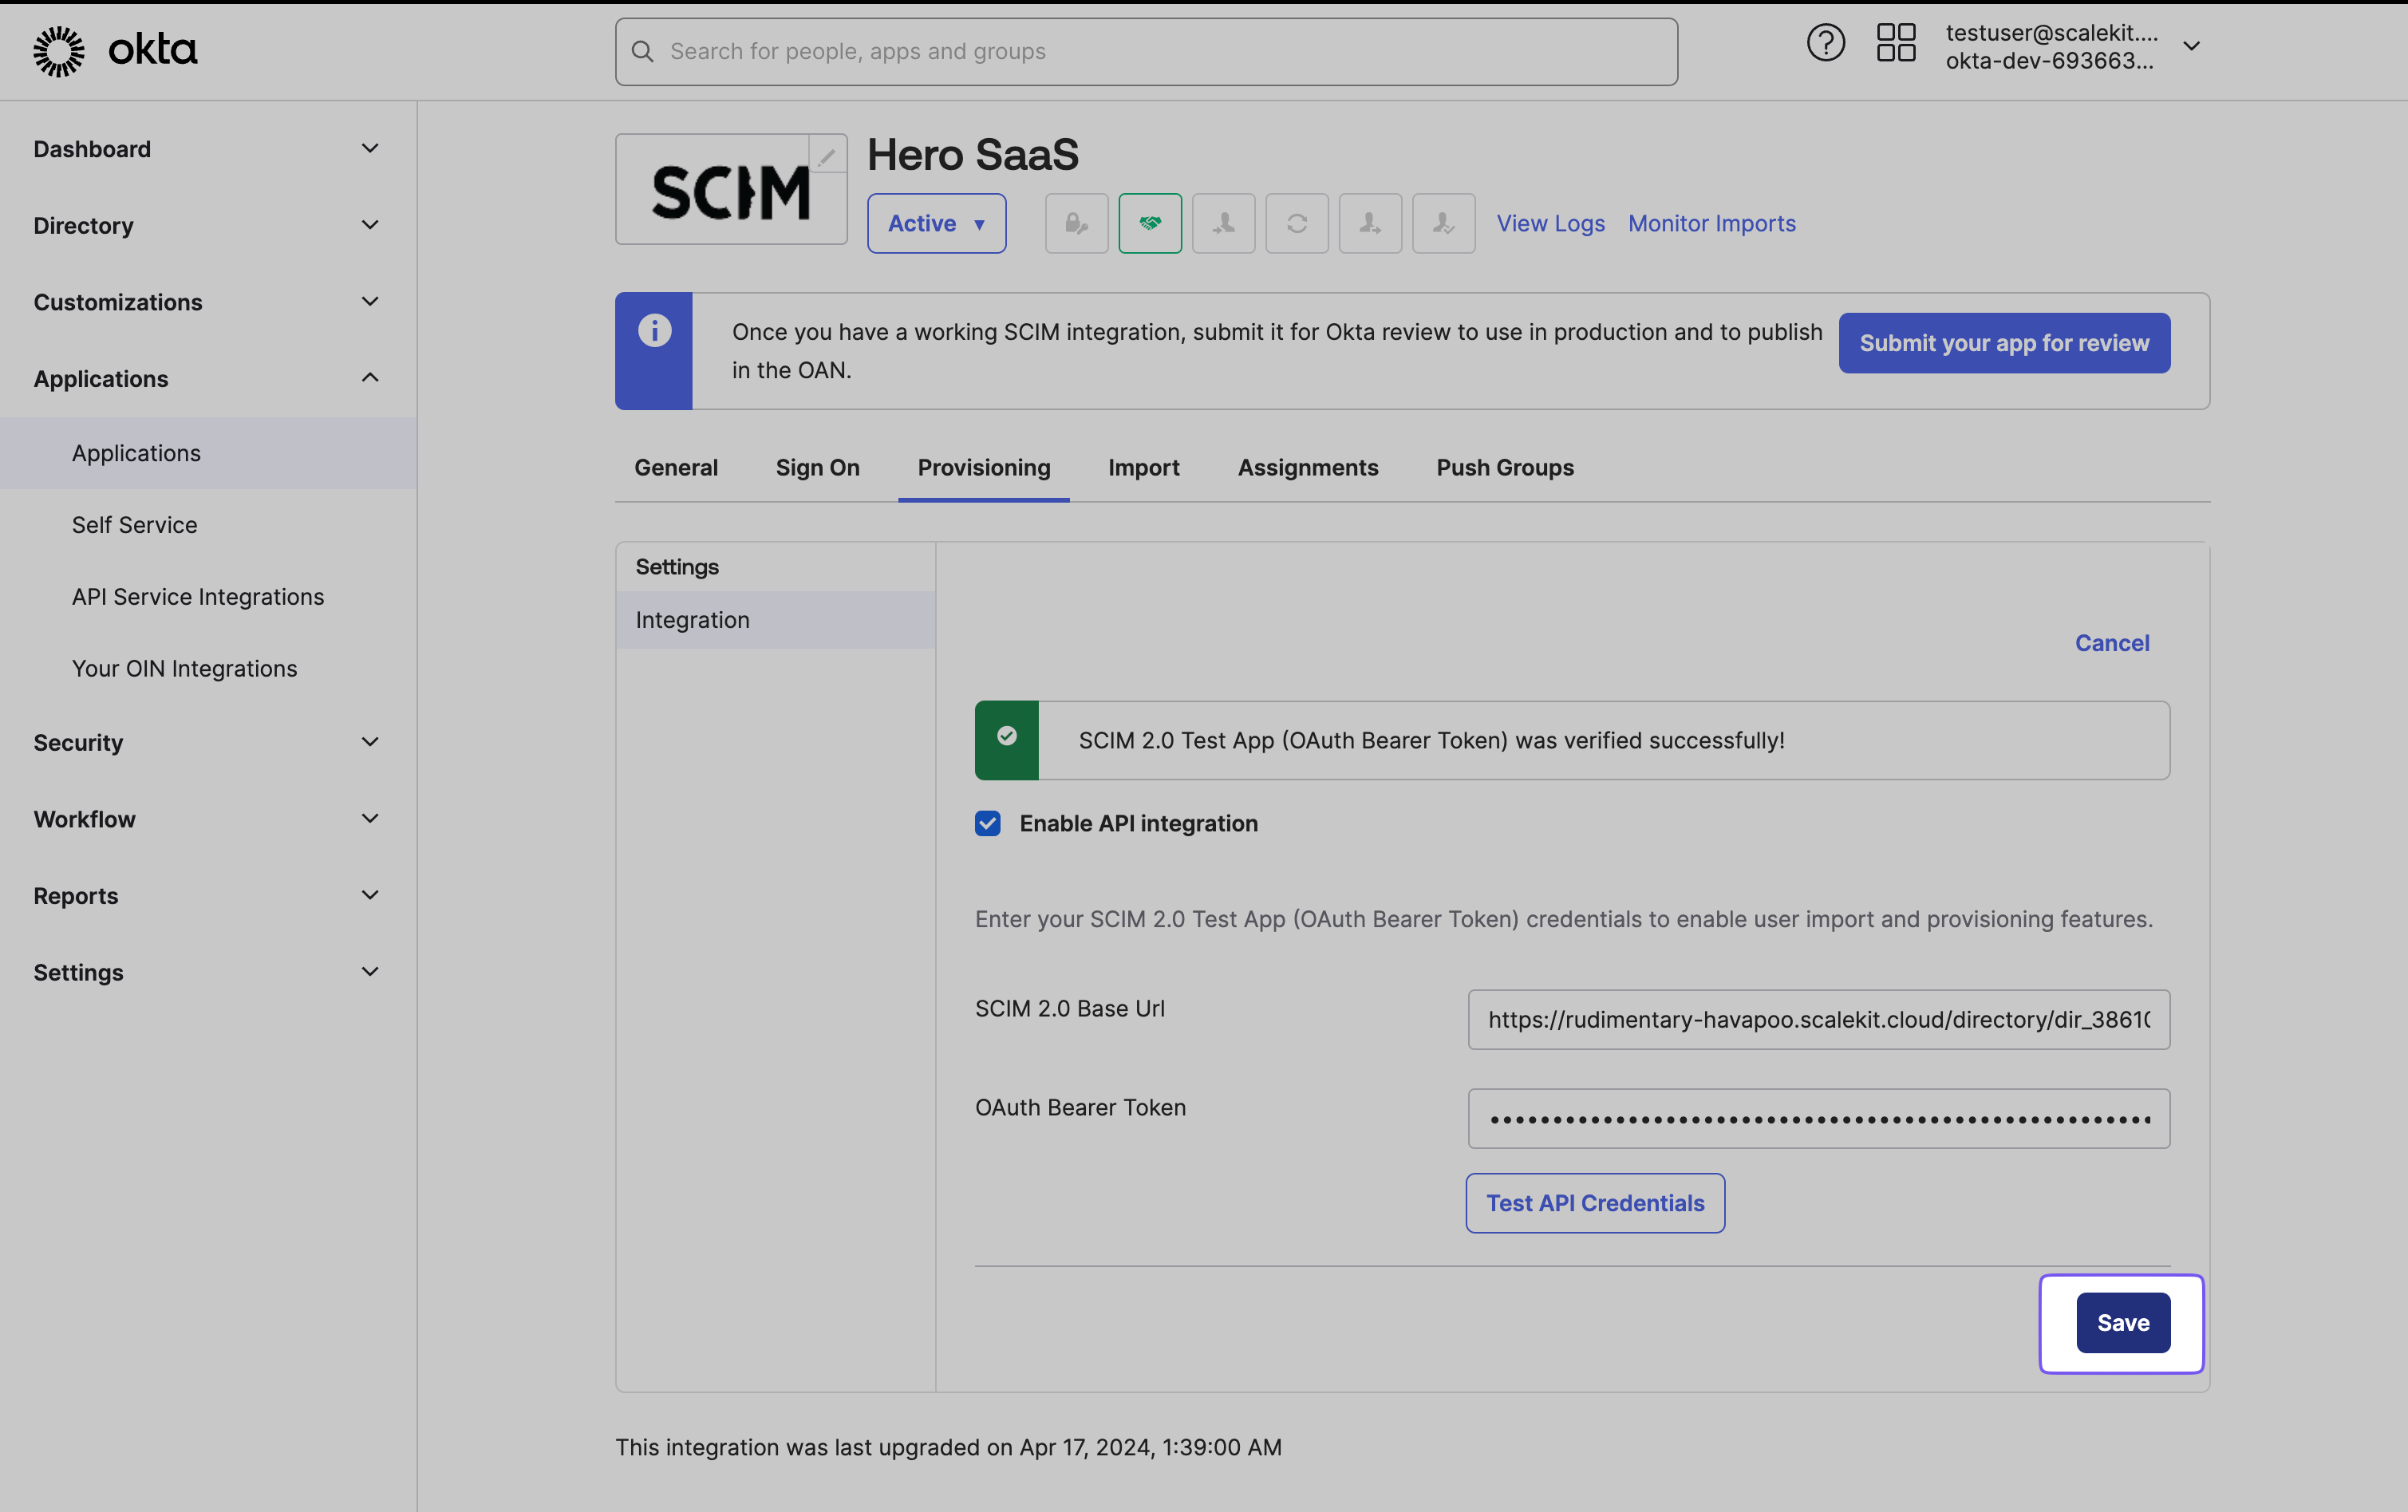
Copy the Endpoint URL and Bearer Token from your Admin Portal and paste them into the SCIM 2.0 Base URL field and OAuth Bearer Token field, respectively. Verify the configuration by clicking “Test API Credentials,” then save the settings.

Give provisioning permissions to the API integration. This is necessary to allow Okta to send and receive events to the app. Upon successful configuration, the Provisioning tab will display a new set of options. These options will be utilized to complete the provisioning process for your application.
-
Configure provisioning options
Section titled “Configure provisioning options”In the “To App” navigation section, enable the following options:
- Create Users
- Update User Attributes
- Deactivate Users
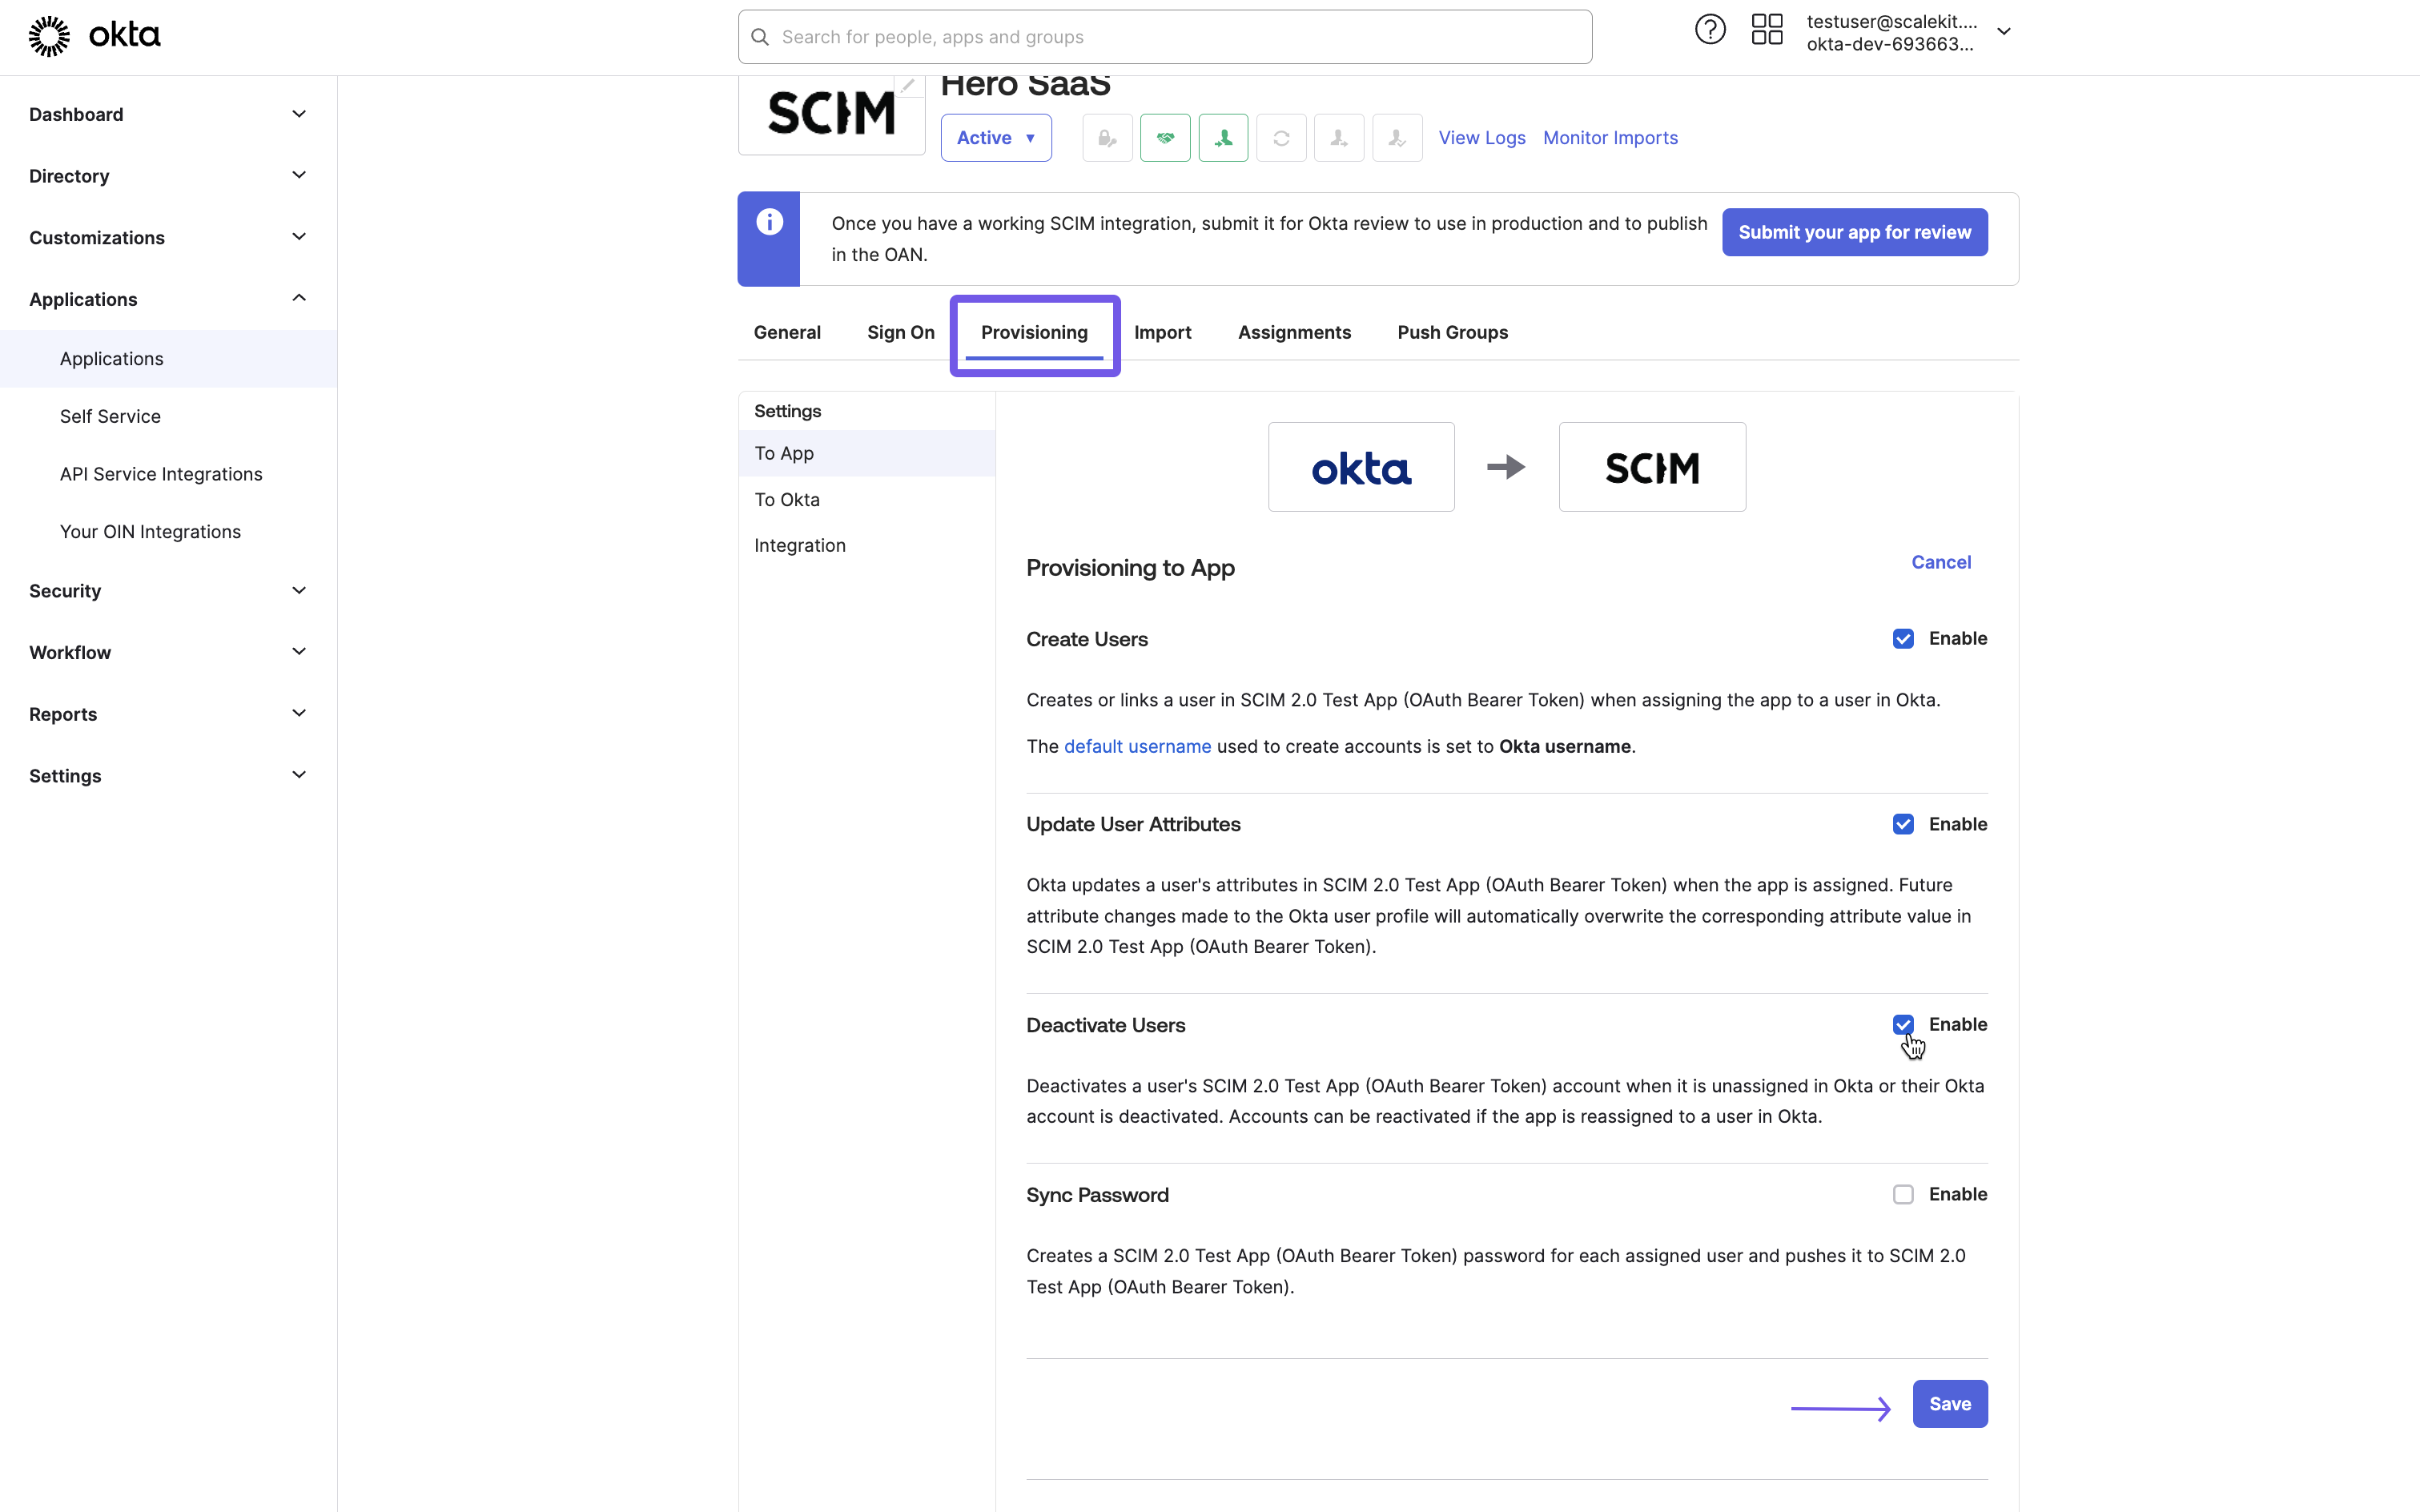
After enabling these options, click “Save” to apply the changes. These settings allow Okta to perform user provisioning actions in your application, including creating new user accounts, updating existing user information, and deactivating user accounts when necessary.
-
Assign users and groups
Section titled “Assign users and groups”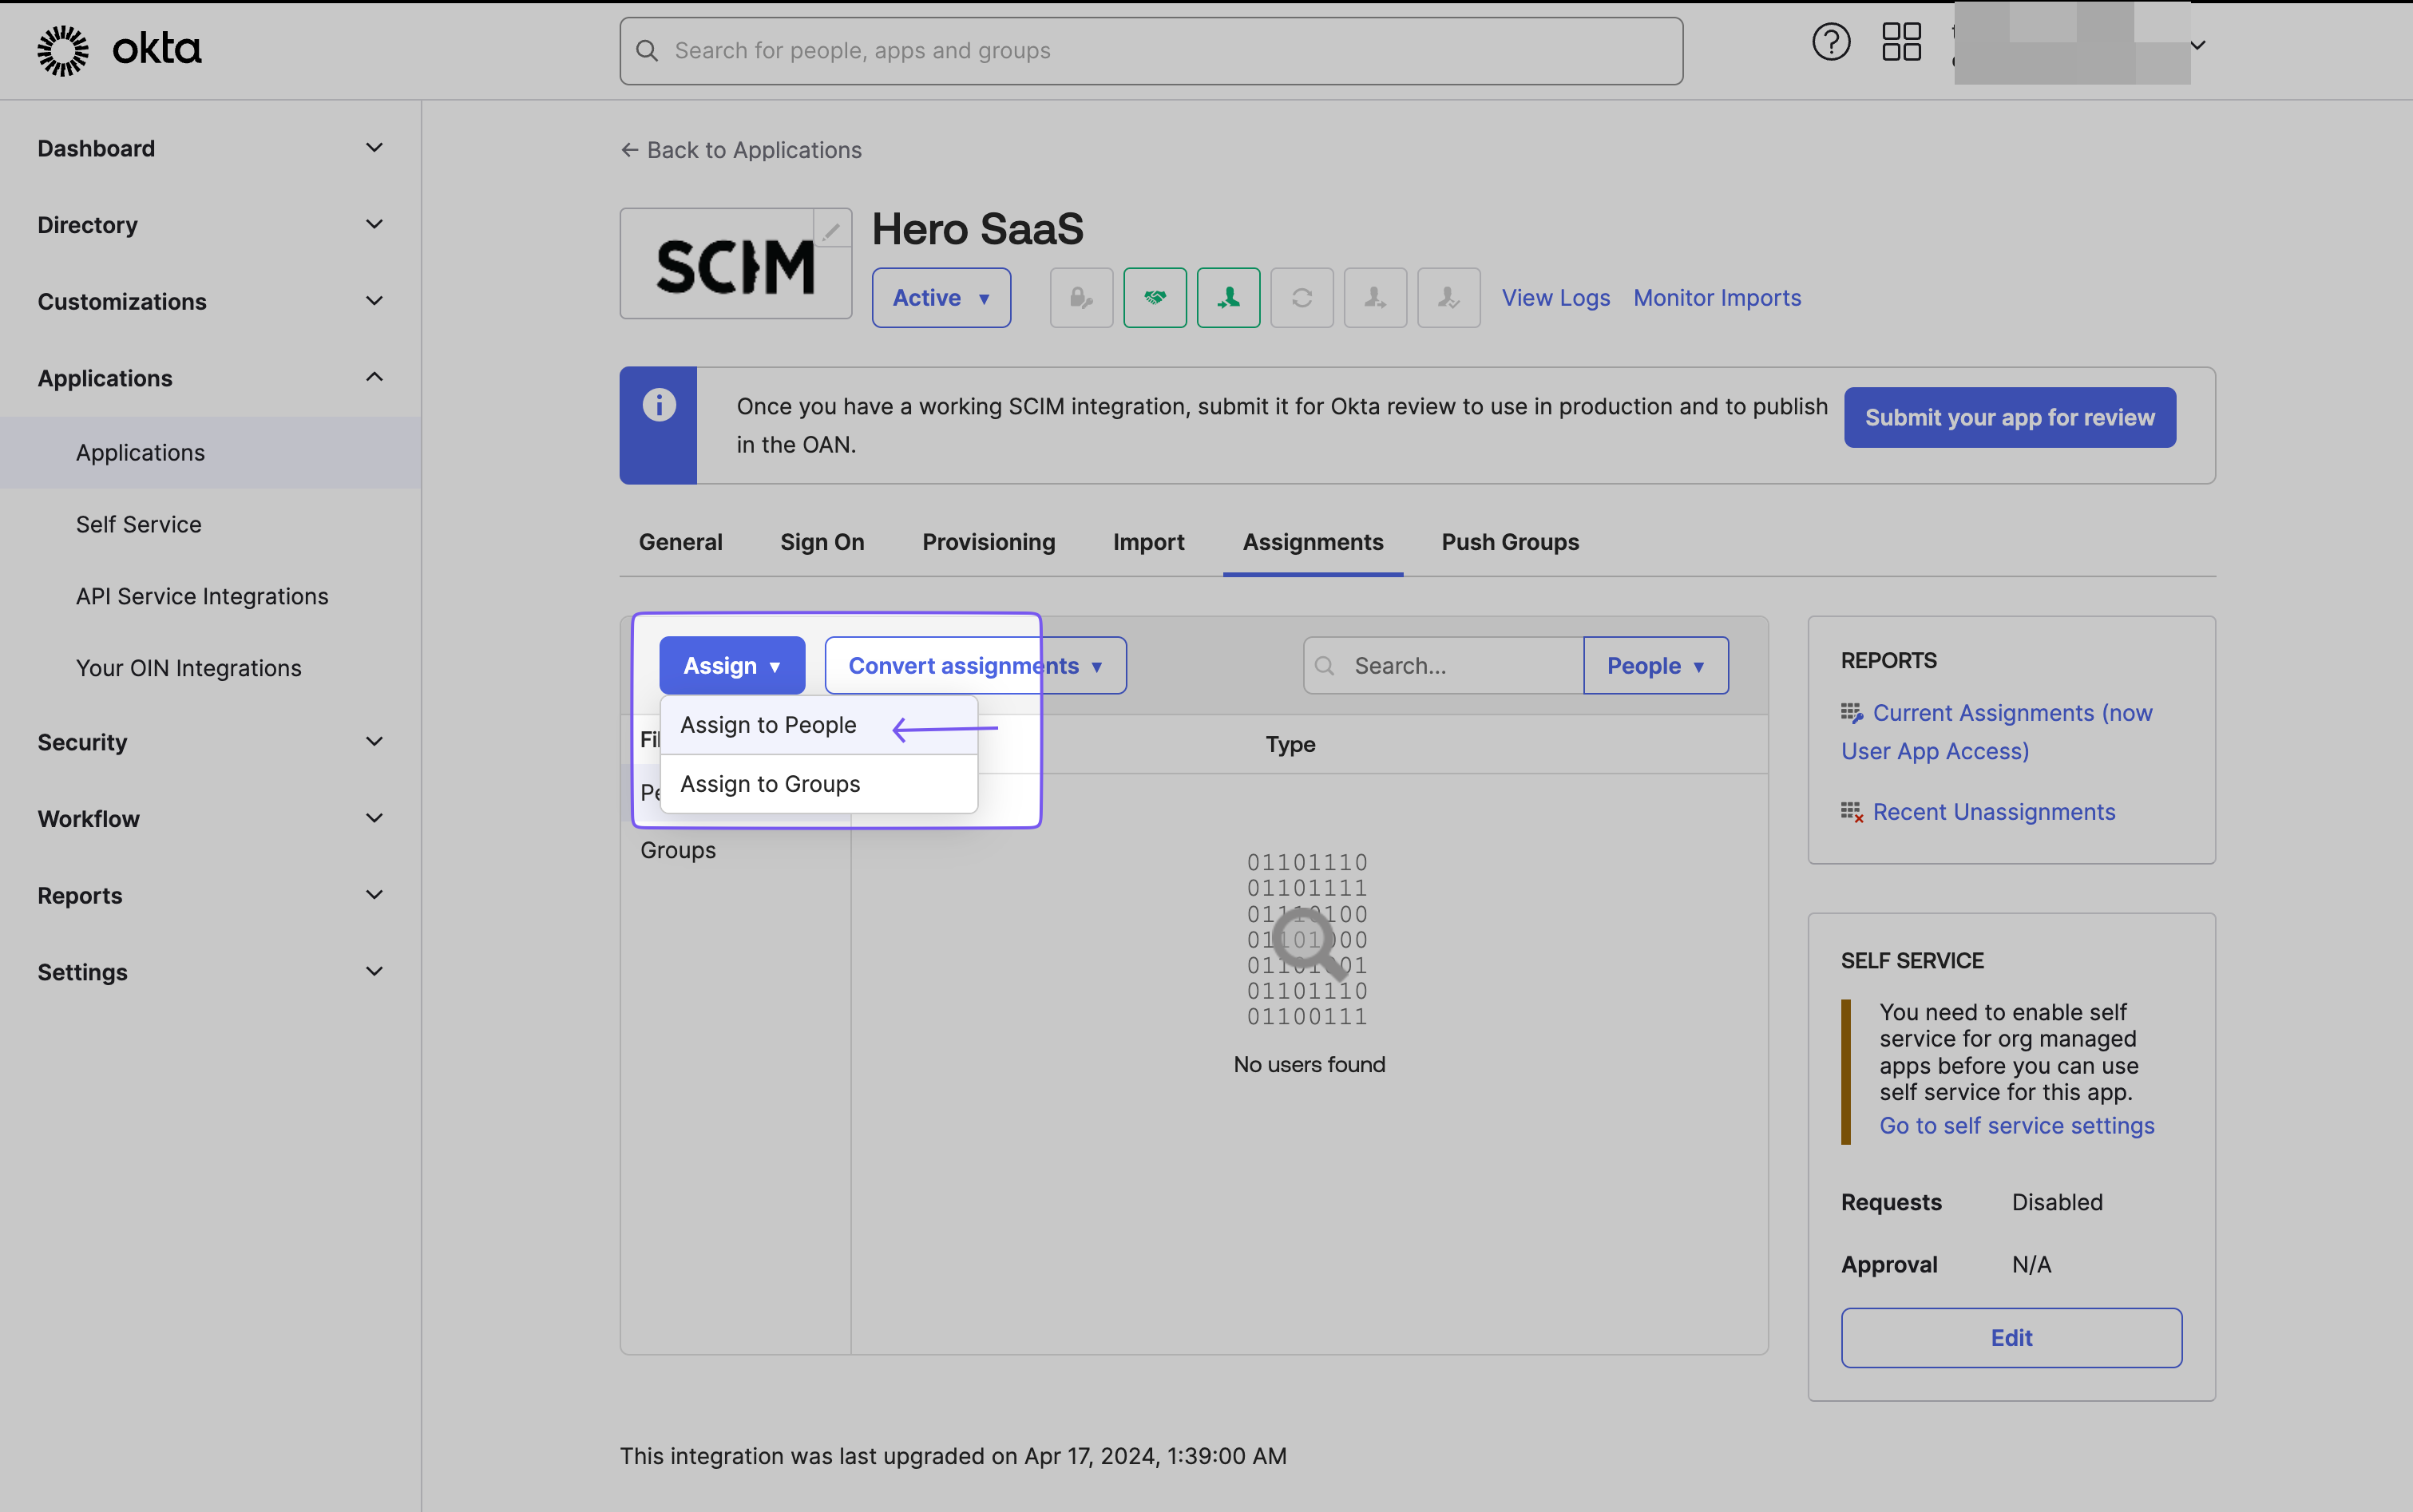
To assign users to the SAML Application:
- Navigate to the “Assignments” tab.
- From the “Assign” dropdown, select “Assign to People.”
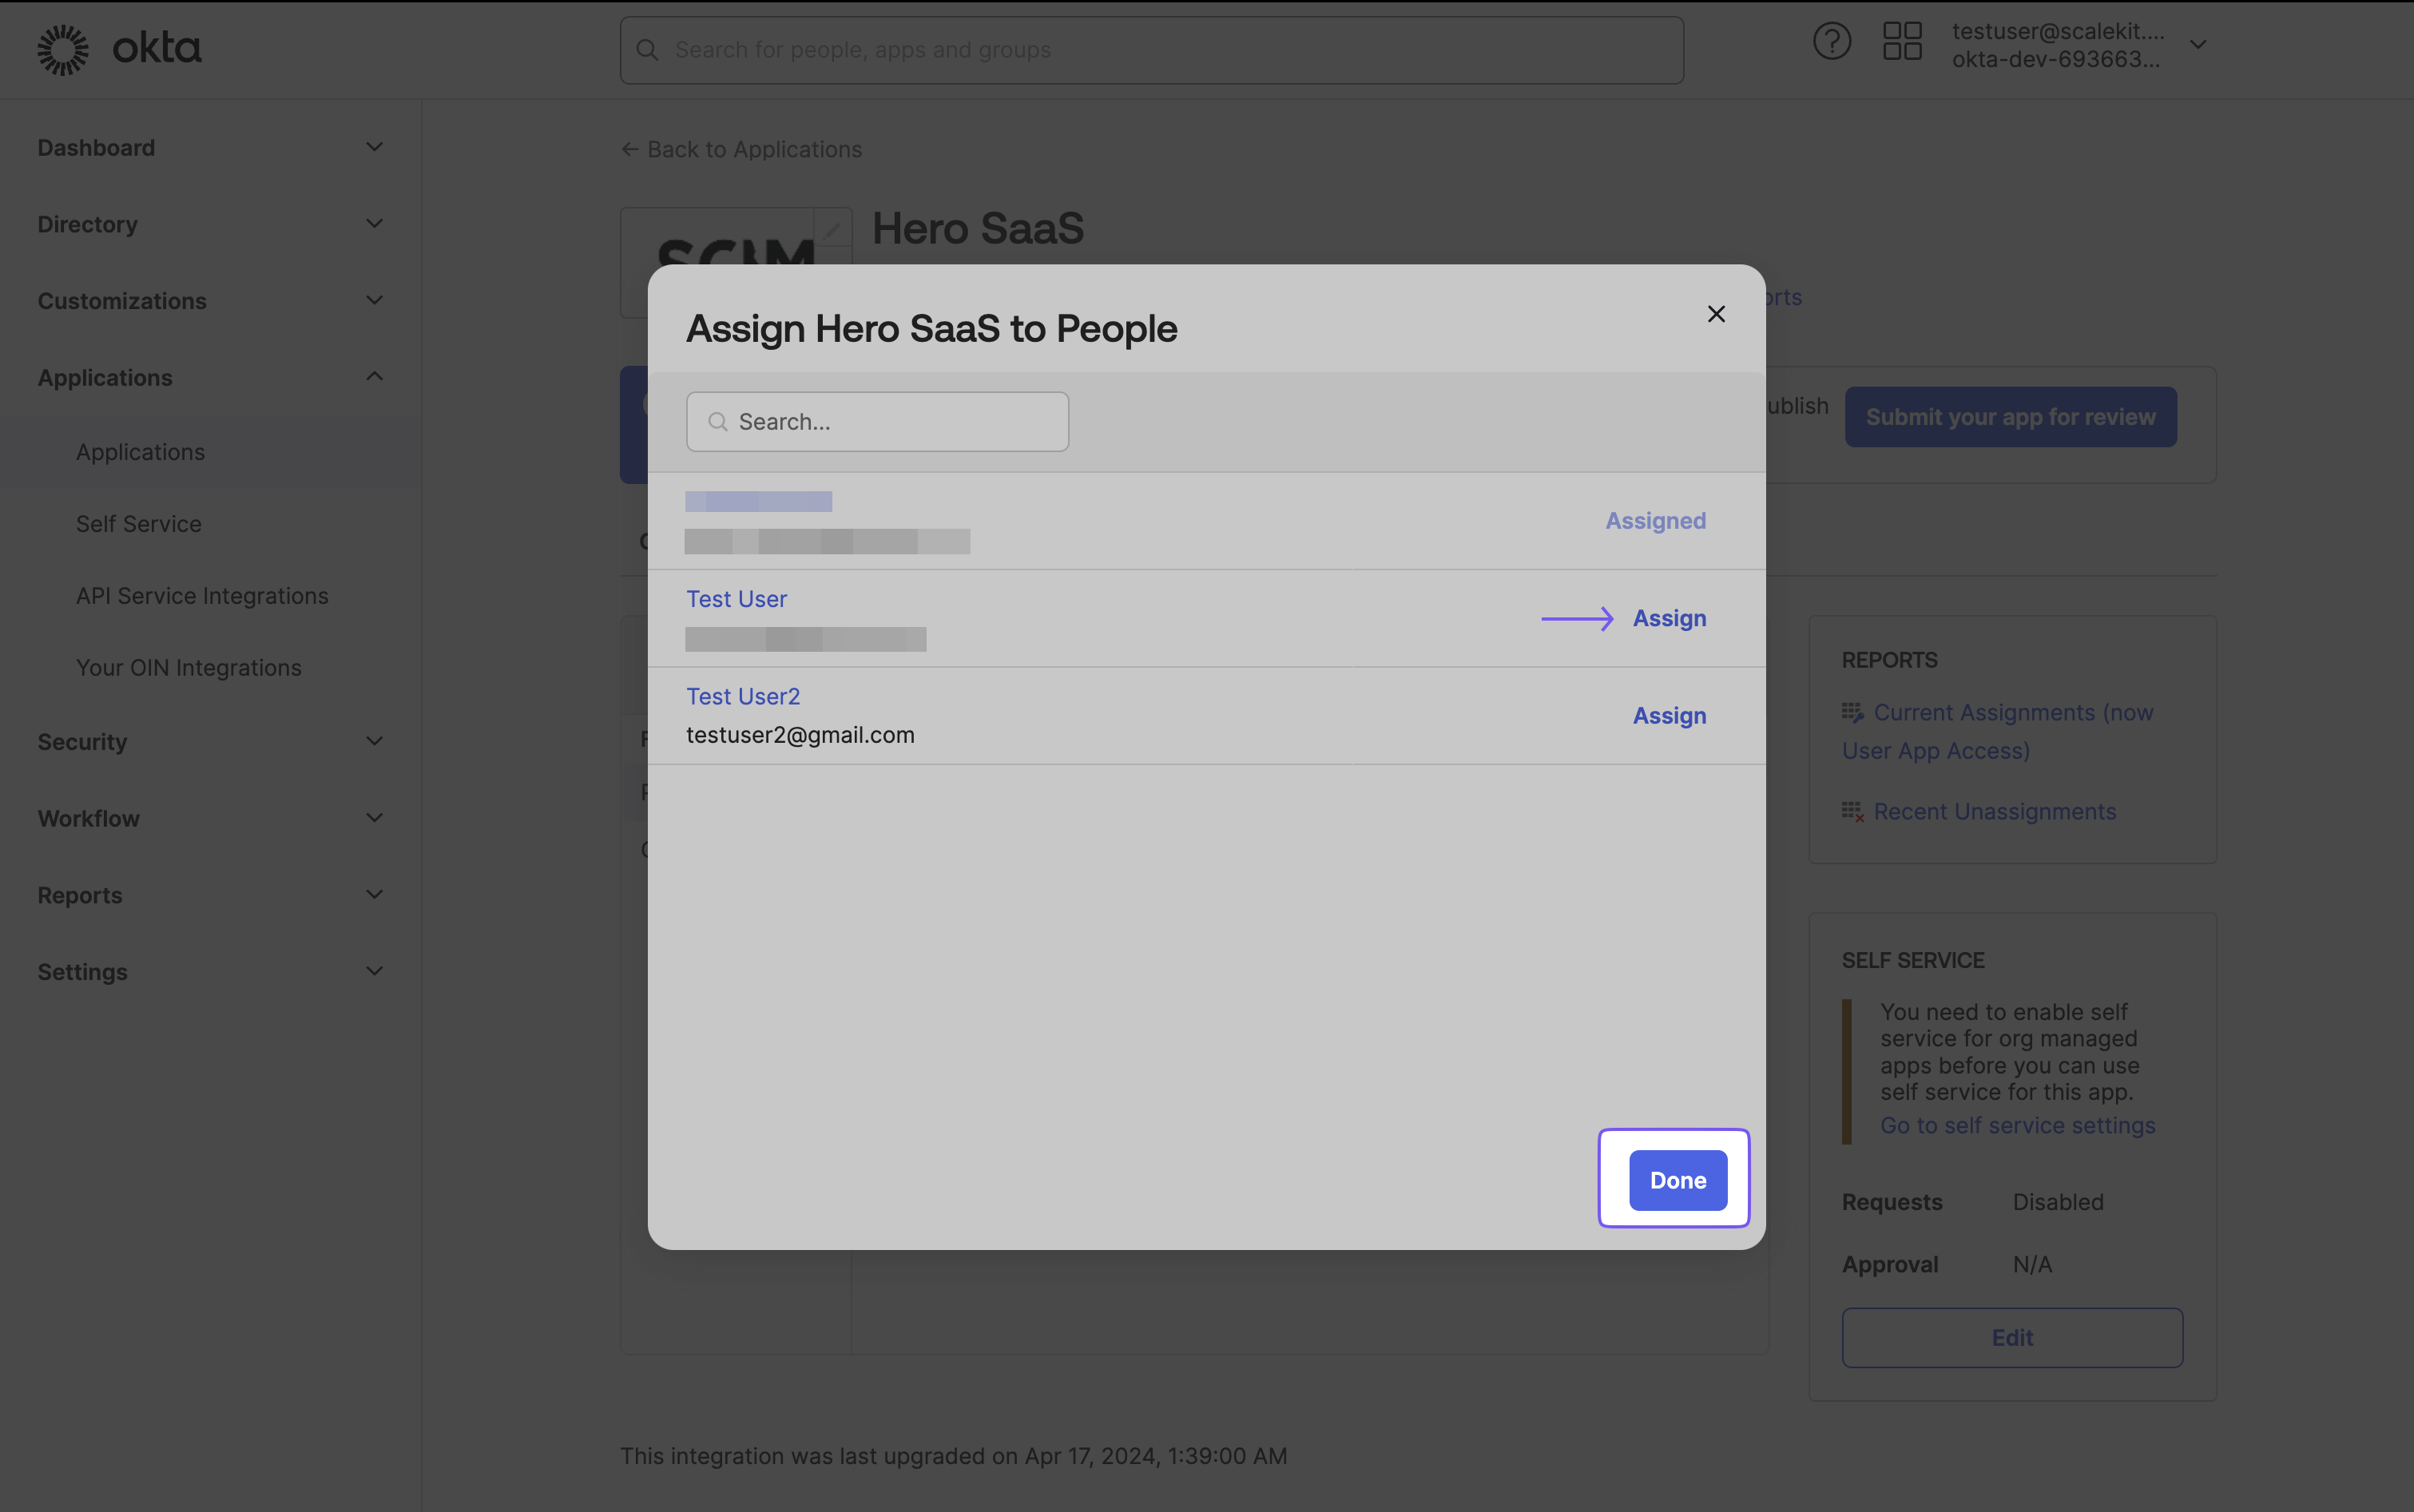
- Choose the users you want to provision and click “Assign.”
- A form will open for each user. Review and populate the user’s metadata fields.
- Scroll to the bottom and click “Save and Go Back.”
- Repeat this process for all users, then select “Done.”
-
Push groups and sync group membership
Section titled “Push groups and sync group membership”To push groups and sync group membership:
- Navigate to the “Push Groups” tab.
- From the “Push Groups” dropdown, select “Find groups by name.”
- Search for and select the group you want to push.
- Ensure the “Push Immediately” box is checked.
- Click “Save.”

-
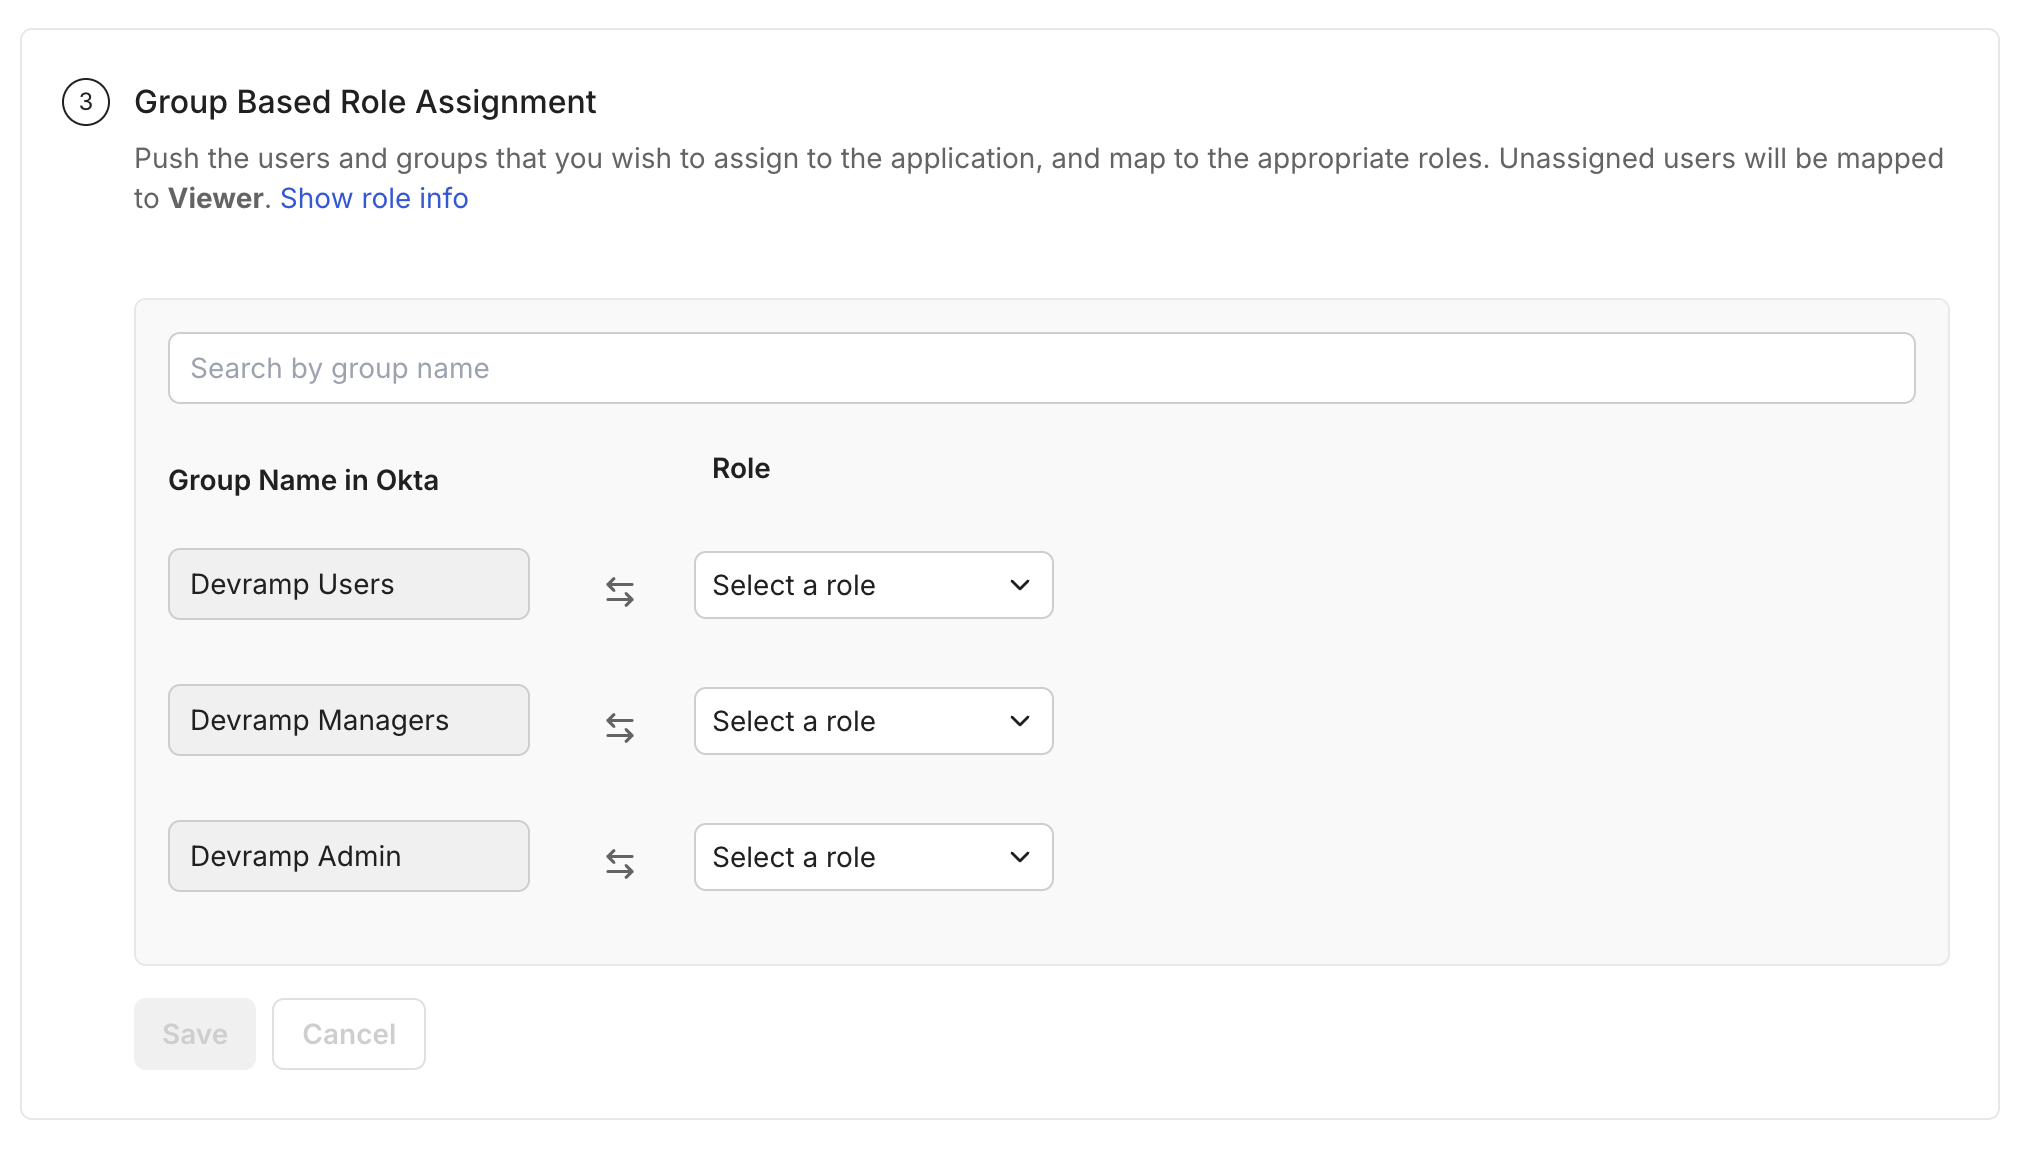
Group based Role Assignment Configuration
Section titled “Group based Role Assignment Configuration”To automatically assign roles to users based on their group membership, configure appropriate group to role mapping in the SCIM Configuration Portal.
-
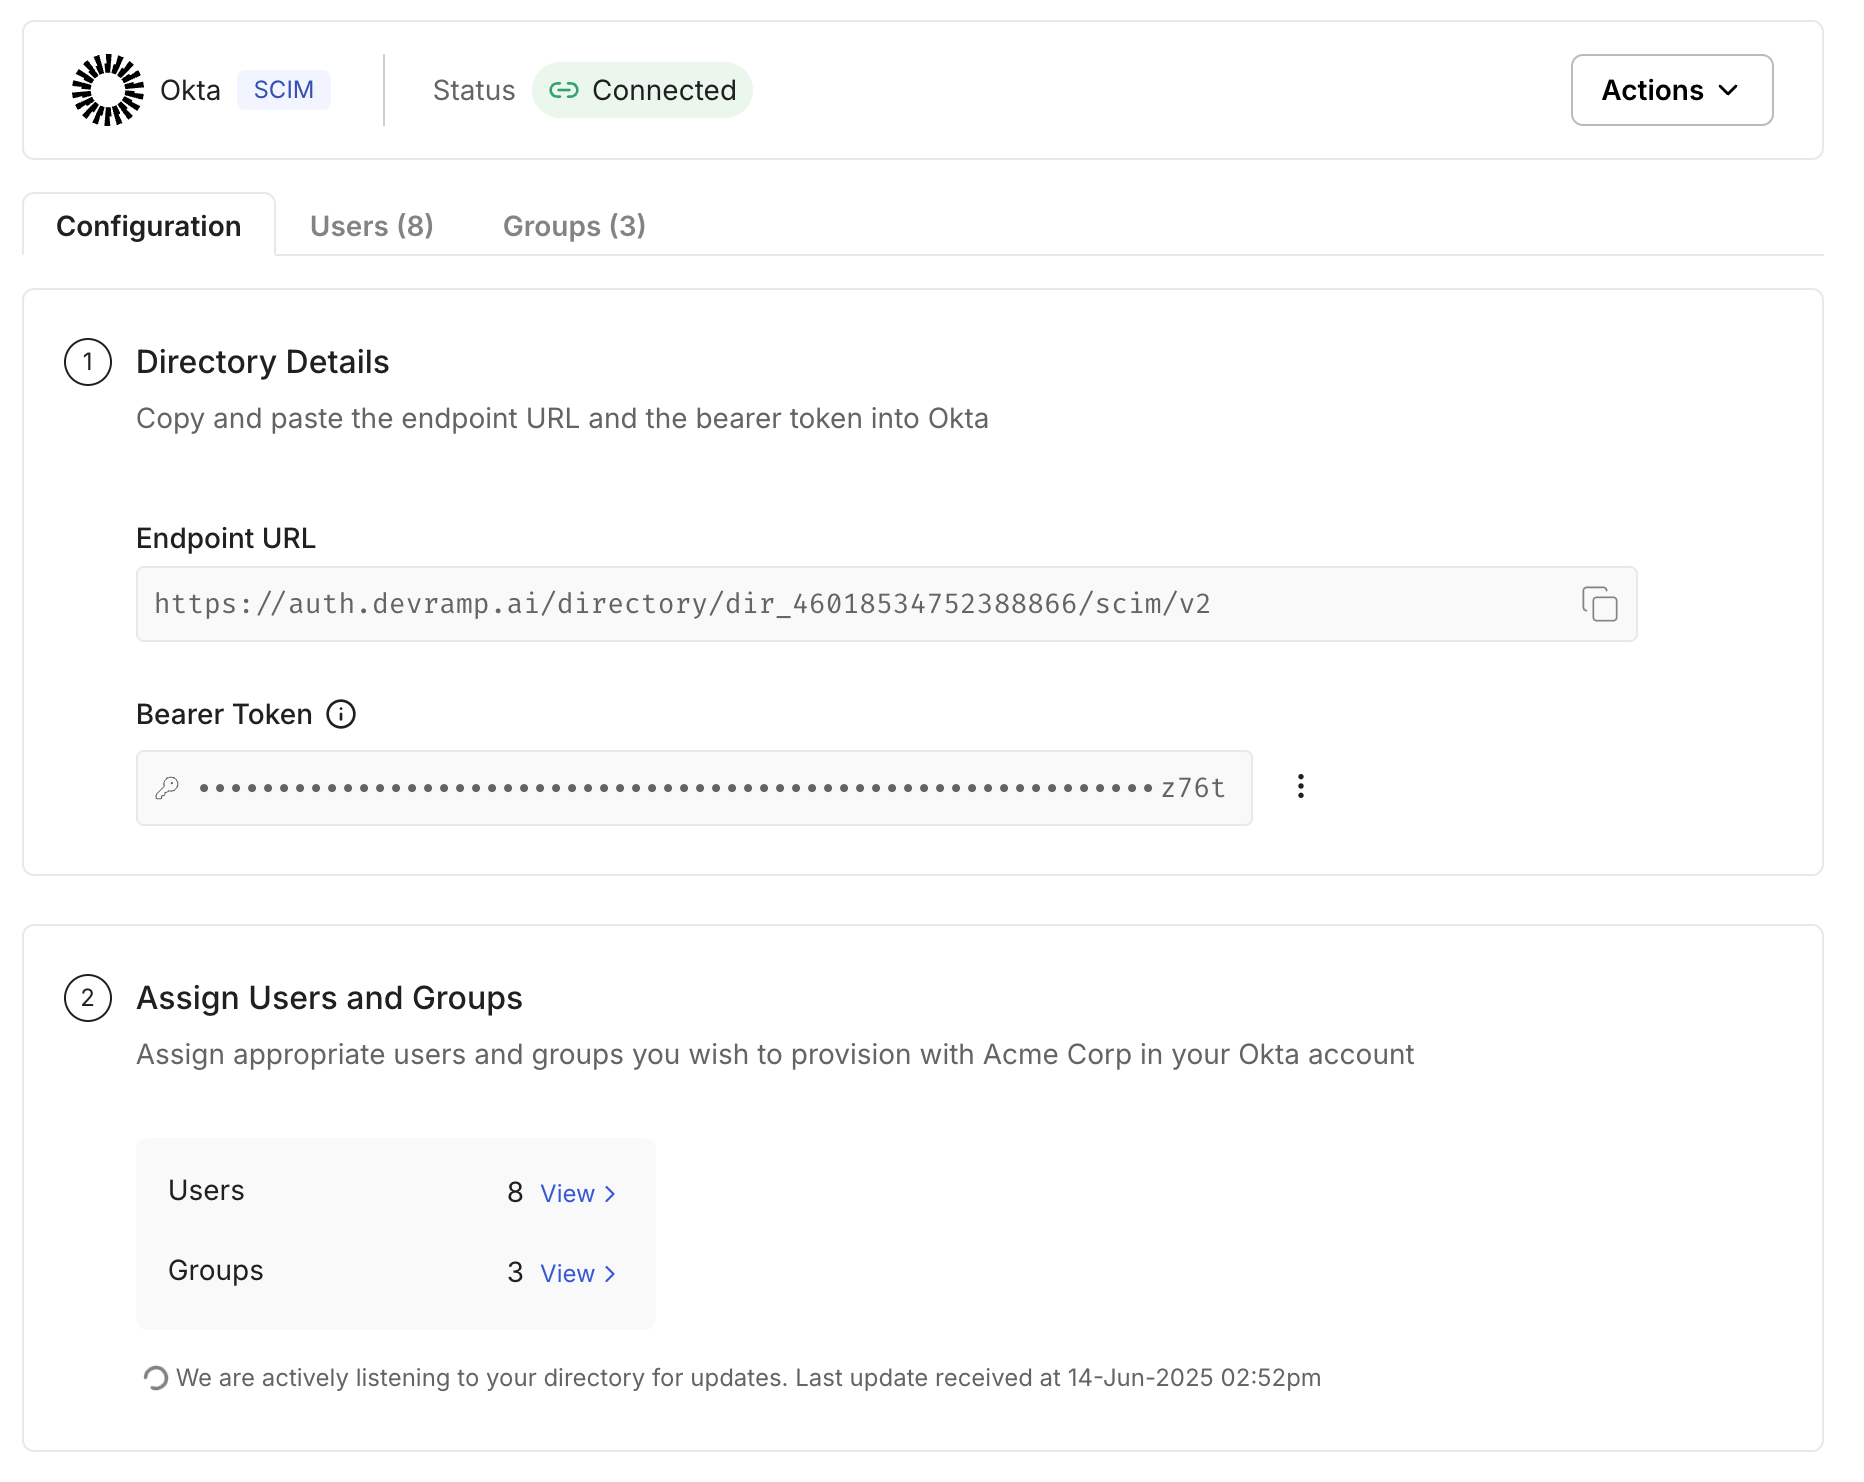
Verify successful connection
Section titled “Verify successful connection”After completing these steps, verify that the users and groups are successfully synced by visiting Users and Groups tab in the Admin Portal.