
OneLogin Directory
Learn how to sync your OneLogin directory with your application for automated user provisioning and management using SCIM.
This guide helps administrators sync their OneLogin directory with an application they want to onboard. Integrating your application with OneLogin automates user management tasks and keeps access rights up-to-date.
Setting up the integration involves:
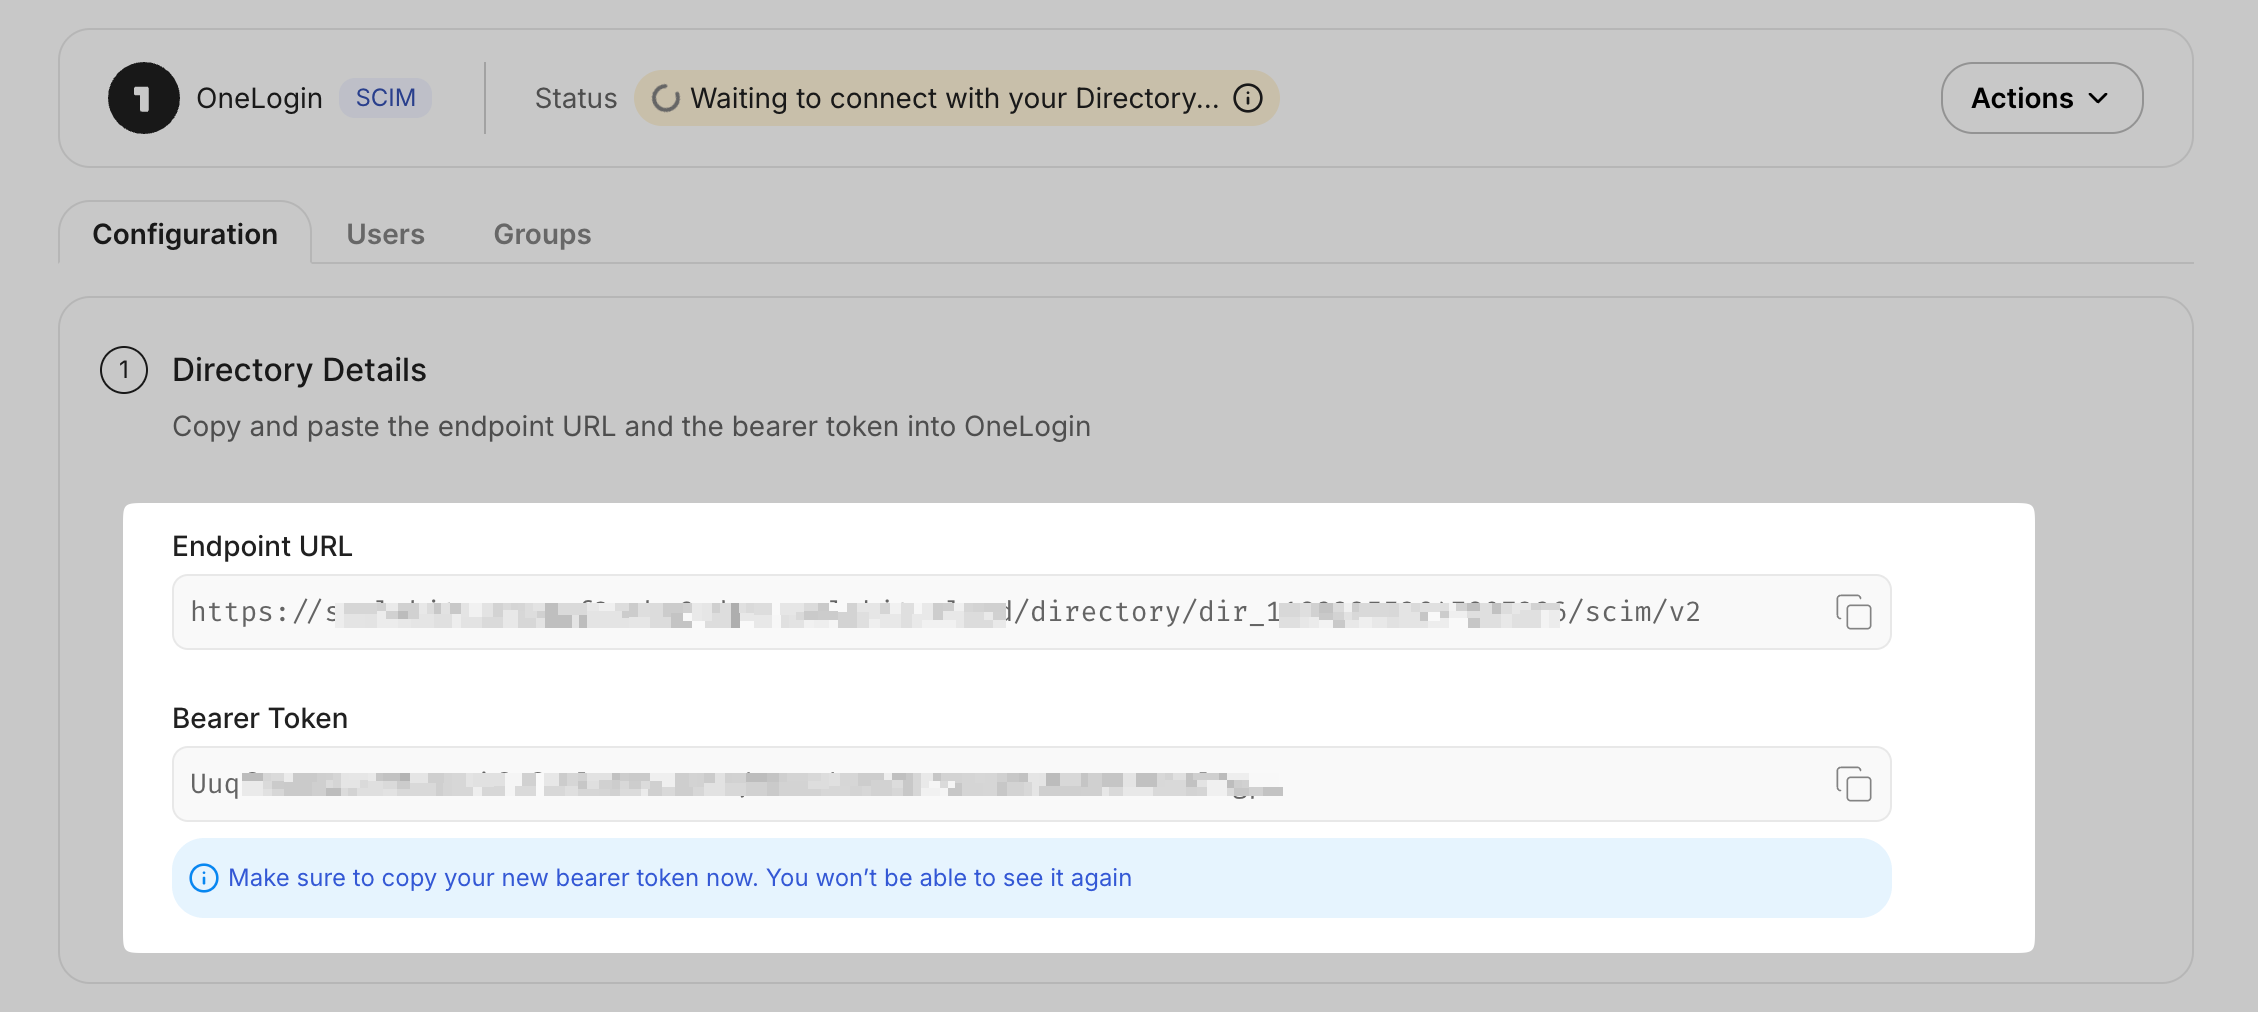
- Endpoint: The URL where OneLogin sends requests to your application, enabling communication between them.
- Bearer Token: A token OneLogin uses to authenticate its requests to the endpoint, ensuring security and authorization.
By setting up these components, you enable seamless synchronization between your application and the OneLogin directory.
-
Create an endpoint and API token
Section titled “Create an endpoint and API token”Open the Admin Portal from the app being onboarded and select the “SCIM Provisioning” tab. Choose “OneLogin” as your Directory Provider.
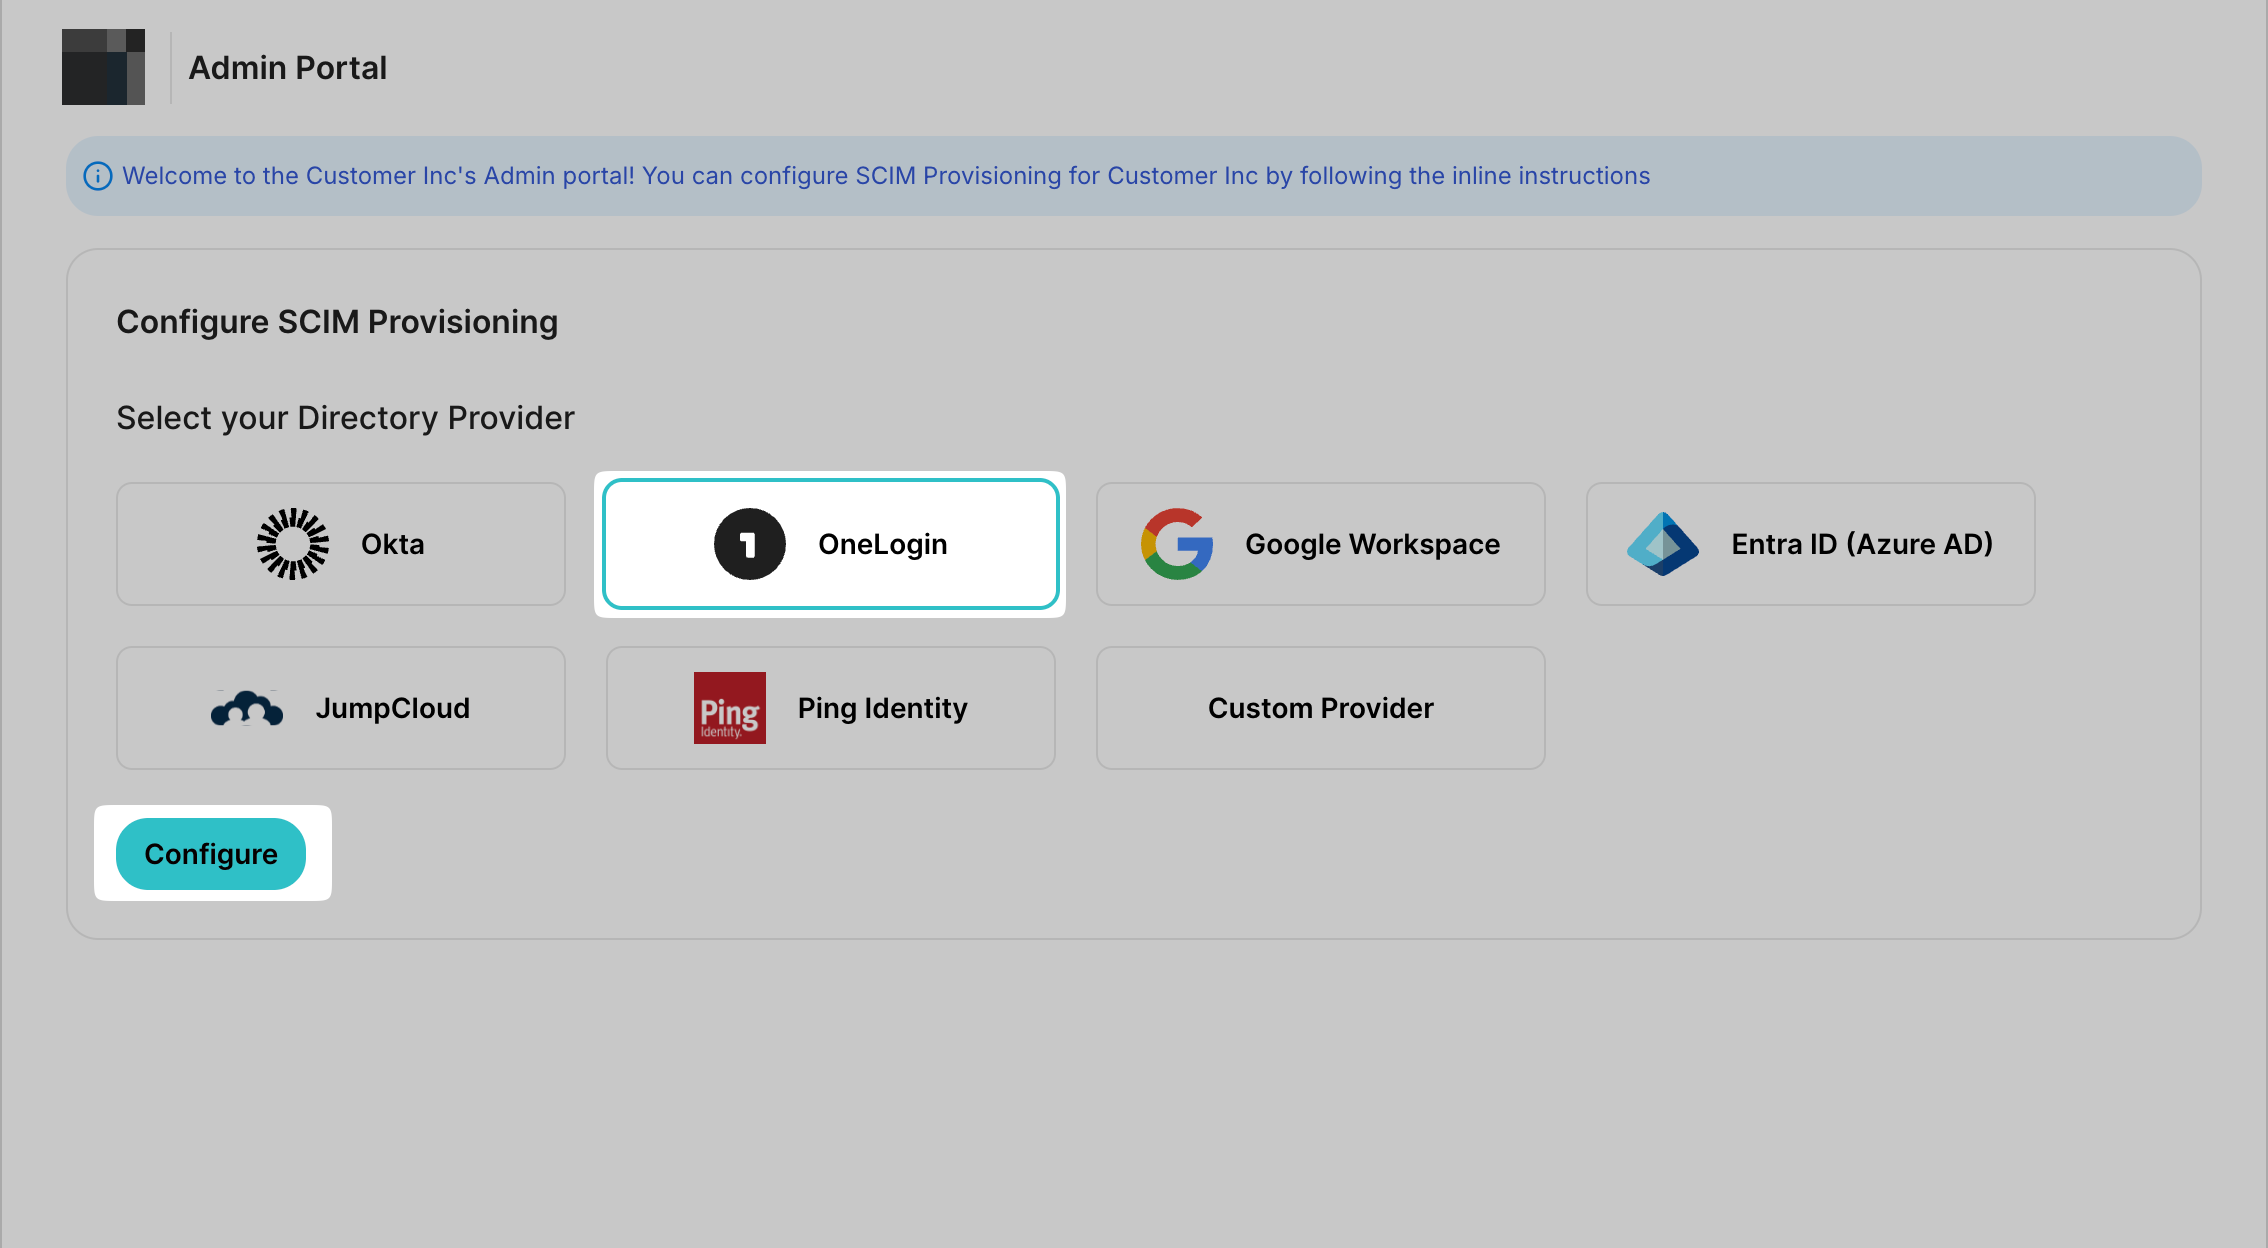
Click “Configure” to generate an Endpoint URL and Bearer token for your organization.
-
Add a new application in OneLogin
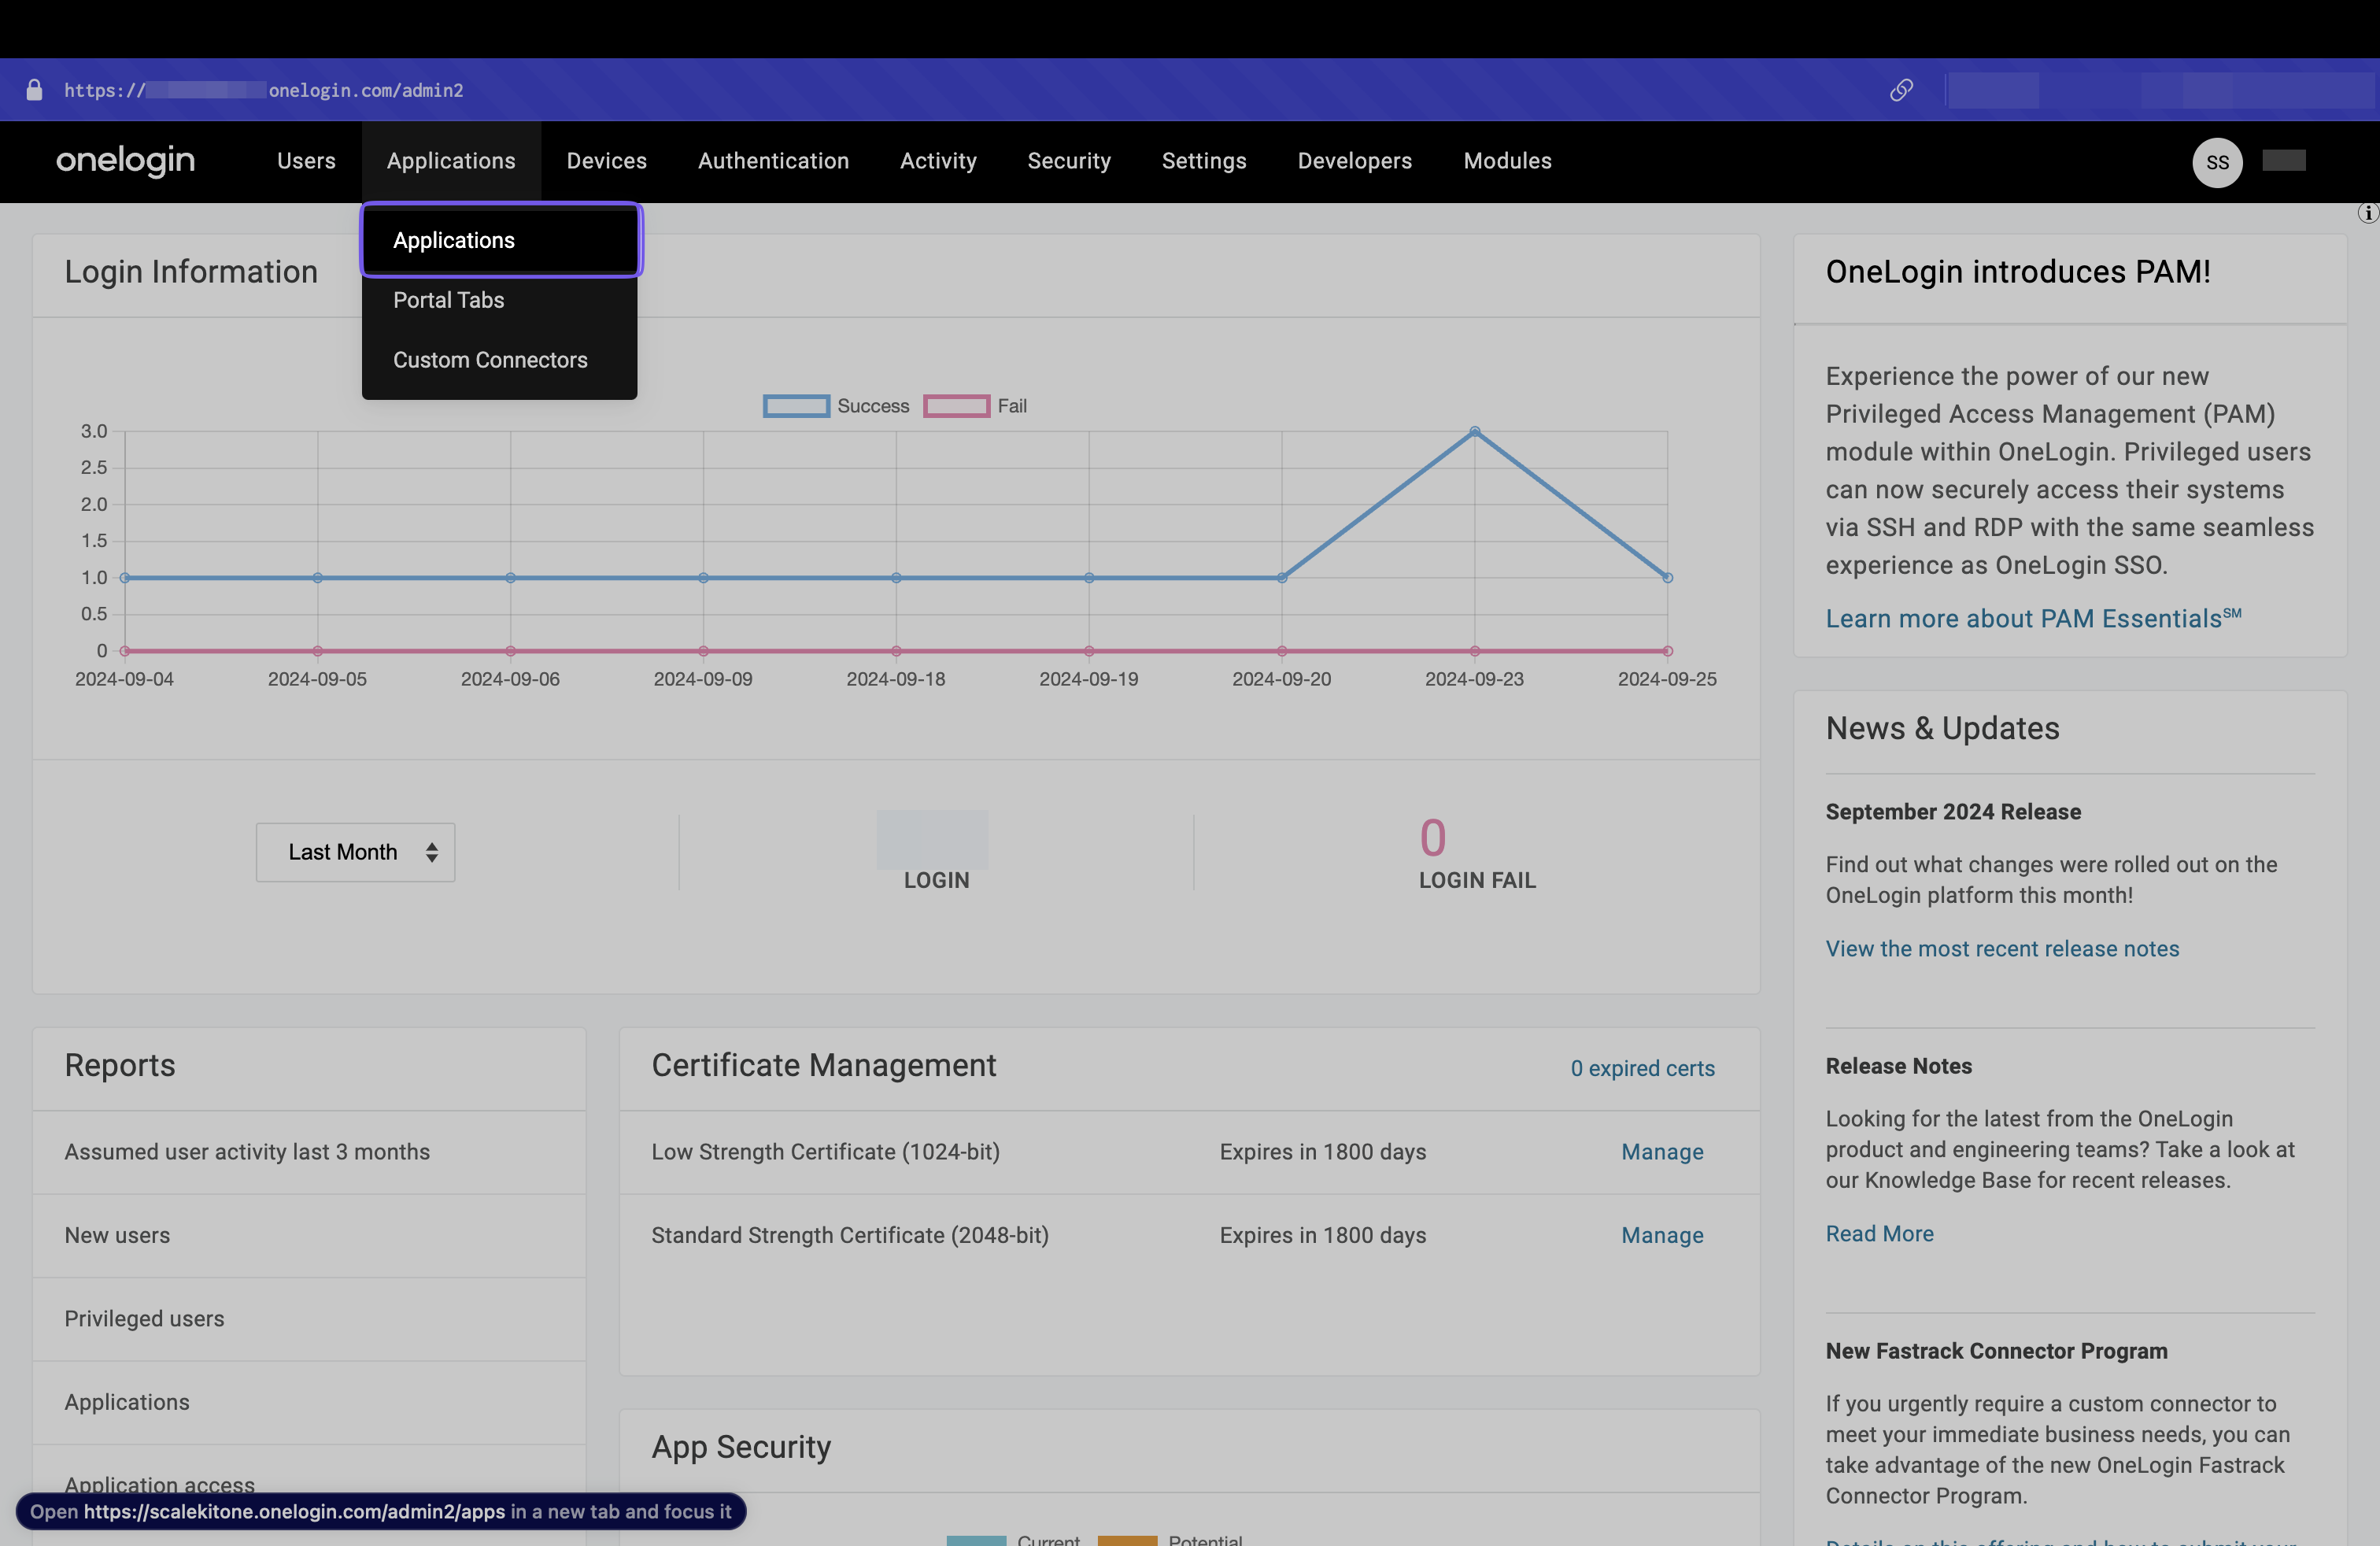
Section titled “Add a new application in OneLogin”In OneLogin, click “Administration” and then “Applications” from the top navigation pane.
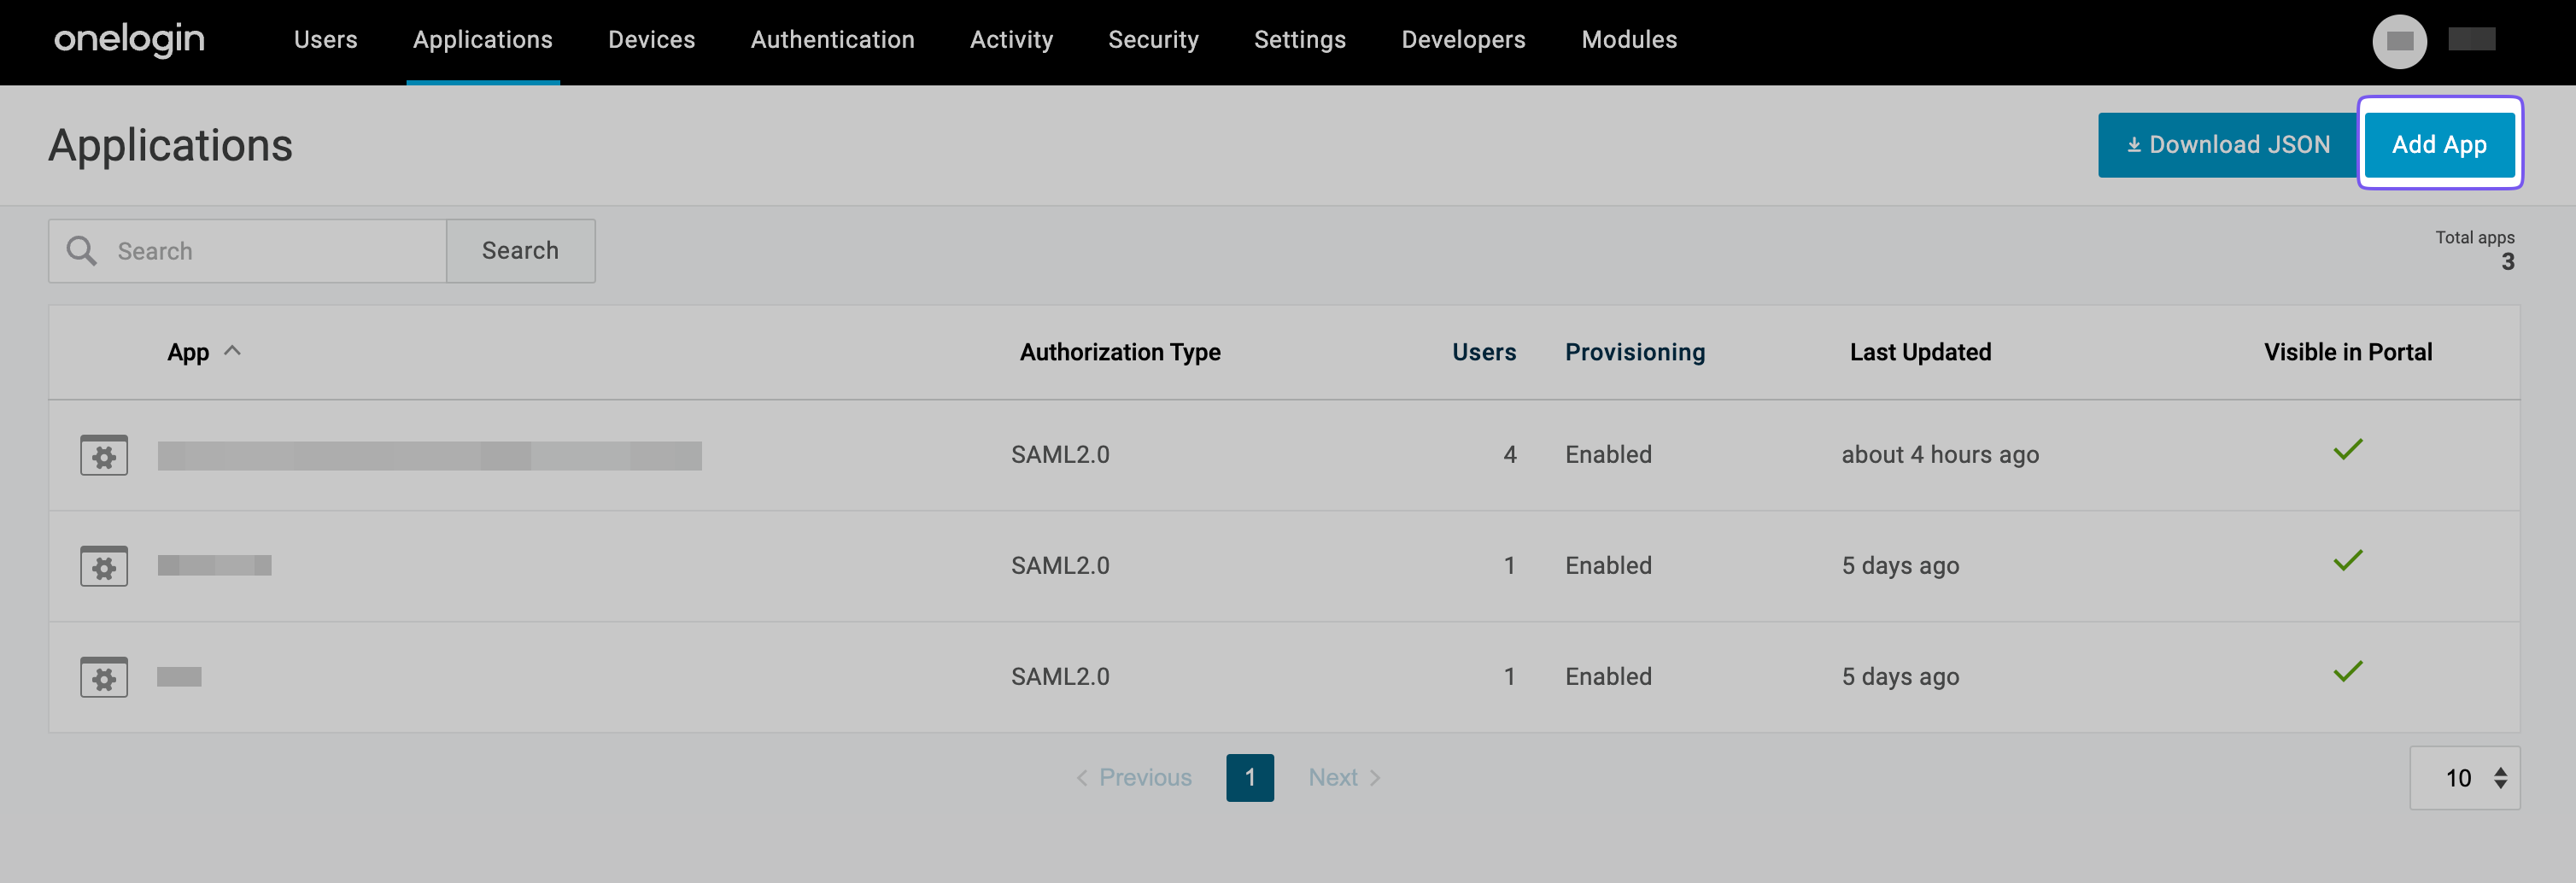
Click “Add App” to add a new application.
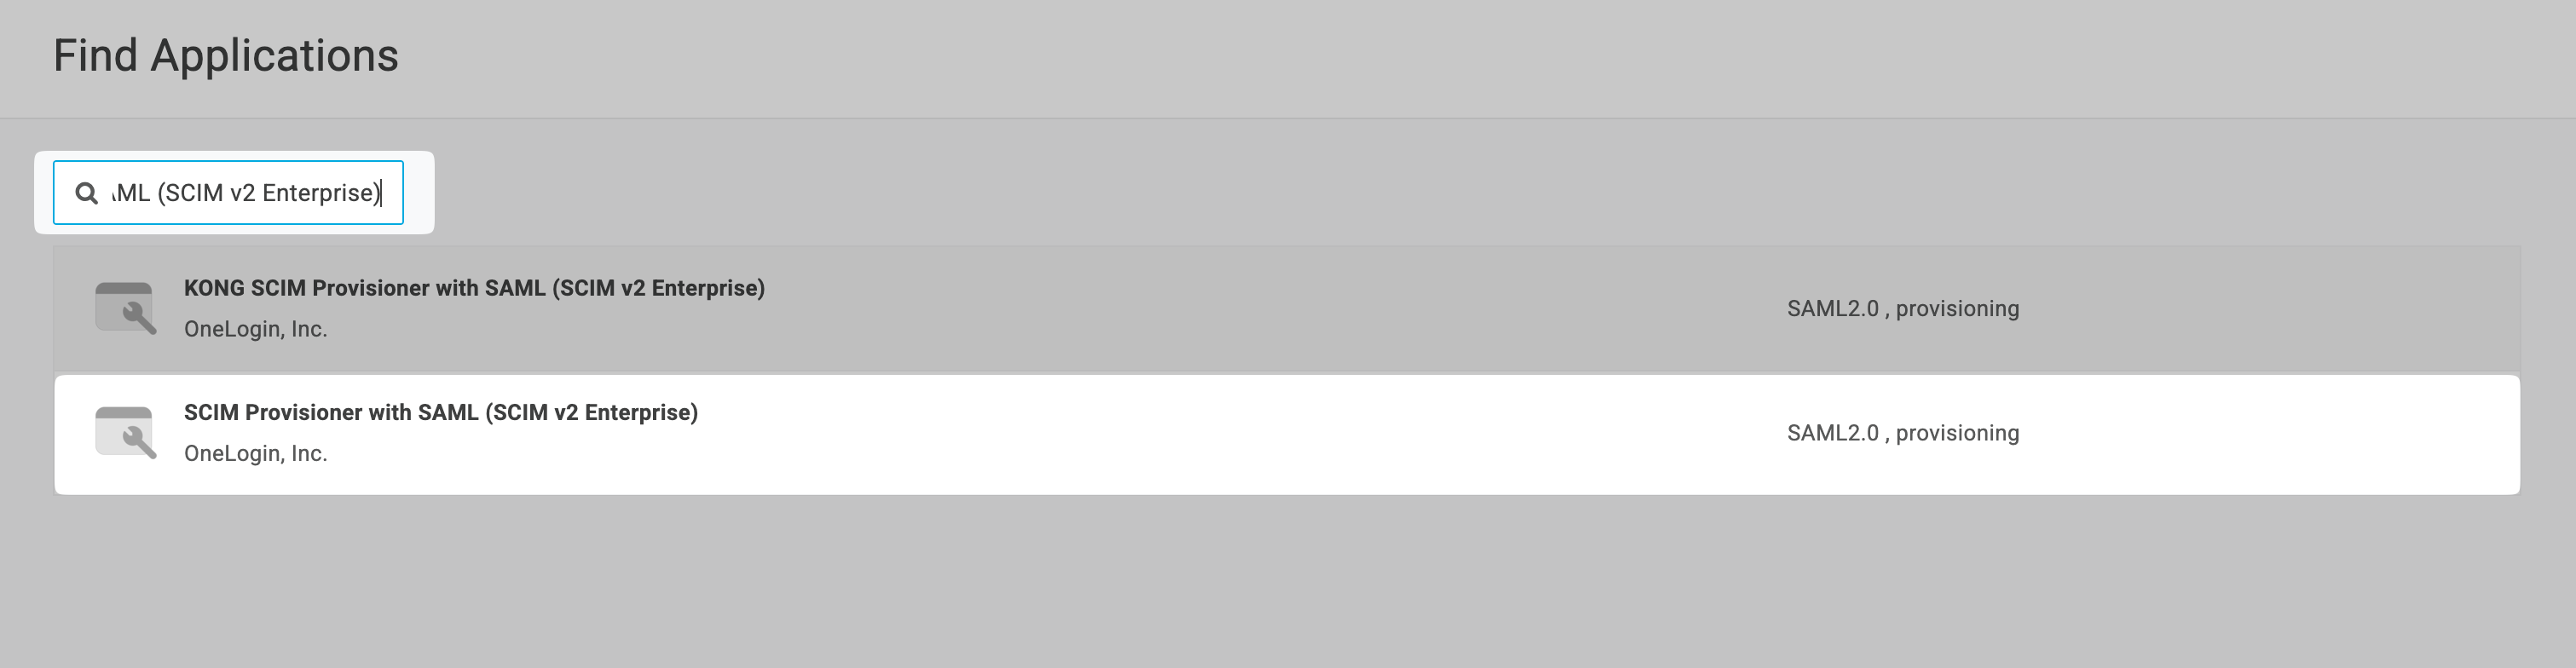
Search for “SCIM with SAML (SCIM v2 Enterprise)”
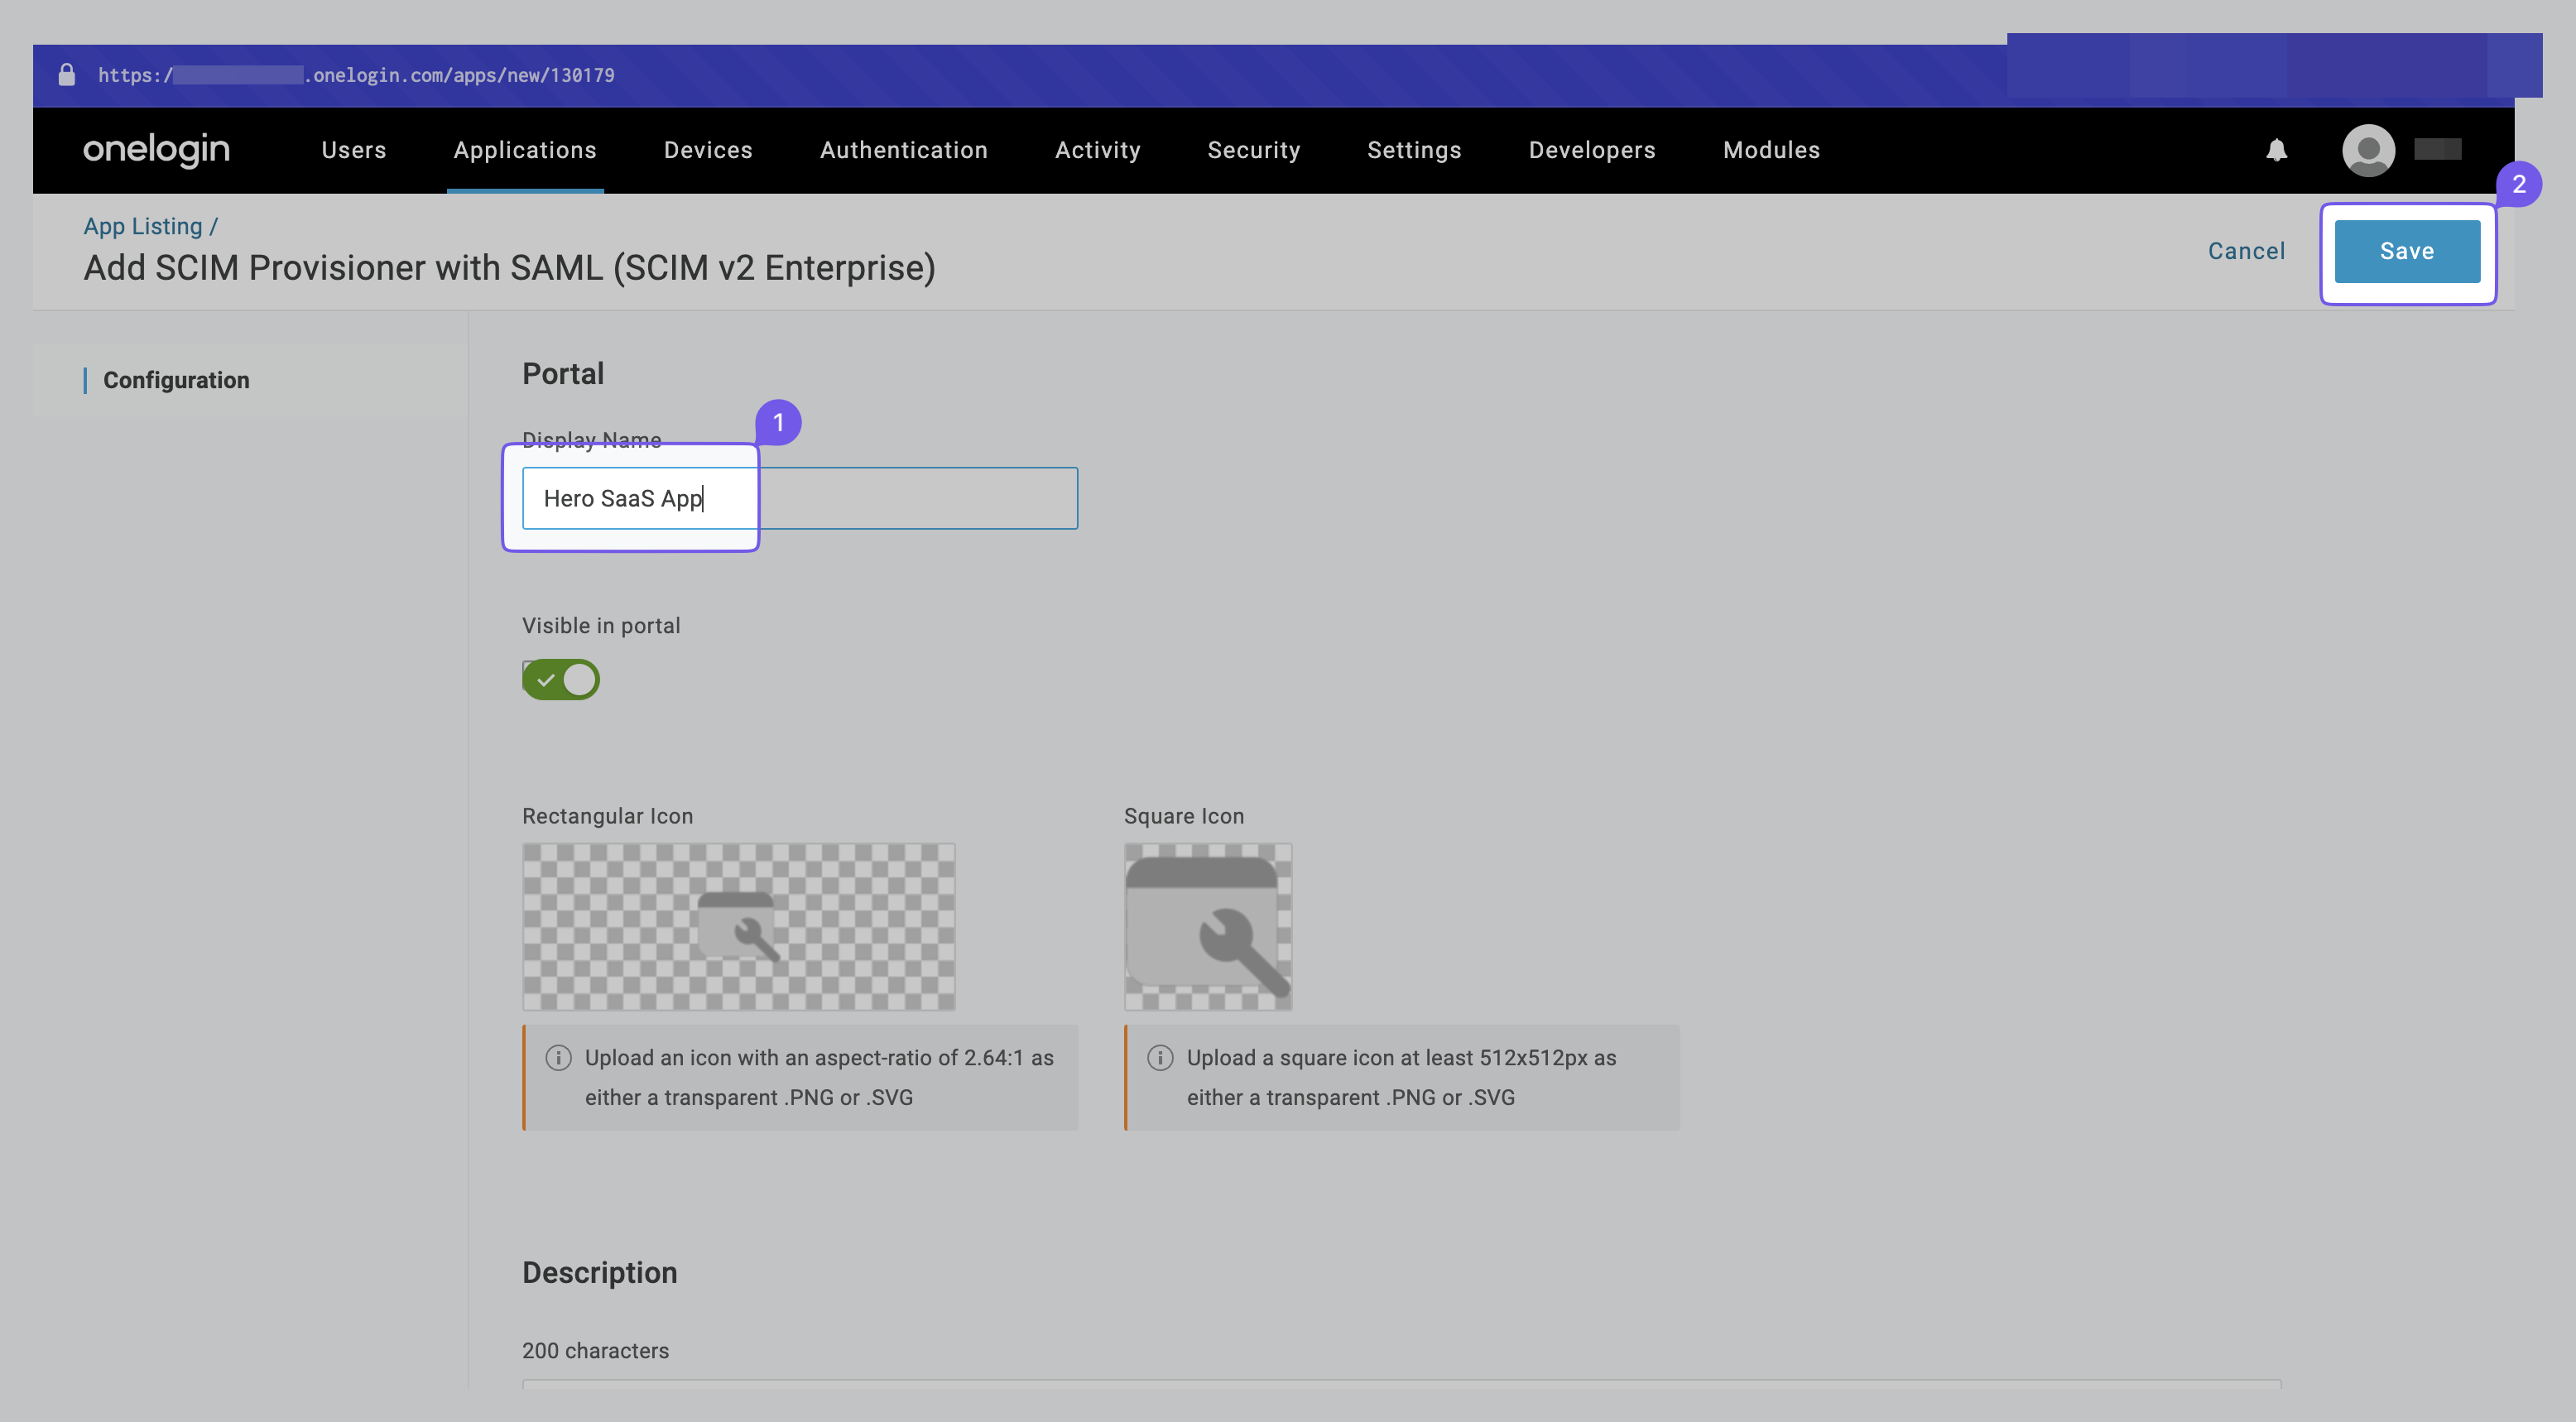
Name the app (e.g., “Hero SaaS App”) and click “Save”.
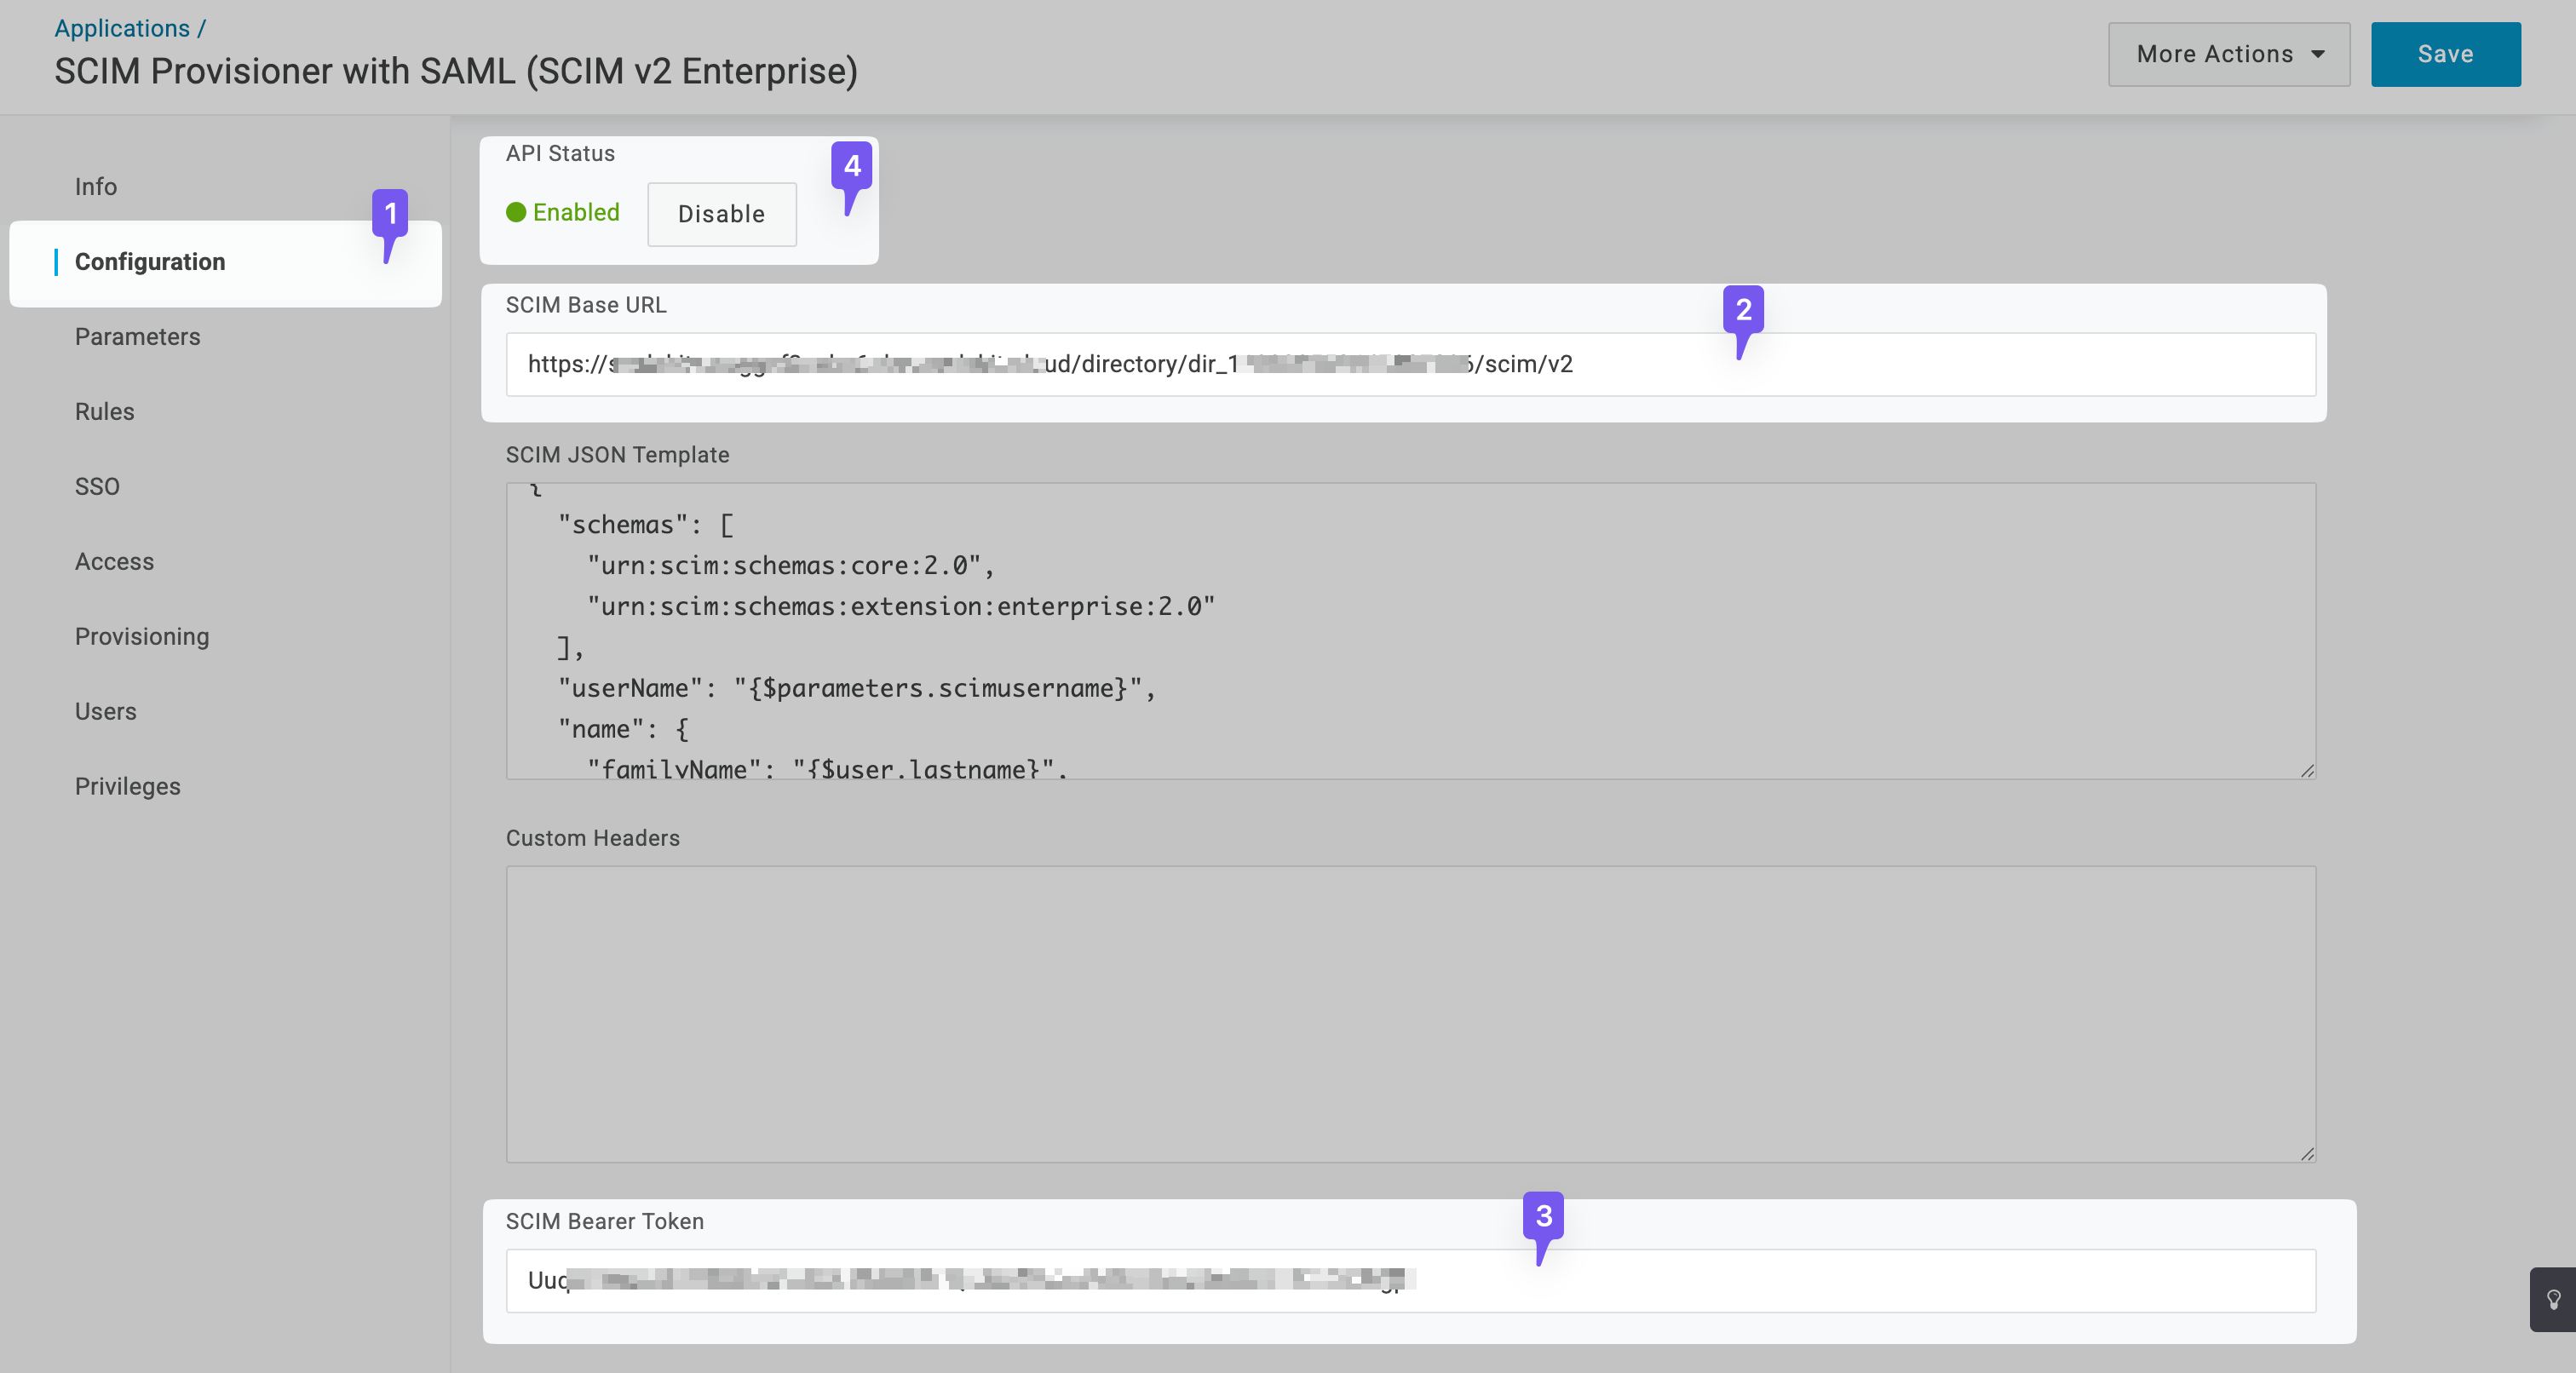
Go to the “Configuration” tab in the left navigation panel. Configure the “Endpoint URL” and “Bearer Token”, then click the “Enable” button.
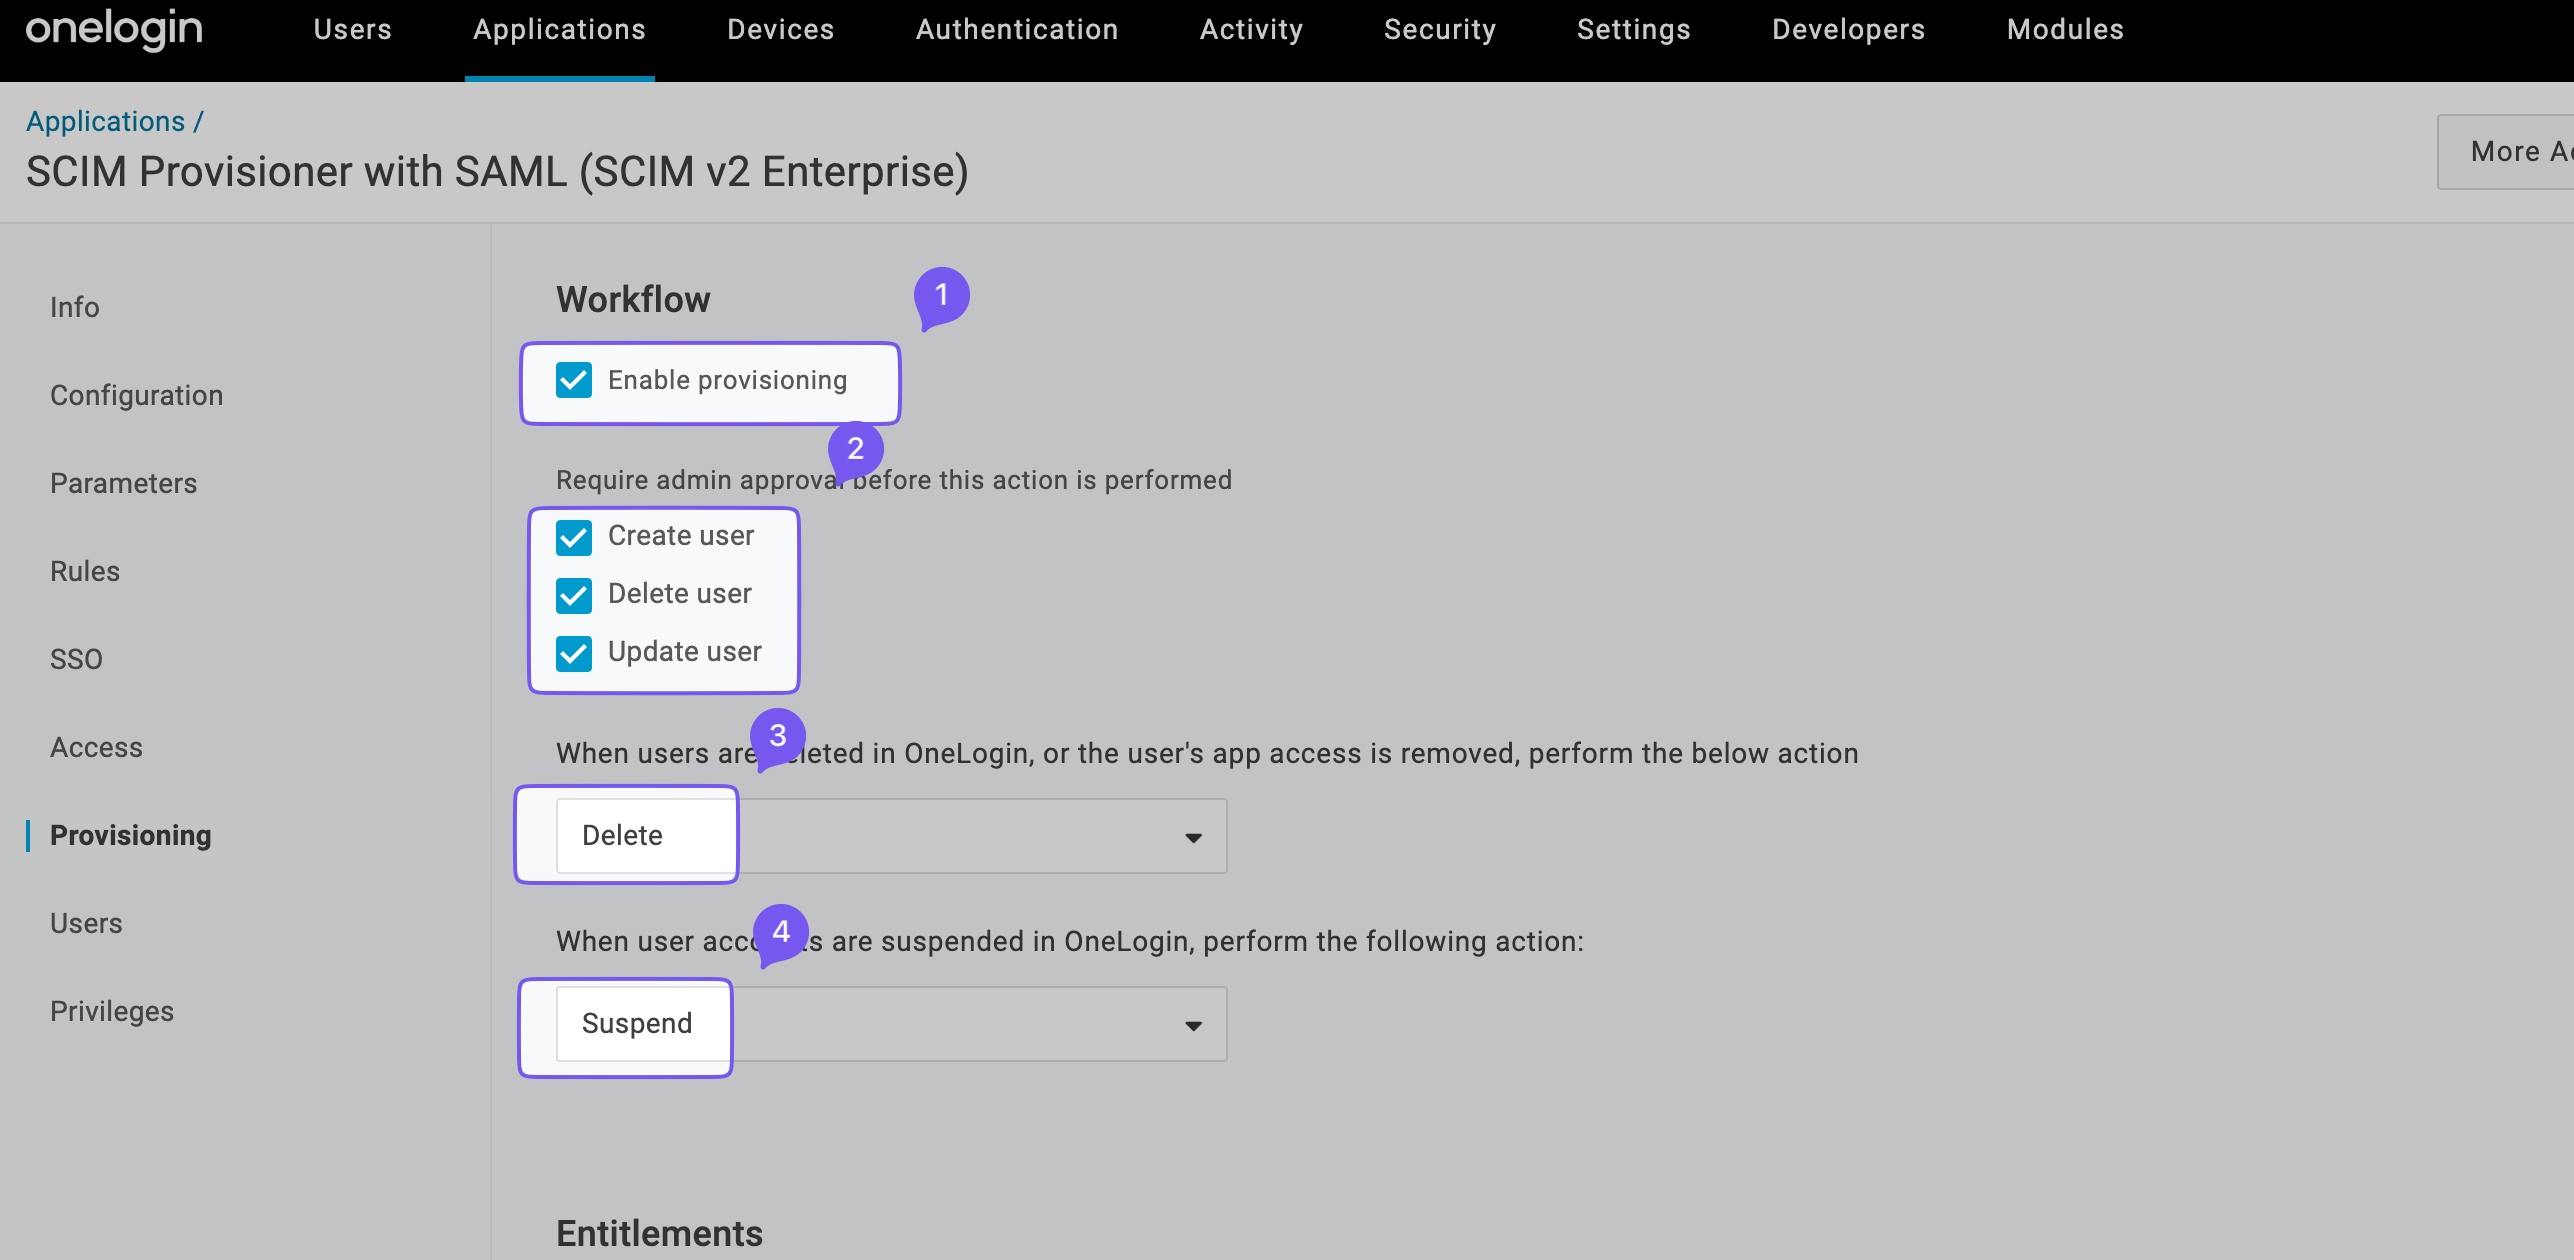
Go to the “Provisioning” tab, enable provisioning, and click “Save”.
-
Provision users
Section titled “Provision users”Go to “Users” and click on a user you want to provision.
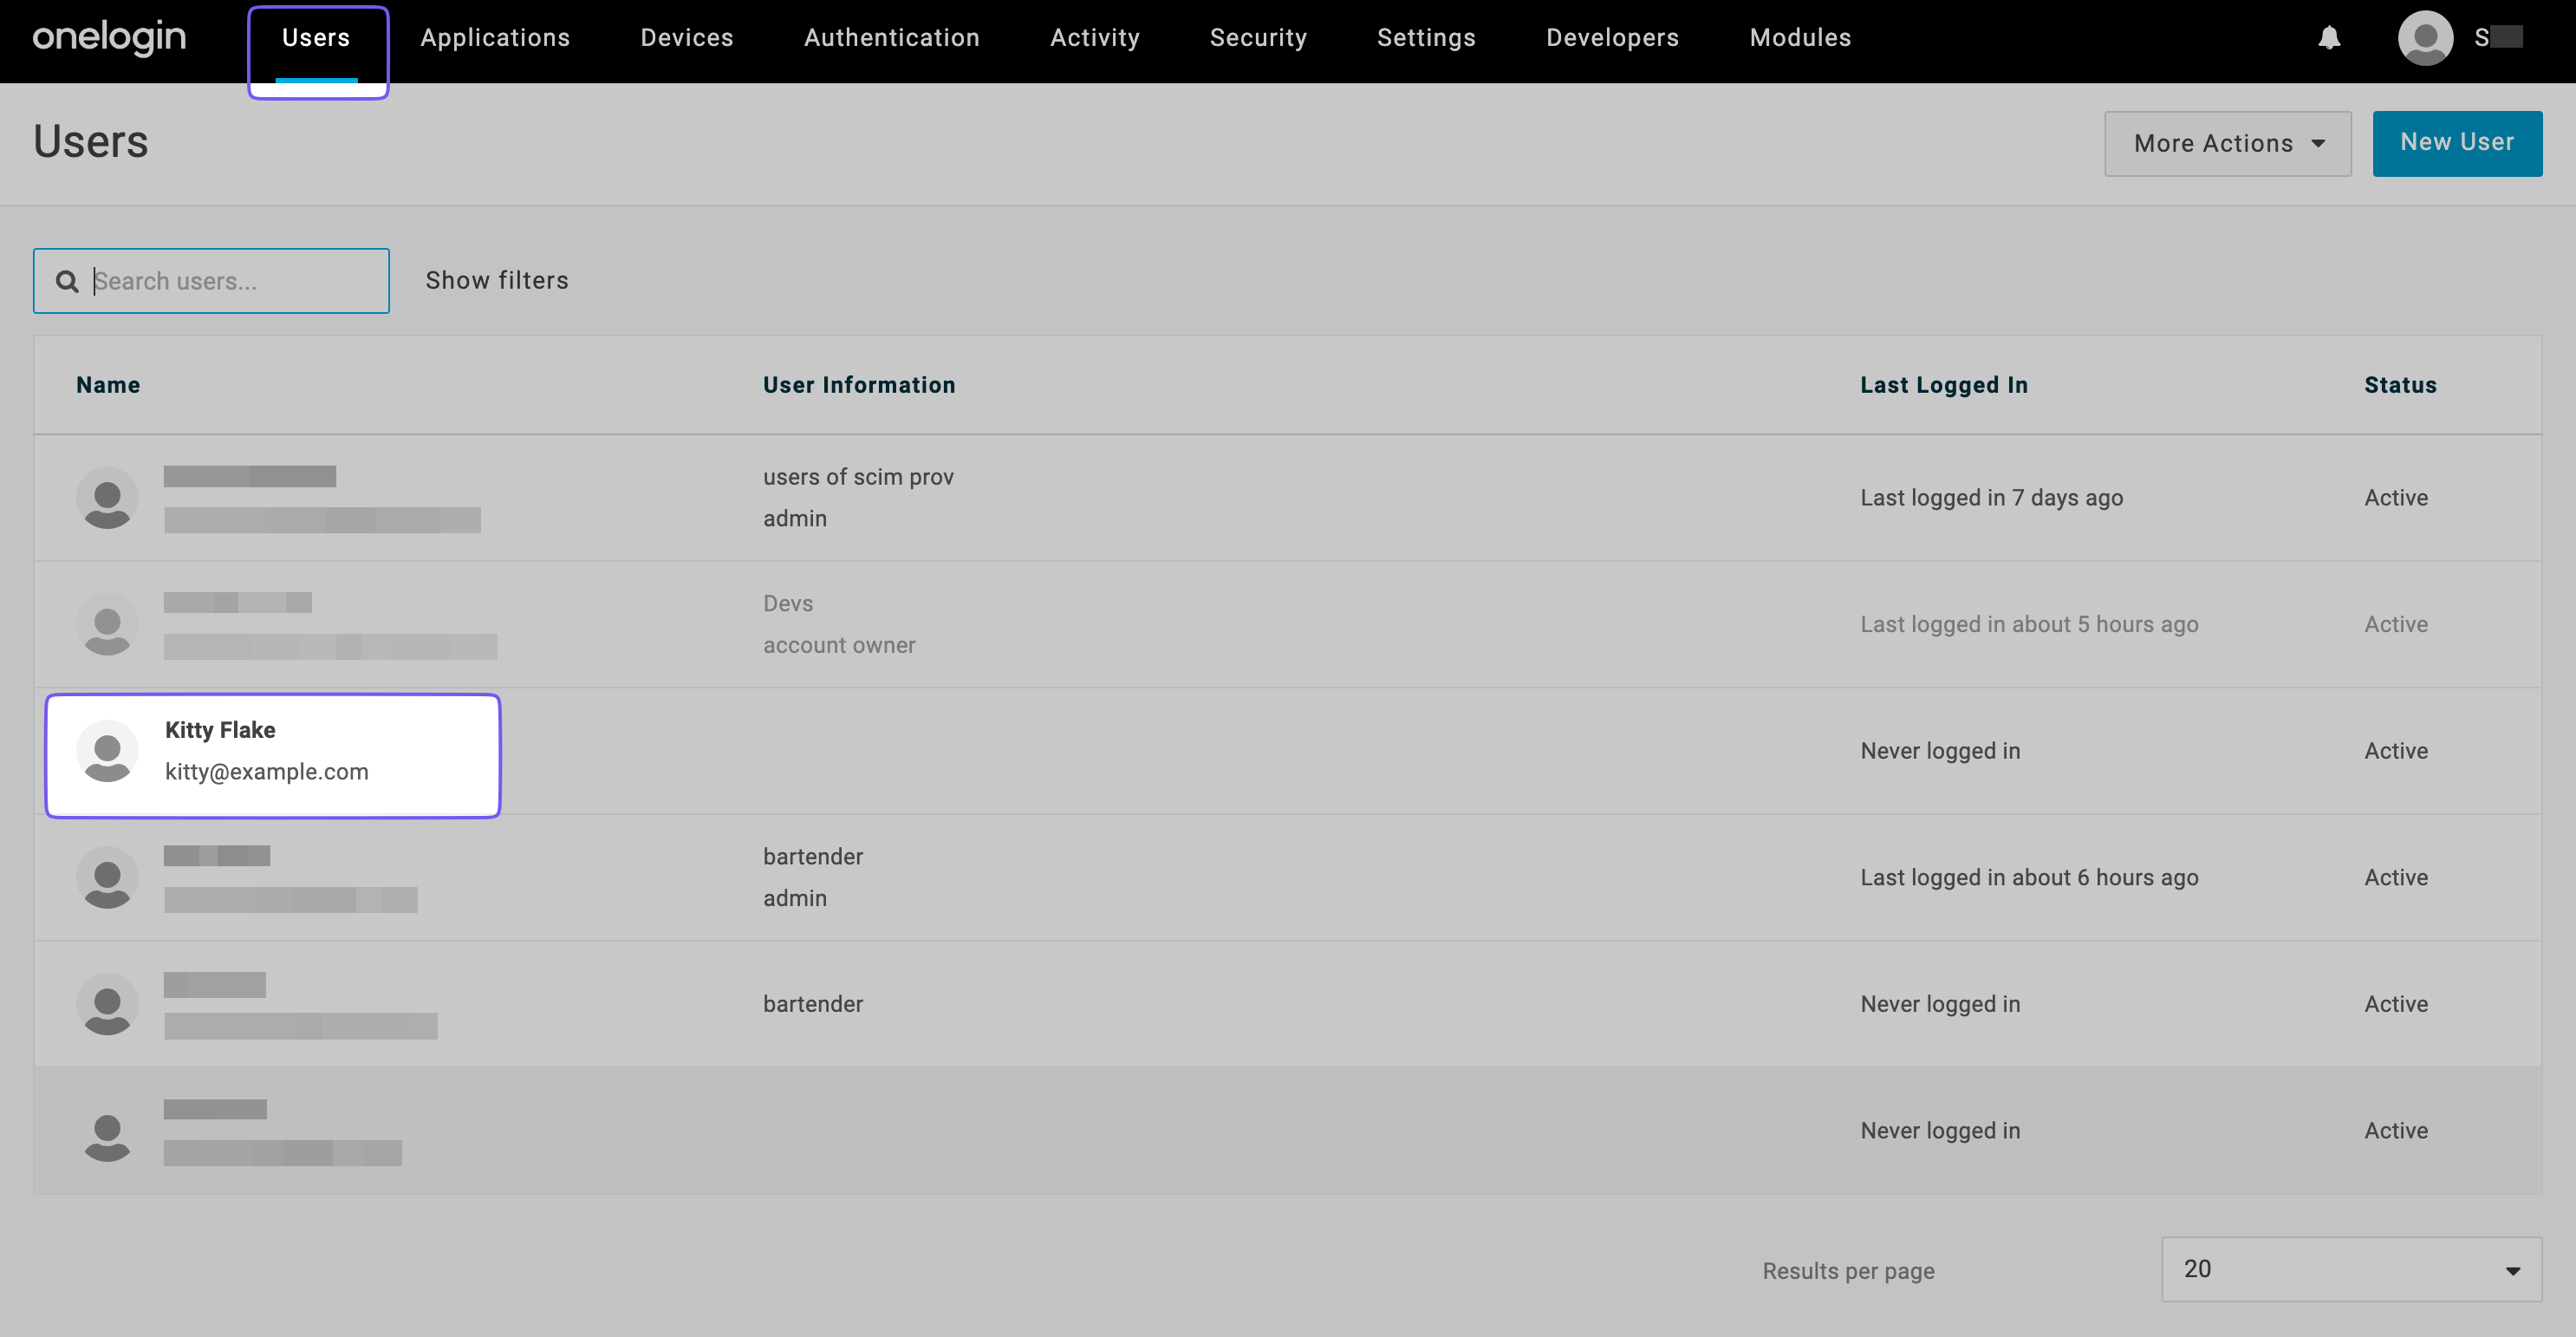
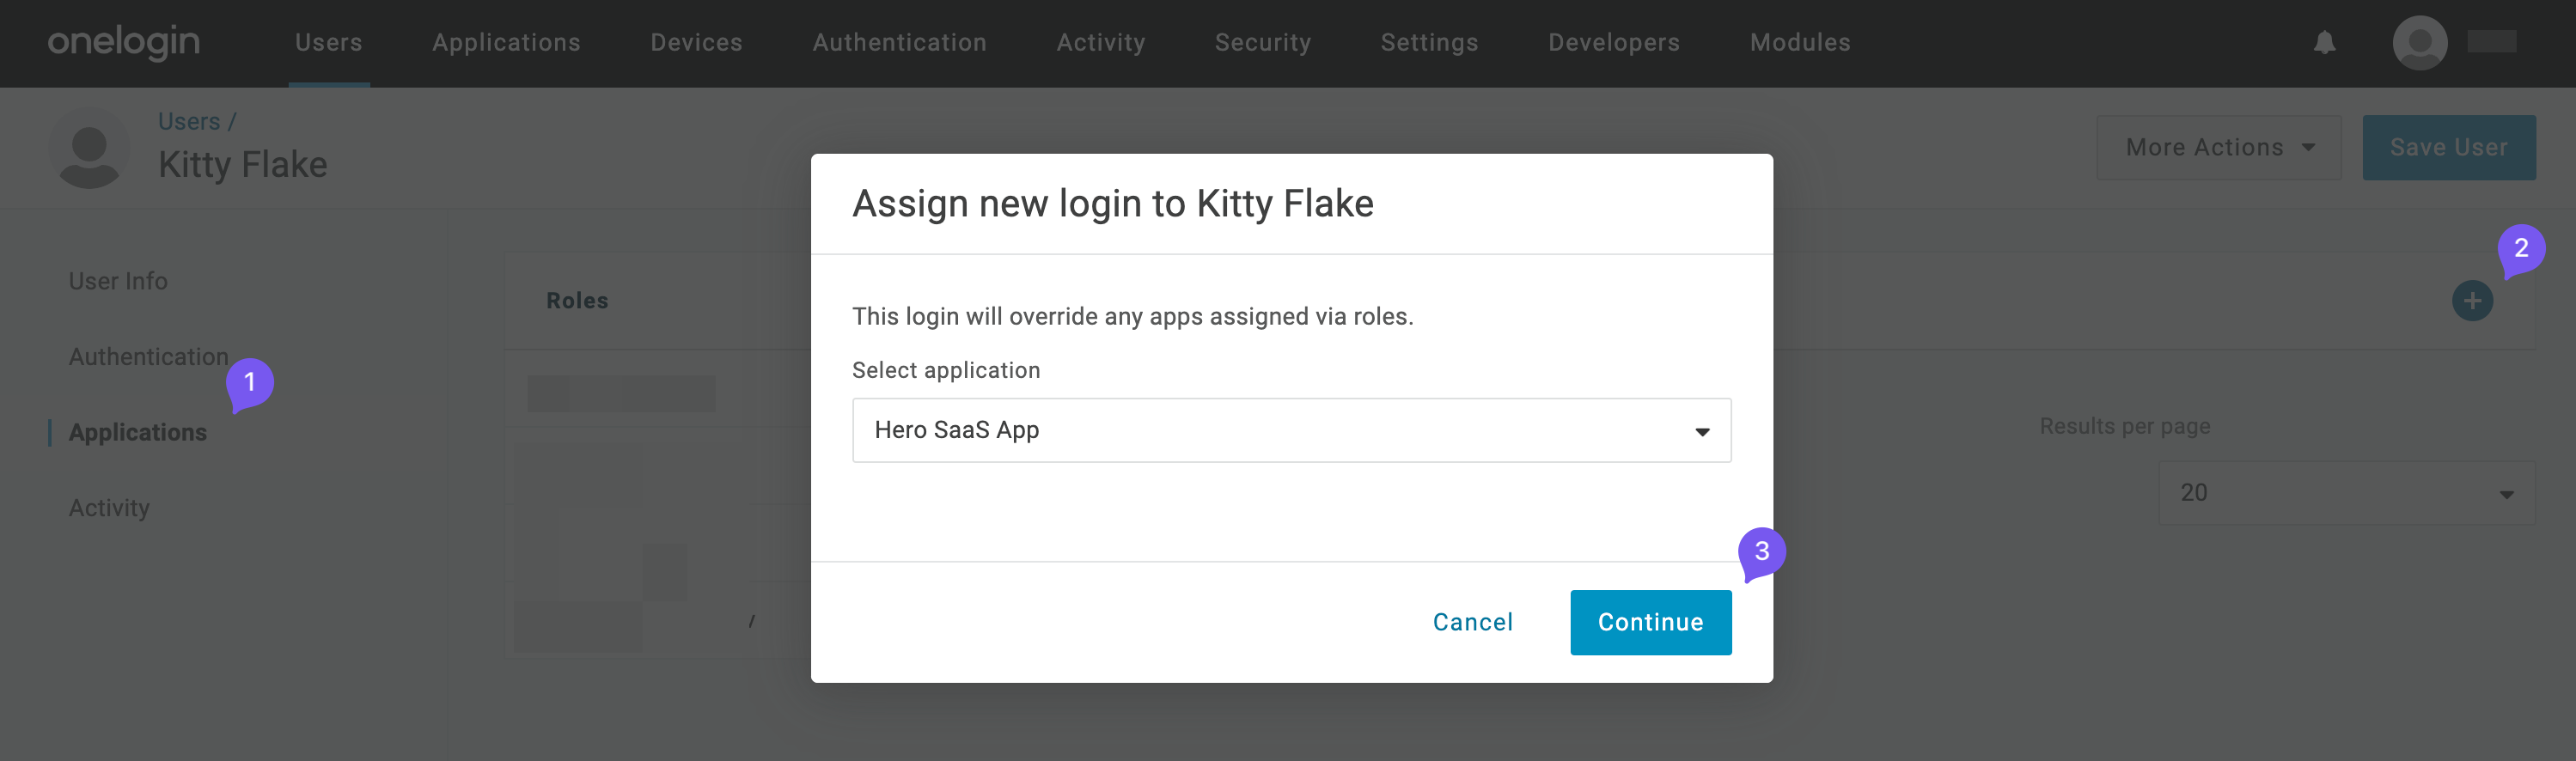
Go to the “Applications” tab, click ”+”, and assign “Hero SaaS App”. Click “Continue”.
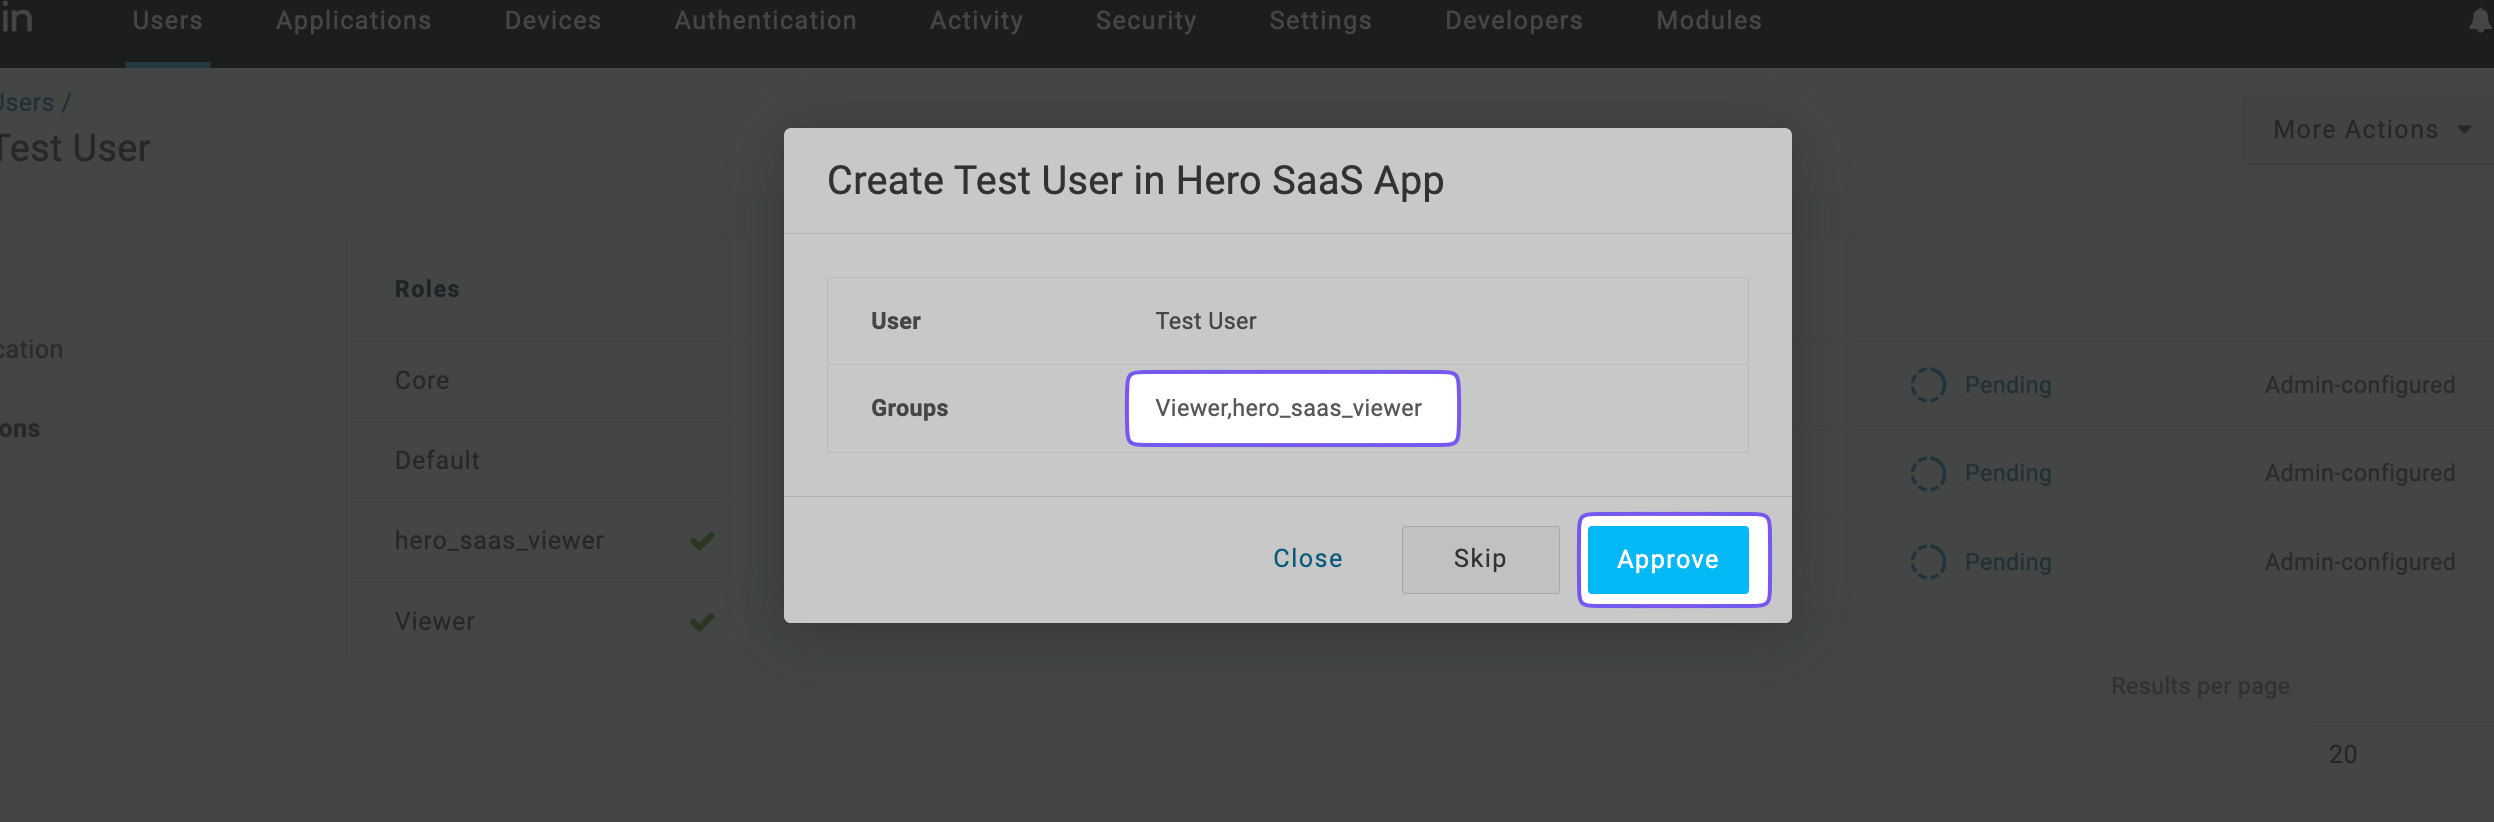
Click “Pending” to approve provisioning.
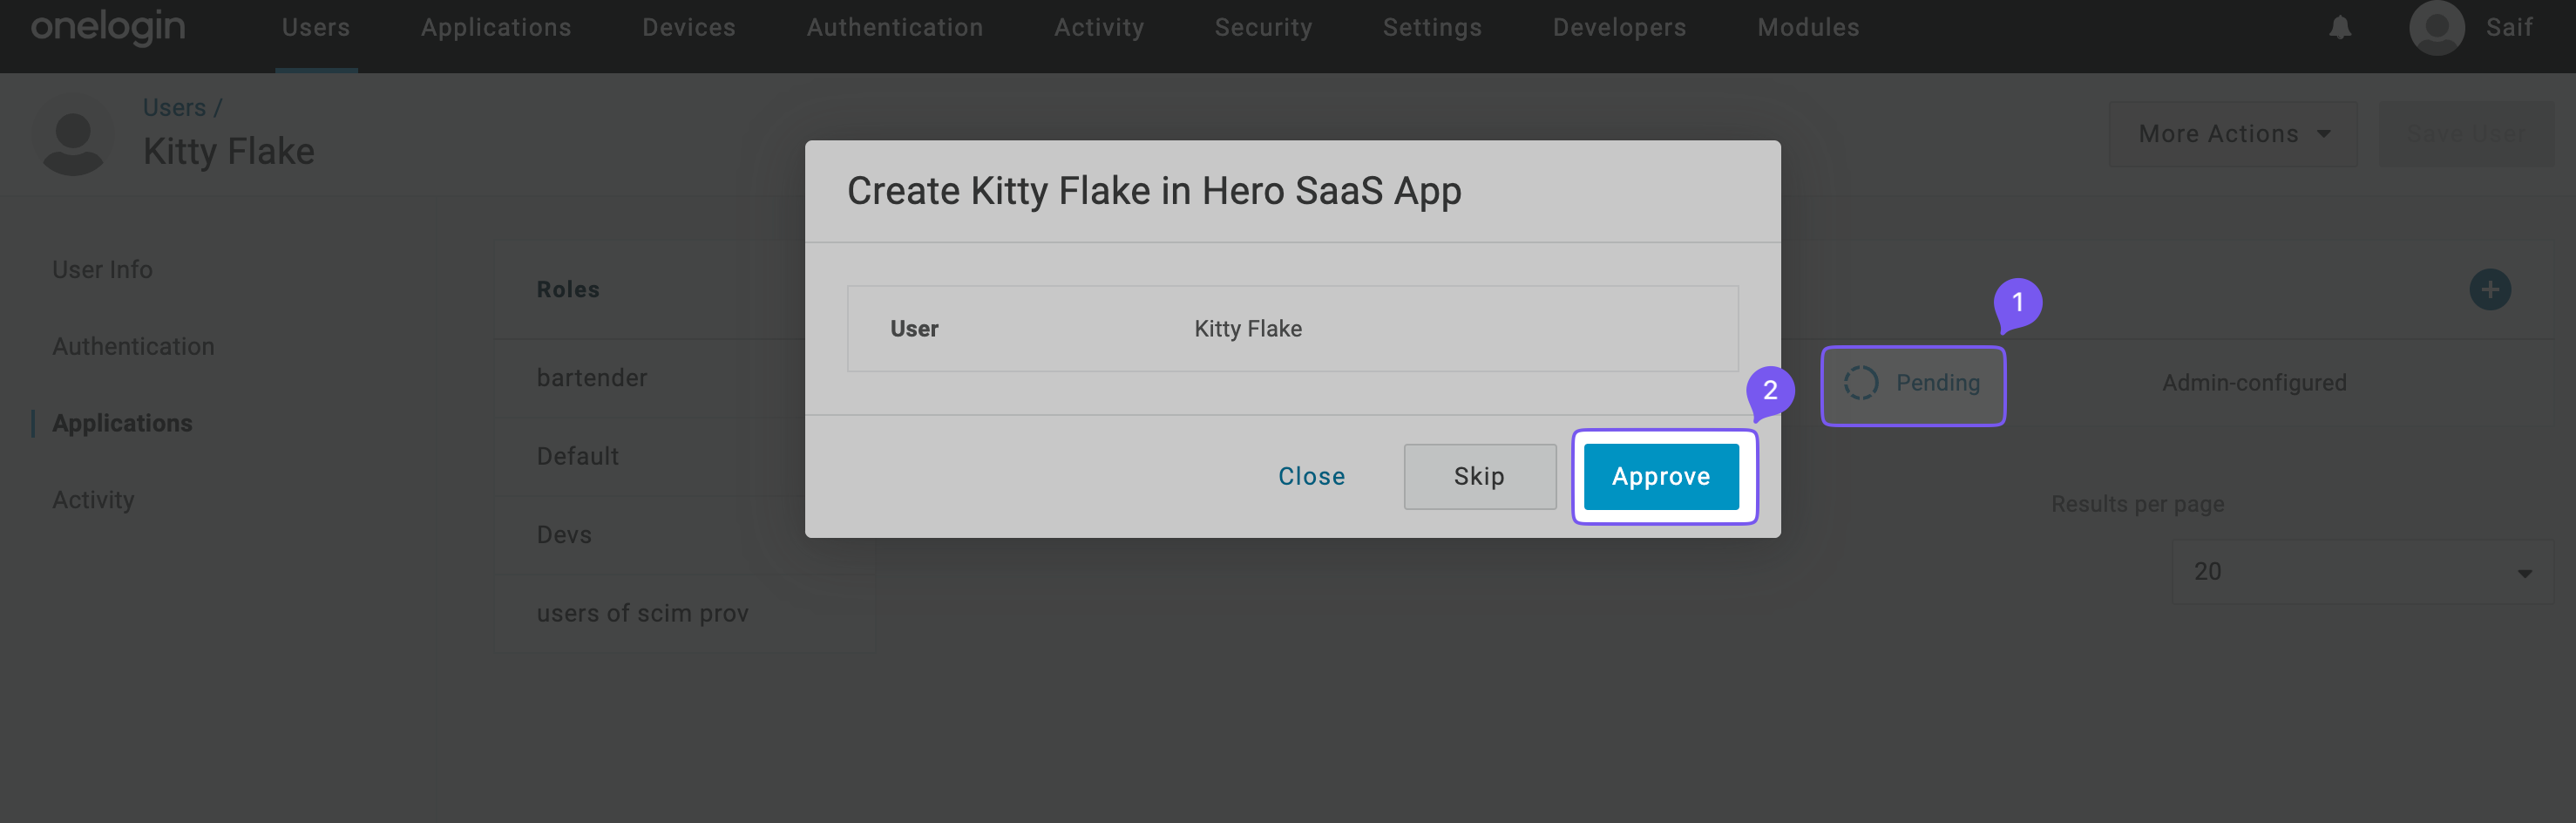
The status should change to “Provisioned” within a few seconds.
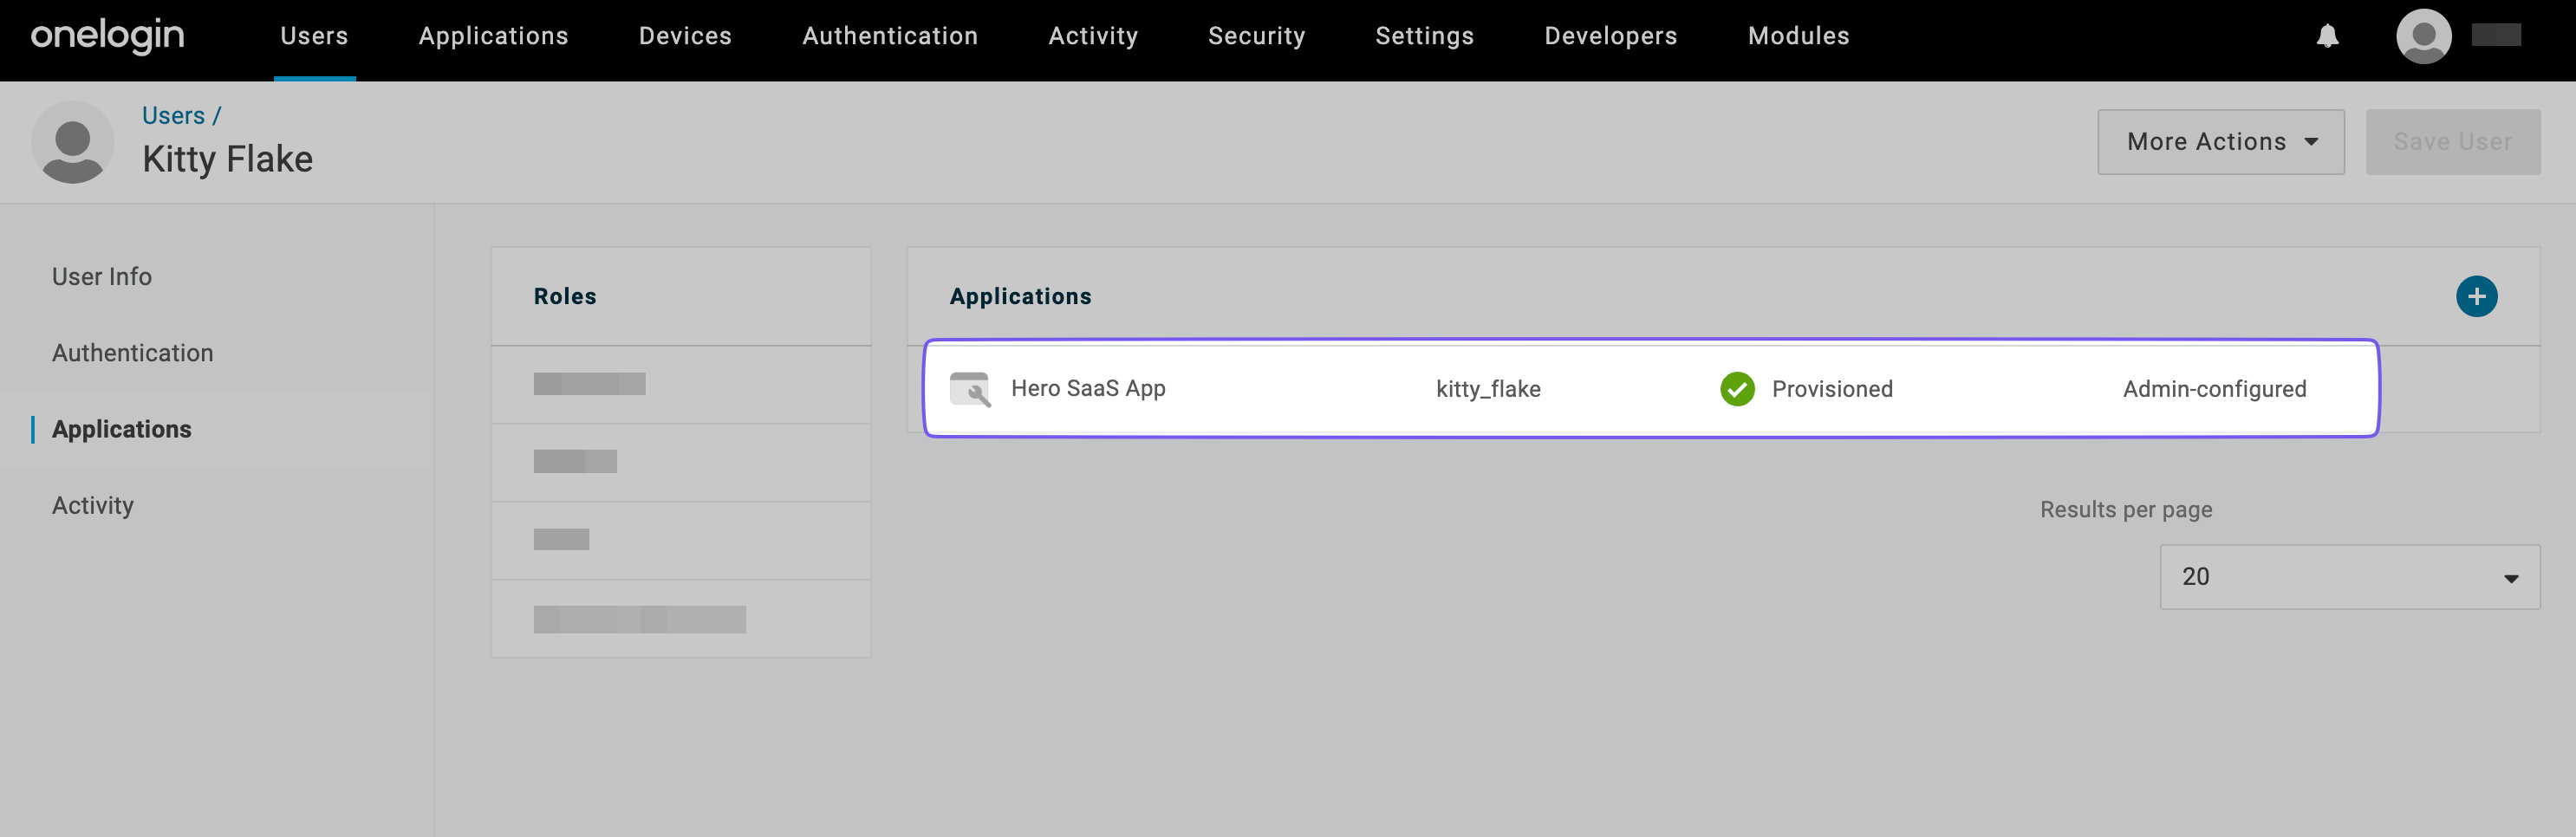
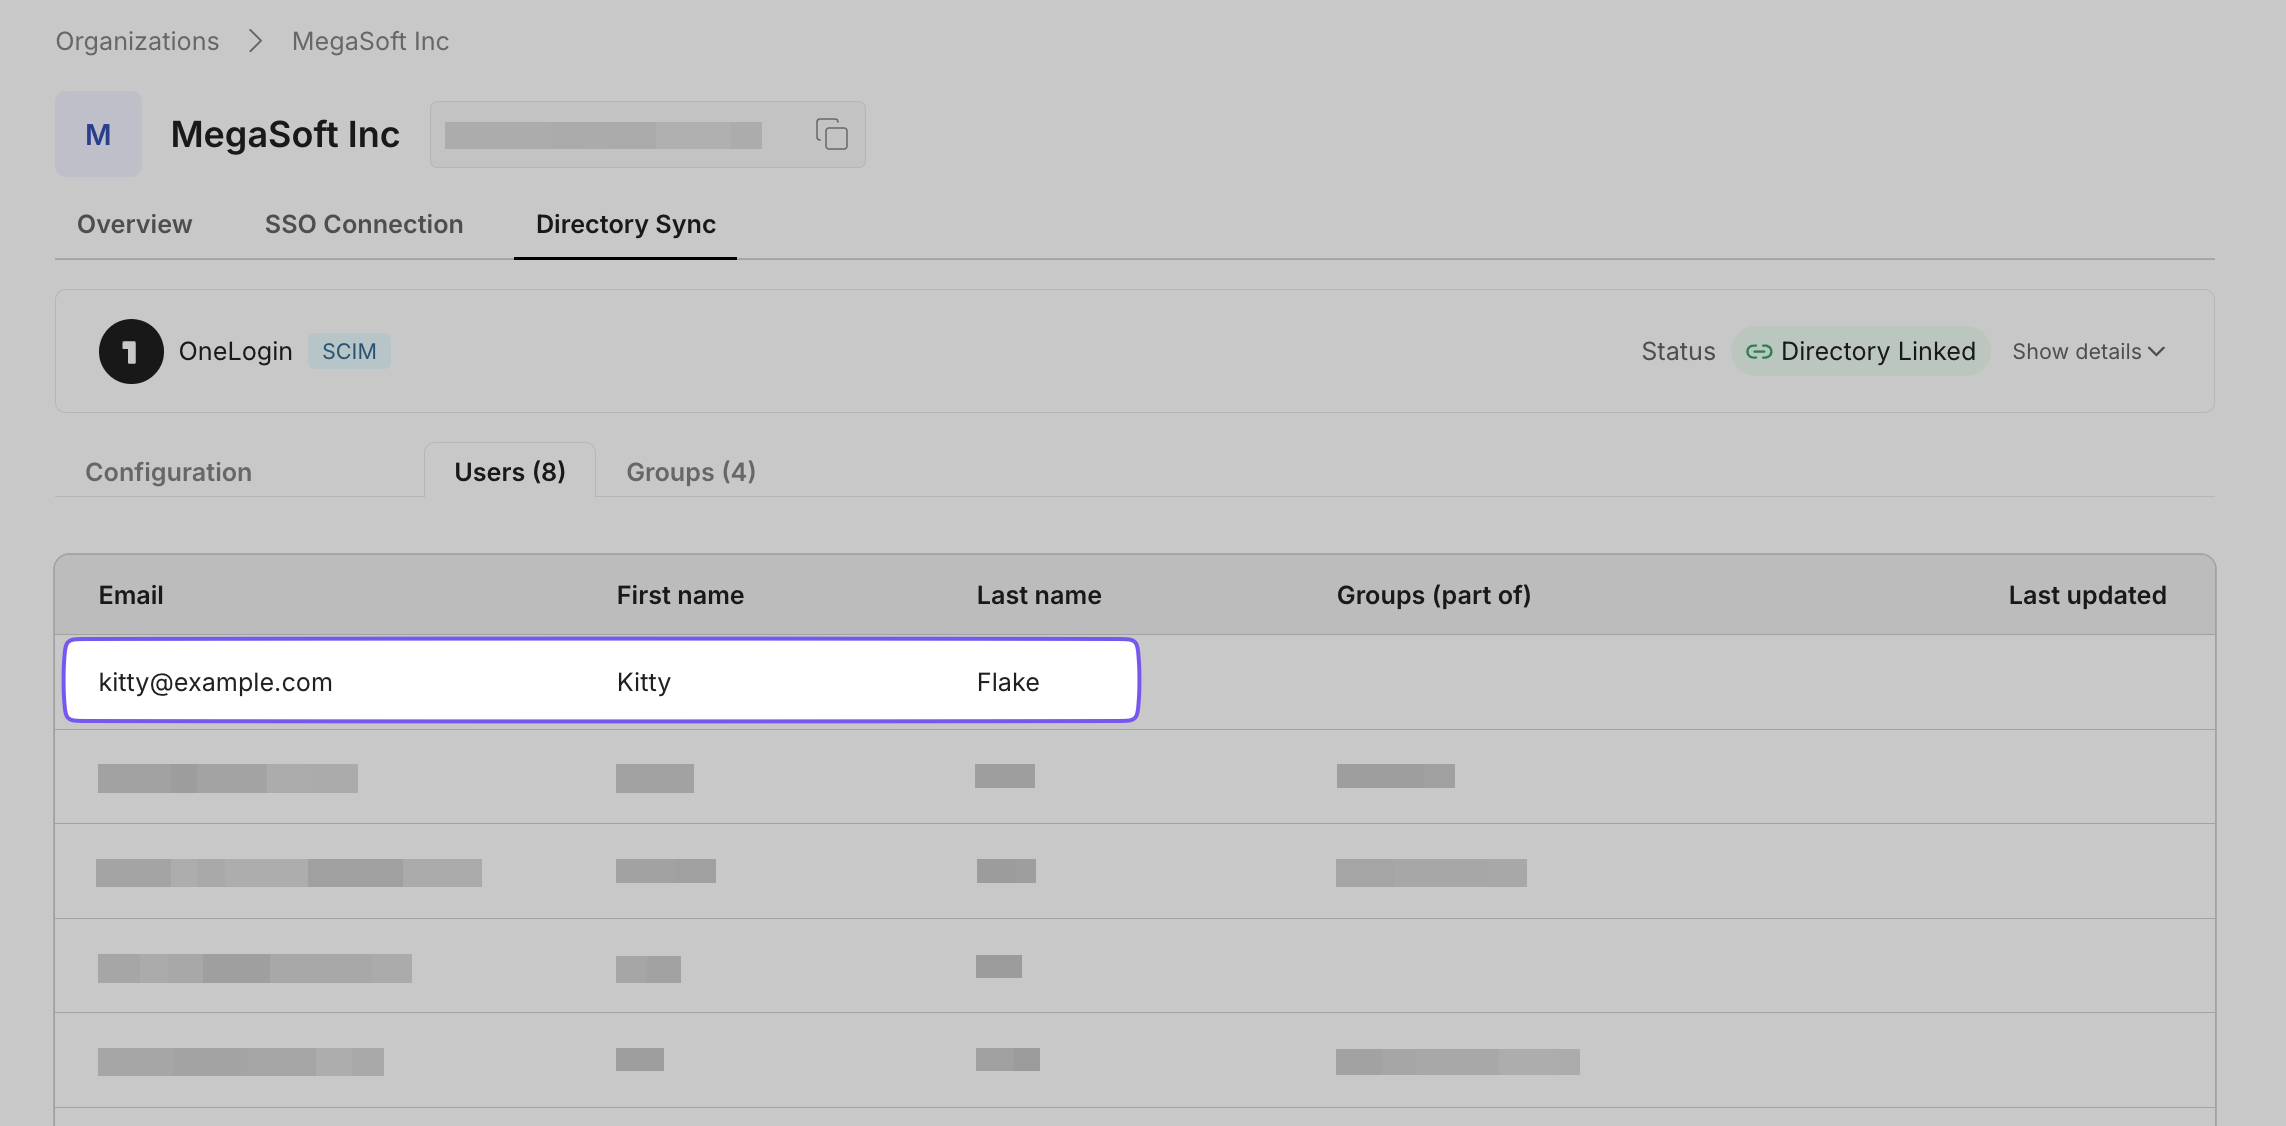
This action informs the Hero SaaS app that the user is approved for access, and the app can create an account for them. You can see the new user added to the “Hero SaaS App” in the portal.
-
Configure group provisioning
Section titled “Configure group provisioning”Applications being onboarded may have roles that scope access, such as “admin” roles allowing users to perform administrator actions like deleting logs. You can choose which users in your organization get administrator access while others get member access.
To map users to groups in the app being onboarded:
- Create a role in OneLogin.
- Enable the inclusion of the Group parameter.
- Create a rule that automatically picks up a user’s role value and sets it to the Group parameter.
- Assign the role to the user.
- Assign the user to the app.
-
Configure provisioning settings for groups
Section titled “Configure provisioning settings for groups”Navigate to the list of Applications and select “Hero SaaS App”. Ensure the provisioning workflow is enabled in the “Provisioning” tab.
Switch to “Rules” Tab and Click “Add Rule” button.
Name the rule (e.g., “Assign Group in Hero SaaS”) and set the action to “Set Groups in Hero SaaS App” for each “role” with any value.

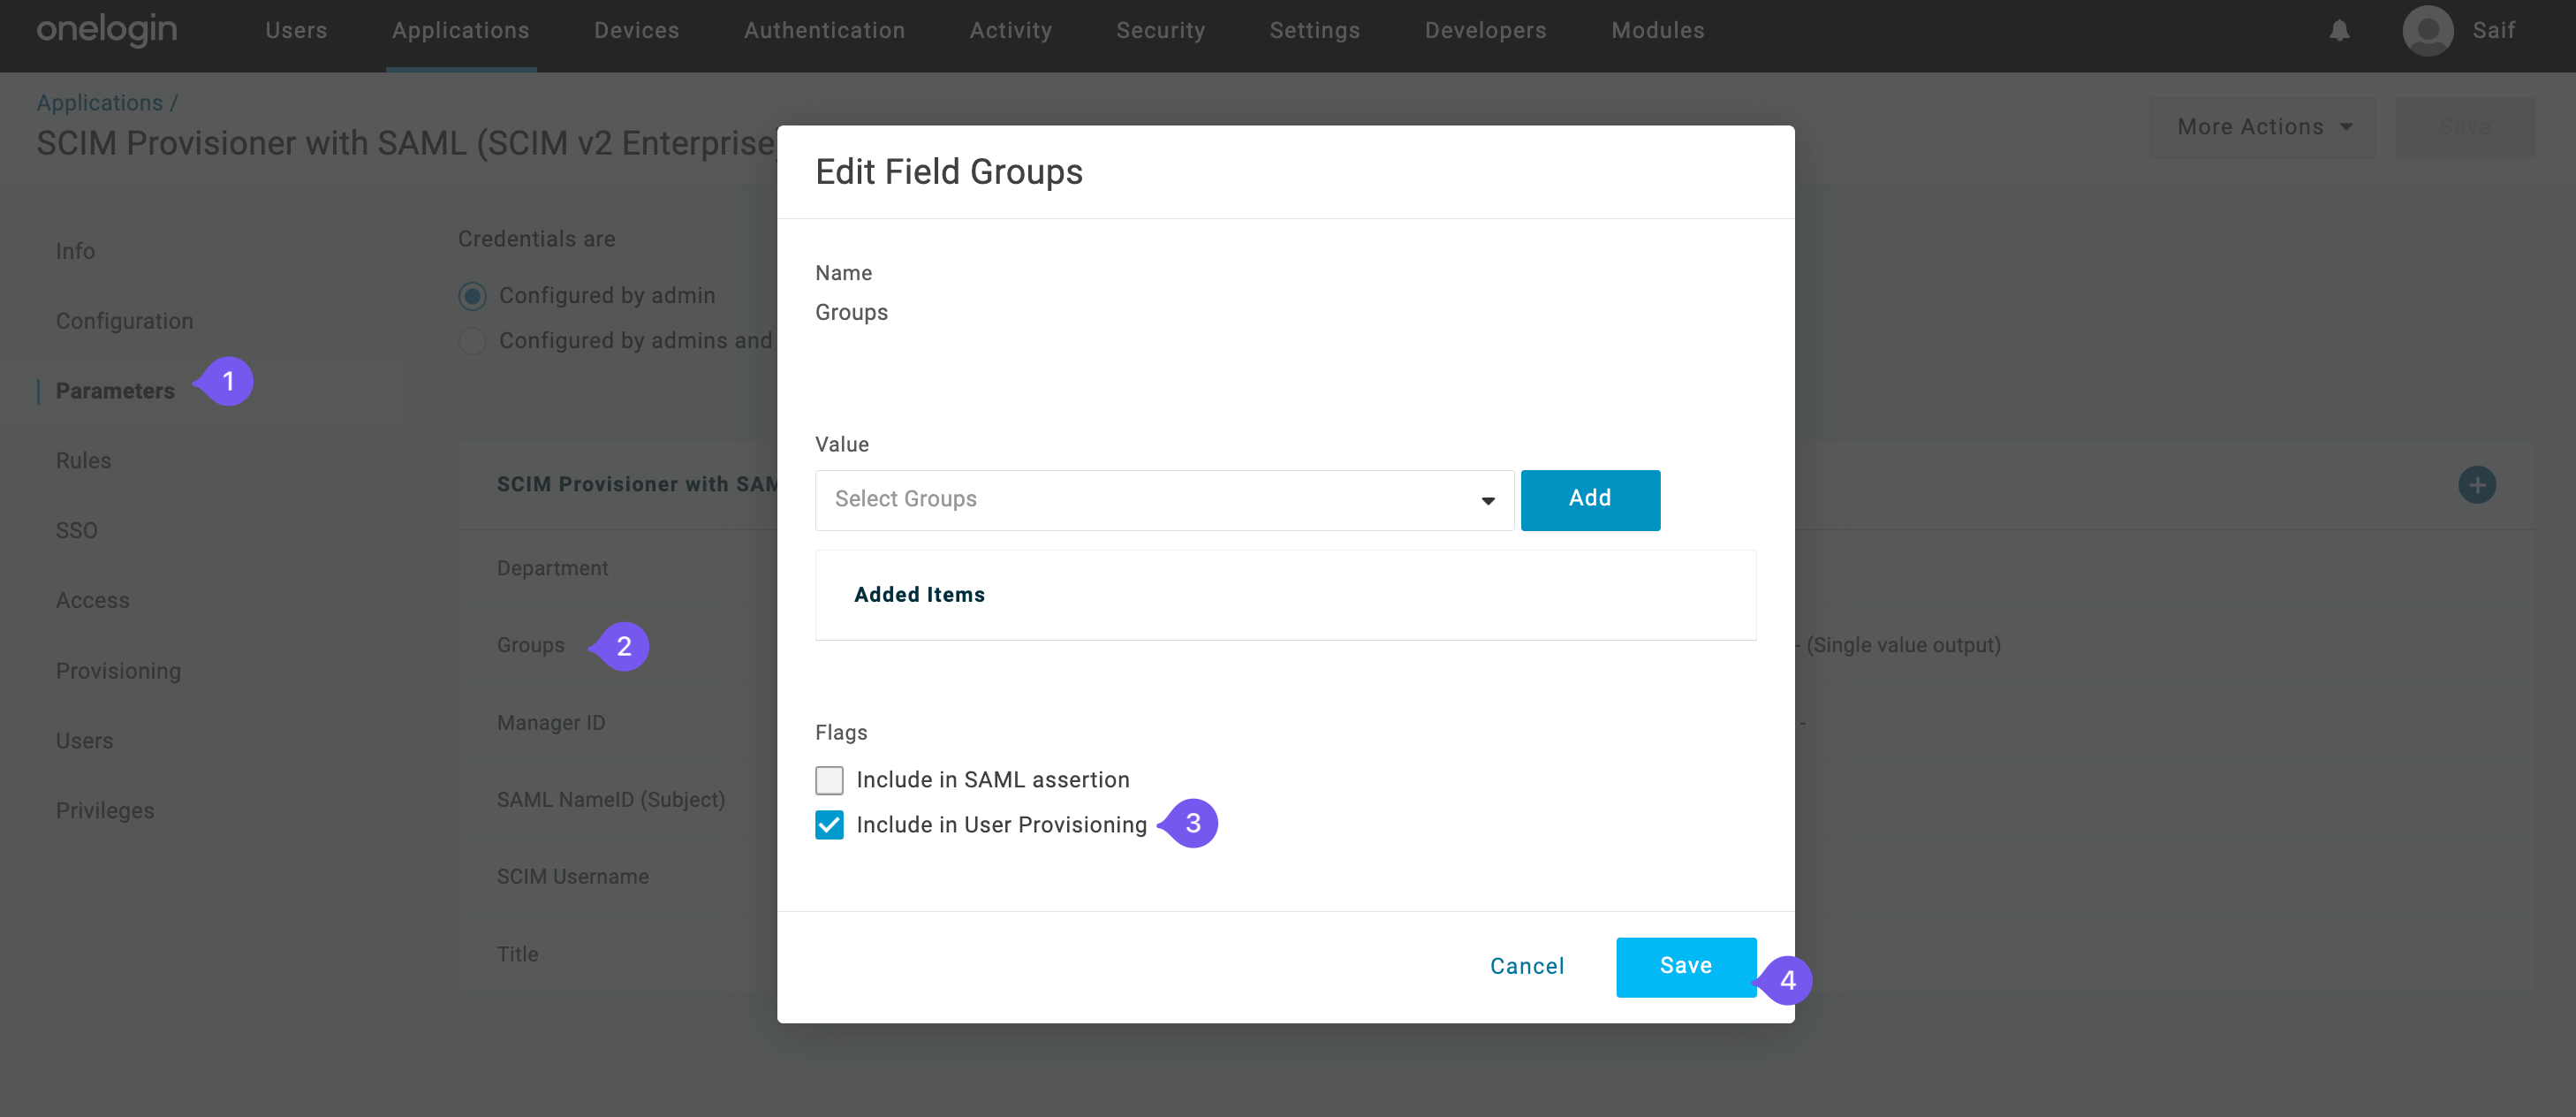
Select the “Parameters” tab, click on the “Groups” row, and check “Include in User Provisioning” in the popup.
-
Create and assign roles
Section titled “Create and assign roles”Click on the user and navigate to “Applications”.
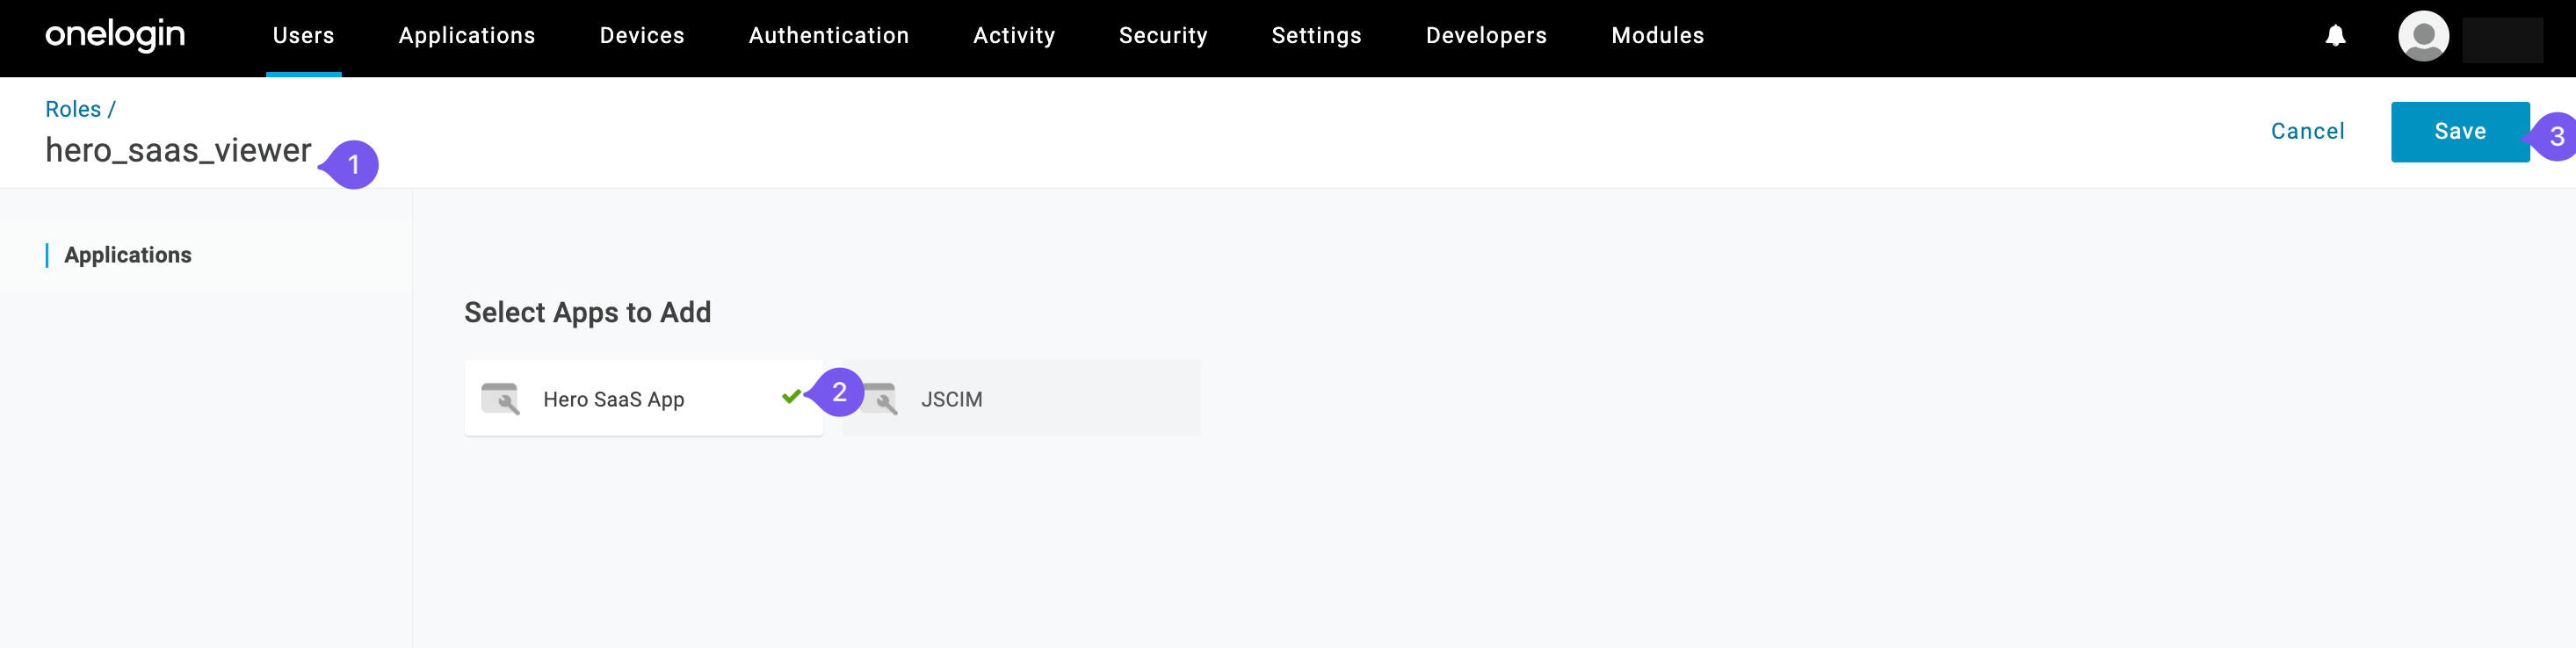
Add “Hero SaaS App” and select the roles to be passed to the app (treated as Groups by Hero SaaS App).
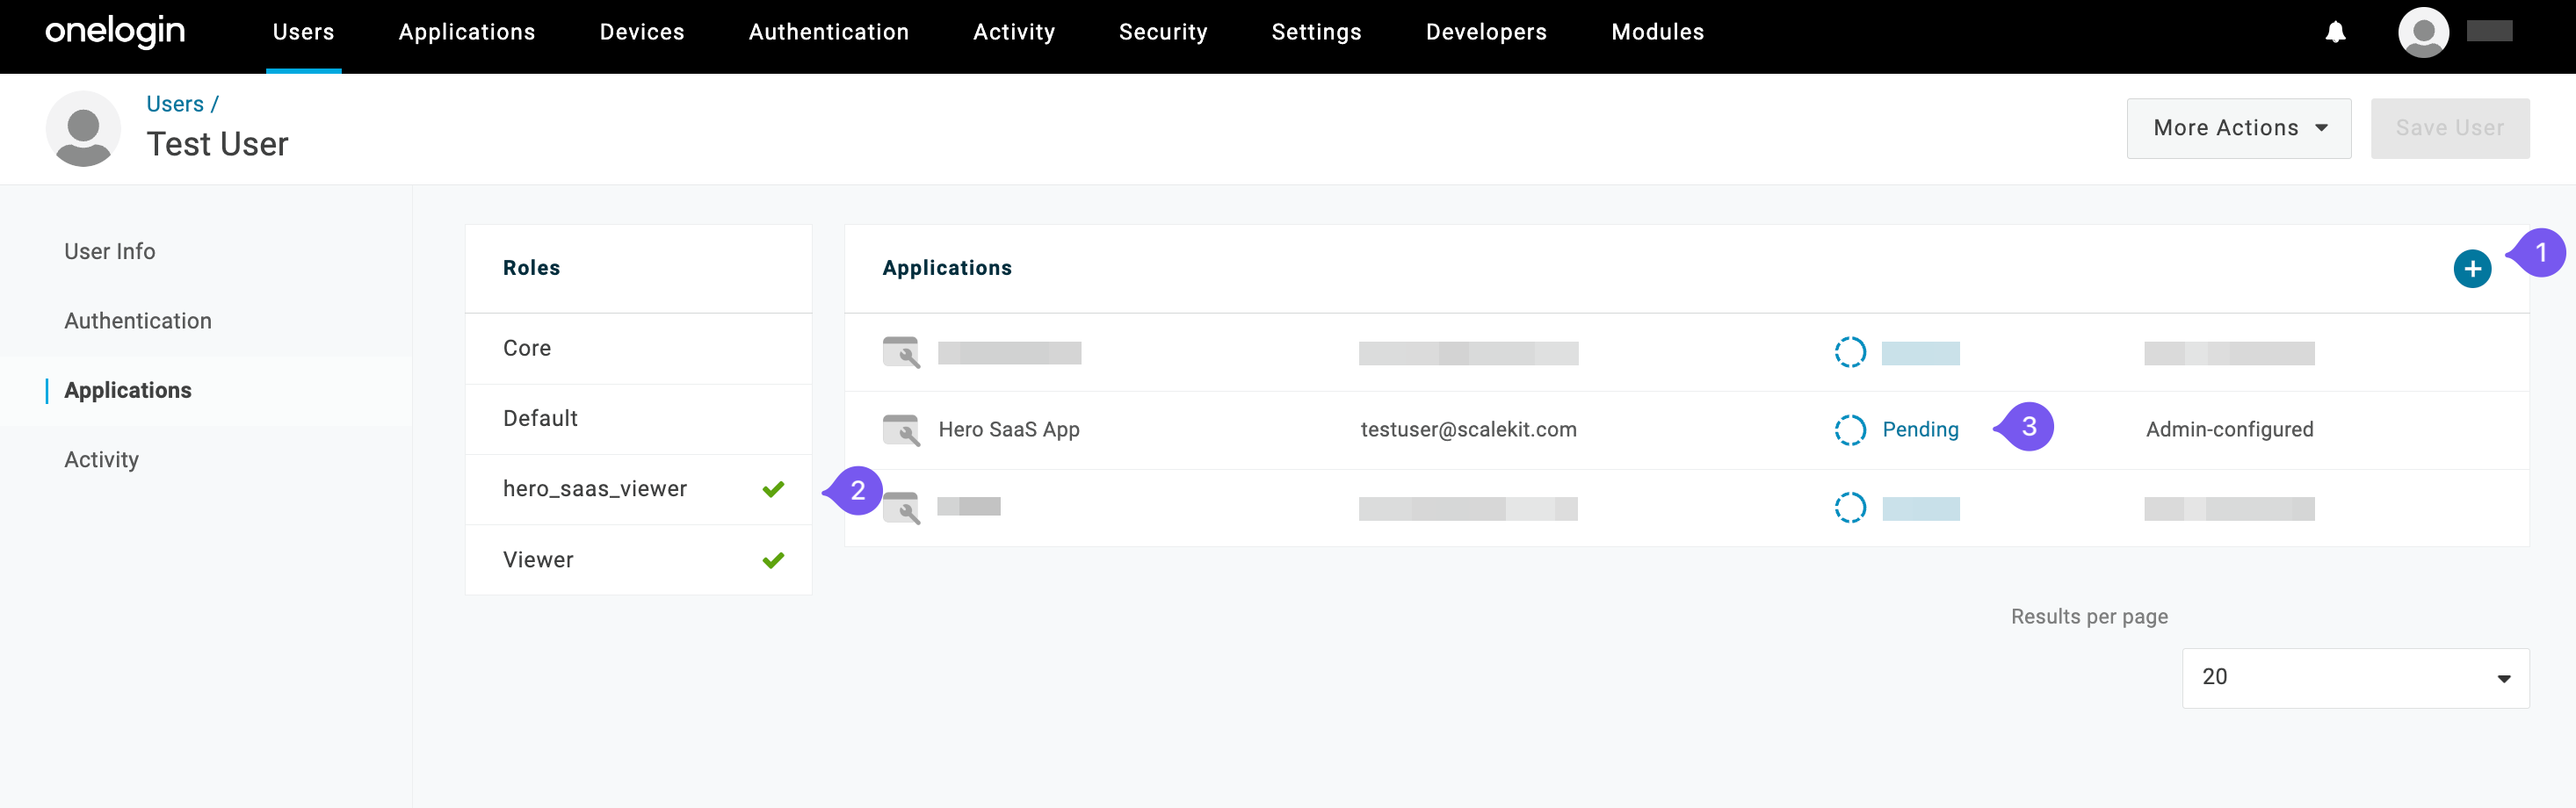
Approve the user provisioning along with the Group.
Finally, verify that the groups are sent to the Hero SaaS App from the administrator portal where you configured the OneLogin connection.
