
Generic SAML
Learn how to configure a generic SAML identity provider for secure single sign-on (SSO) with your application.
This guide walks you through configuring a generic SAML identity provider for your application, enabling secure single sign-on for your users. You’ll learn how to set up a SAML application, configure service provider and identity provider settings, and test the connection.
-
Create a SAML application
Section titled “Create a SAML application”Login to your Identity Provider portal as an admin and create a new Application with SAML as the single sign-on method.
-
Configure the Service Provider
Section titled “Configure the Service Provider”Depending on your Identity Provider, they may allow you to configure Service Provider section in your SAML application via either of the three following methods:
- via SAML Metadata URL
- via SAML Metadata file
- via copying ACS URL and Entity ID manually
via SAML Metadata URL
Section titled “via SAML Metadata URL”Copy the Metadata URL content in your Identity Provider portal
via SAML Metadata File
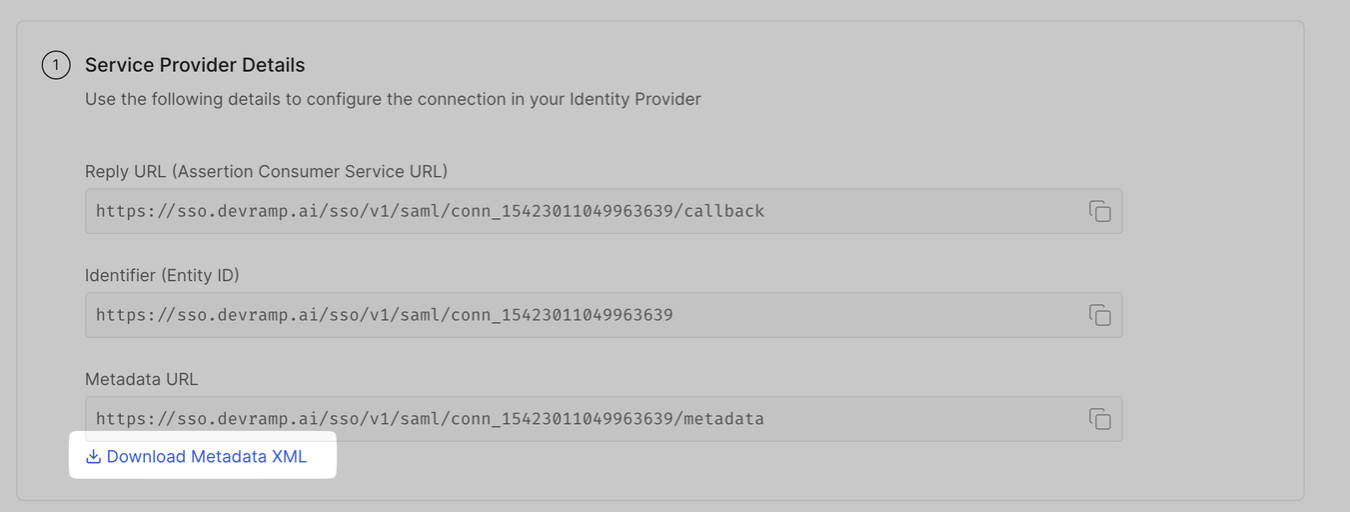
Section titled “via SAML Metadata File”Under Service Provider Details, click on Download Metadata XML and upload in your Identity Portal
via Manual Configuration
Section titled “via Manual Configuration”Copy the ACS URL (Assertion Consumer Service) and Service Provider Entity ID from the Service Provider Details section and paste them in the appropriate sections in your Identity Provider Portal.
-
Configure Attribute mapping & assign users/groups
Section titled “Configure Attribute mapping & assign users/groups”Attribute mapping
Section titled “Attribute mapping”SAML Attributes need to be configured in your Identity Provider portal so that the user profile details are shared with us at the time of user login as part of SAML Response payload.
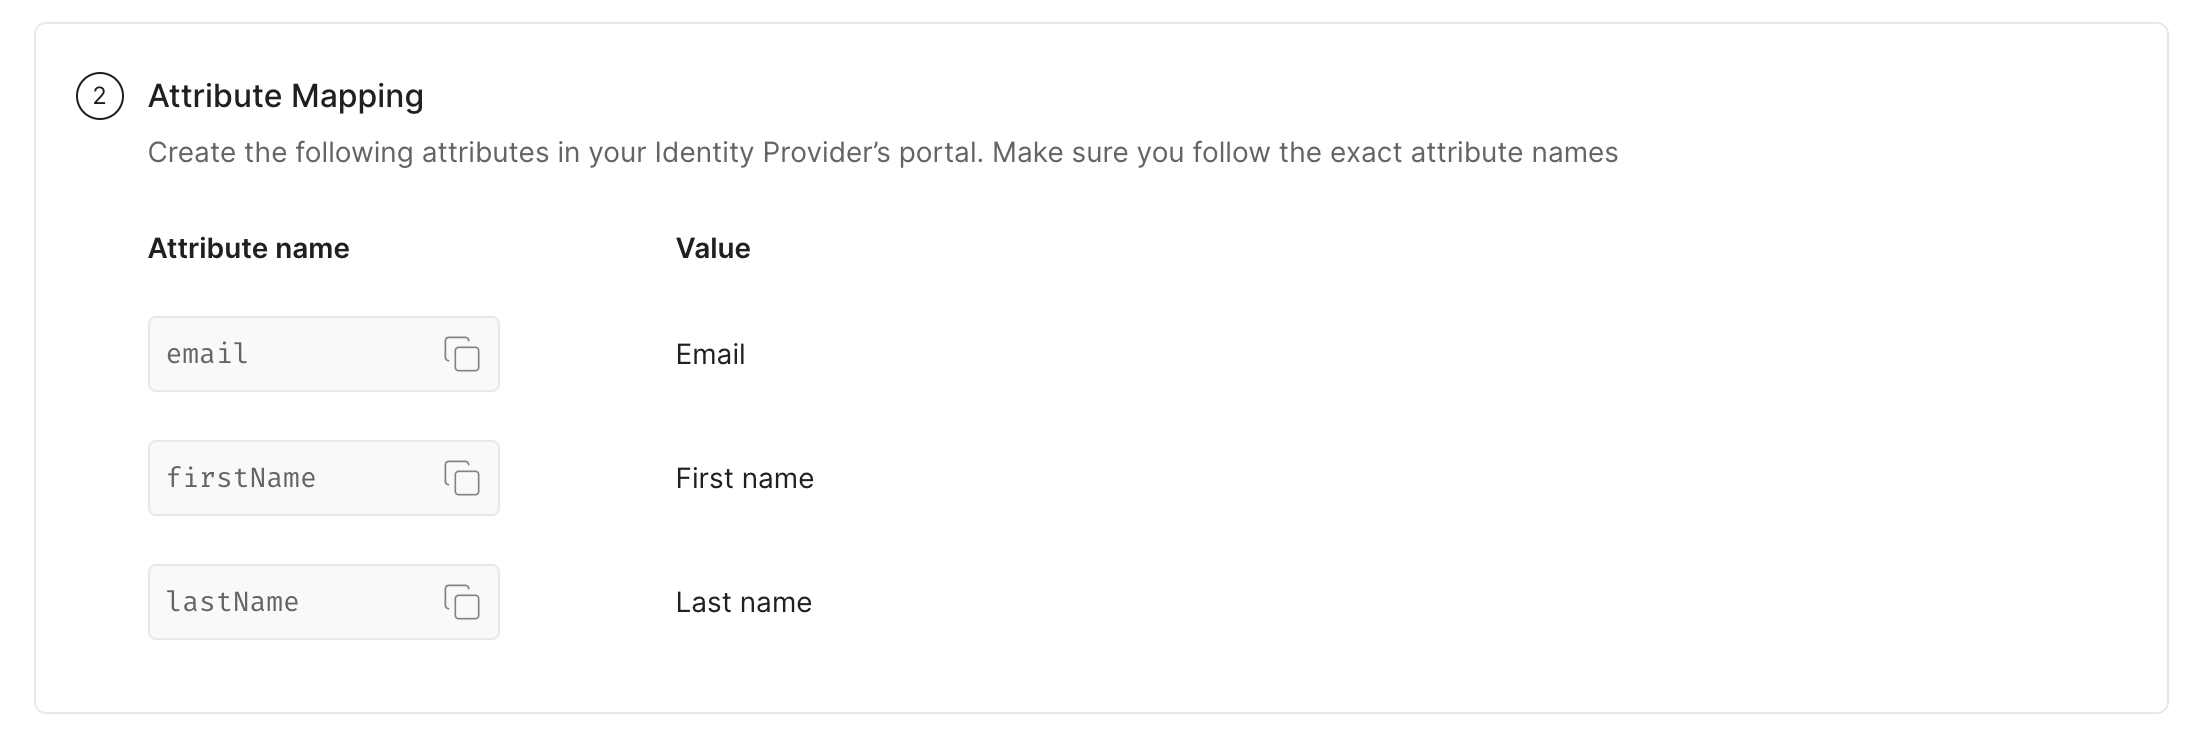
User profile details that are needed for seamless user login are:
- Email Address of the user
- First Name of the user
- Last Name of the user
To configure these attributes, locate Attribute Settings section in the SAML Configuration page in your Identity Provider’s application, and carefully map the attributes with the Attribute names exactly as shown in the below image.
Assign user/group
Section titled “Assign user/group”To finish the Service Provider section of the SAML configuration, you need to “Assign” the users who need to access to this application.
Find the User/Group assignment section in your Identity Provider application and select and assign all the required users or user groups that need access to this application via Single Sign-on.
-
Configure Identity Provider
Section titled “Configure Identity Provider”After you have completed the Service Provider configuration, you now need to configure the Identity Provider details in our SSO Configuration page.
Depending on your Identity Provider, you can choose either of the below methods:
- Automated Configuration (configuration via Metadata URL)
- Manual Configuration (configuration via individual fields)
Automated Configuration (recommended)
Section titled “Automated Configuration (recommended)”If you supply the Identity Provider Metadata URL, our system will automatically fetch the necessary configuration details required like Login URL, Identity Provider Entity ID, X.509 Certificate to complete the SAML SSO configuration.
Also, we will periodically scan this url to keep the configuration up-to-date incase any of this information changes in your Identity Provider reducing the manual effort needed from your side.
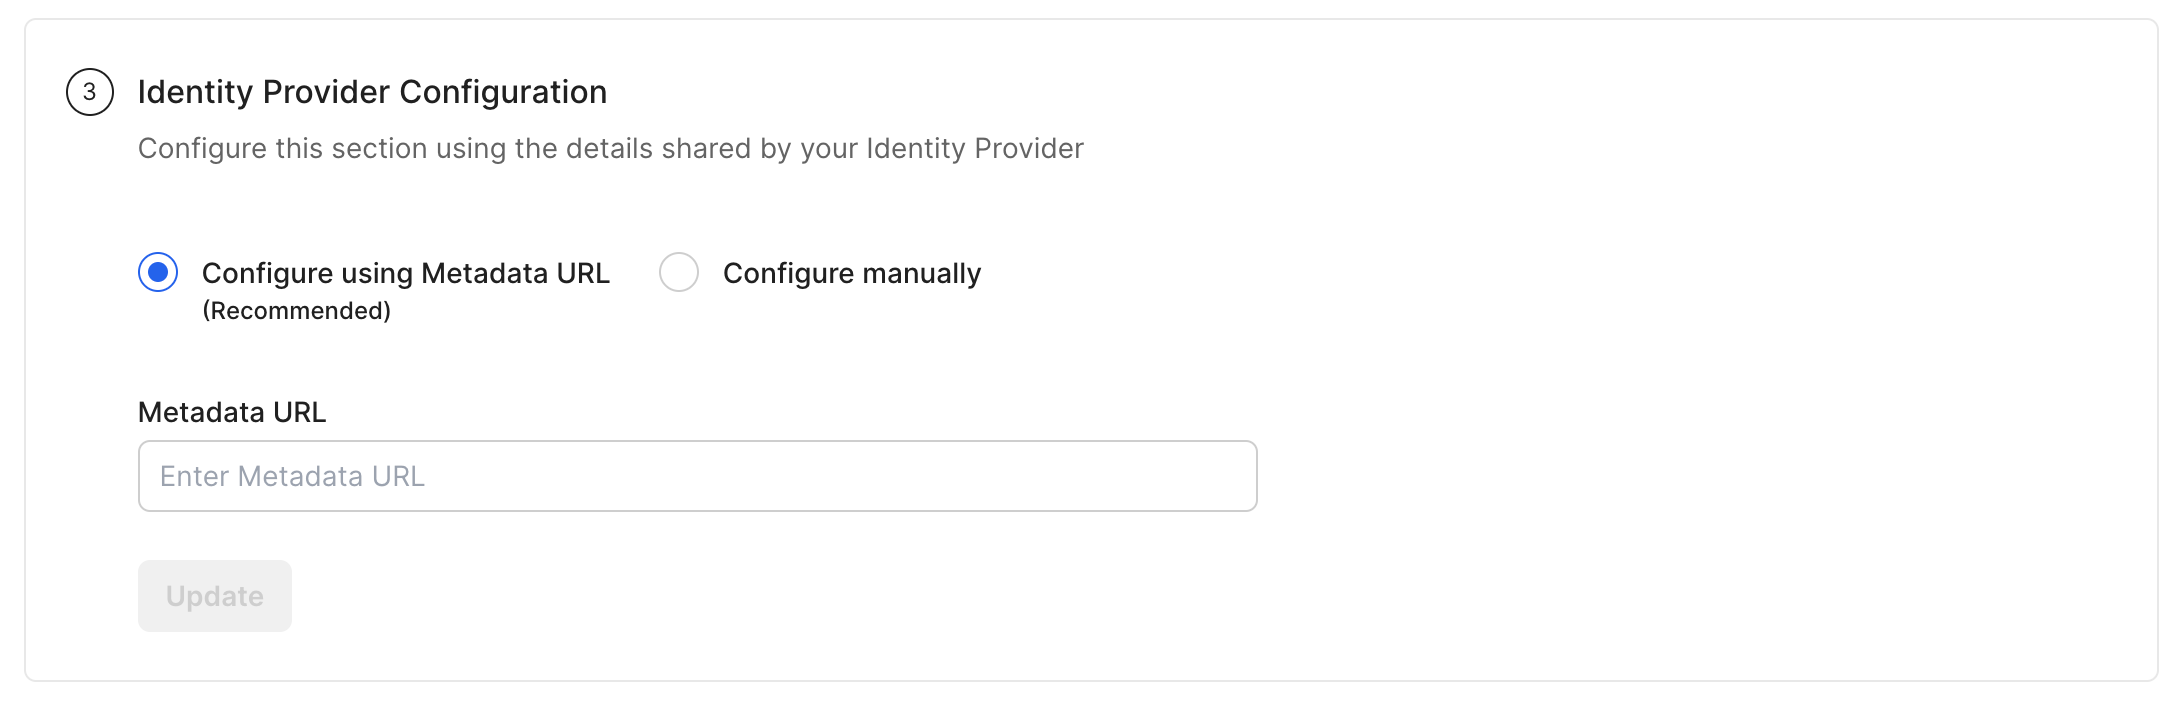
Locate and copy the Identity Provider Metadata URL from your Identity Provider’s application.
Under Identify Provider Configuration, select Configure using Metadata URL, and paste it under Metadata URL on the SSO Configuration Portal.
Manual Configuration
Section titled “Manual Configuration”- Choose “Configure Manually” option in the “Identity Provider Configuration” section
- Carefully copy the below configuration details from your Identity Provider section and paste them in the appropriate fields:
- Issuer (also referred to as Identity Provider Entity ID)
- Sign-on URL (also referred to as SSO URL or Single Sign-on URL)
- Signing Certificate (also referred to as X.509 certificate)
- You can also upload the certificate file instead of copying the contents manually.
-
Test Single Sign-on
Section titled “Test Single Sign-on”To verify whether the SAML SSO configuration is completed correctly, click on Test Connection on the SSO Configuration Portal.
If everything is done correctly, you will see a Success response as shown below.

If there’s a misconfiguration, our test will identify the errors and will offer you a way to correct the configuration right on the screen.
-
Enable Single Sign-on
Section titled “Enable Single Sign-on”After you successfully verified that the connection is configured correctly, you can enable the connection to let your users login to this application via Single Sign-on.
Click on Enable Connection.

With this, we are done configuring your application for an SSO login setup.