
Branded custom domains
Learn how to set up a branded custom domain with Scalekit
Custom domain branding lets you provide a fully branded authentication experience for your customers. By default, Scalekit assigns a unique environment URL (like https://yourapp.scalekit.com), but you can replace it with your own domain (like https://auth.yourapp.com) using DNS CNAME configuration. This branded domain becomes the base URL for your admin portal, SSO connections, directory sync setup, and REST API endpoints—giving your customers a seamless, on-brand experience throughout their authentication journey.
This guide shows you how to configure a CNAME record in your DNS registrar and verify SSL certificate provisioning for your custom domain.
| Before | After |
|---|---|
https://yourapp.scalekit.com | https://auth.yourapp.com |
Custom domains use DNS CNAME records to route traffic from your branded domain to Scalekit’s infrastructure:
- Your custom domain (e.g.,
auth.yourapp.com) points to Scalekit’s infrastructure via a CNAME record - Scalekit automatically provisions and manages SSL certificates for your domain
- All Scalekit services (Admin Portal, SSO endpoints, directory sync, REST API) become accessible through your branded domain
This architecture ensures your domain remains on your brand while leveraging Scalekit’s secure, scalable infrastructure. CNAME records safely route traffic without exposing your configuration, and SSL certificates automatically provisioned by Scalekit ensure all traffic to your custom domain is encrypted (HTTPS).
DNS record reference
Section titled “DNS record reference”When configuring your CNAME record, you’ll need to provide the following fields:
| DNS Record Field | Example Value | Description |
|---|---|---|
| Record Type | CNAME | Canonical Name record that creates an alias from your domain to Scalekit’s infrastructure |
| Name/Host/Label | auth.yourapp.com | Your custom subdomain (copied from Scalekit dashboard) |
| Value/Target/Destination | scalekit-prod-xyz.com | Scalekit’s endpoint URL (copied from Scalekit dashboard) |
| TTL | 3600 | Time to Live in seconds (optional, typically set by your registrar’s default) |
Set up your custom domain
Section titled “Set up your custom domain”Let’s set up your custom domain by adding a CNAME record to your DNS registrar and verifying the configuration.
-
CNAME configuration is available only for production environments. Log into the Scalekit dashboard and ensure you’re working in your production environment.
-
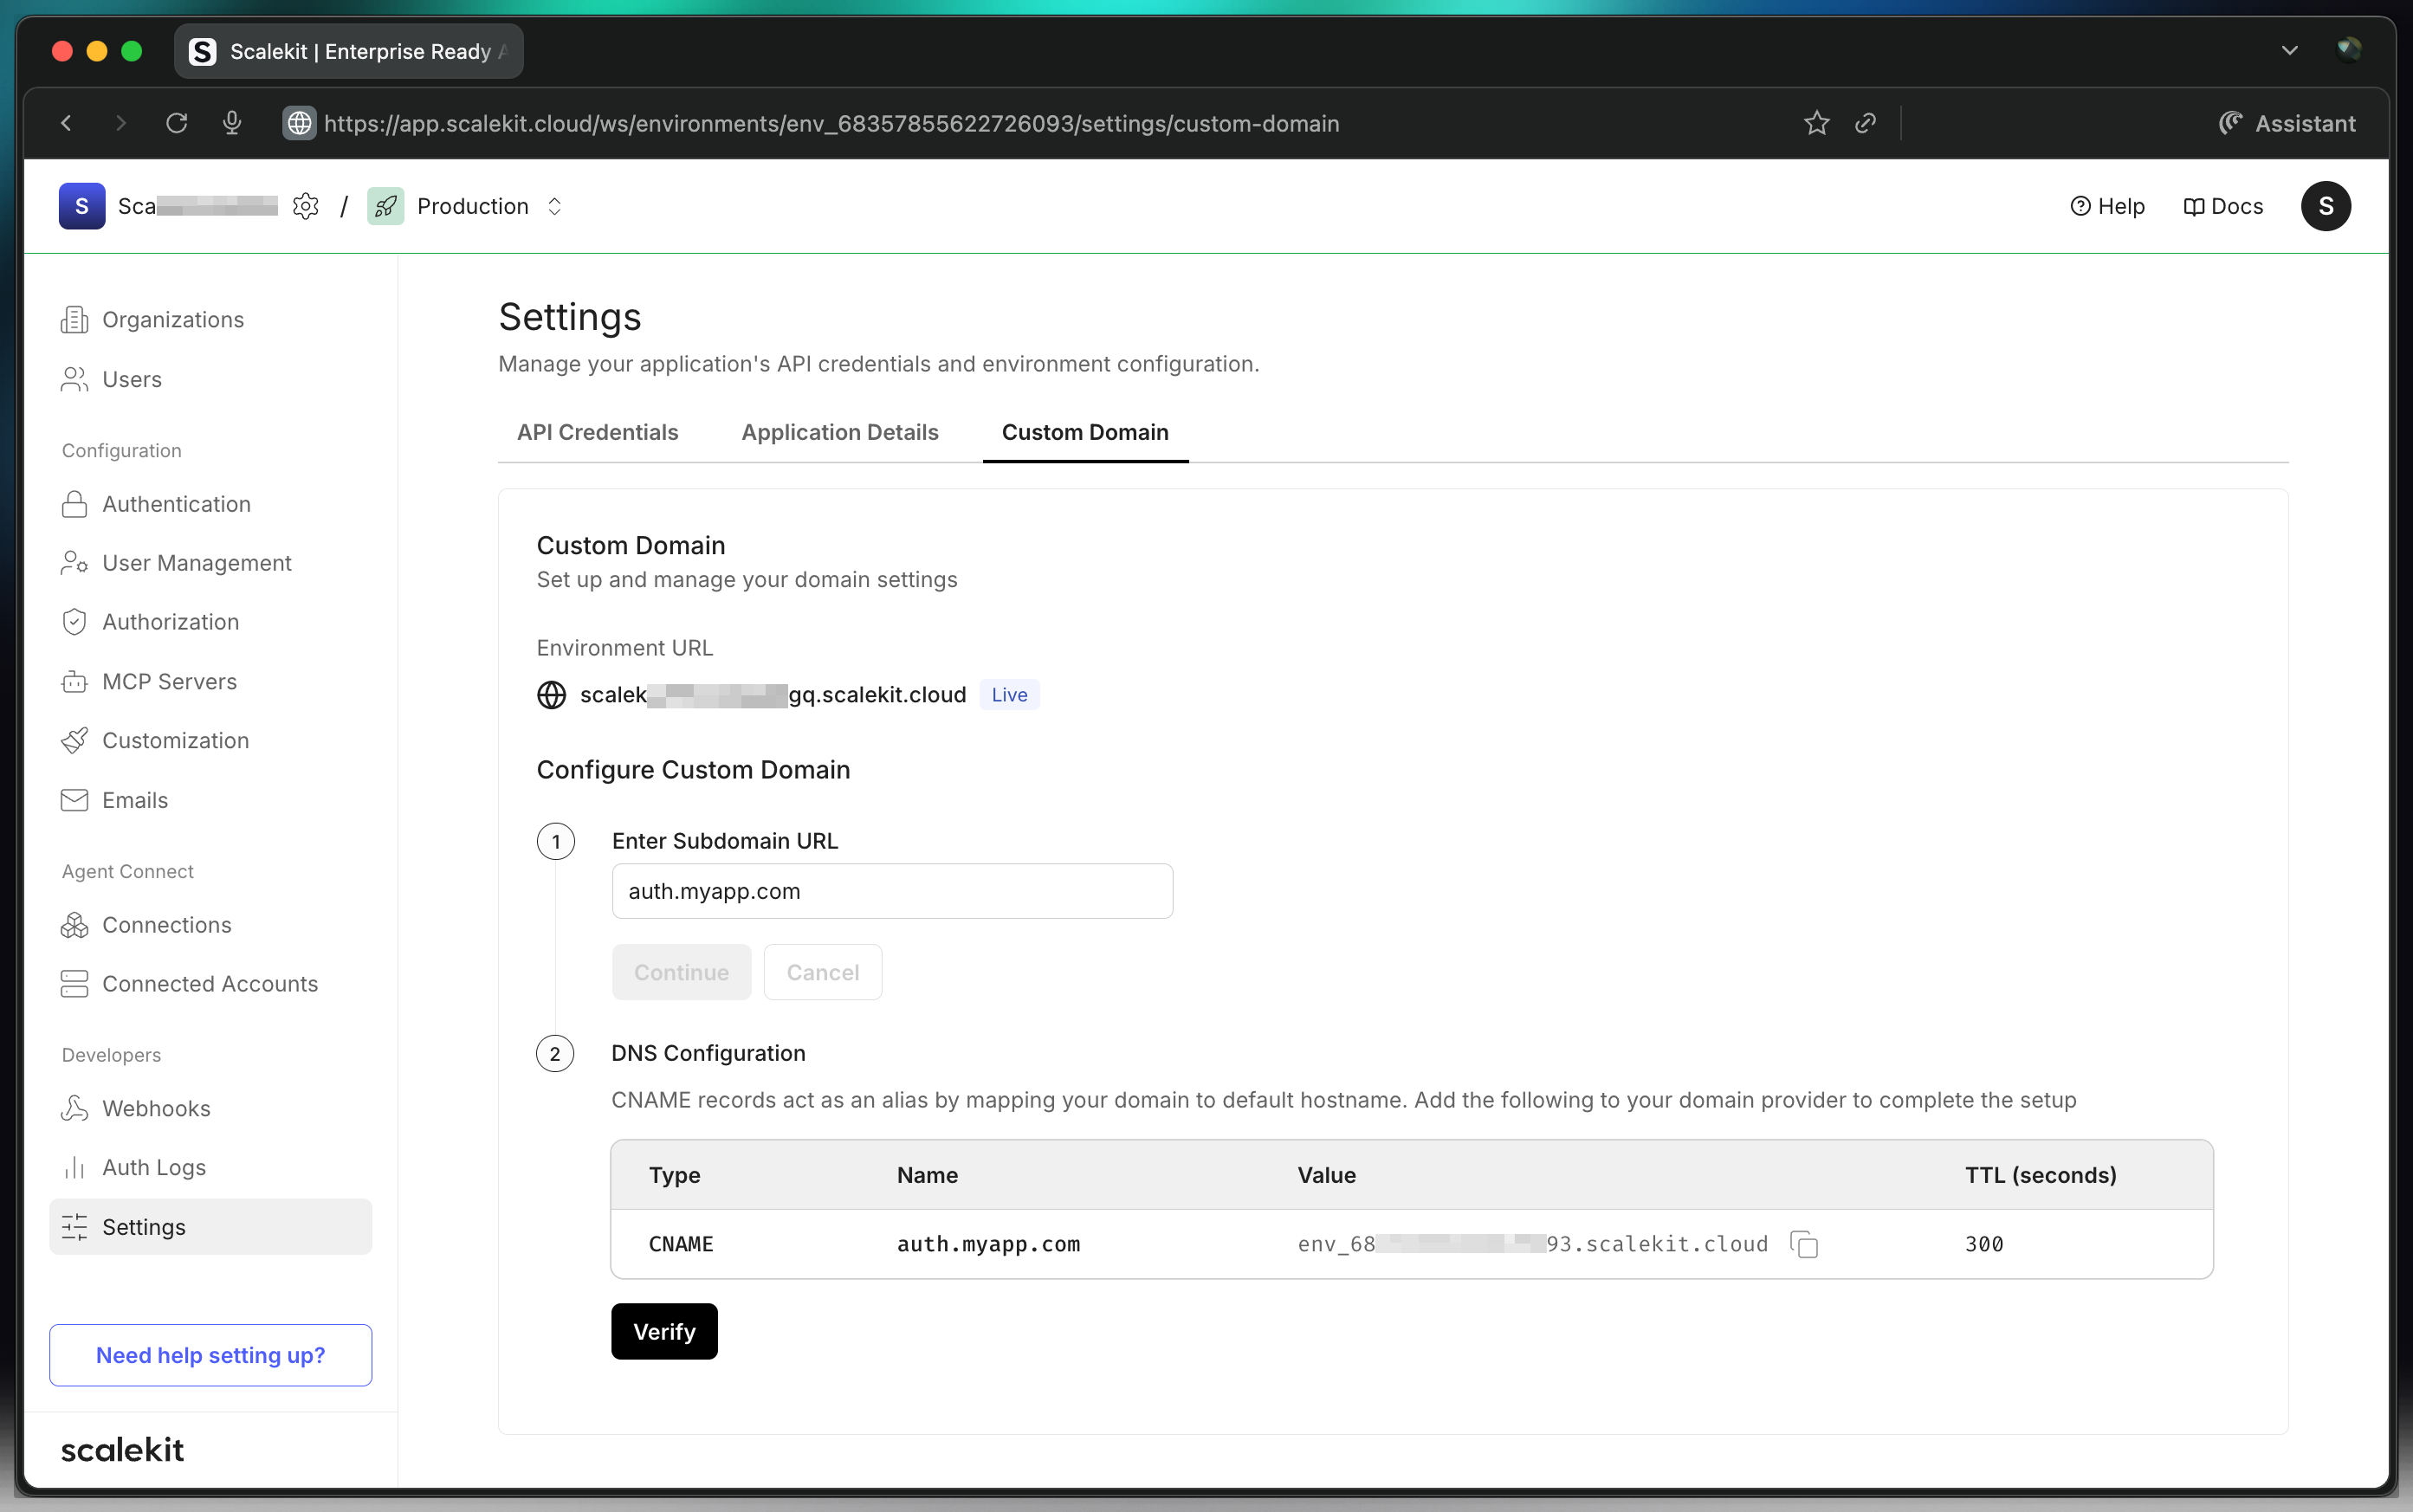
In the Scalekit dashboard, go to Dashboard > Customization > Custom Domain. This page displays the CNAME record details you’ll need to configure in your DNS registrar.
-
Go to your domain registrar’s DNS management console and create a new DNS record. Select
CNAMEas the record type. -
In Dashboard > Customization > Custom Domain, copy the
Namefield (your desired subdomain). Paste this value into your DNS registrar’sName,Label, orHostfield. -
Still in Dashboard > Customization > Custom Domain, copy the
Valuefield. Paste this value into your DNS registrar’sDestination,Target, orValuefield. -
Save the CNAME record in your DNS registrar. The changes may take some time to propagate across DNS servers.
-
Return to Dashboard > Customization > Custom Domain in the Scalekit dashboard and click the Verify button. This validates that your CNAME record is properly configured and accessible.
SSL certificate provisioning
Section titled “SSL certificate provisioning”After successful CNAME verification, Scalekit automatically provisions an SSL certificate for your custom domain:
- Initial provisioning - SSL certificate provisioning can take up to 24 hours after CNAME verification
- Check status - Click the Check button in Dashboard > Customization > Custom Domain to verify SSL certificate status
- Still pending after 24 hours - If SSL provisioning takes longer than 24 hours, contact our support team at support@scalekit.com for assistance
External resources
Section titled “External resources”For detailed instructions on adding a CNAME record with popular DNS registrars: