Google as your sign in option
Learn how to integrate Google Sign-In with Scalekit, enabling secure social authentication for your users with step-by-step OAuth configuration instructions.
Scalekit enables apps to easily let users sign in using Google as their social connector. This guide walks you through the process of setting up the connection between Scalekit and Google, and using the Scalekit SDK to add “Sign in with Google” to your application.
By the end of this guide, you will be able to:
- Test Google sign-in without setting up Google OAuth credentials (dev only)
- Set up an OAuth 2.0 connection between Scalekit and Google
- Implement ‘Sign in with Google’ in your application using the Scalekit SDK
Set up Google connection
Section titled “Set up Google connection”Access social login settings
Section titled “Access social login settings”Open your Scalekit dashboard and navigate to Social Login under the Authentication section.
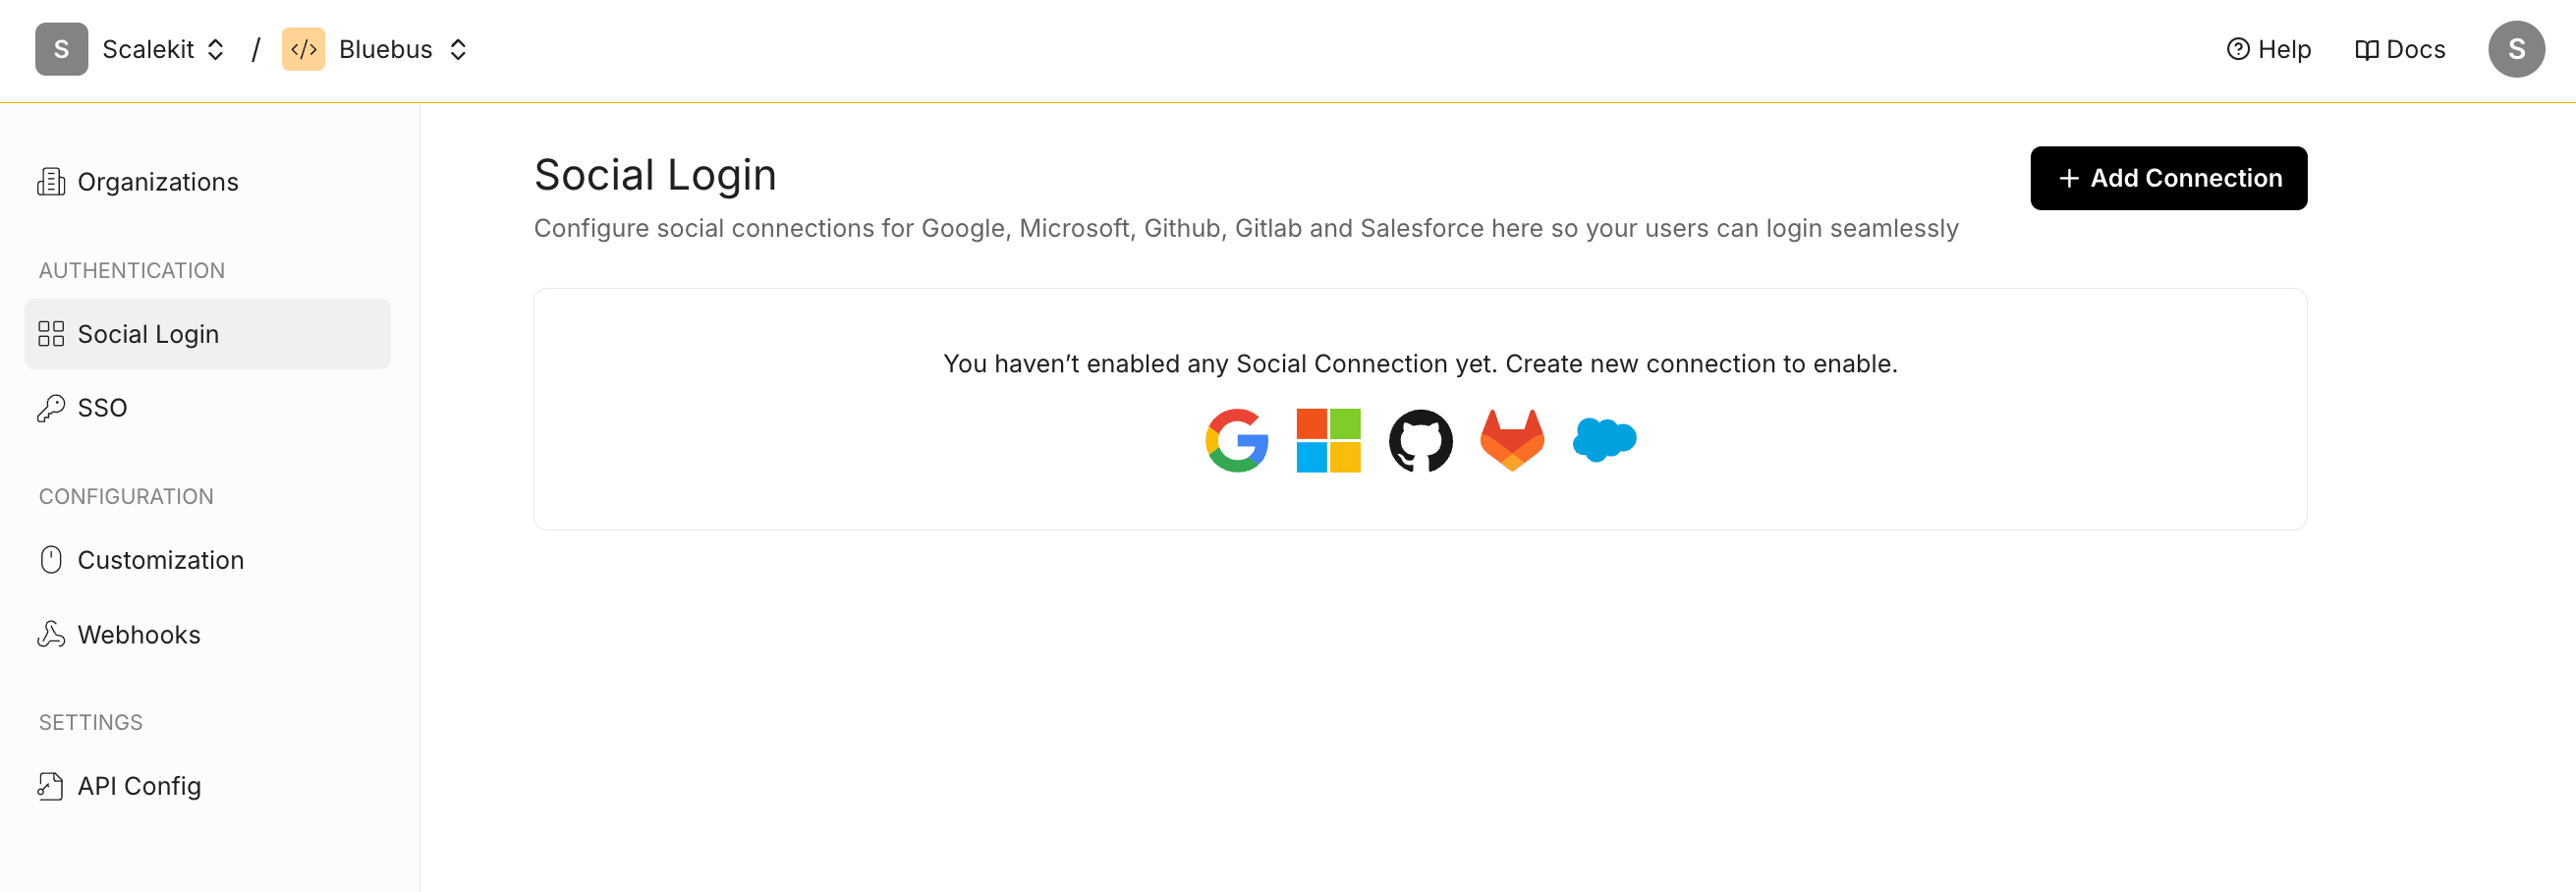
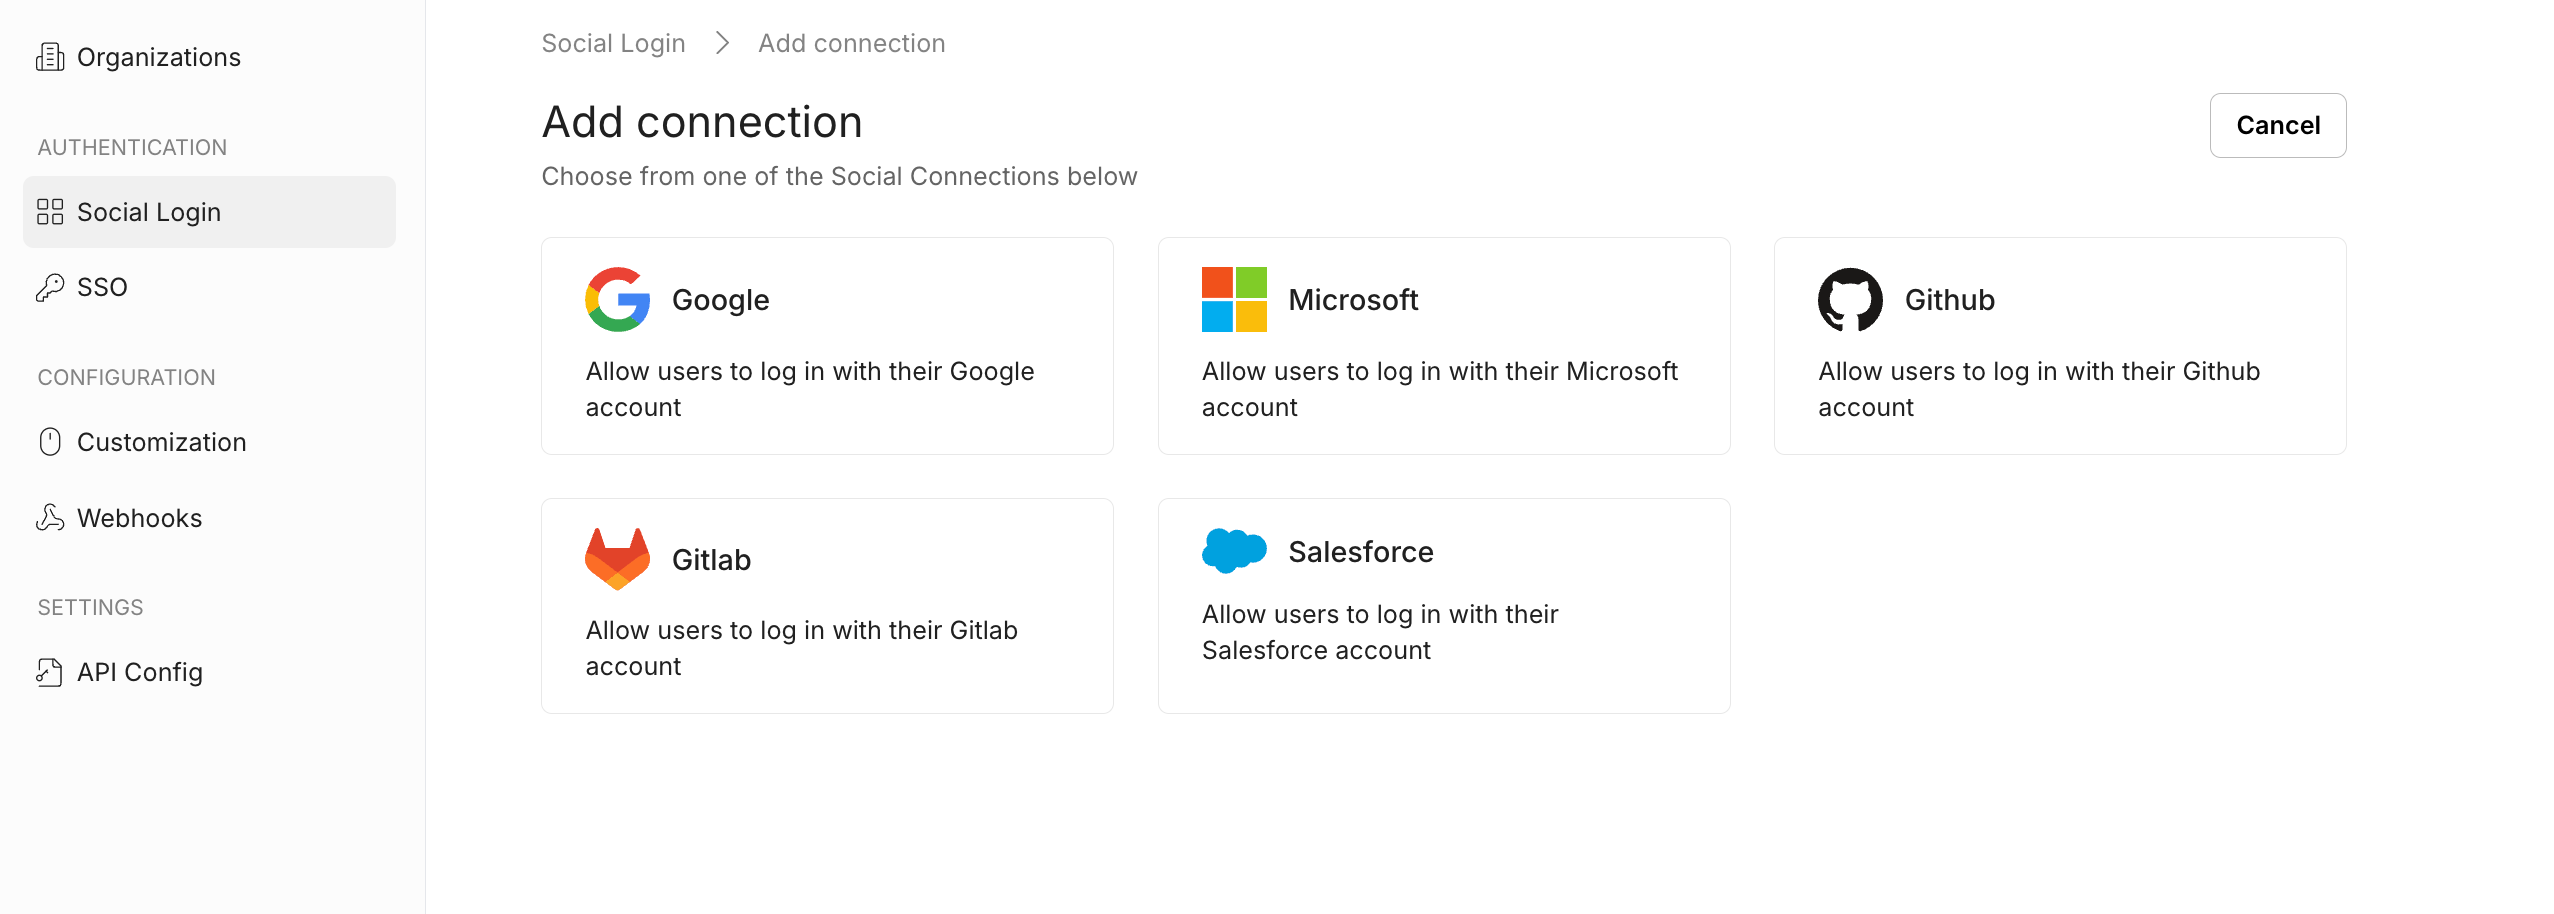
Add Google connection
Section titled “Add Google connection”Click the ”+ Add Connection” button and select Google from the list of available options.
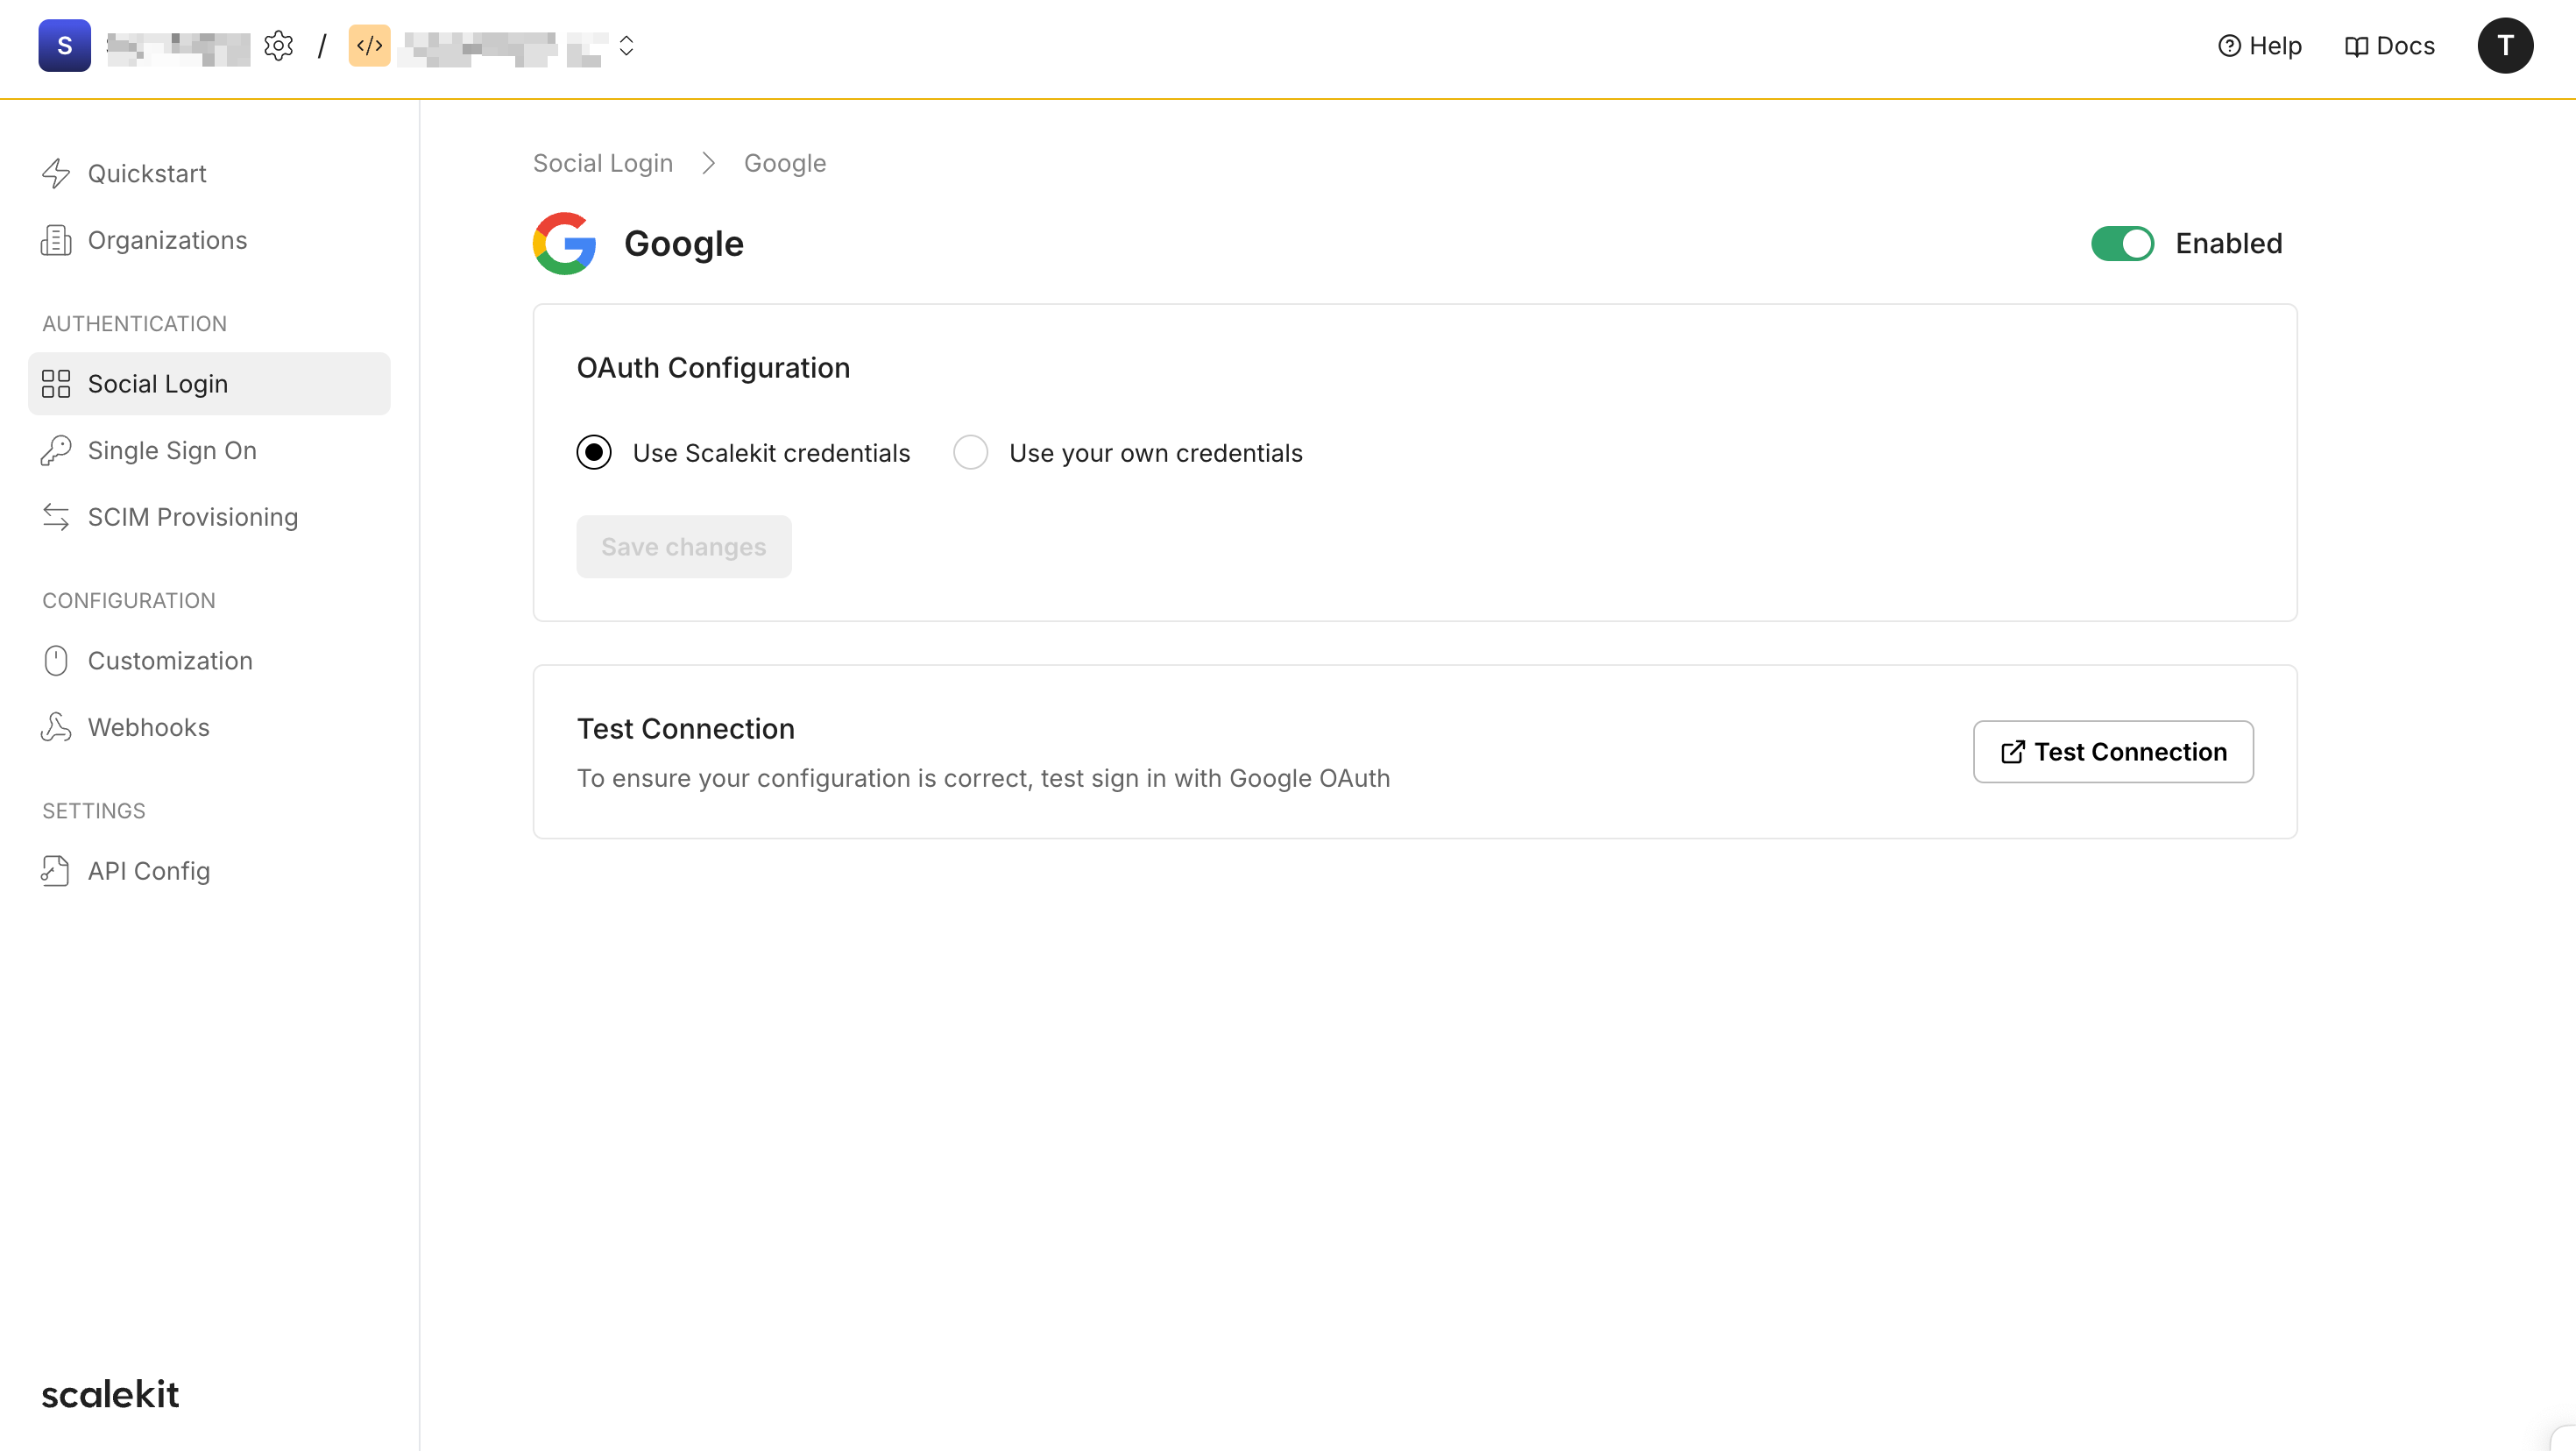
Test with Scalekit credentials
Section titled “Test with Scalekit credentials”For faster development and testing, Scalekit provides pre-configured Google OAuth credentials, allowing you to test the authentication flow without setting up your own Google OAuth client.
This is particularly useful when you want to quickly validate Google sign-in functionality in your app without dealing with OAuth setup. It also helps if you’re still in the early stages of development and don’t have Google credentials yet, or if you need to test the behavior before setting up a production-ready connection.
Under OAuth Configuration, select Use Scalekit credentials and save the changes. Once done, you can now directly test the setup by clicking Test Connection.
Set up with your own credentials
Section titled “Set up with your own credentials”Configure OAuth settings
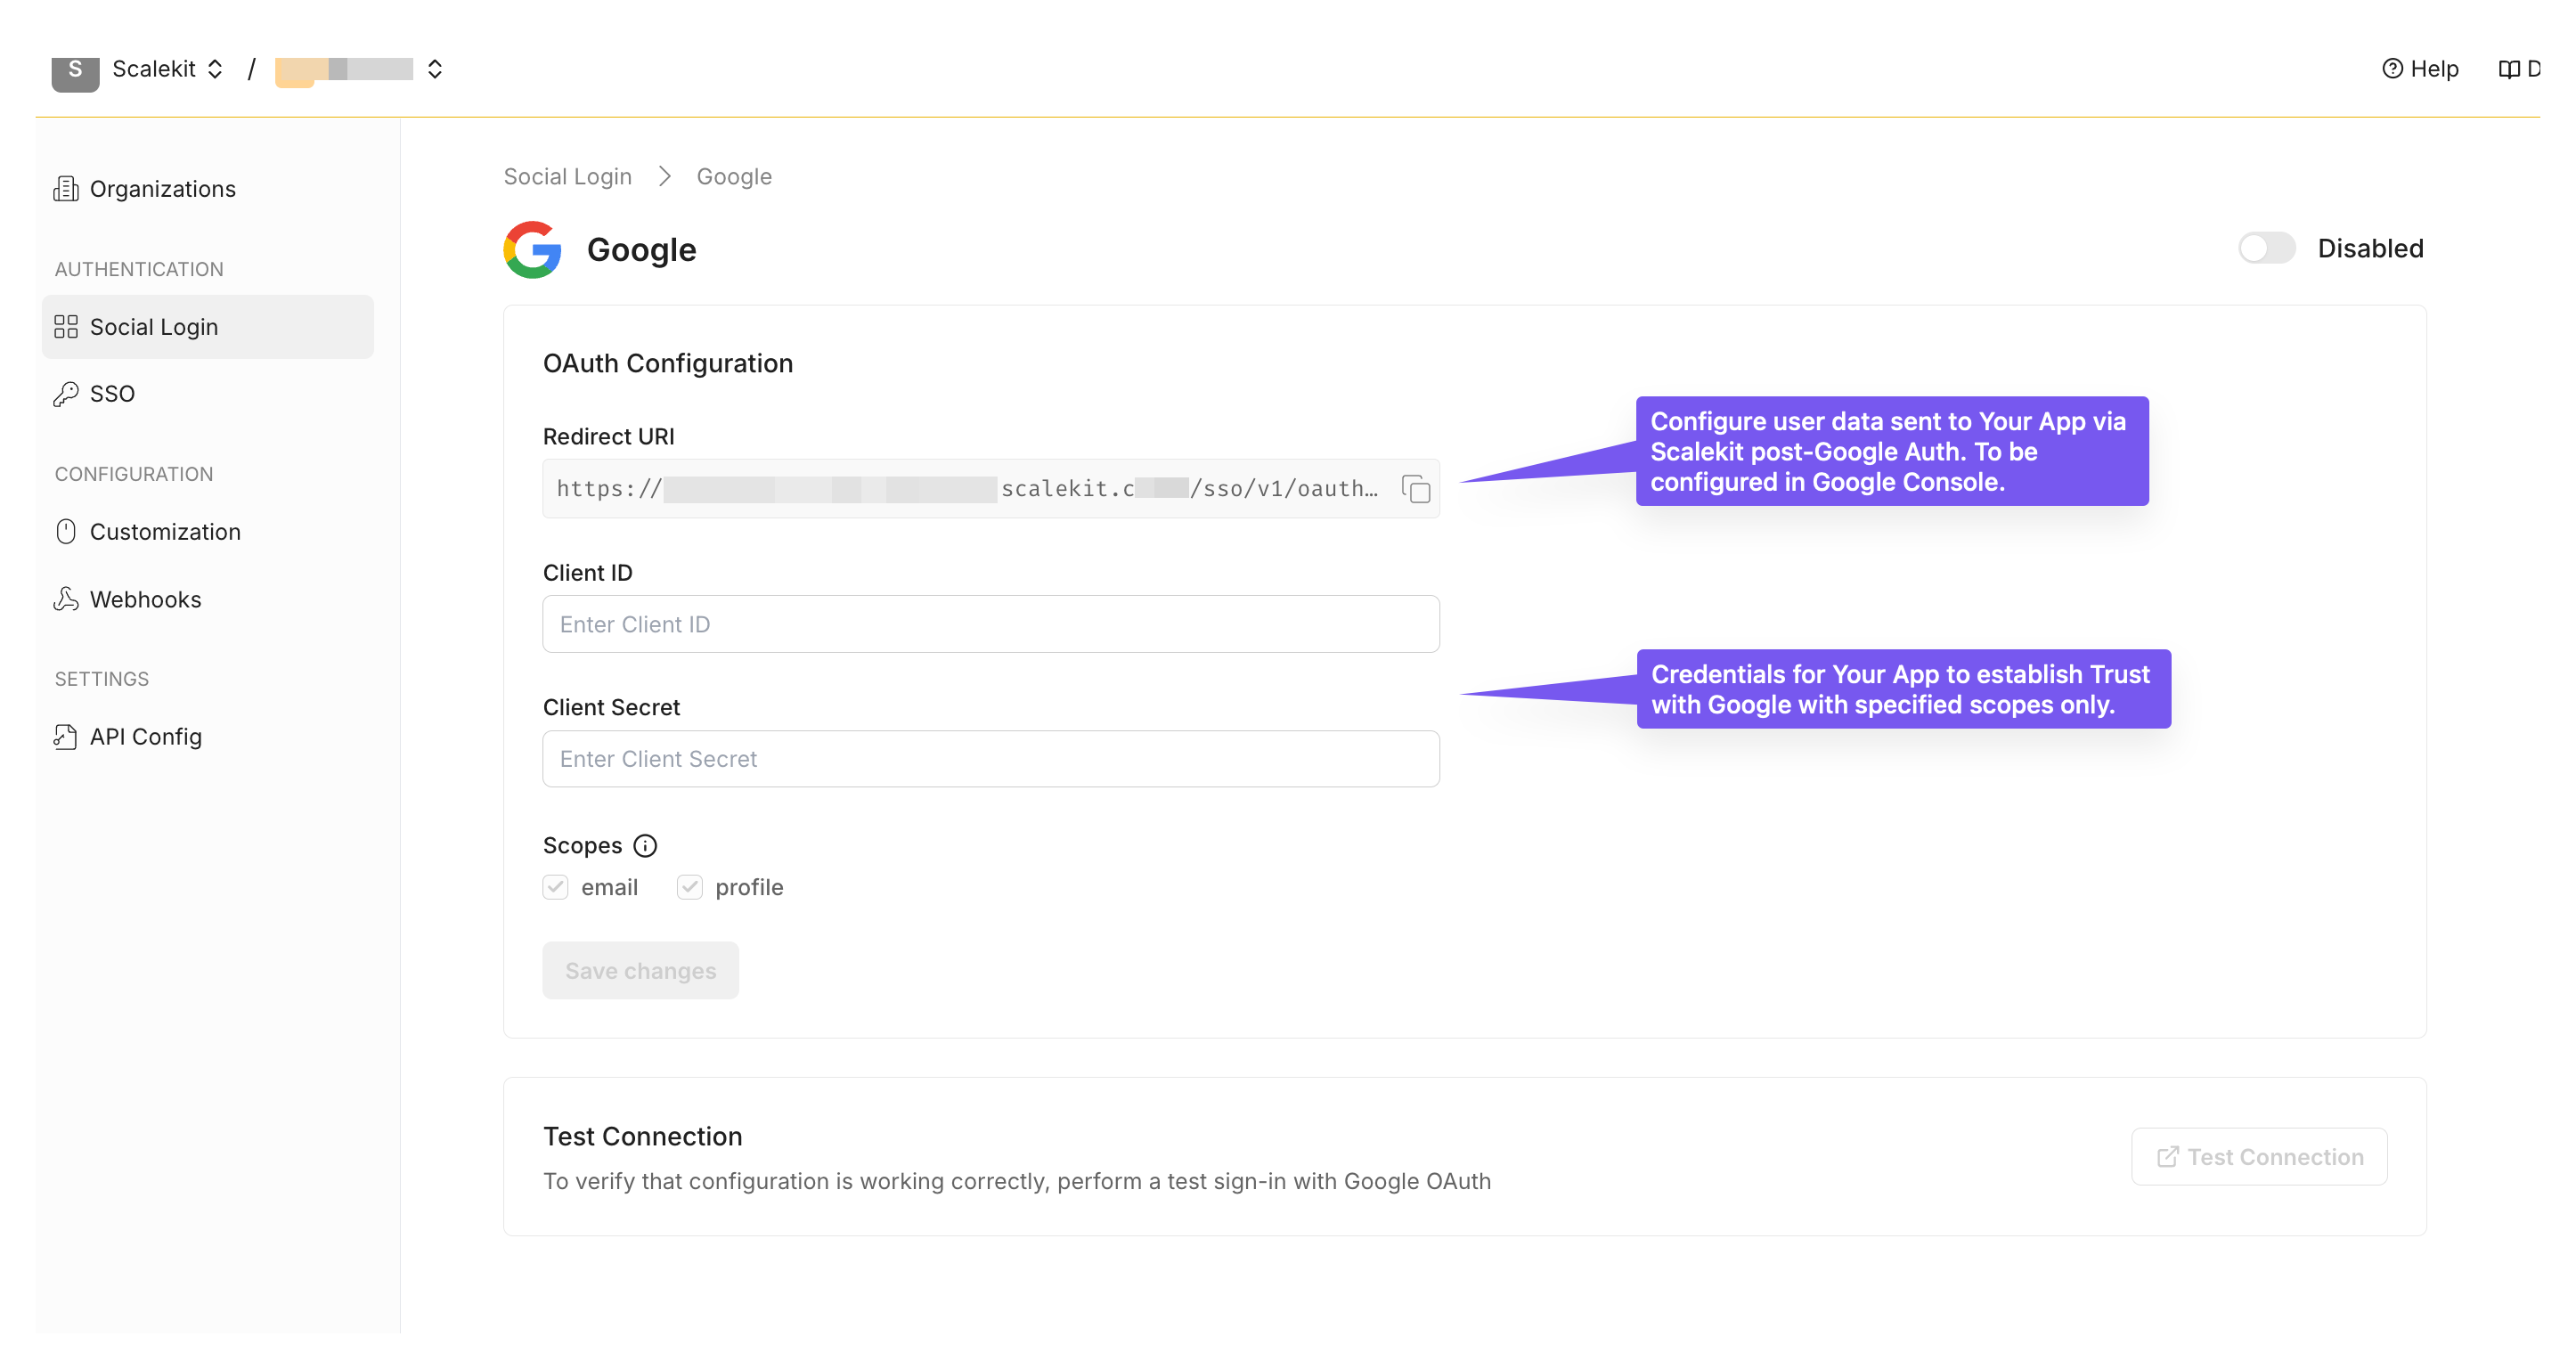
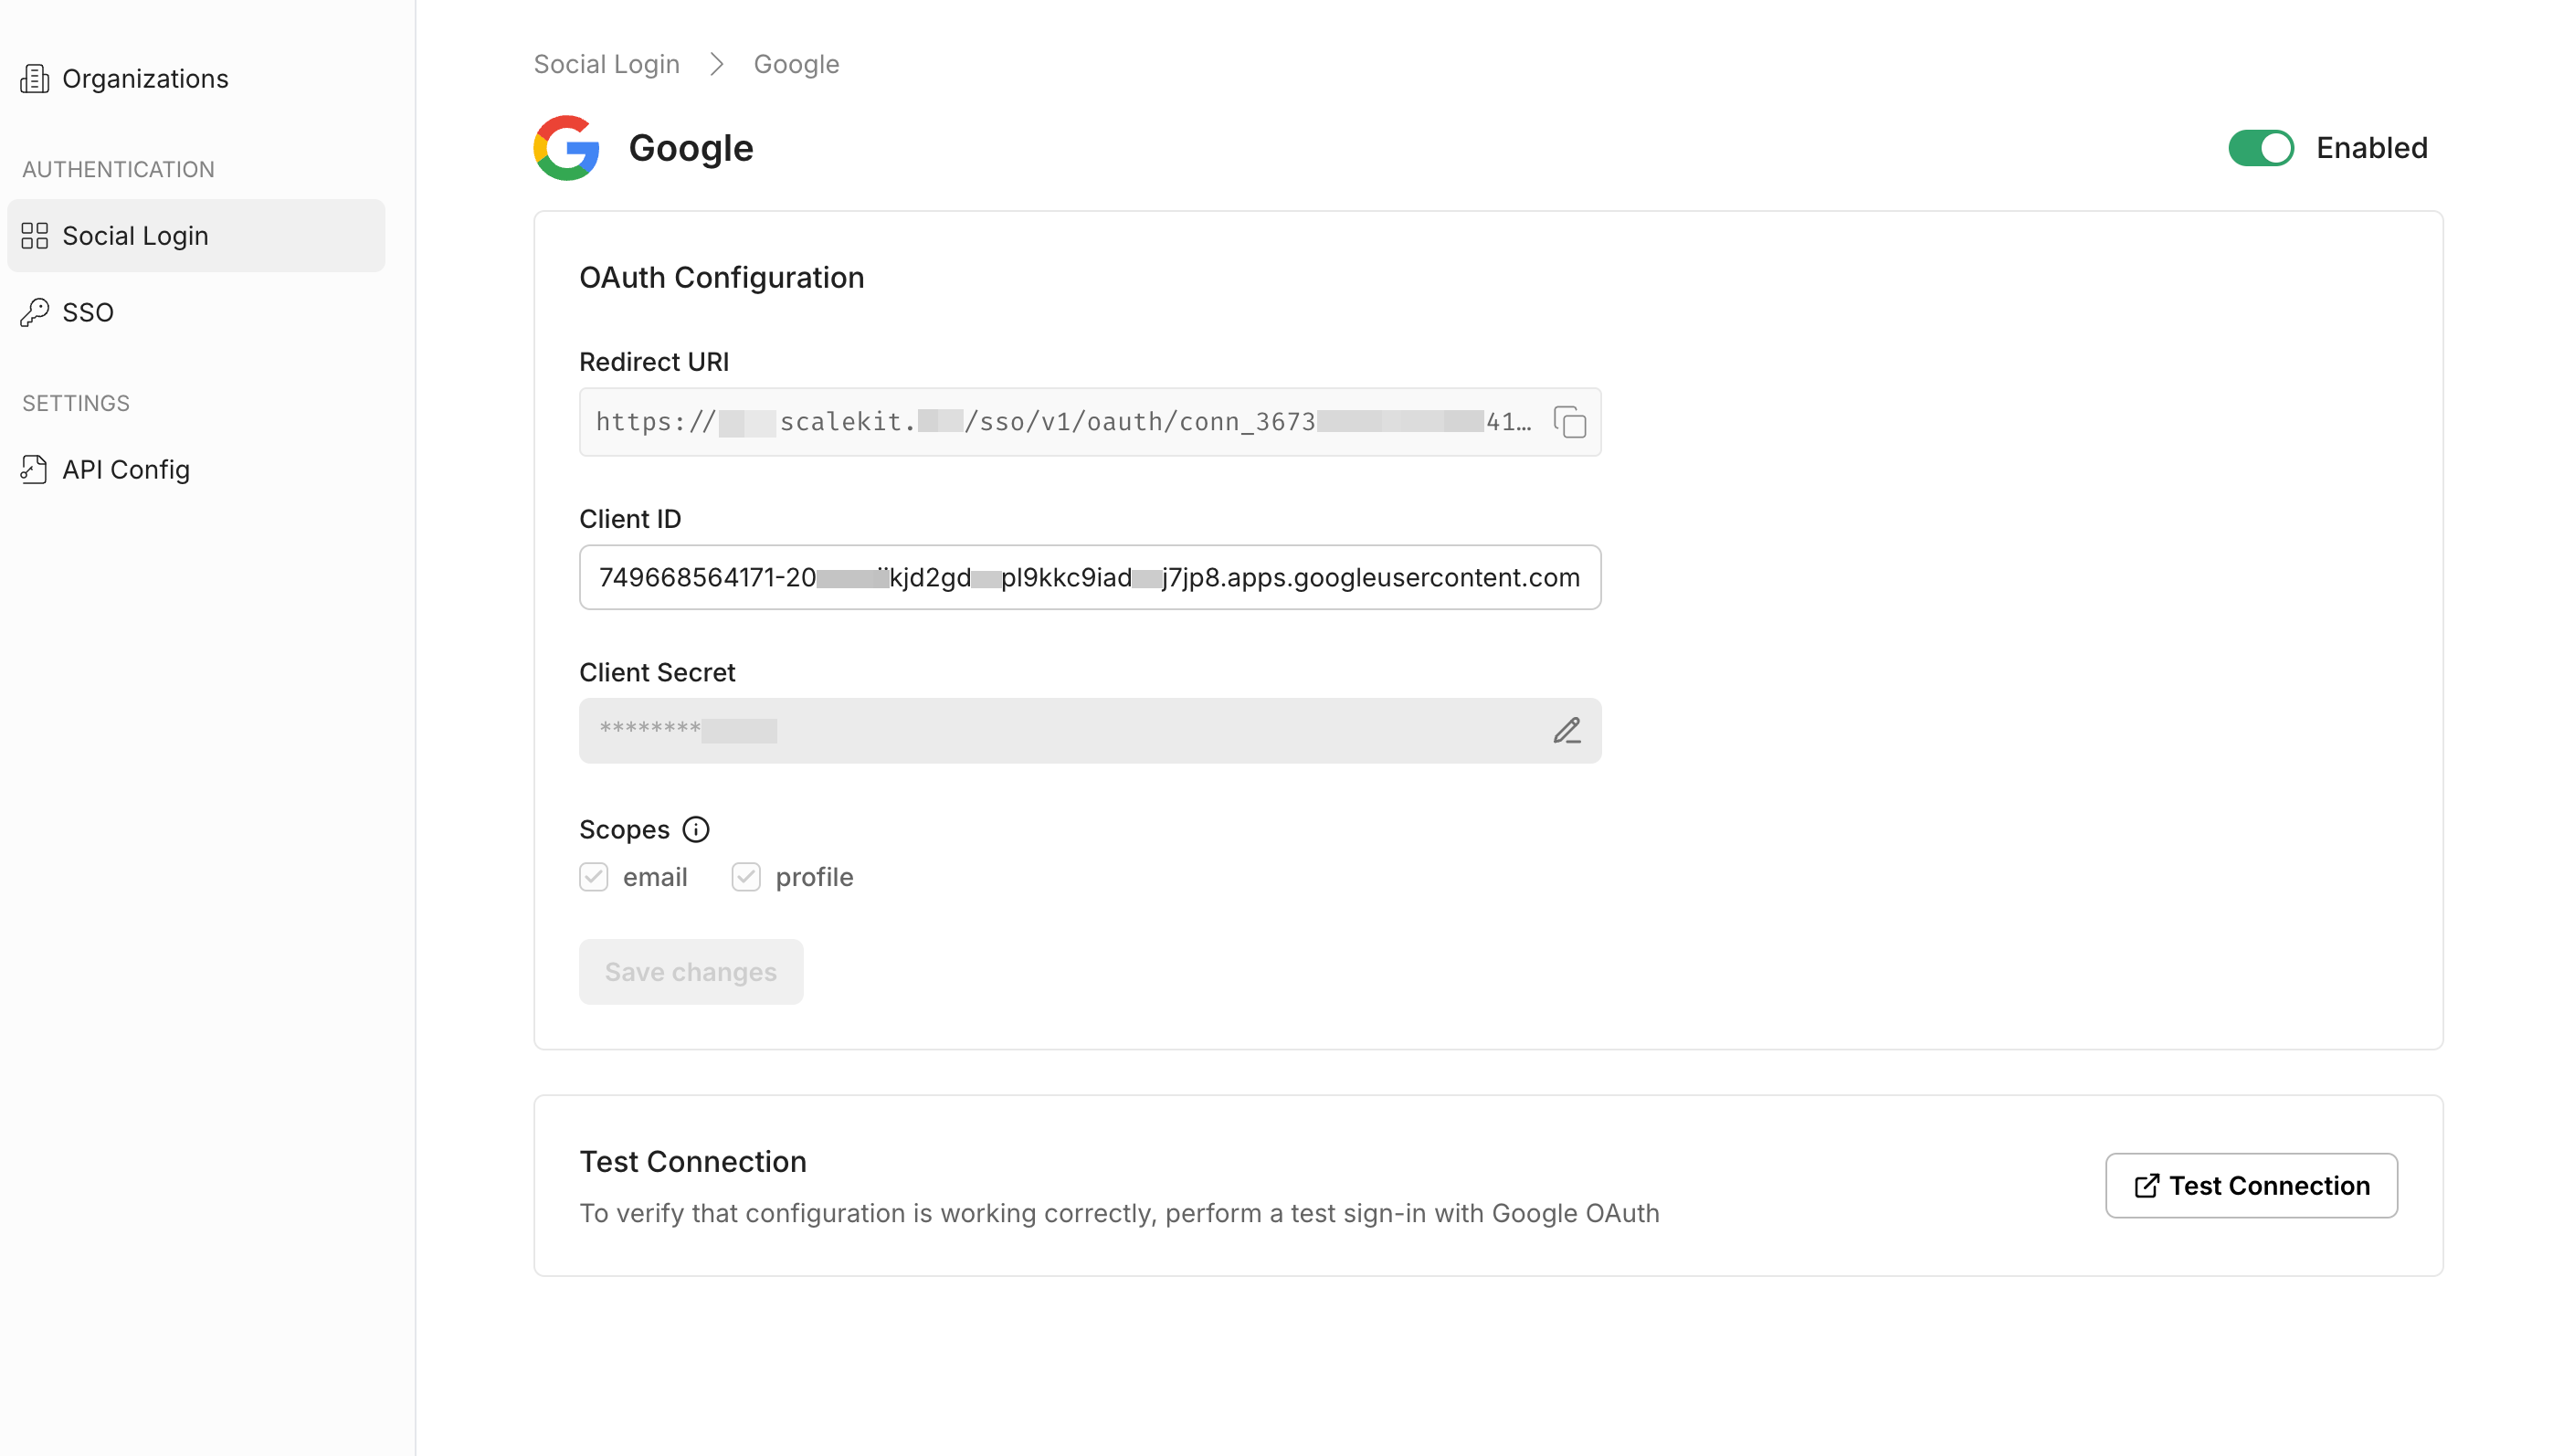
Section titled “Configure OAuth settings”The OAuth Configuration details page helps you set up the connection:
- Note the Redirect URI provided for your app. You’ll use this URL to register with Google.
- Client ID and Client Secret are generated by Google when you register an OAuth App. They enable Scalekit to authenticate your app and establish trust with Google.
Get Google OAuth client credentials
Section titled “Get Google OAuth client credentials”-
Open the Google Cloud Platform Console. From the projects list, select an existing project or create a new one.
-
Navigate to the Google Auth Platform’s overview page.
- Click Get Started and provide details such as app information, audience, and contact information.
- Important: Select External audience type. You must use External for social login because:
- Internal only works for whitelisted Google Workspace accounts (your own employees)
- External allows anyone with a Google account to sign in to your app
- Internal cannot be used for public-facing authentication
- Complete the process by clicking Create.
-
On the “Overview” page, click the Create OAuth Client button to start setting up your app’s OAuth client.
-
Choose the appropriate application type (e.g., web application) from the dropdown menu.
-
Copy the redirect URI from your Google Social Login configuration and paste it into the Authorized Redirect URIs field. The URI should follow this format (for development environment):
https://{your-subdomain}.scalekit.dev. -
Save and retrieve credentials: Click Save to finalize the setup. You will be redirected to a list of Google OAuth Clients. Select the newly created client and copy the Client ID and Client Secret from the additional information section.
-
Enter credentials in social login configuration: Paste the copied client credentials into their respective fields on your Google Social Login page.
-
Click Test Connection to simulate and verify the Google Sign-In flow.
For Google’s verification requirements and timeline, refer to Google’s OAuth consent screen verification guide.
- Use the Redirect URI from Scalekit as the Callback URL in Google’s setup
- Copy the generated Client ID and Client Secret into the Scalekit Dashboard
After completing the setup, click “Save Changes” in Scalekit for the changes to take effect.
Configure login prompt behavior
Section titled “Configure login prompt behavior”Scalekit offers flexibility to control how and when users are prompted for reauthentication, consent, or account selection. Below are the available options for customizing user sign-in behavior:
-
Auto sign-in (default): Automatically completes the login process without showing any confirmation prompts. This is ideal for single Google account users who are already logged in and have previously provided consent.
-
Consent: The authorization server prompts the user for consent before returning information to the client.
-
Select account: The authorization server prompts the user to select a user account. This allows a user who has multiple accounts at the authorization server to select amongst the multiple accounts that they may have current sessions for.
-
None: The authorization server does not display any authentication or user consent screens; it will return an error if the user is not already authenticated and has not pre-configured consent for the requested scopes. You can use none to check for existing authentication and/or consent.
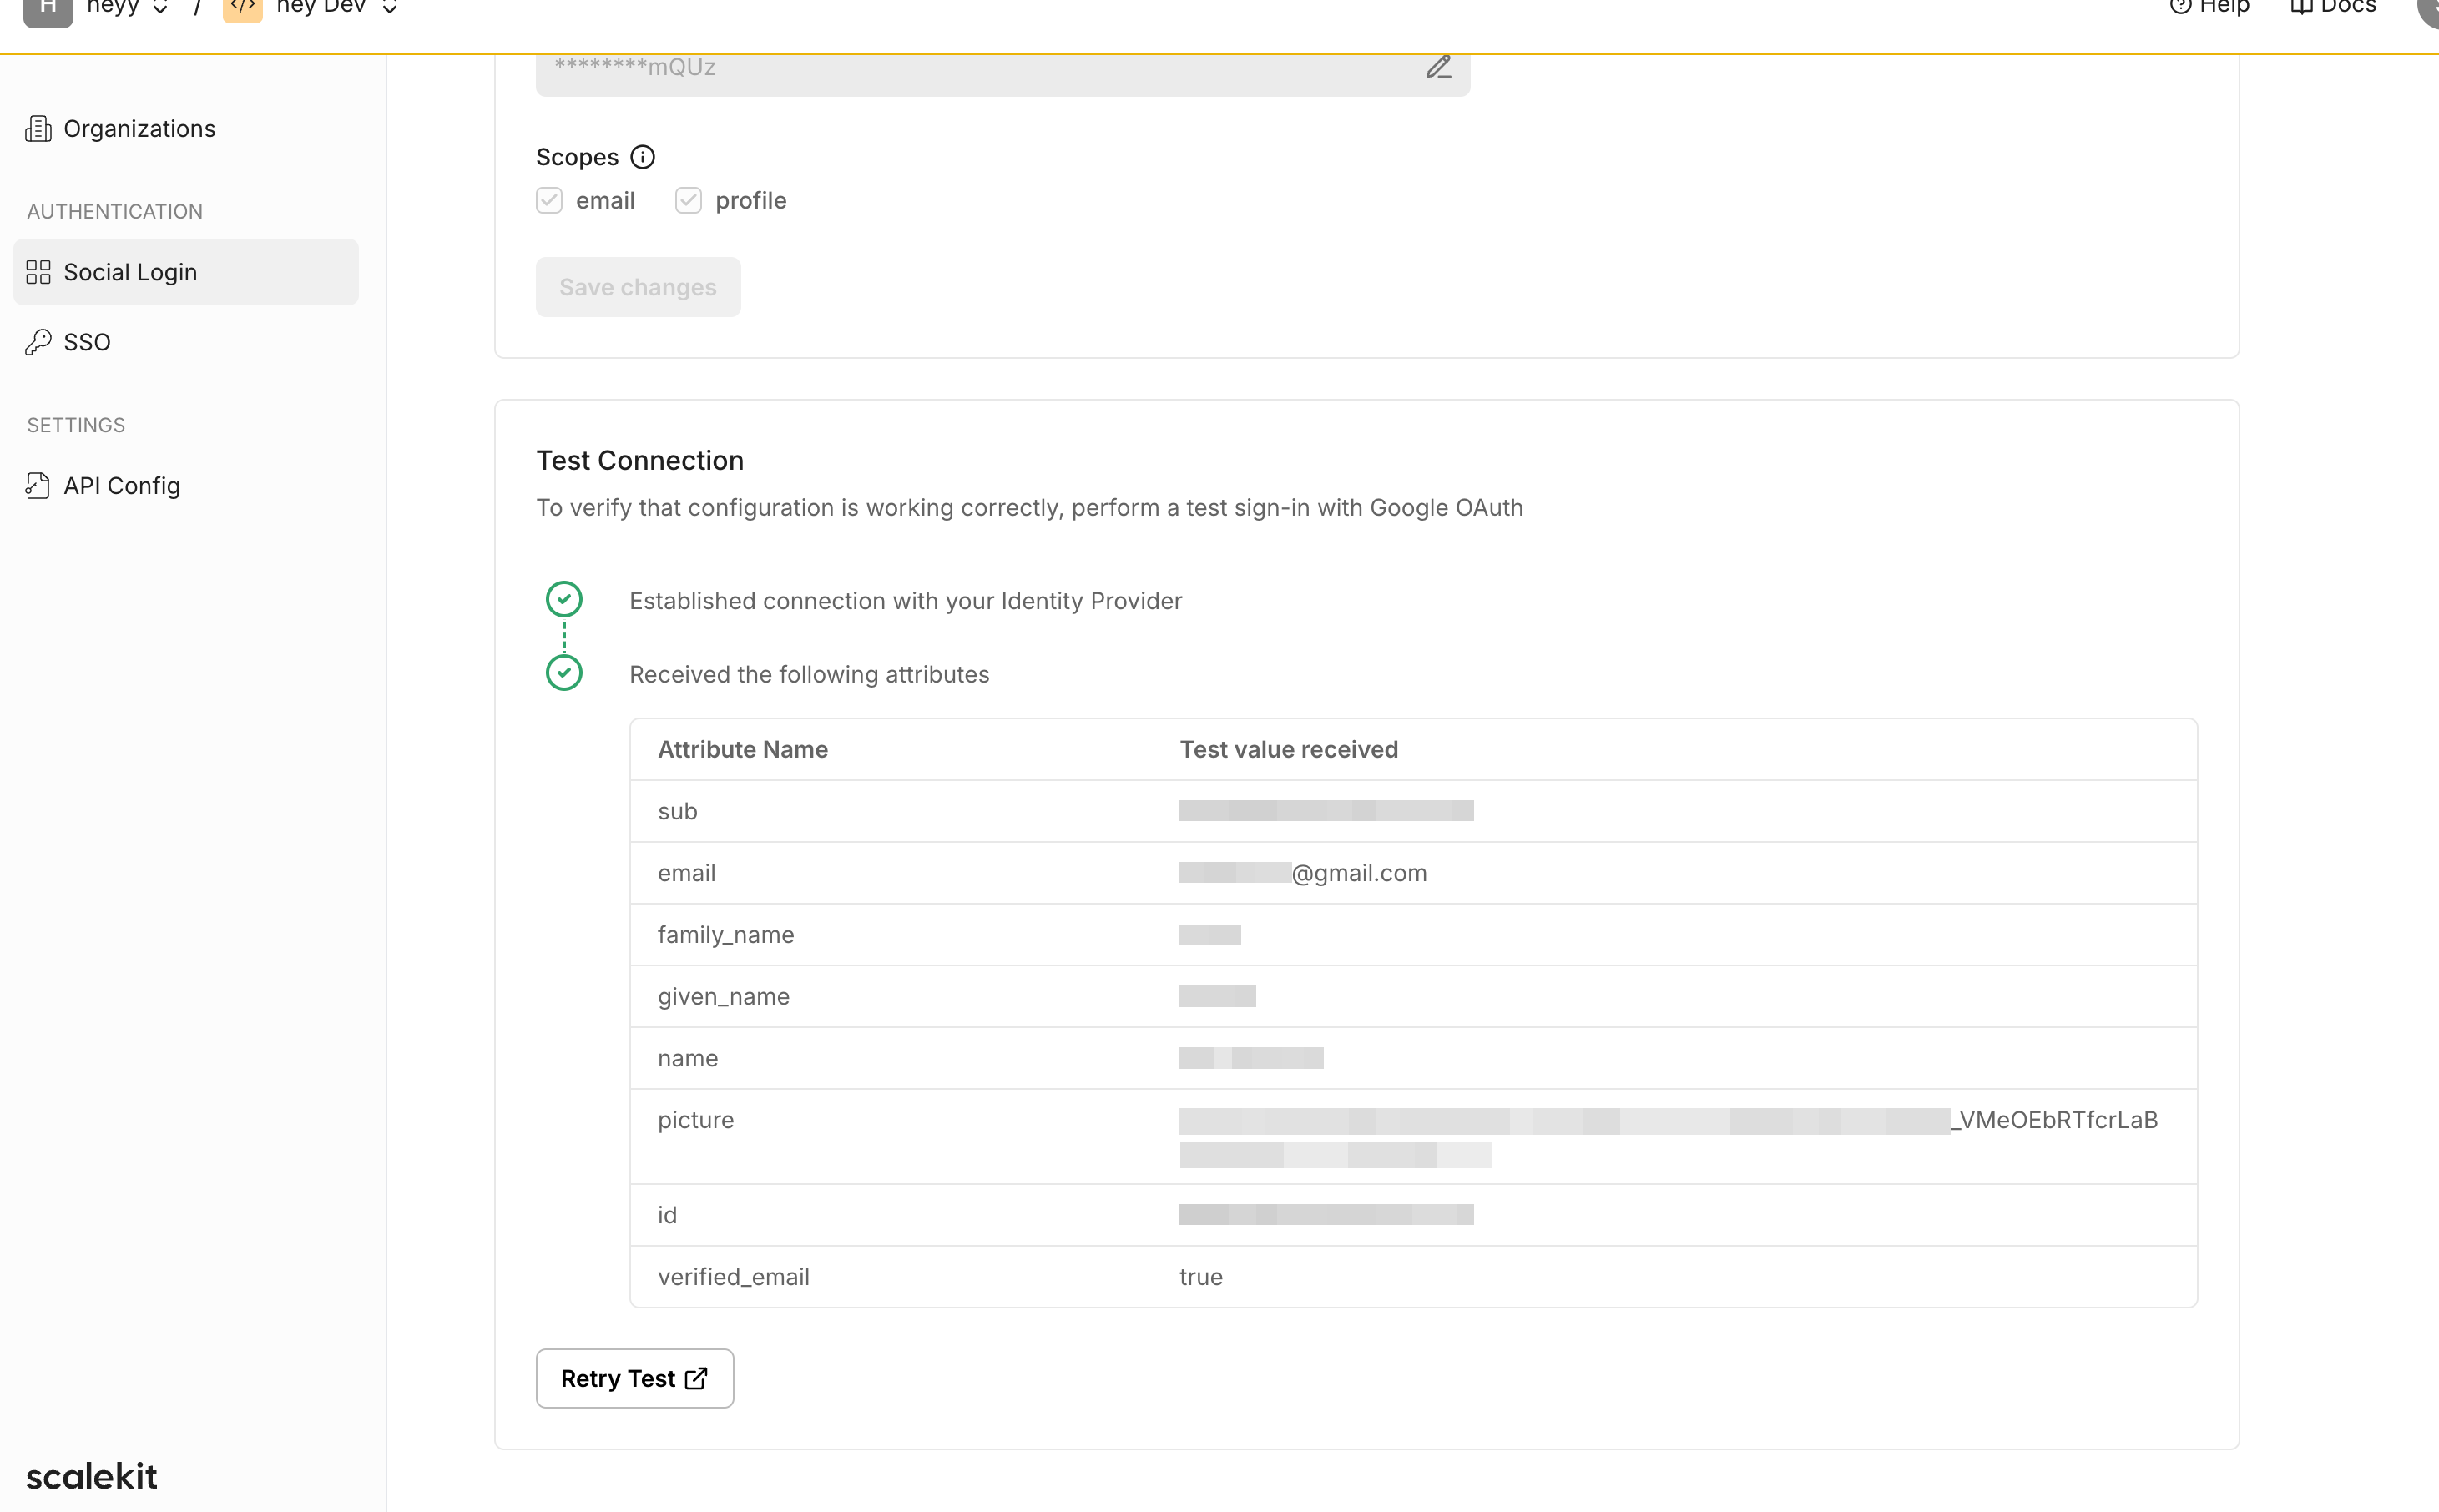
Verify the connection
Section titled “Verify the connection”Click the “Test Connection” button in Scalekit. You will be redirected to the Google Consent screen to authorize access. A summary table will show the information that will be sent to your app.