
Microsoft Entra ID - OIDC
Learn how to set up OpenID Connect (OIDC) Single Sign-On (SSO) using Microsoft Entra ID, with step-by-step instructions for app registration and OIDC configuration.
This guide walks you through configuring Microsoft Entra ID as your OIDC identity provider. You’ll create an app registration, provide OIDC values in the SSO Configuration Portal, map required claims, assign access, test the connection, and enable Single Sign-On.
-
Create an Application
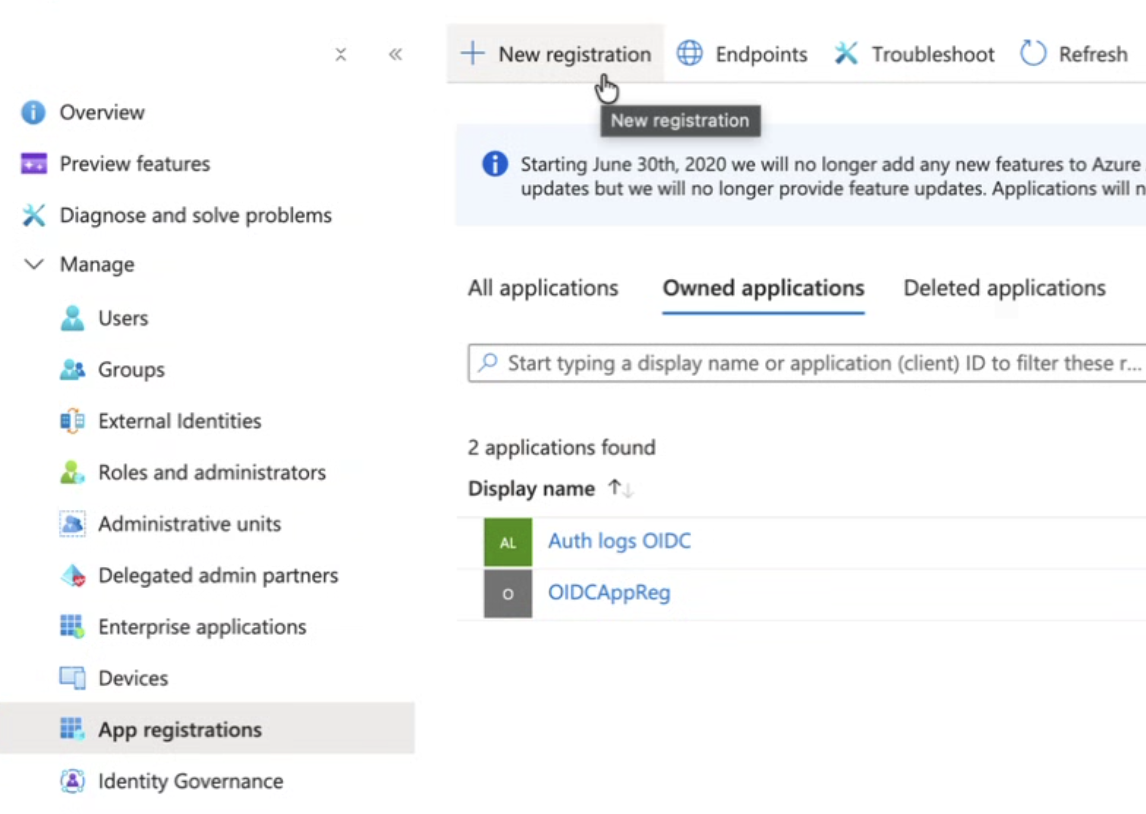
Section titled “Create an Application”Sign in to Microsoft Entra ID in the Microsoft Azure Portal. Go to App registrations and click New registration to create a new app.
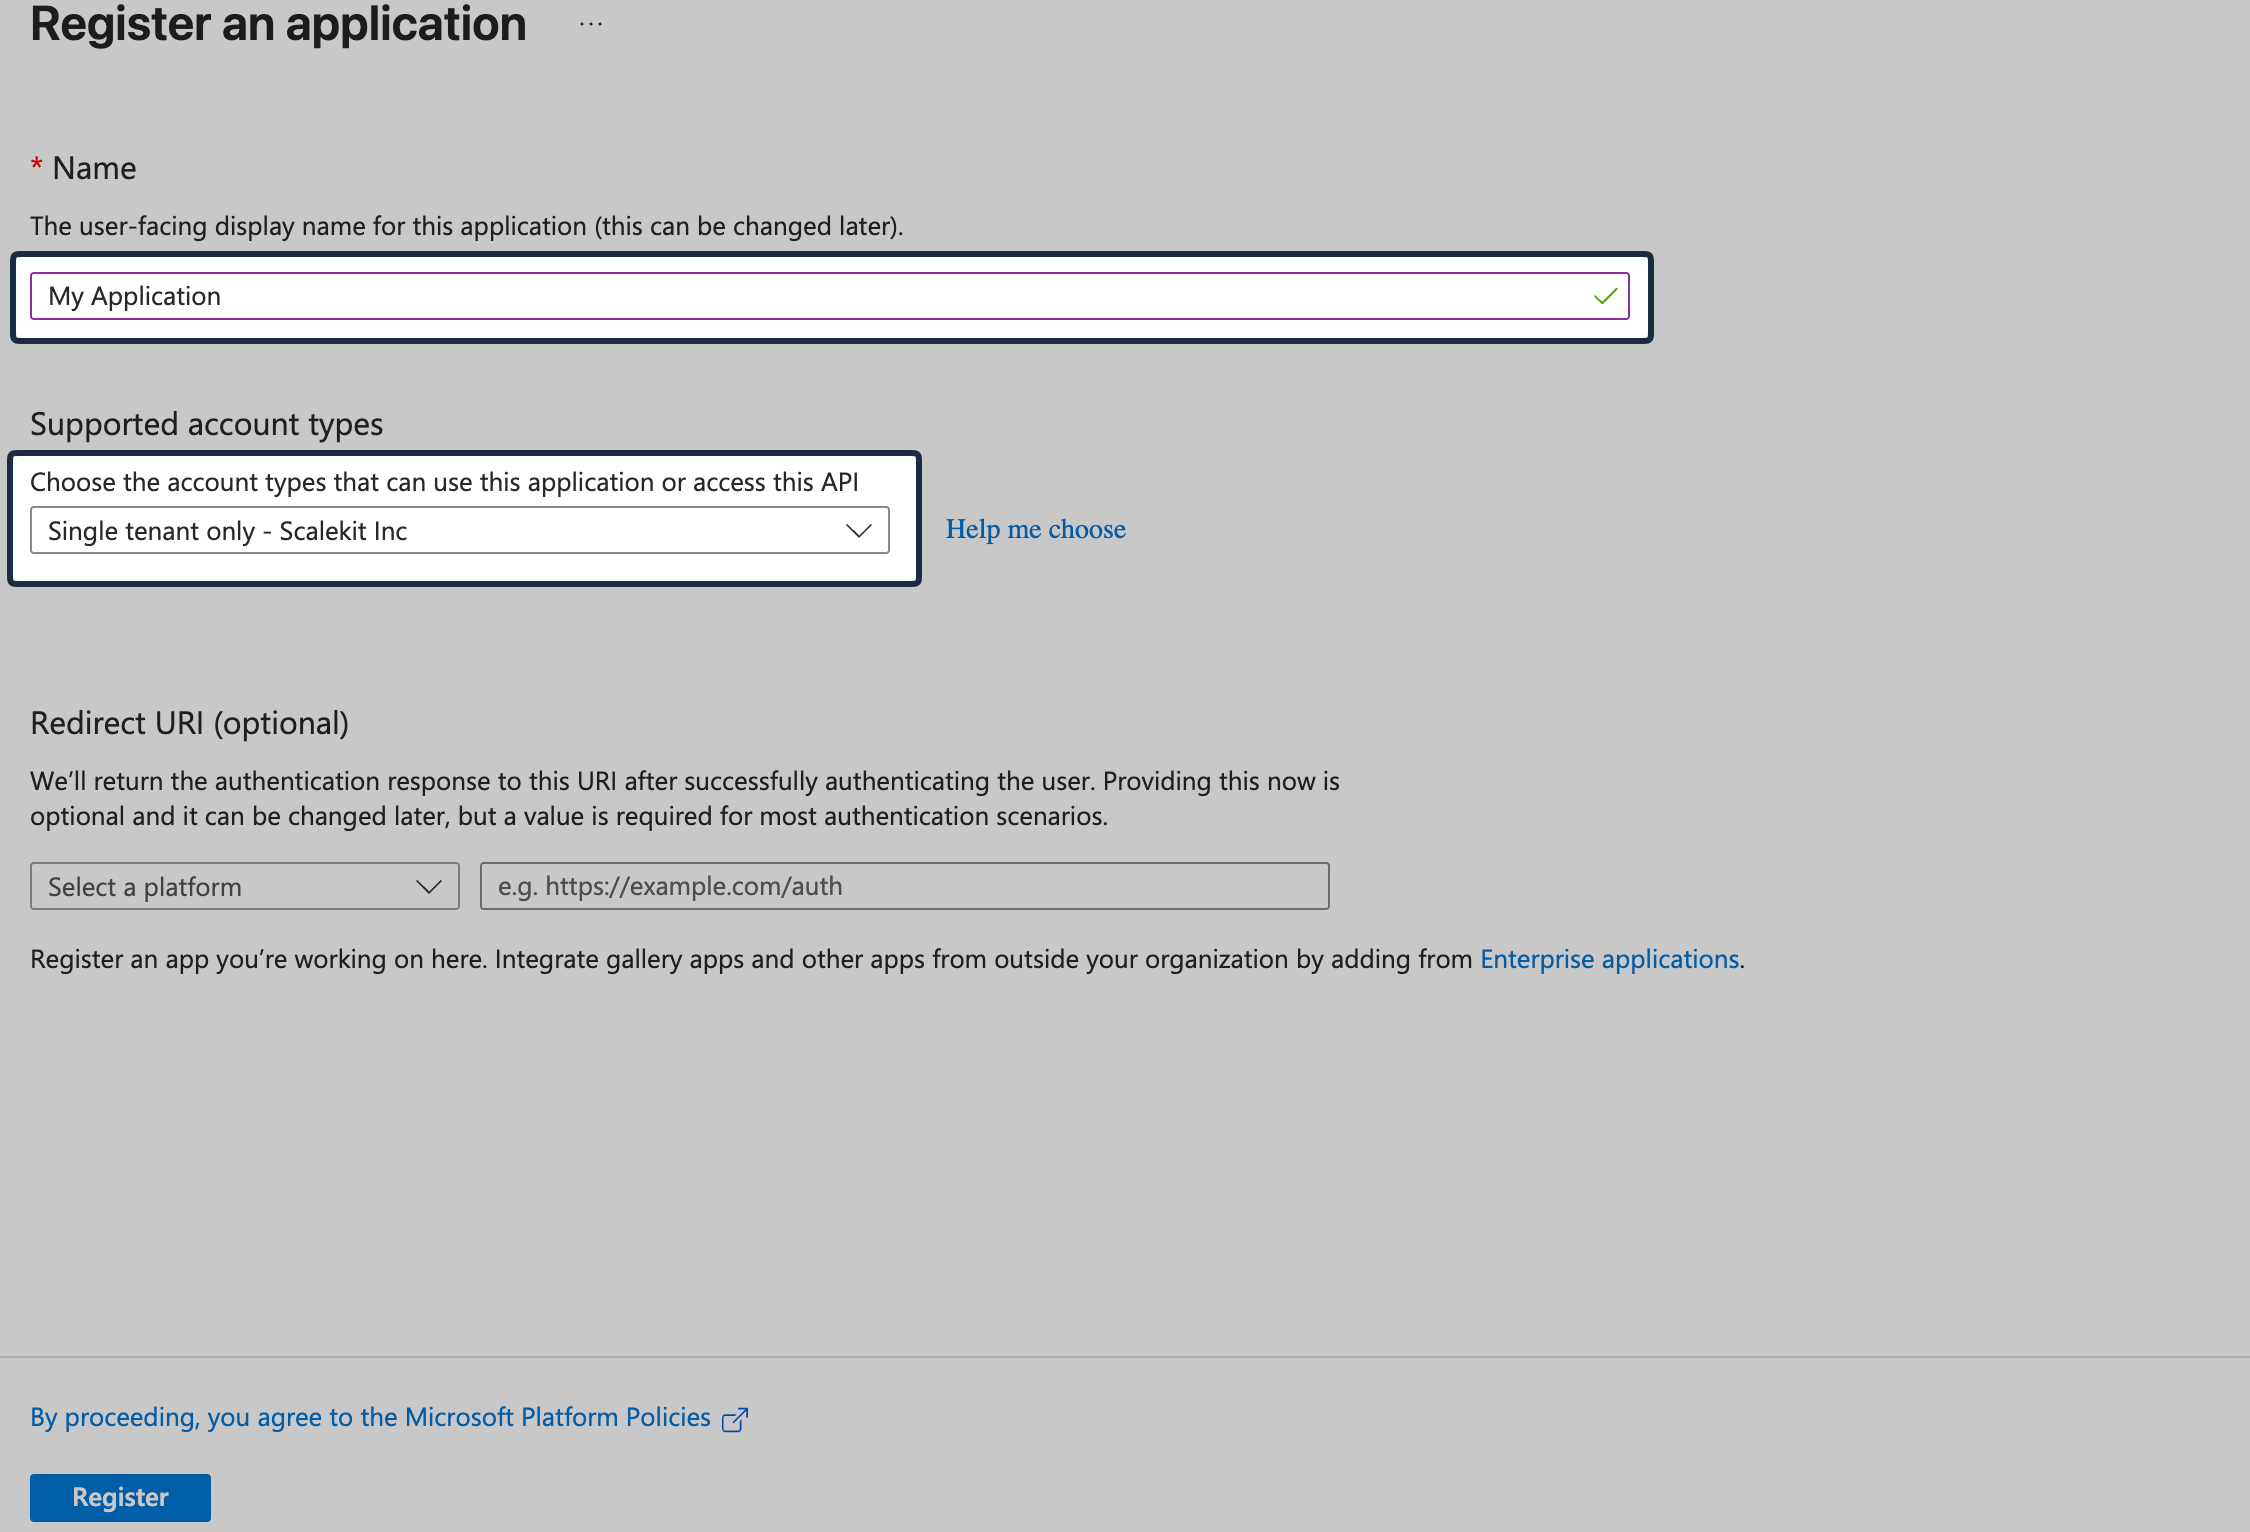
Set the Application name. Set Supported Account Types to Single tenant only.
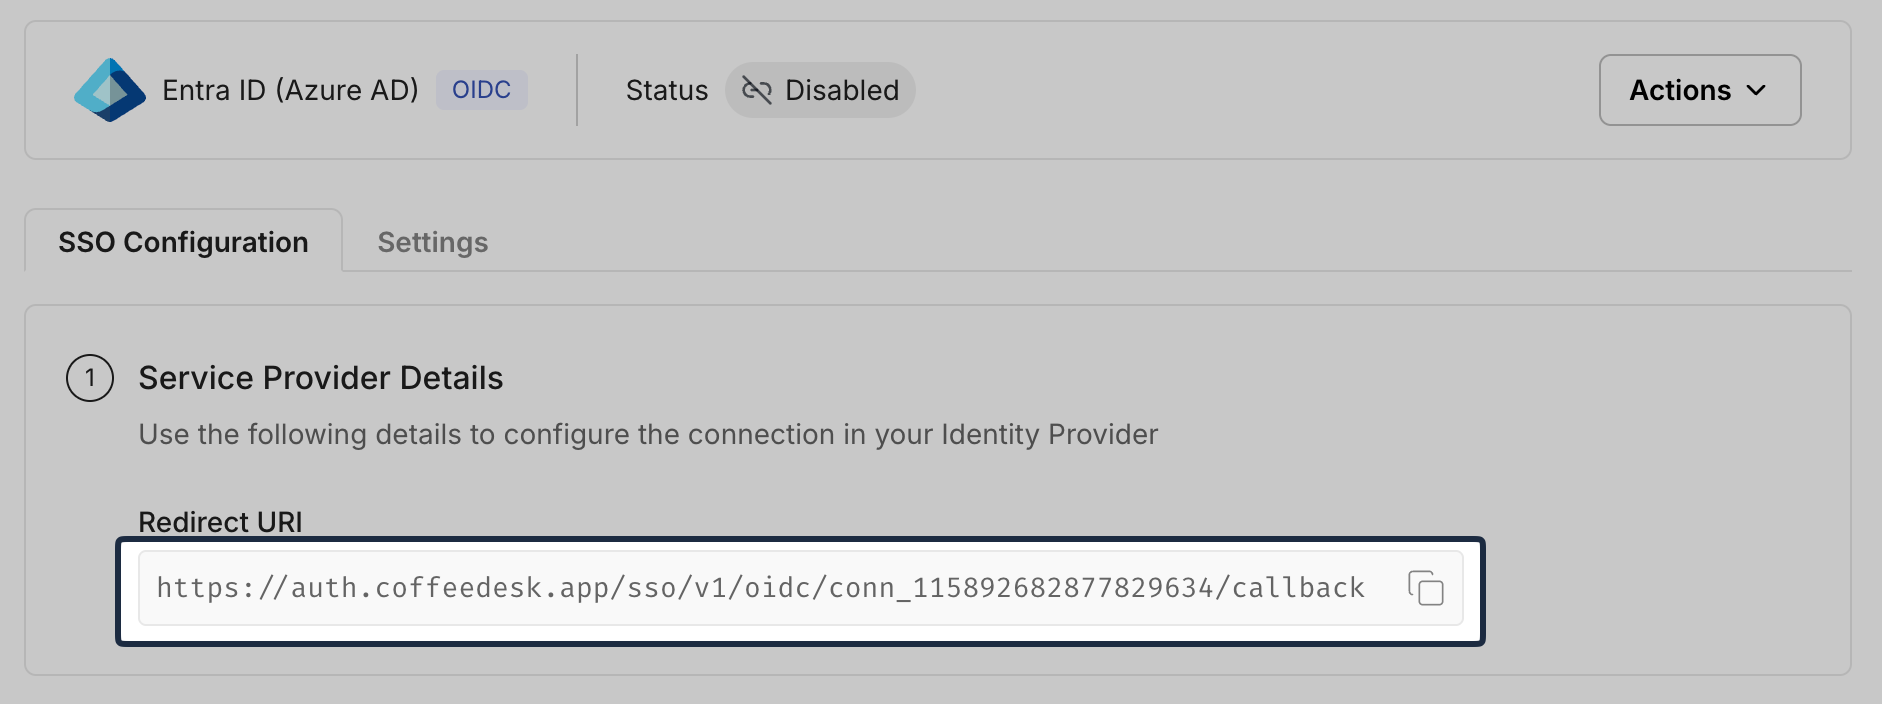
From the SSO Configuration Portal, copy the Redirect URI from Service Provider Details:
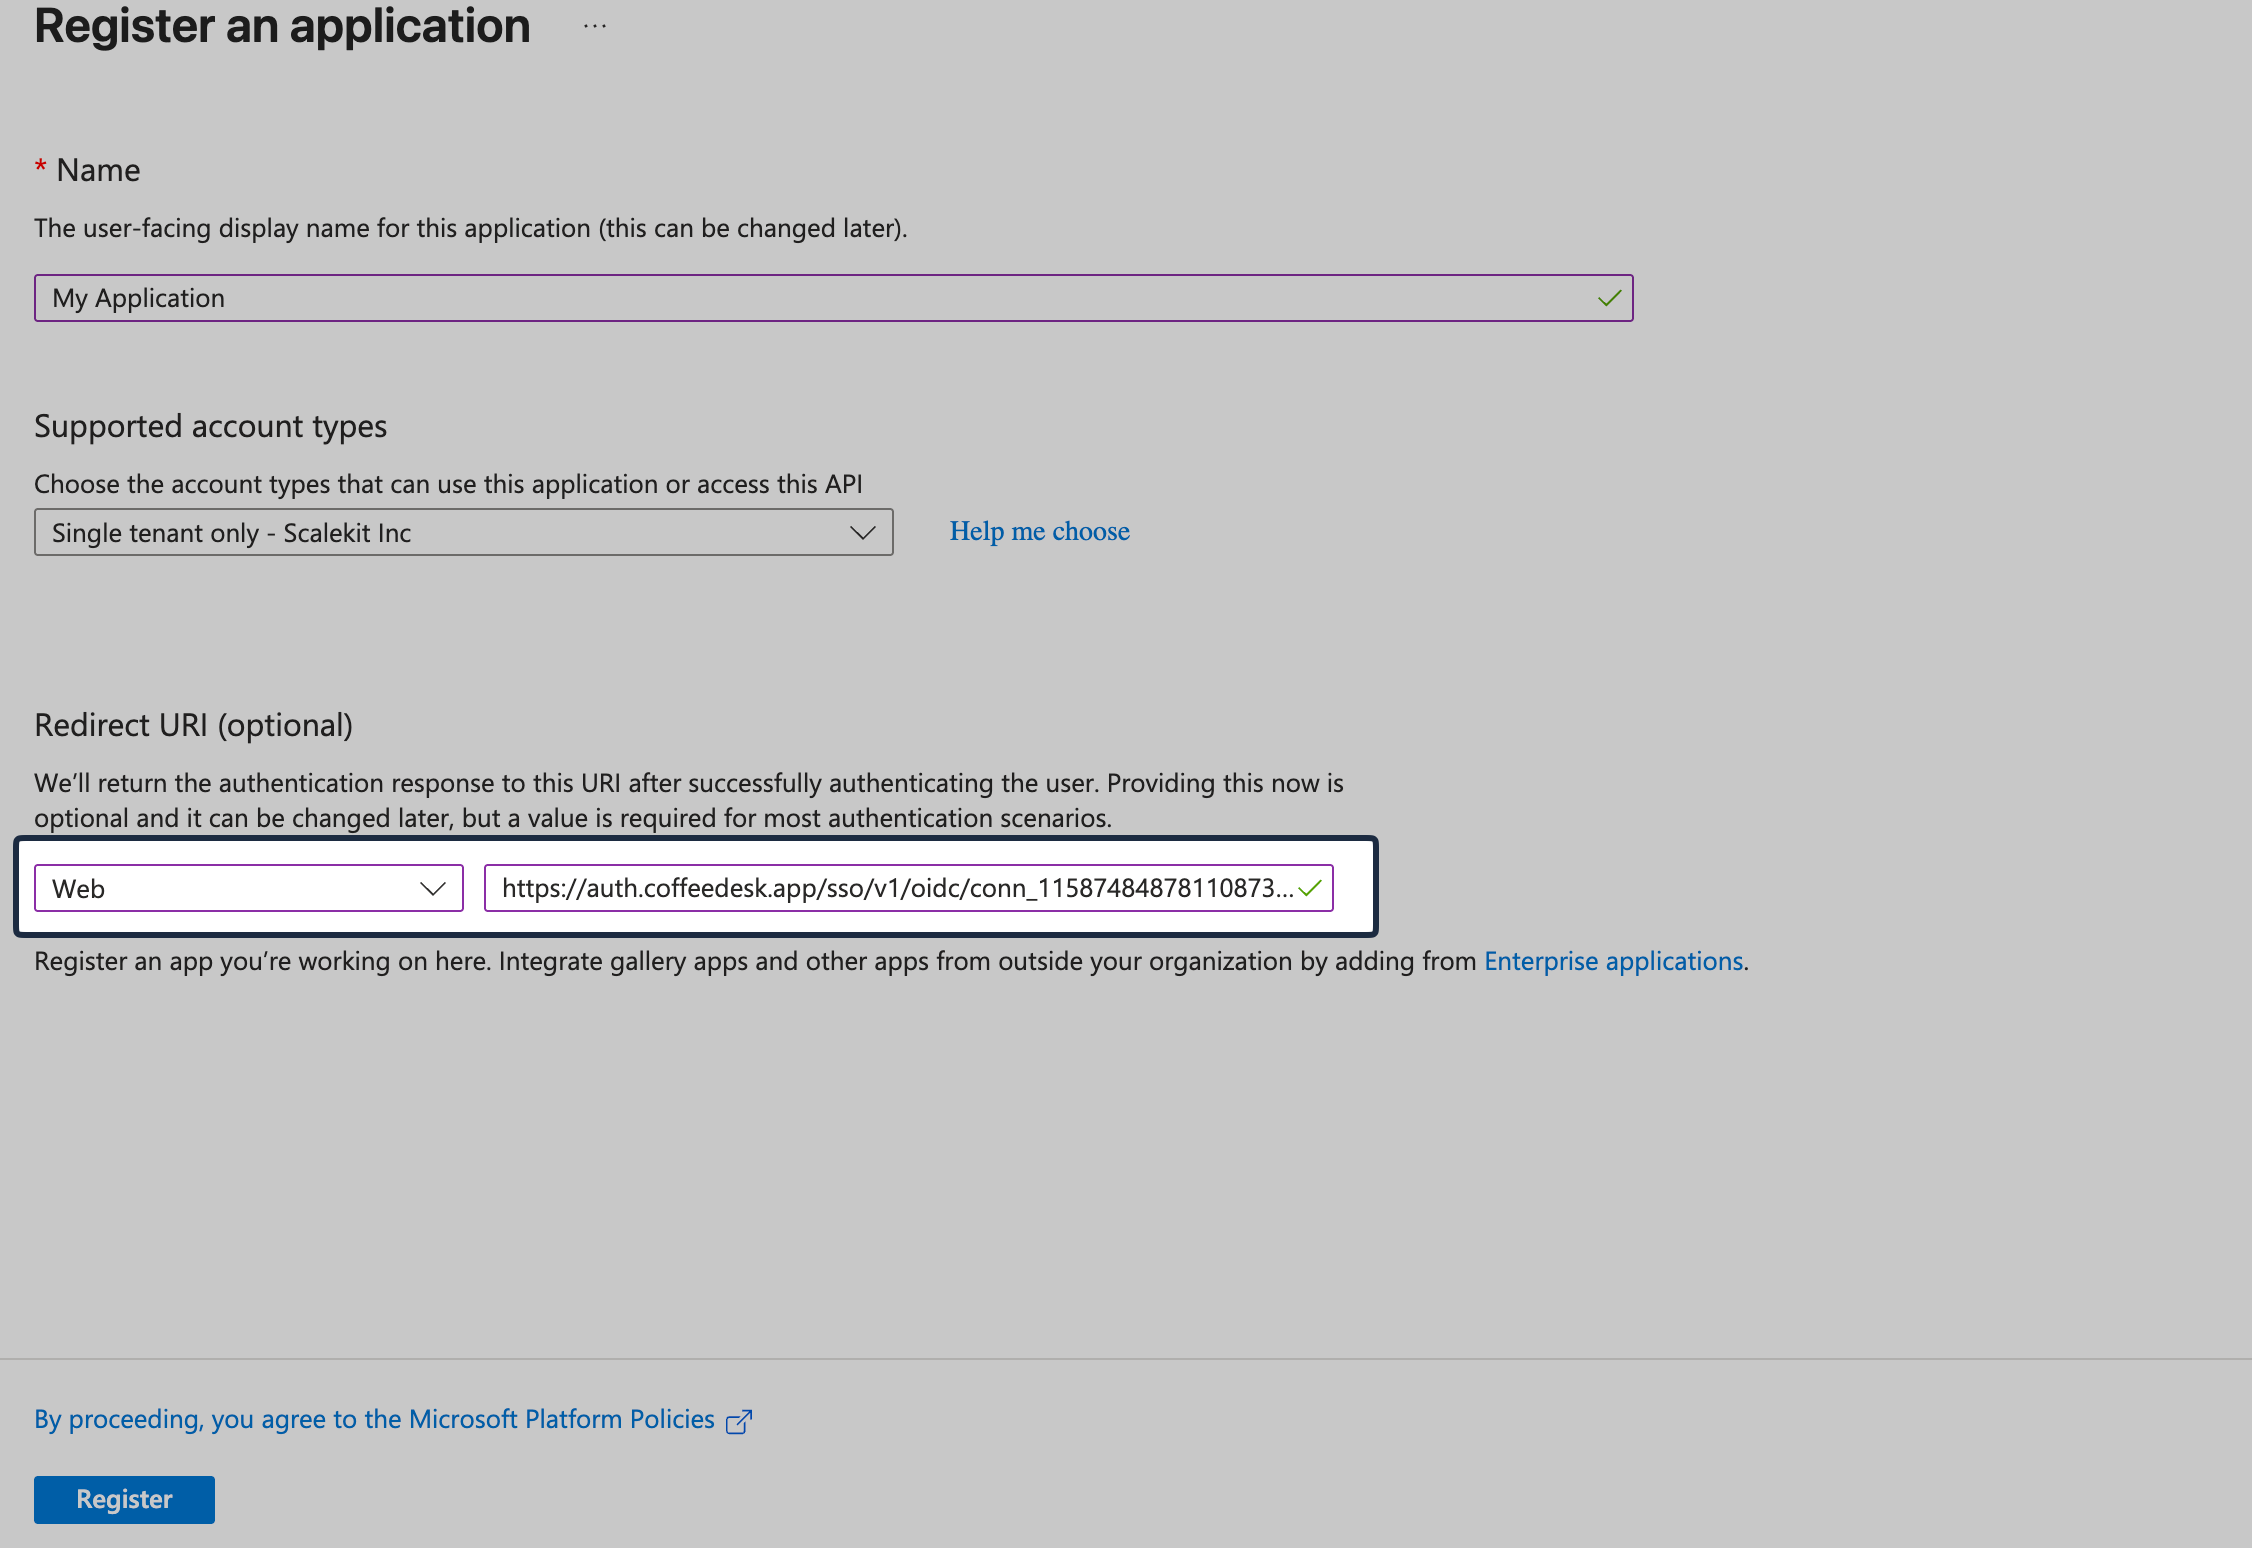
In Entra ID, under Redirect URI section, select Web and paste the copied redirect URI, then click Register.
-
Generate client credentials
Section titled “Generate client credentials”From the application’s Overview page in Entra ID, copy Application (client) ID.
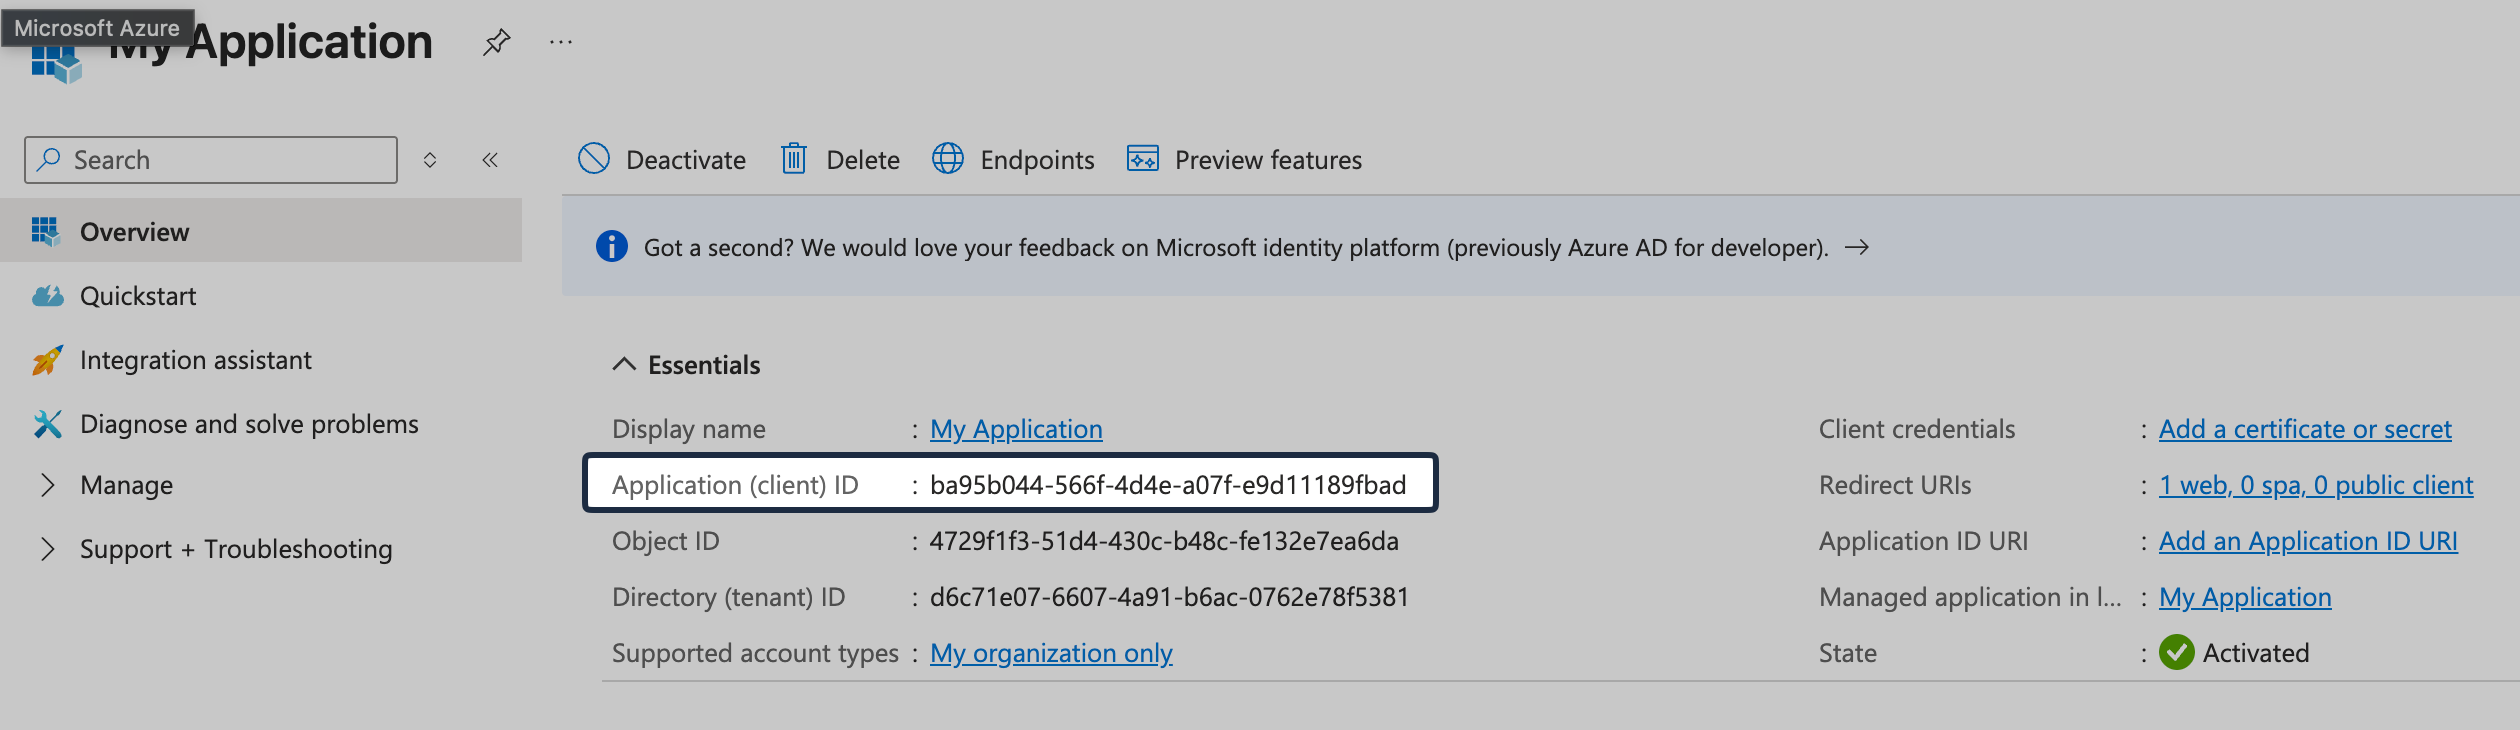
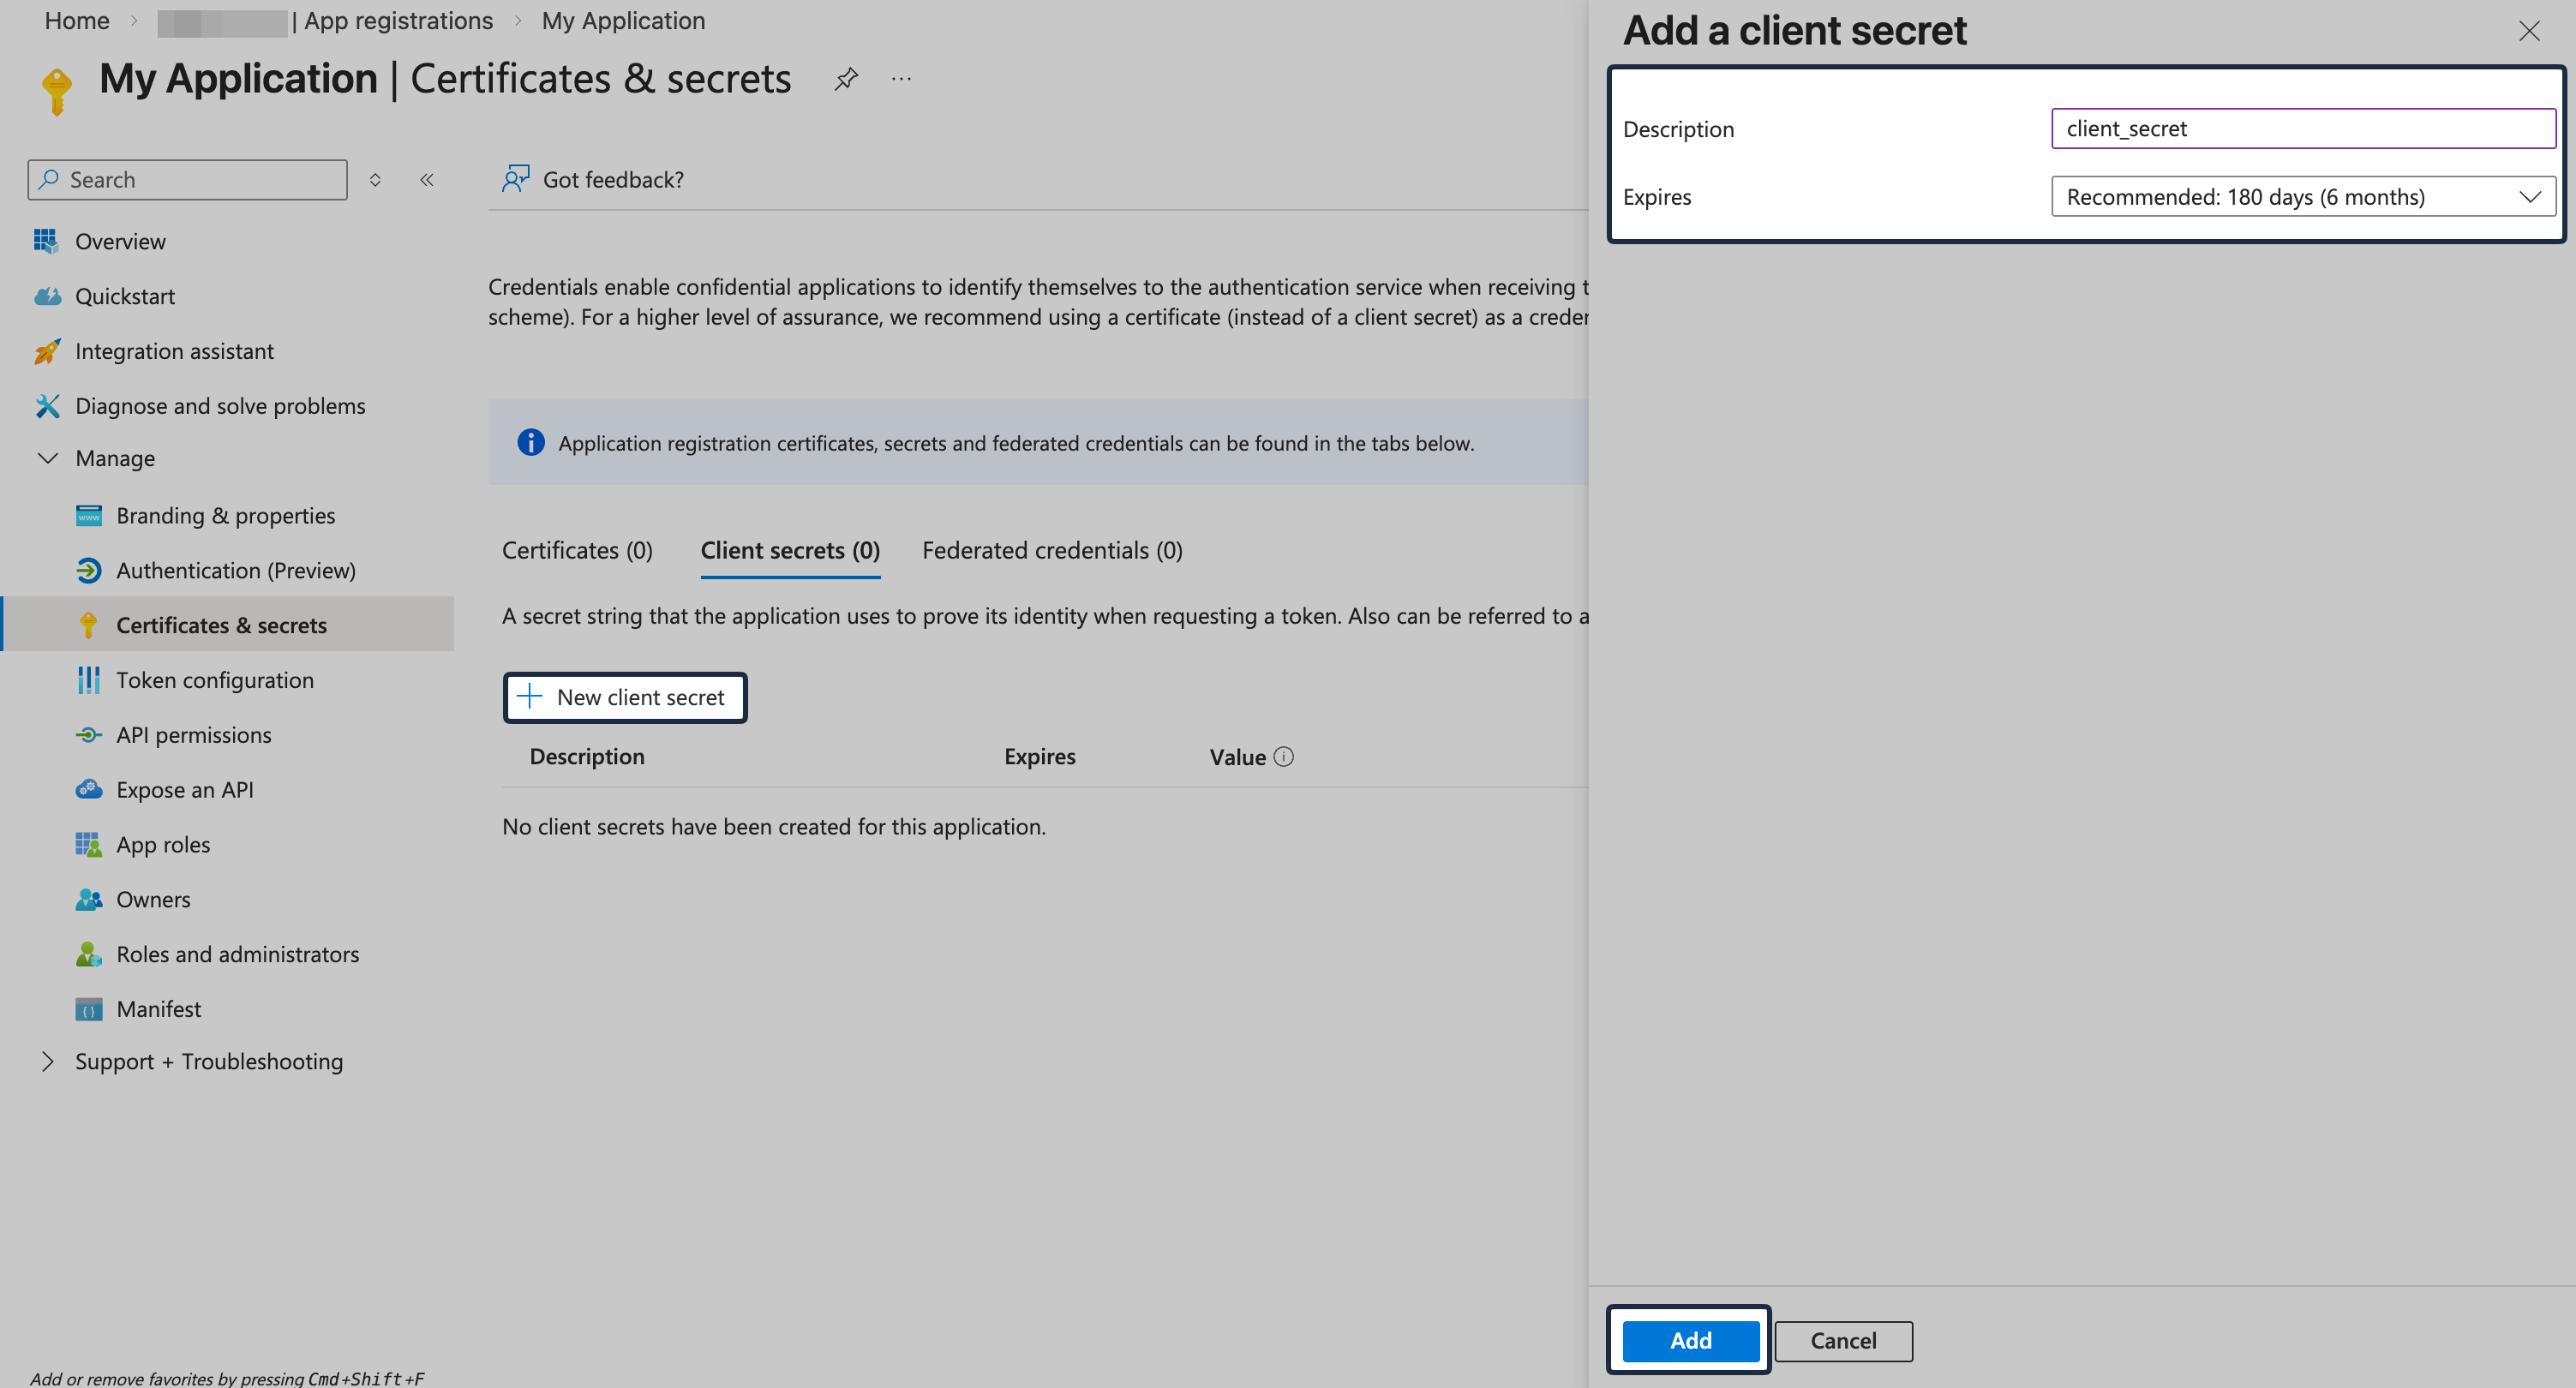
Go to Certificates & secrets, click New client secret, and create a client secret and copy it.

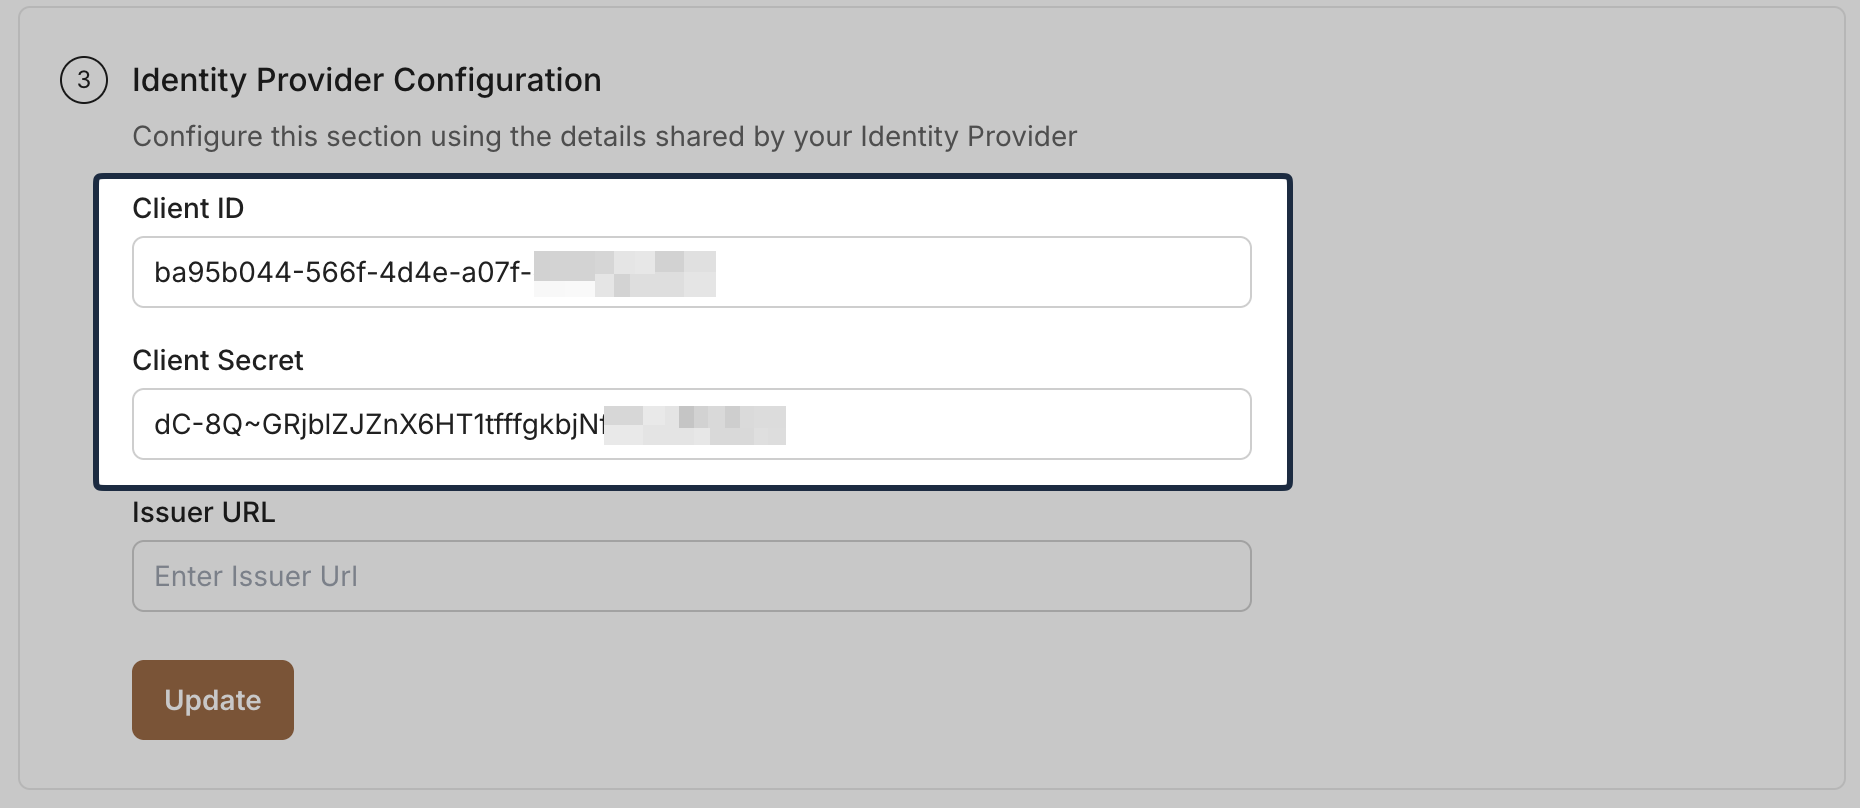
Add the Client ID and Client Secret in the SSO Configuration Portal.
-
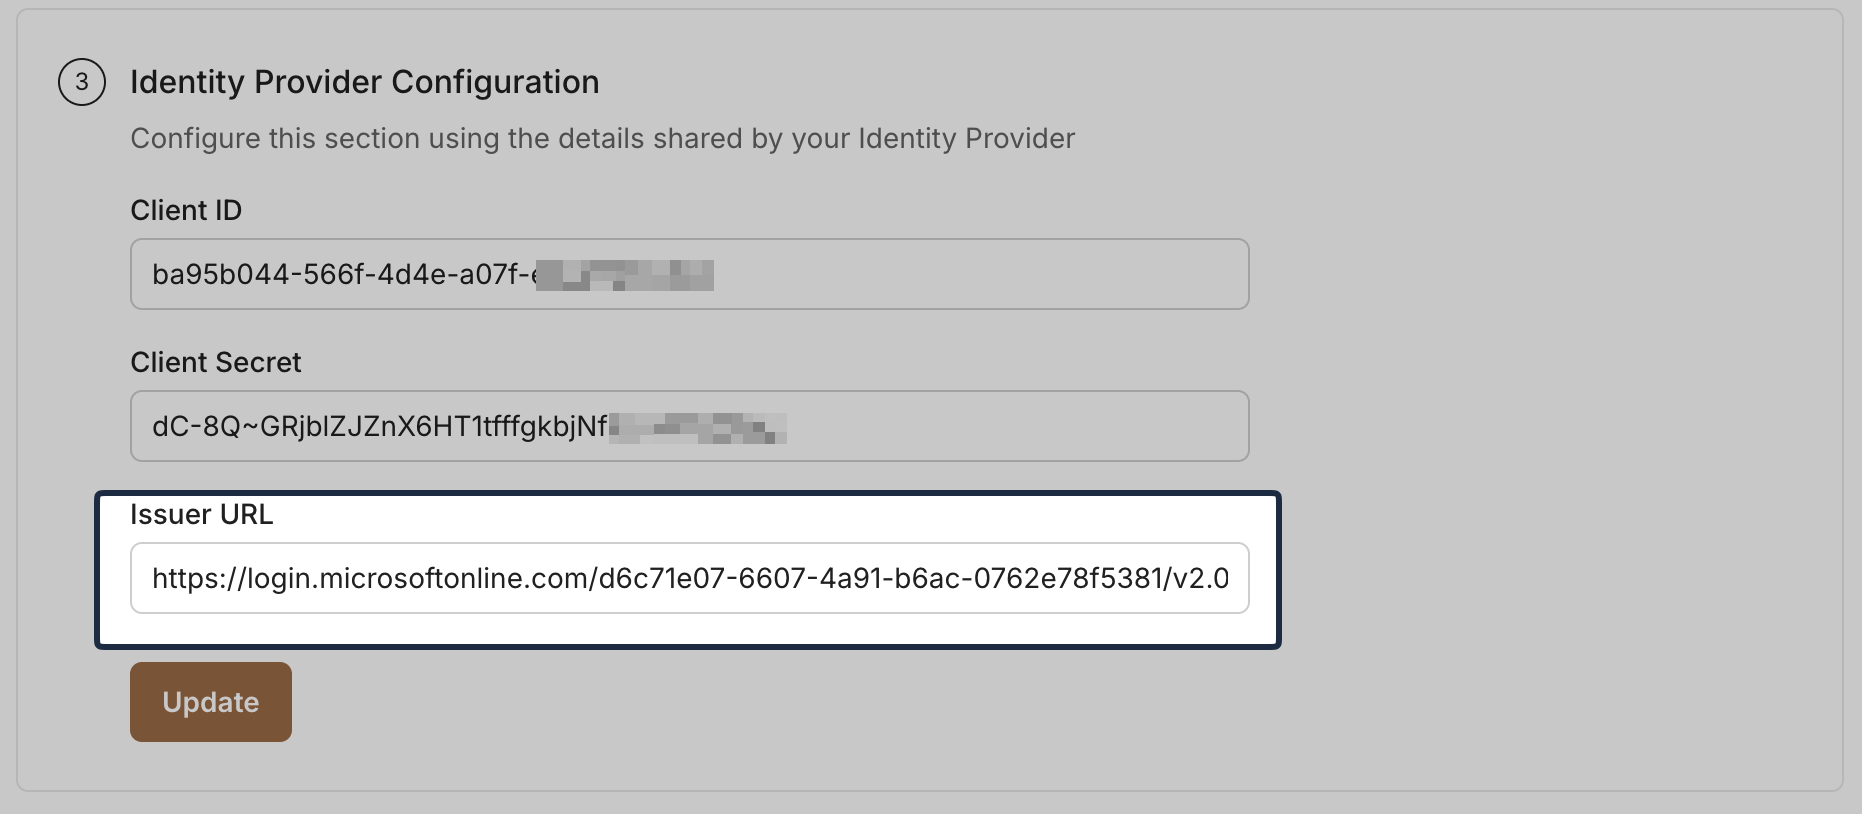
Provide Issuer URL
Section titled “Provide Issuer URL”In Entra ID, navigate to application’s Overview page -> Endpoints. Copy the OpenID Connect metadata document URL:
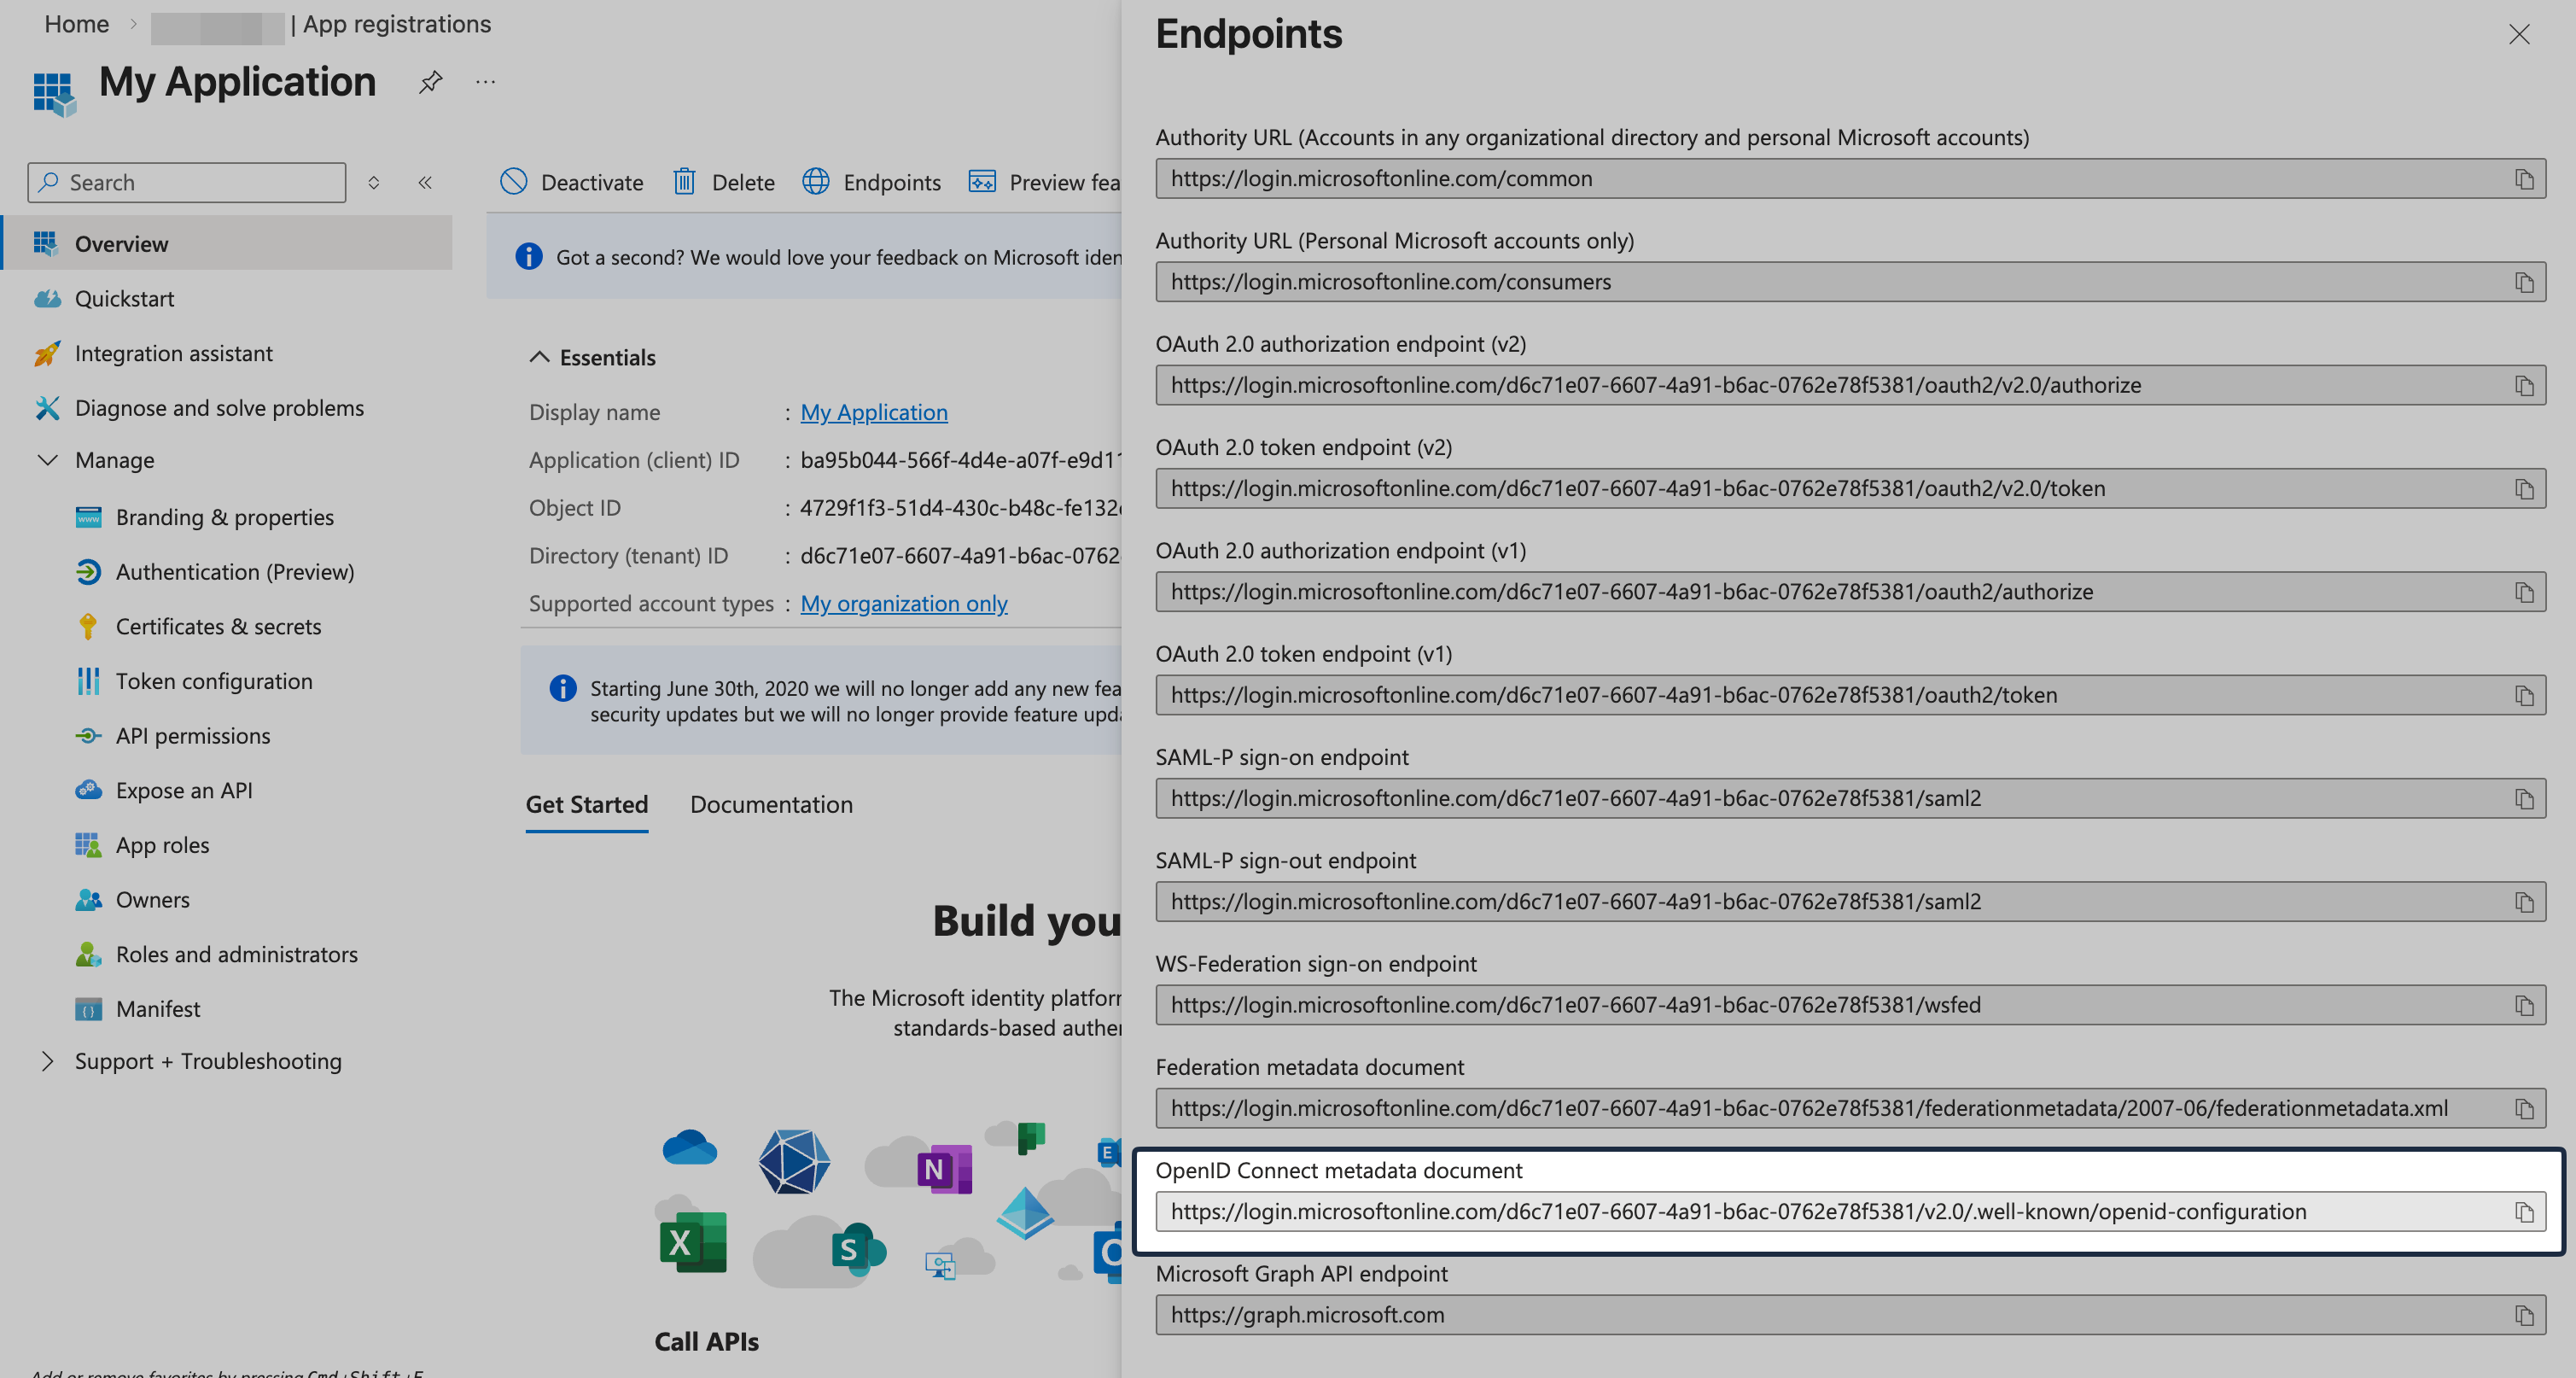
Paste the copied URL into the Issuer URL field in the SSO Configuration Portal and click Update.
-
Attribute Mapping
Section titled “Attribute Mapping”Go to Token configuration and click Add optional claim. Select token type ID, then add these claims:
email,family_name, andgiven_name.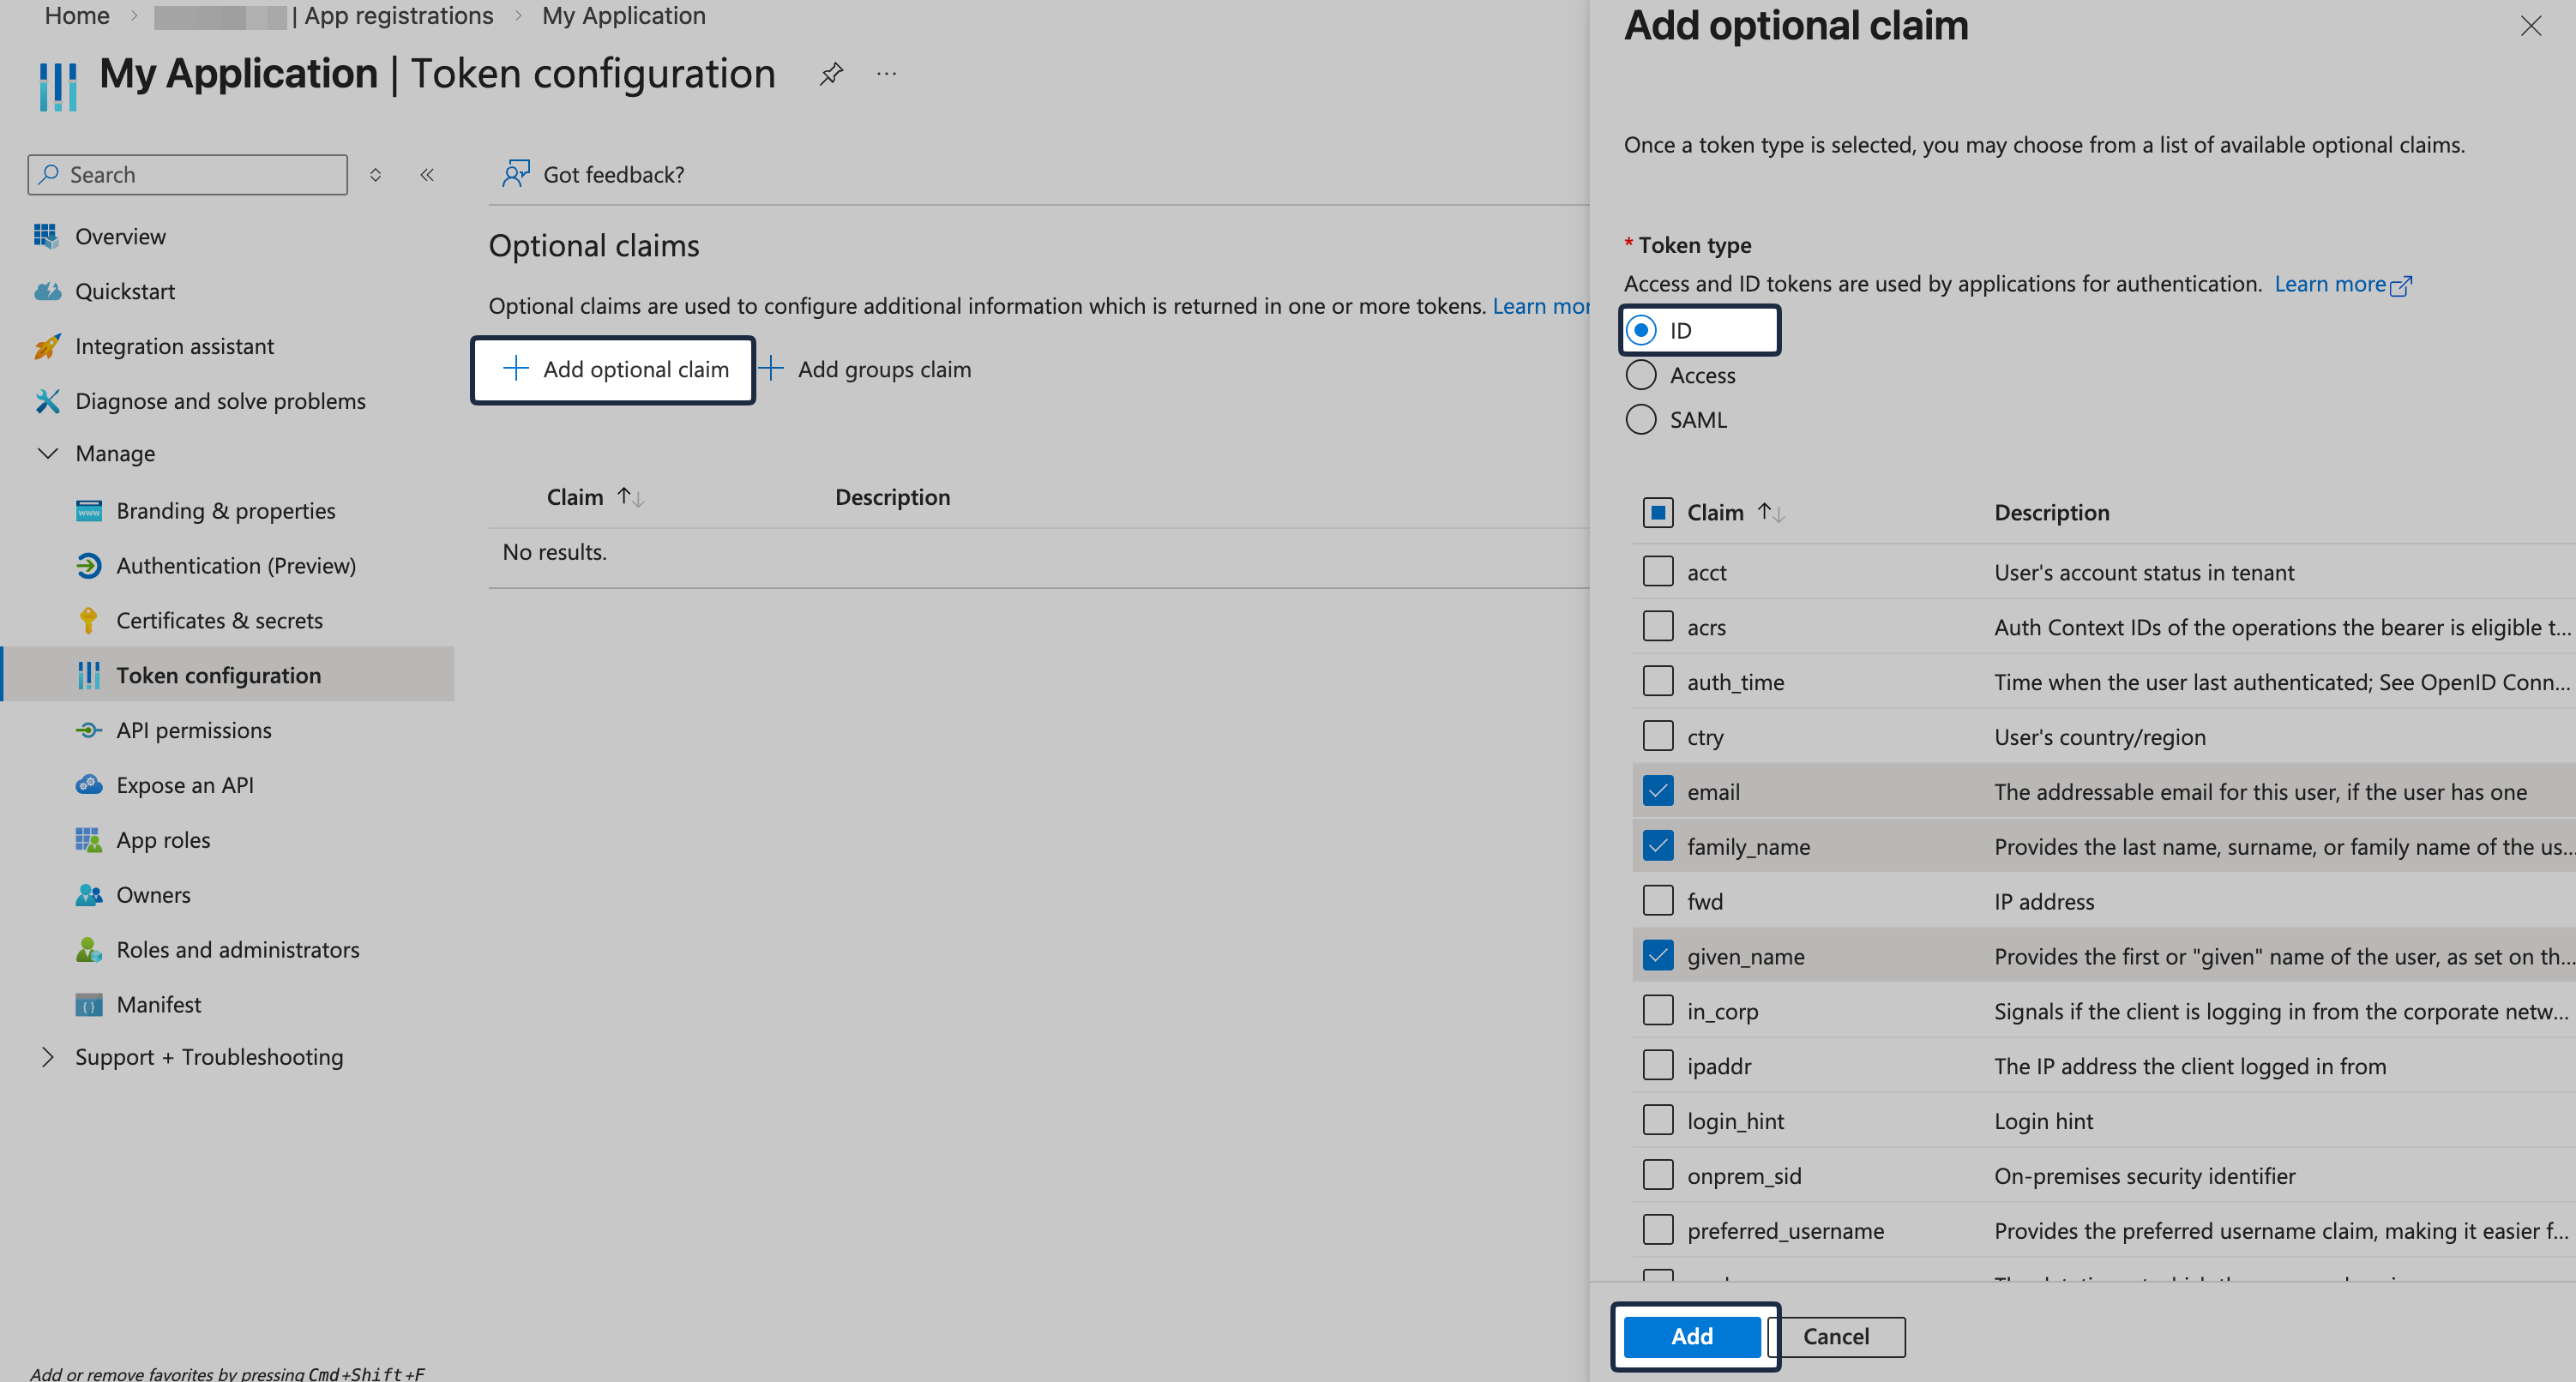
-
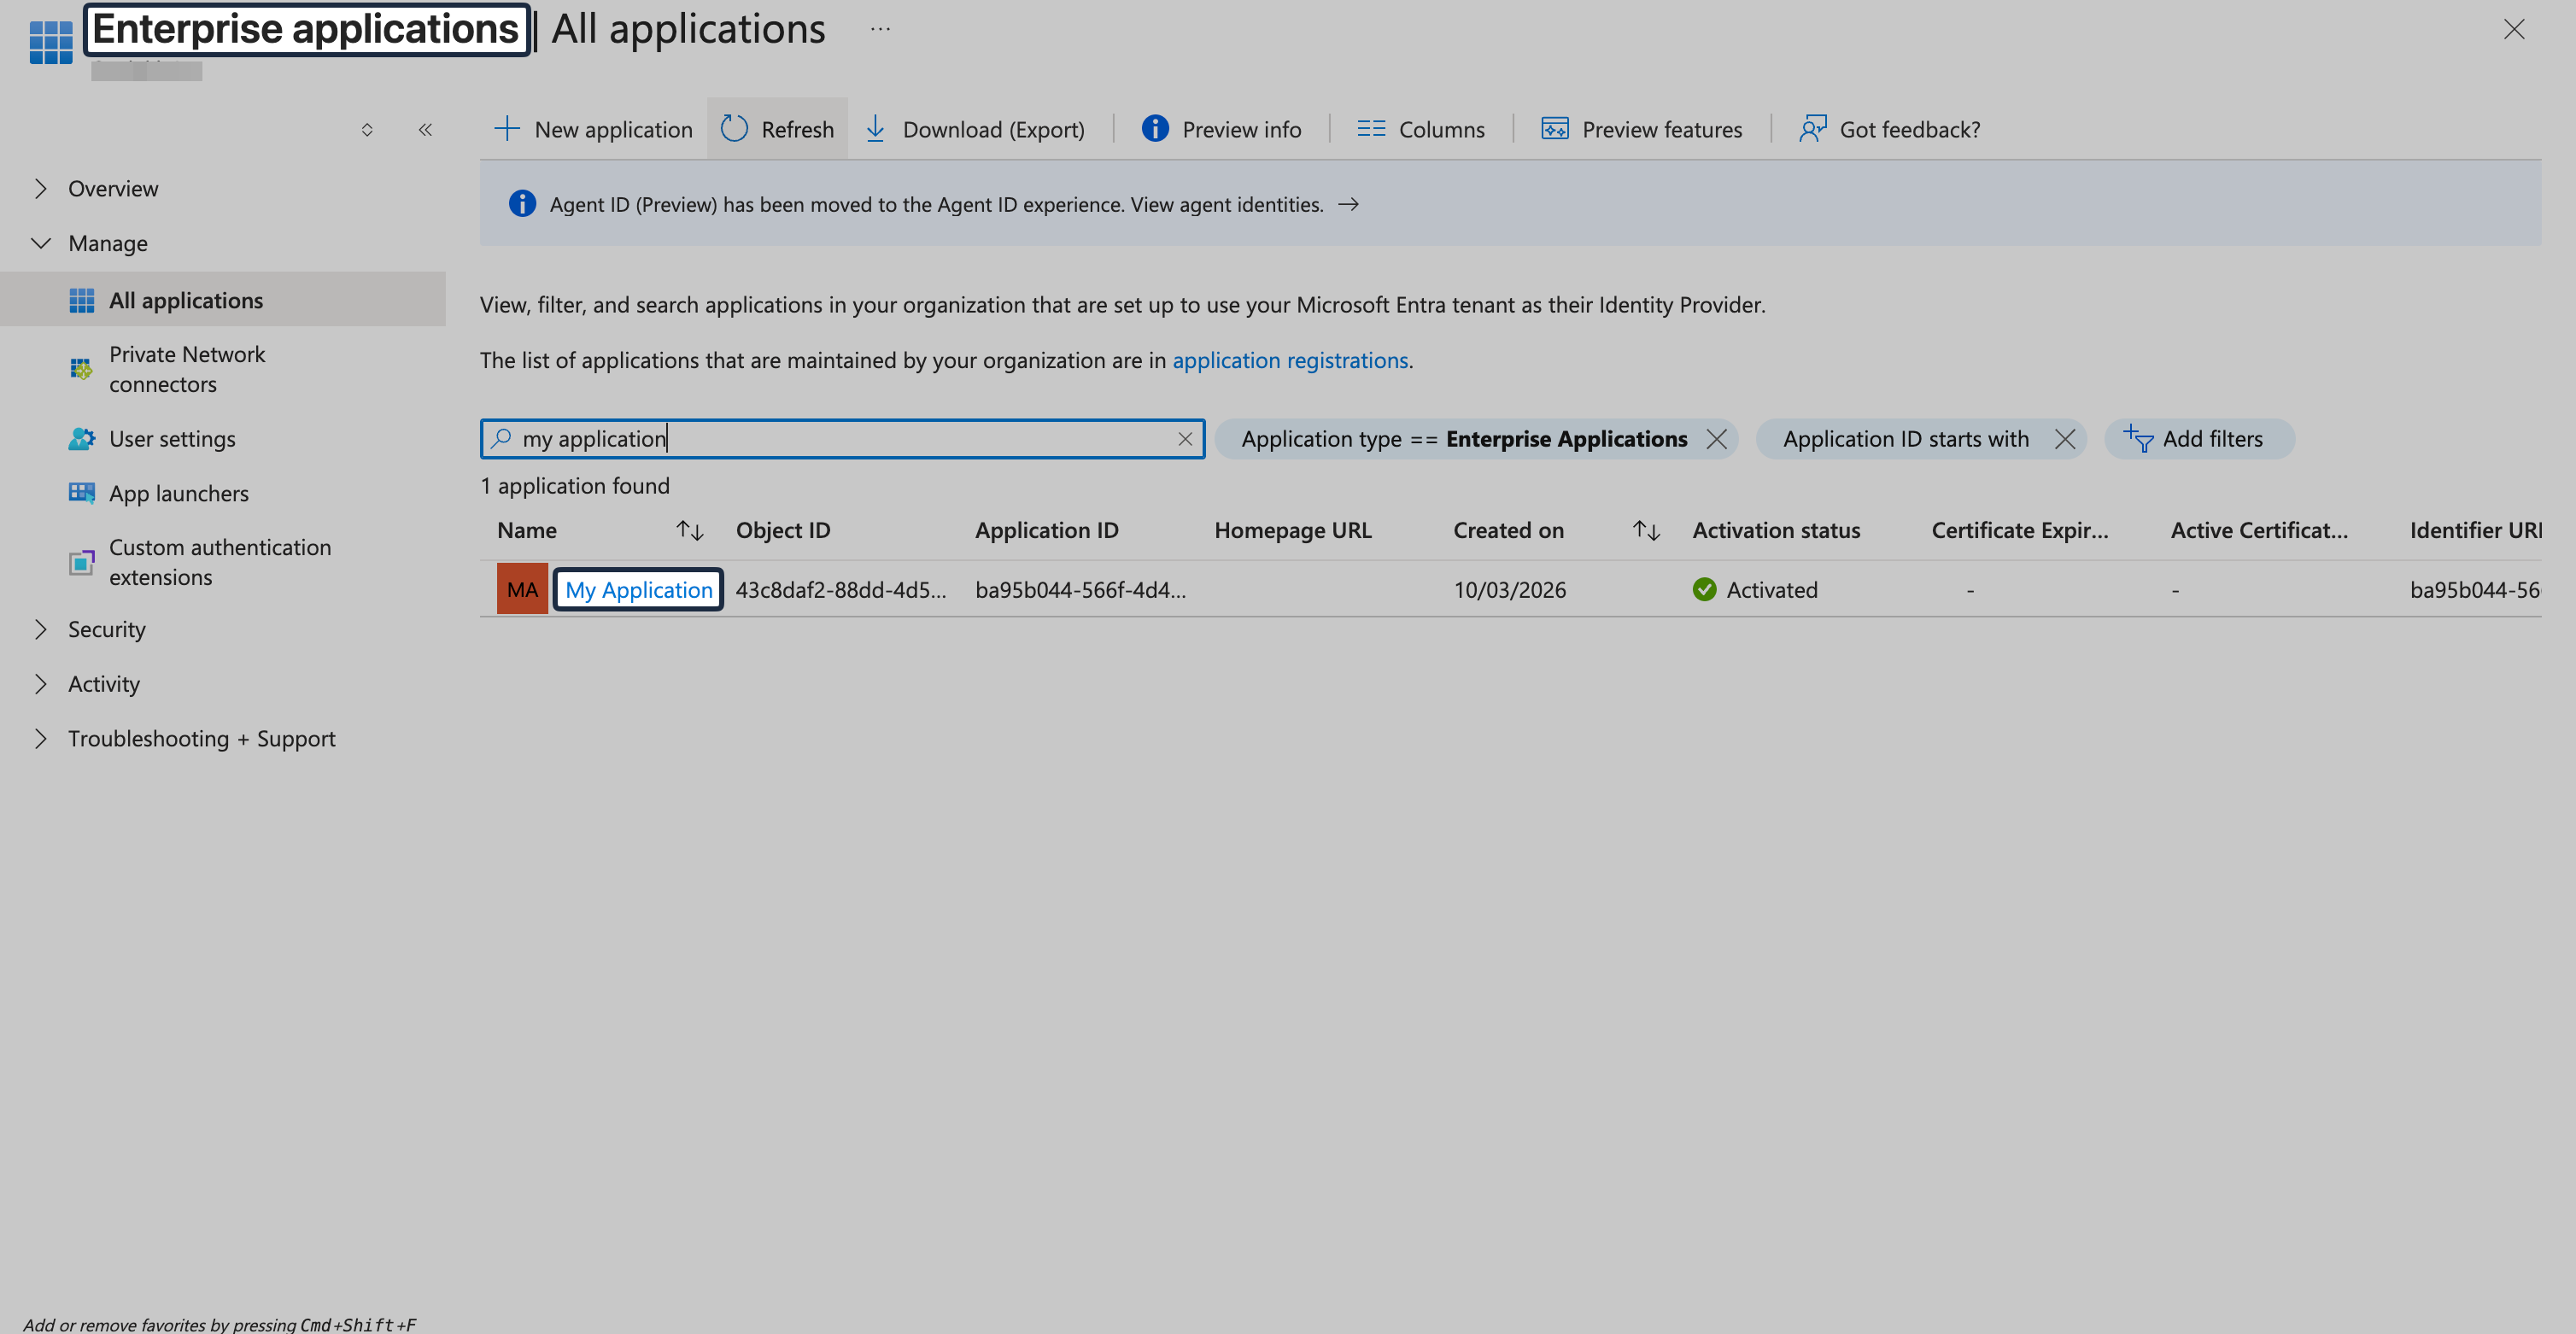
Assign Users and Groups
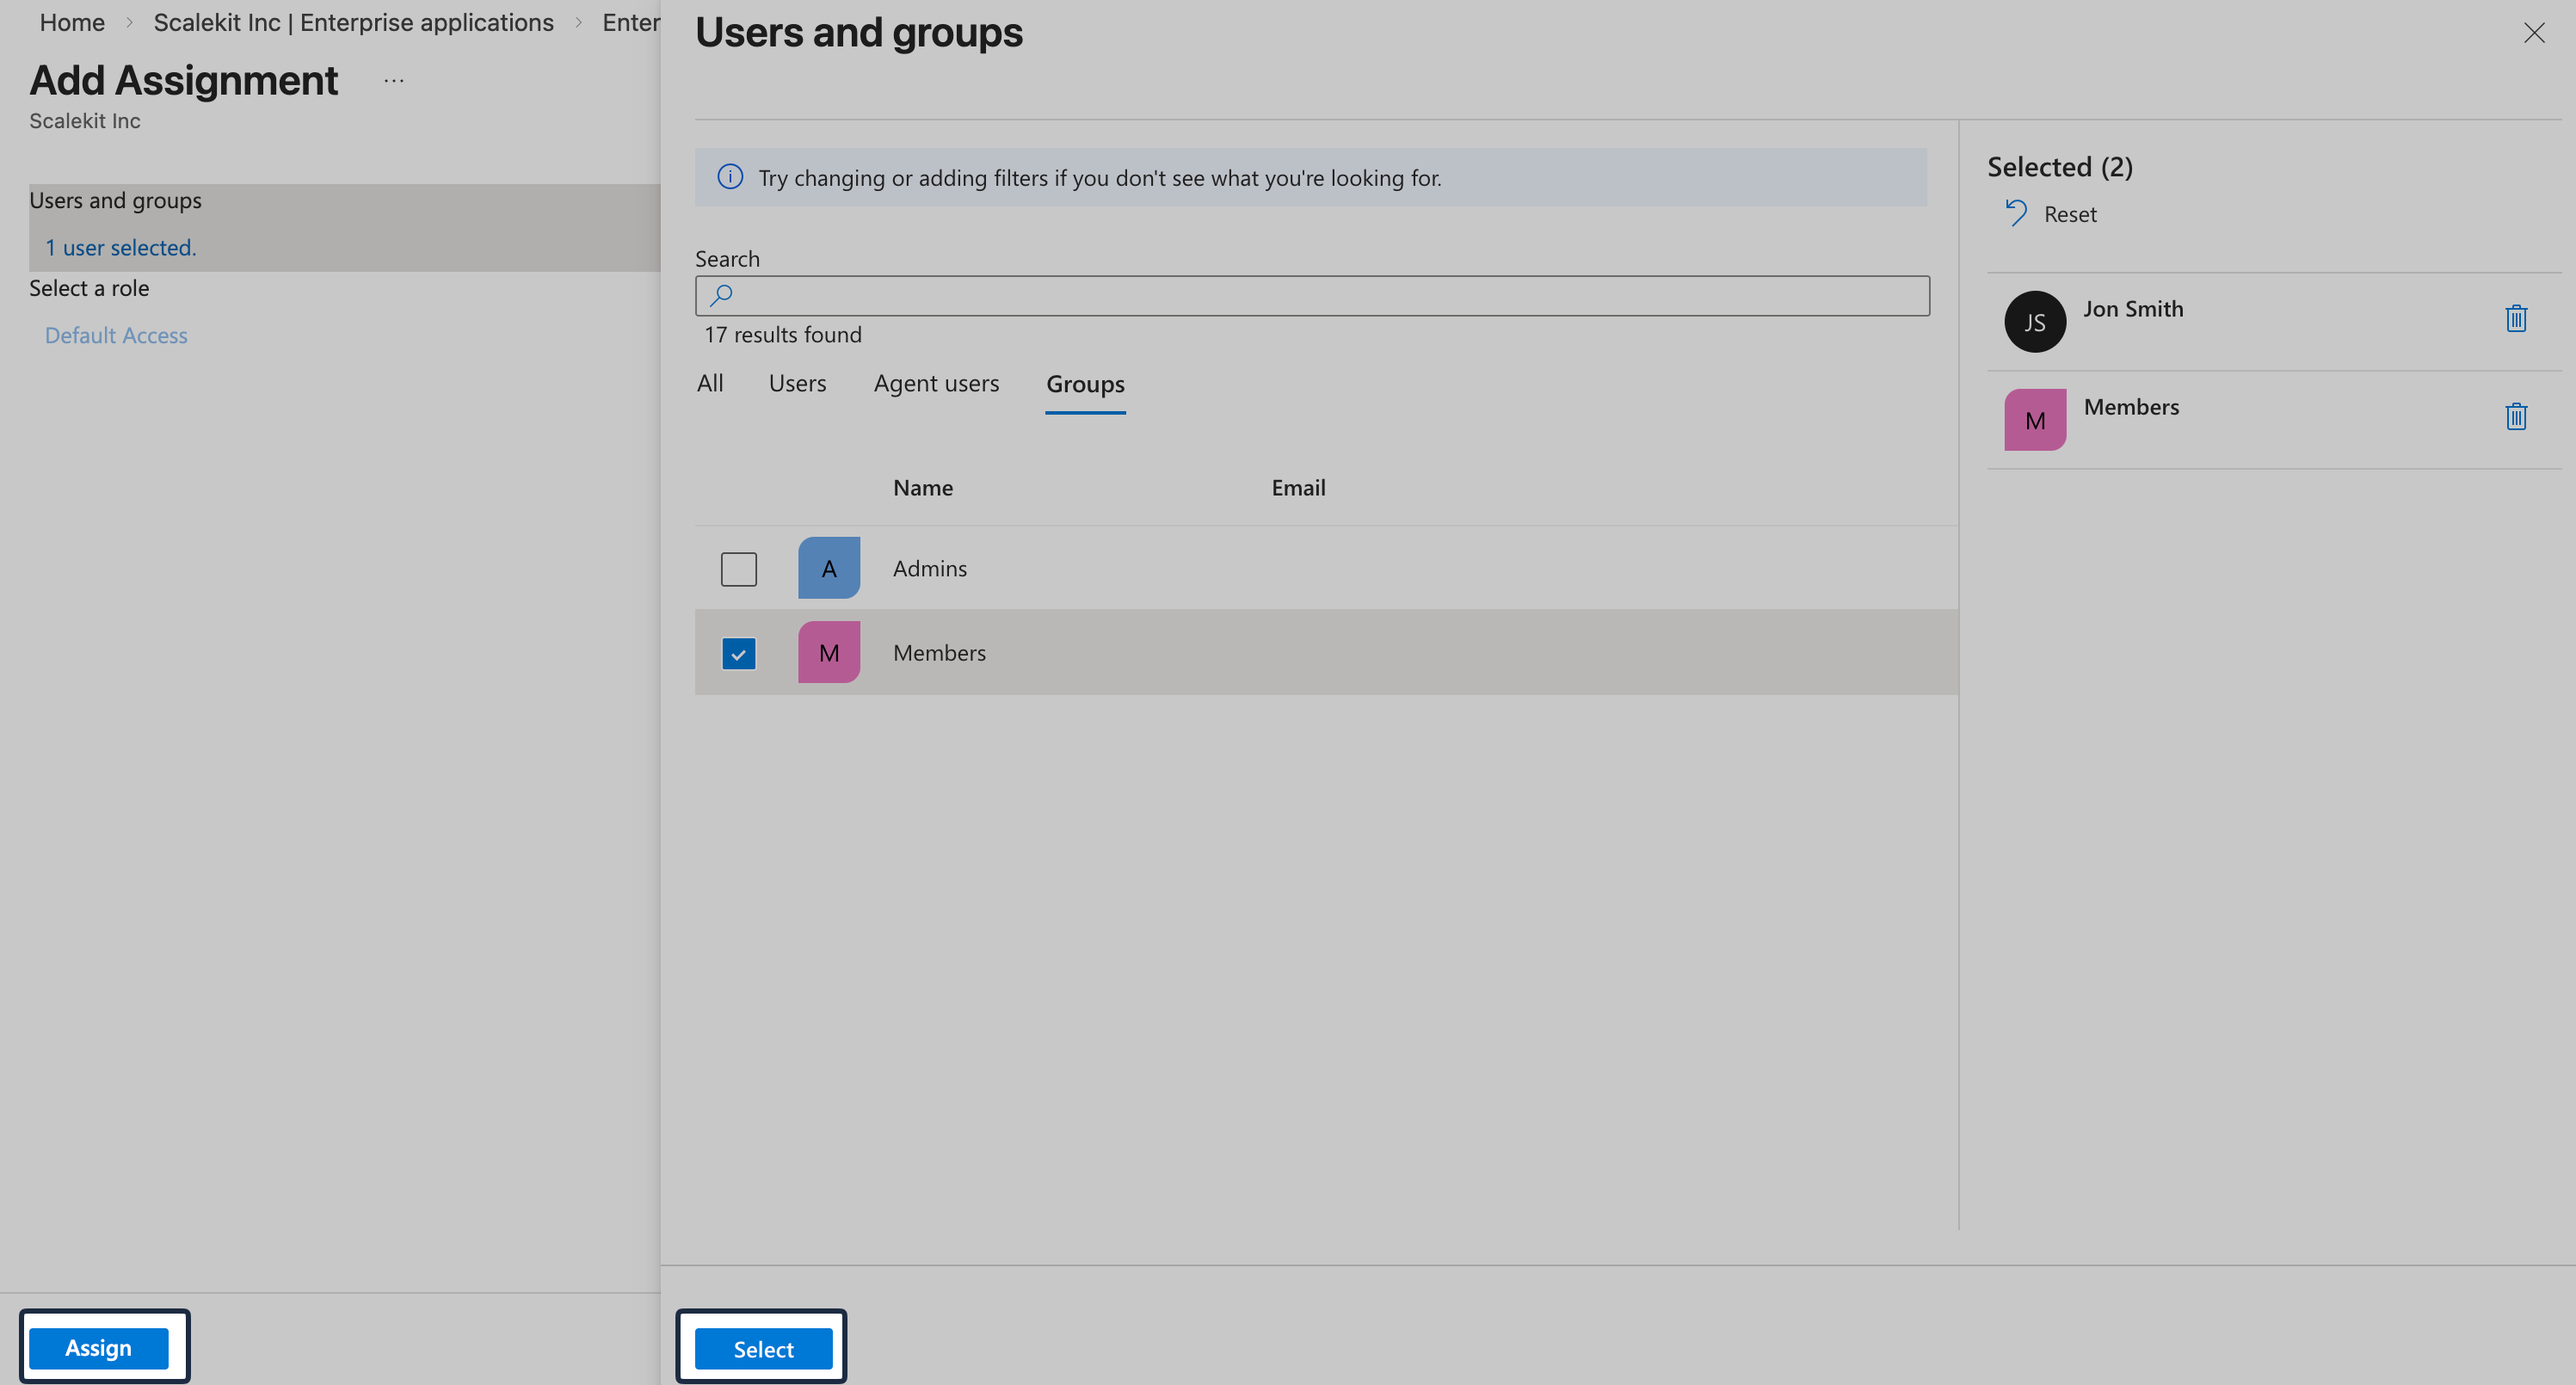
Section titled “Assign Users and Groups”In Entra ID, navigate to Enterprise applications and select the recently created OIDC app.
Then navigate to Users and groups and click Add user/group.
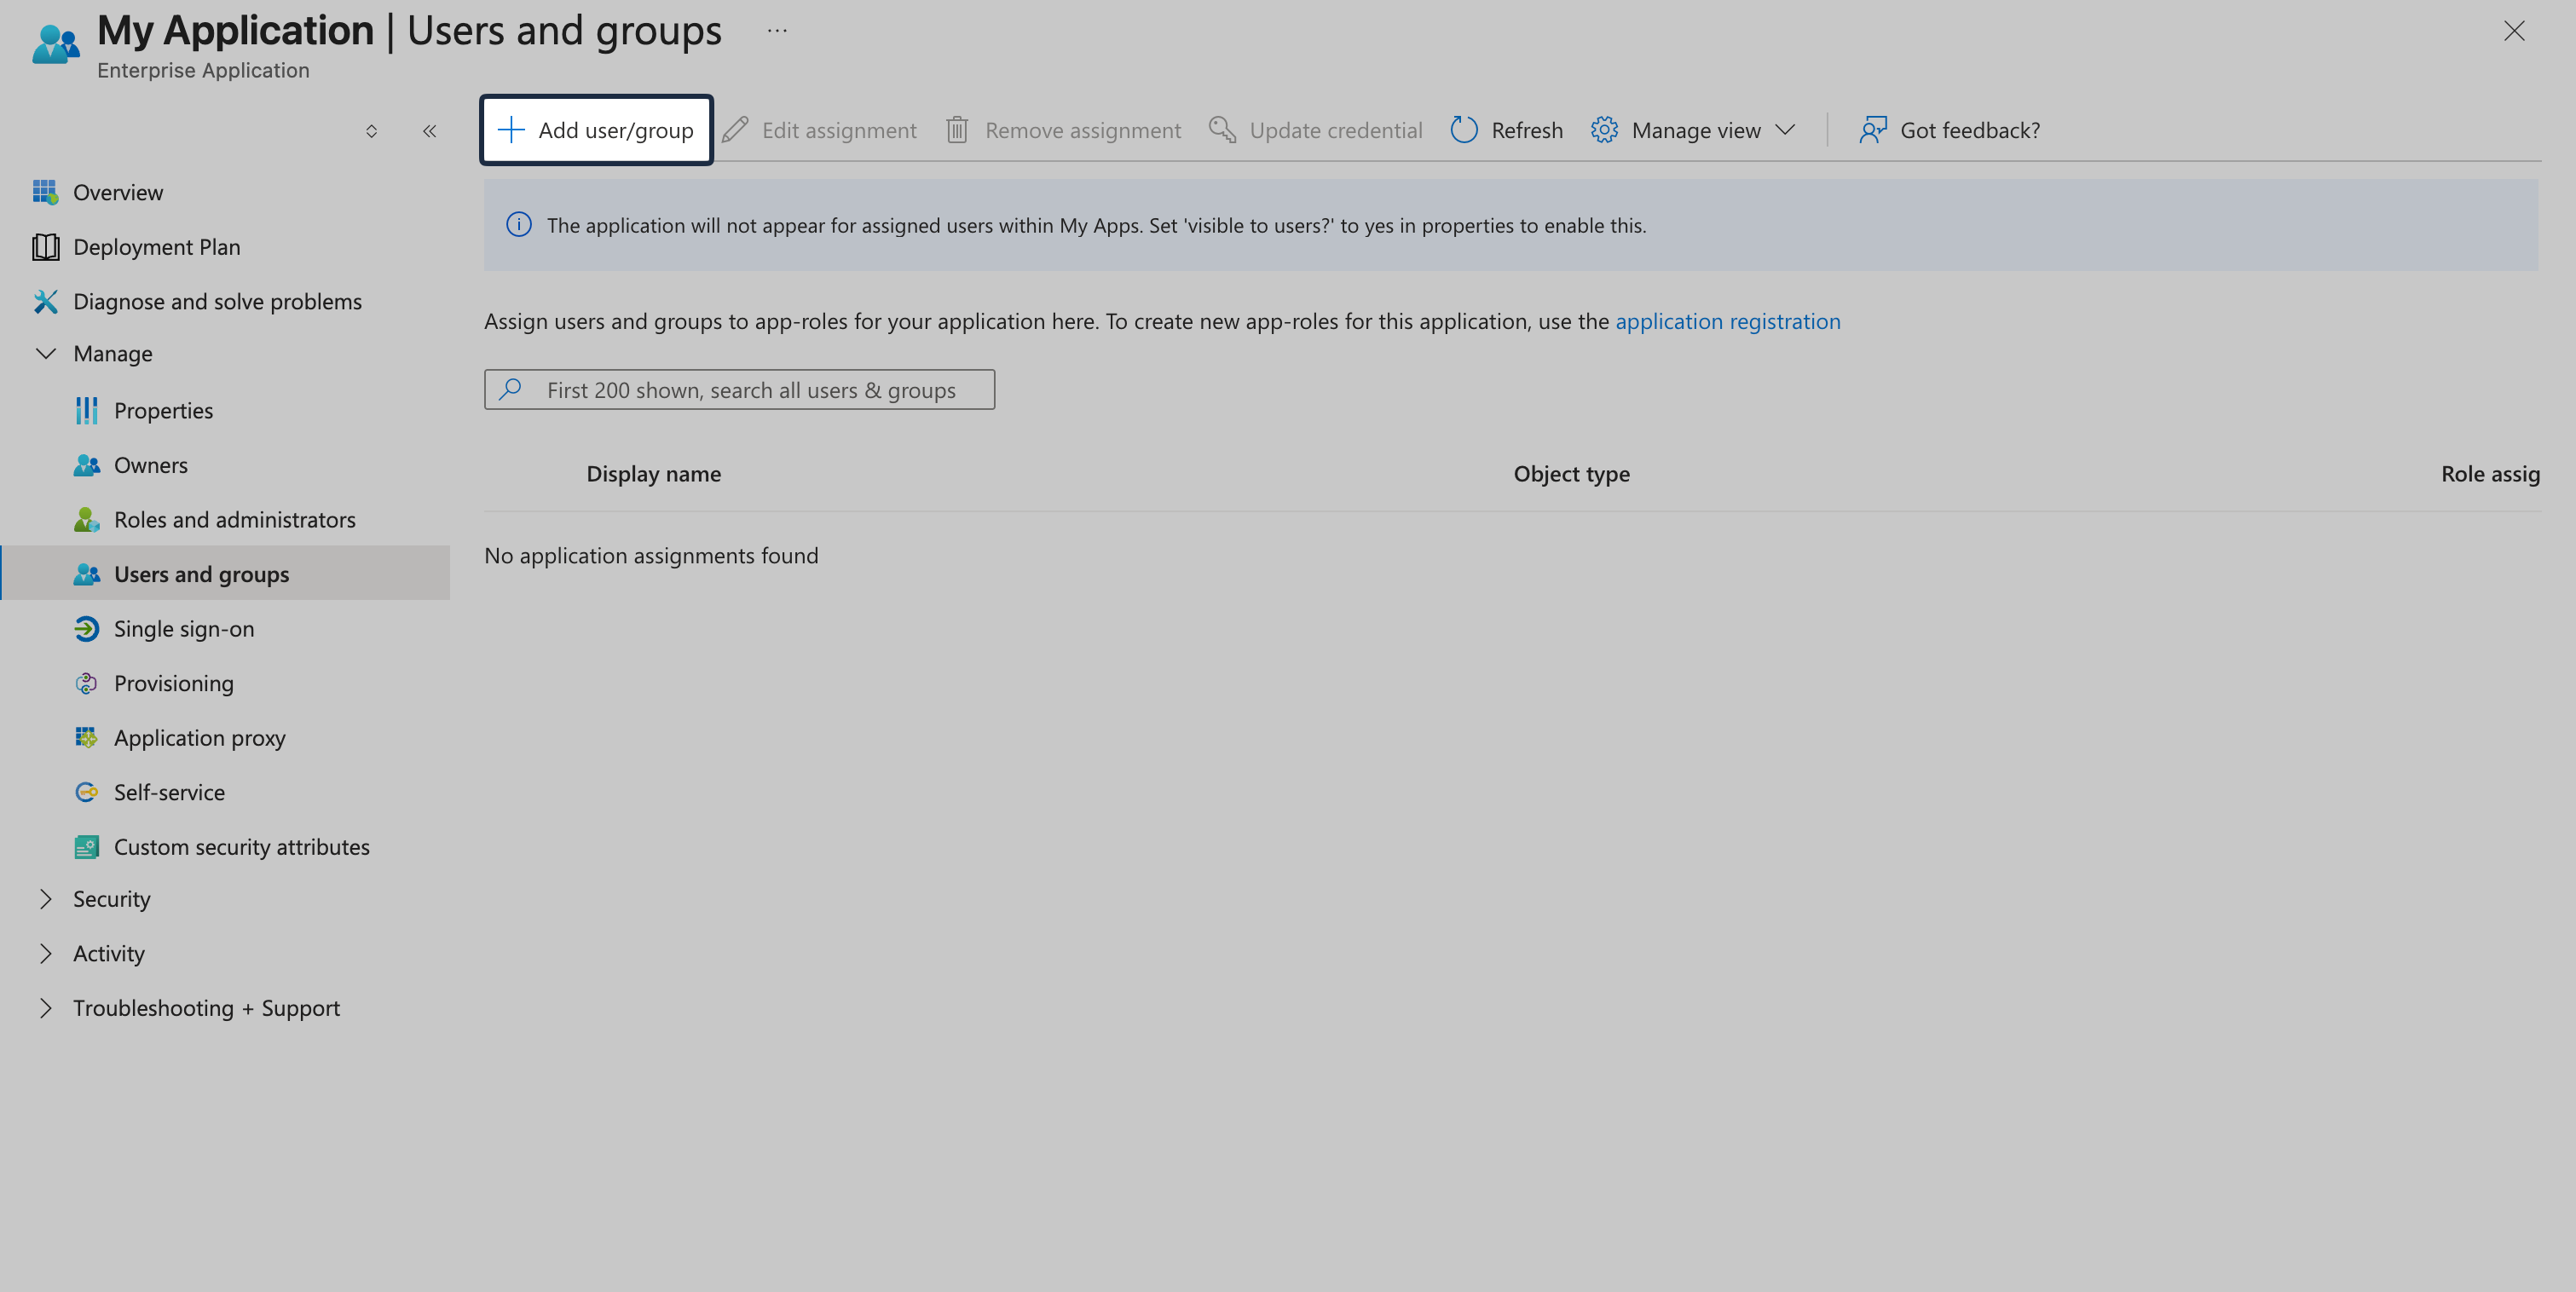
Assign the required users or groups, and save the assignment.
-
Test your SSO connection
Section titled “Test your SSO connection”In the SSO Configuration Portal, click Test Connection to verify your configuration.
-
Enable Single Sign-On
Section titled “Enable Single Sign-On”Once the test succeeds, click Enable Connection.

This completes the Microsoft Entra ID OIDC SSO setup for your application.