
Ping Identity - OIDC
Learn how to set up OpenID Connect (OIDC) Single Sign-On (SSO) using Ping Identity, with step-by-step instructions for OIDC application setup.
This guide walks you through configuring Ping Identity as your OIDC identity provider. You’ll create an OIDC web application, add the redirect URL, provide the required OIDC values in the SSO Configuration Portal, configure user claims, test the connection, and then enable Single Sign-On.
-
Create an OIDC App
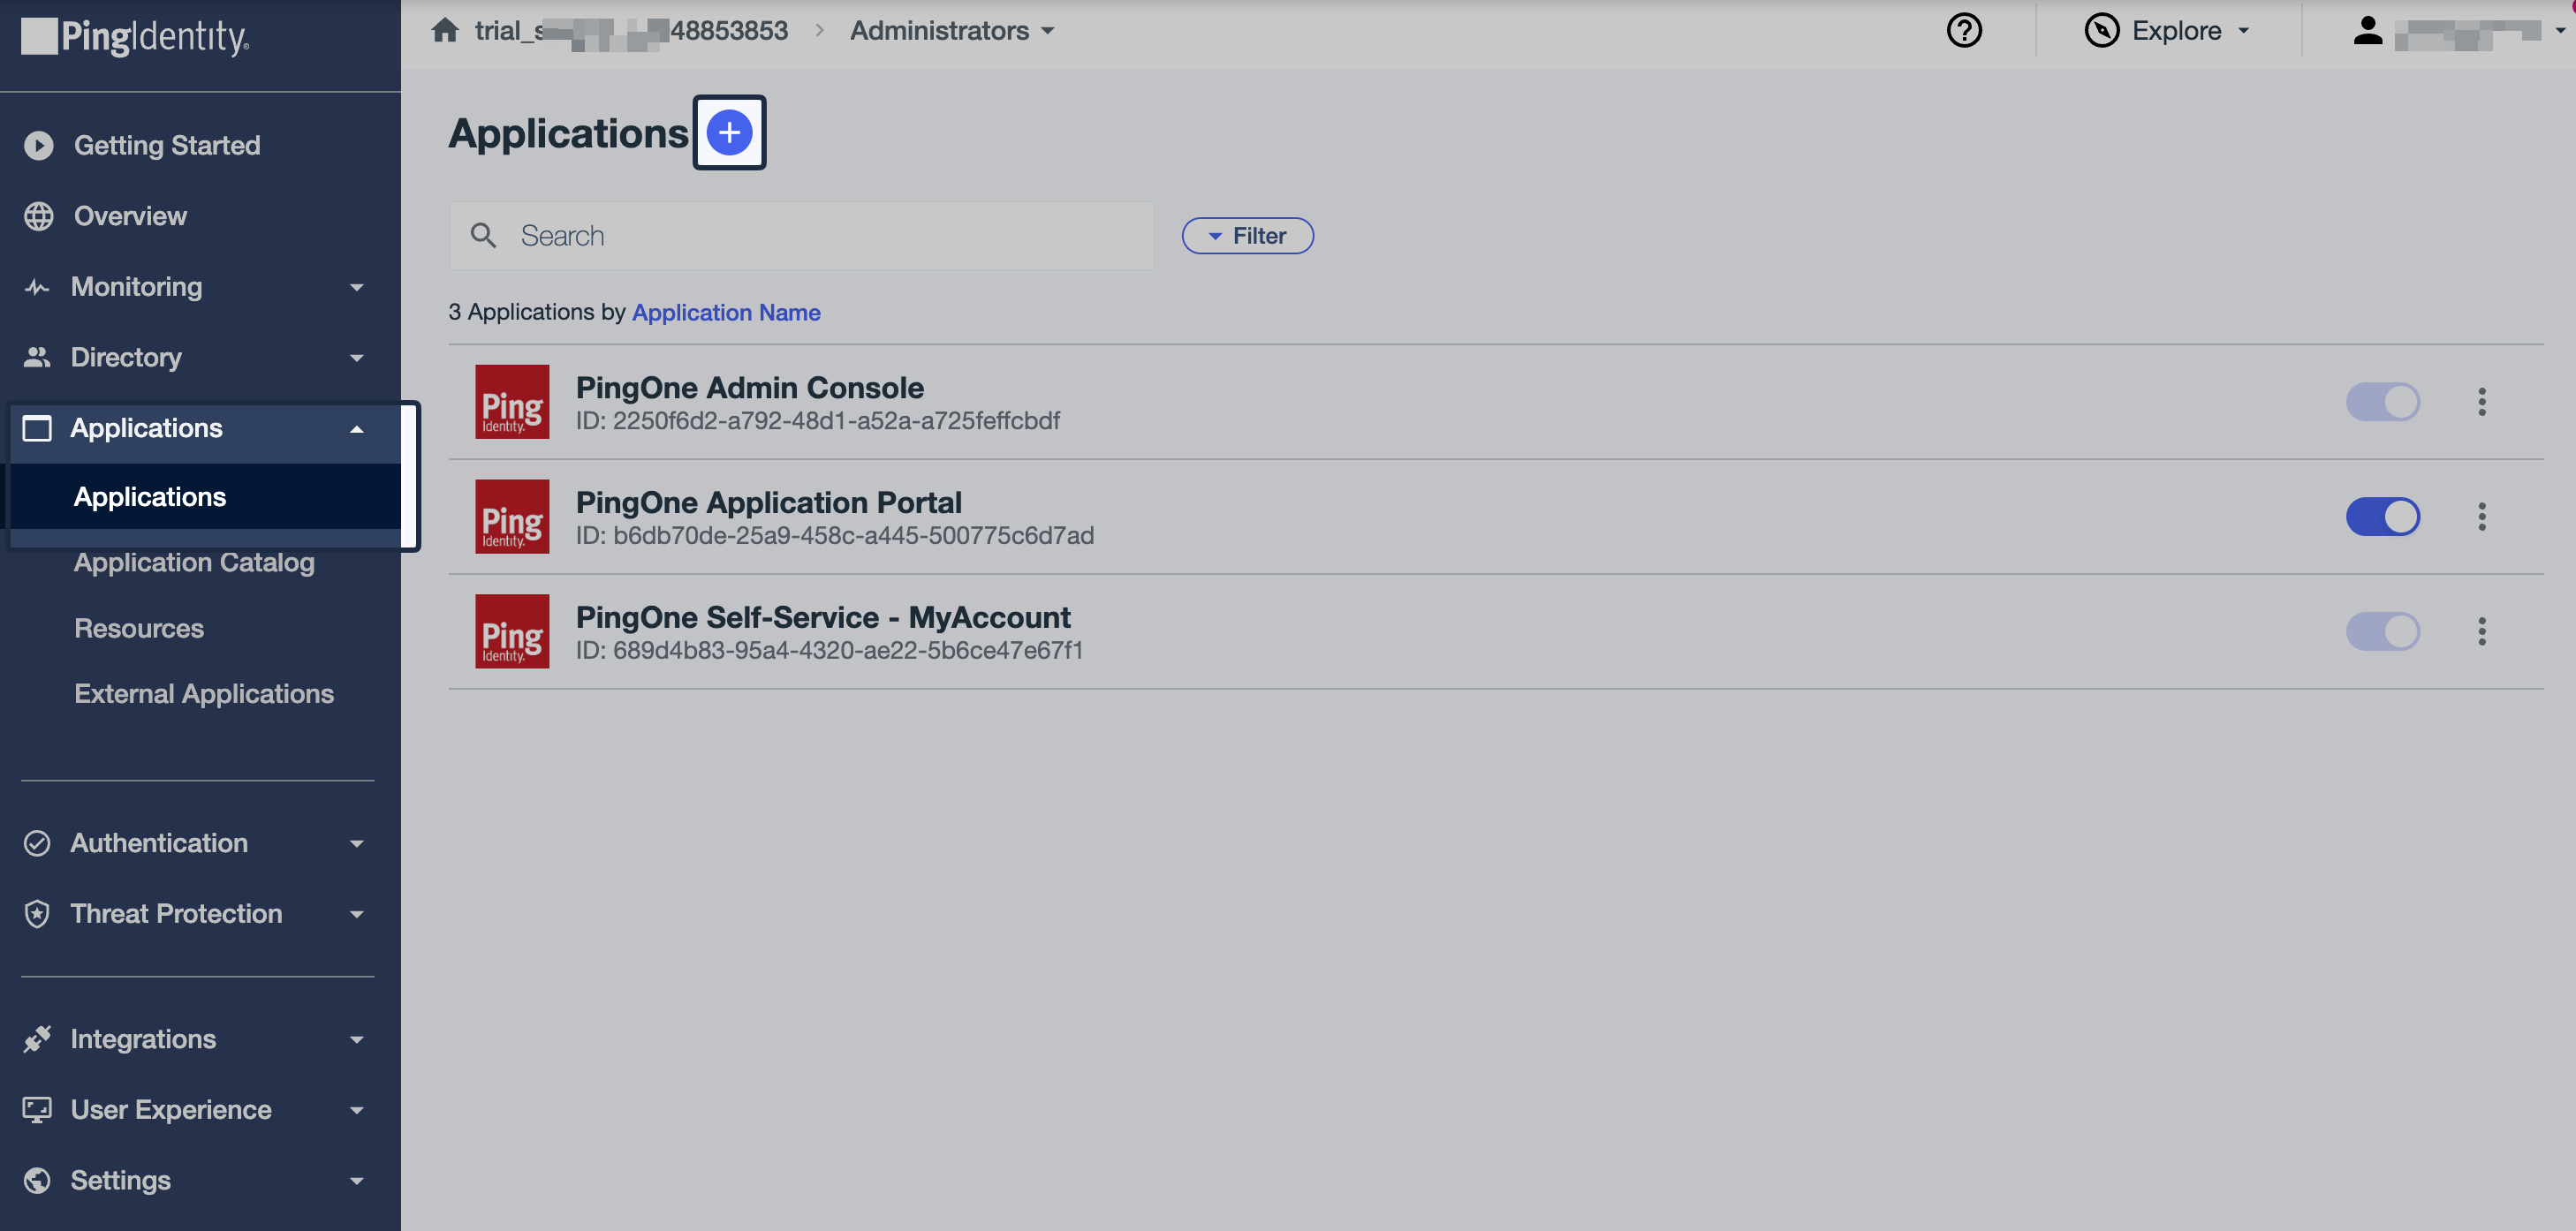
Section titled “Create an OIDC App”Log in to Ping Identity Admin Console. Navigate to Applications -> Applications, then click on + button to add a new application.
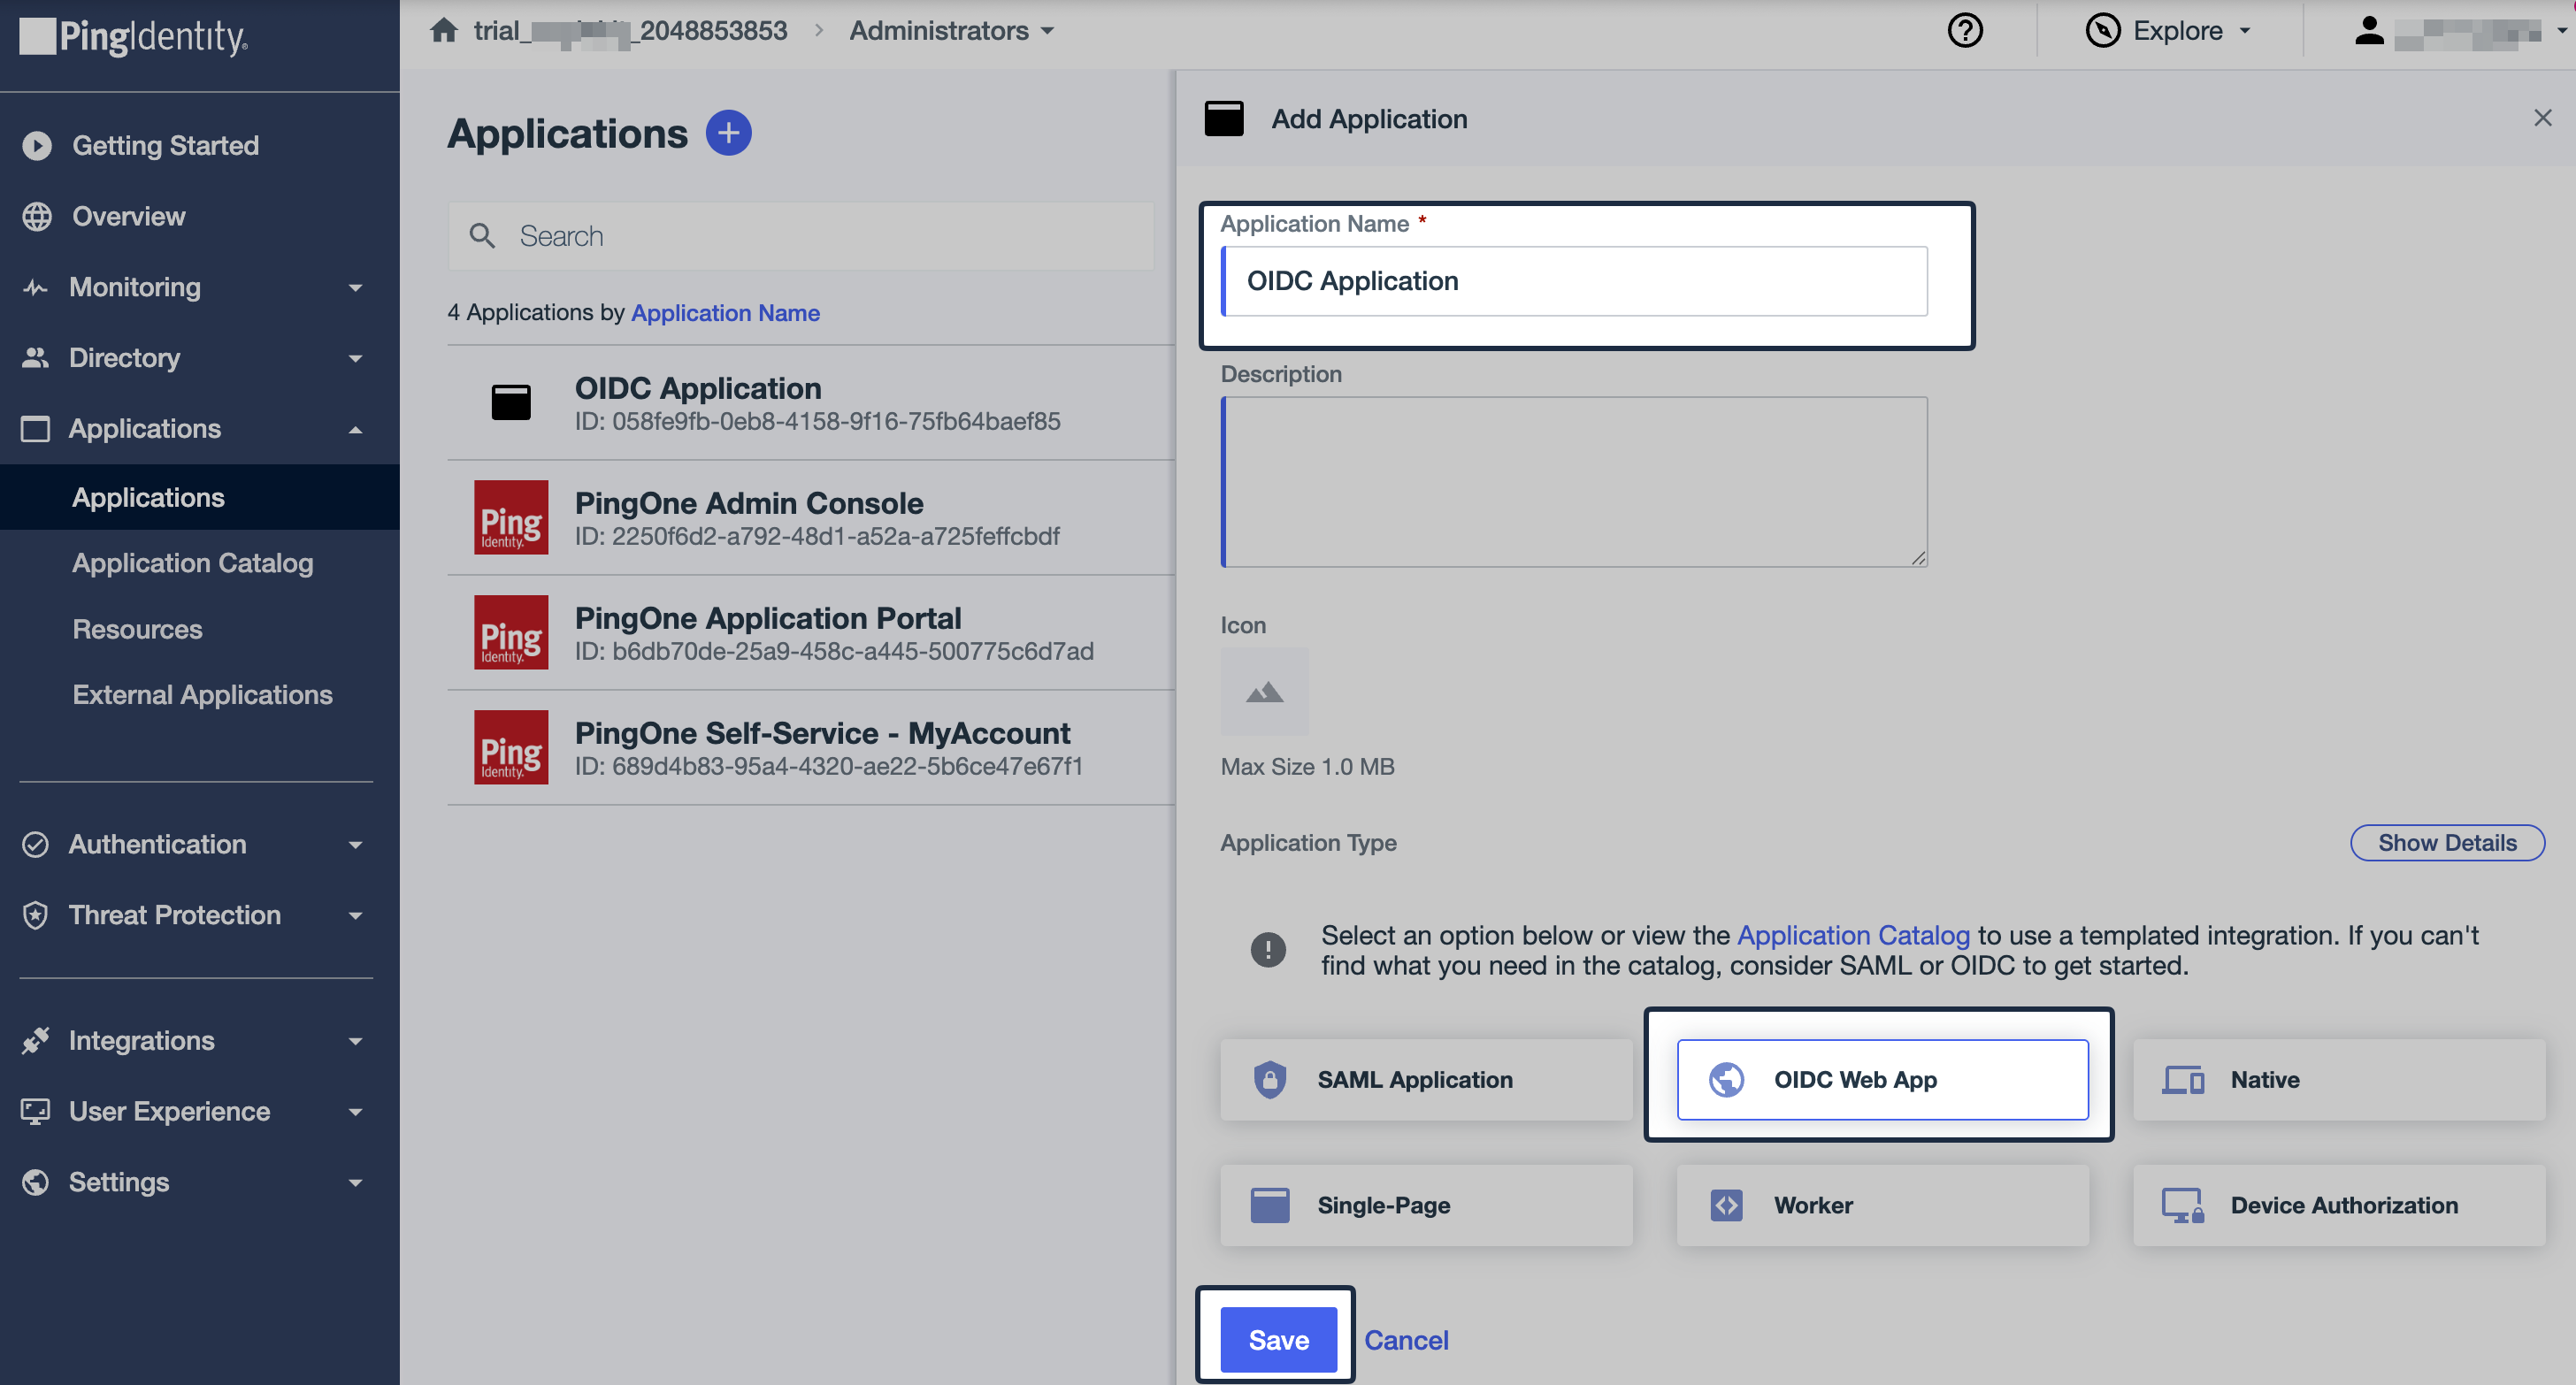
Once Add Application modal opens up, enter suitable Application Name and choose OIDC Web App as the Application Type. Then click on Save.
-
Configure Redirect URL
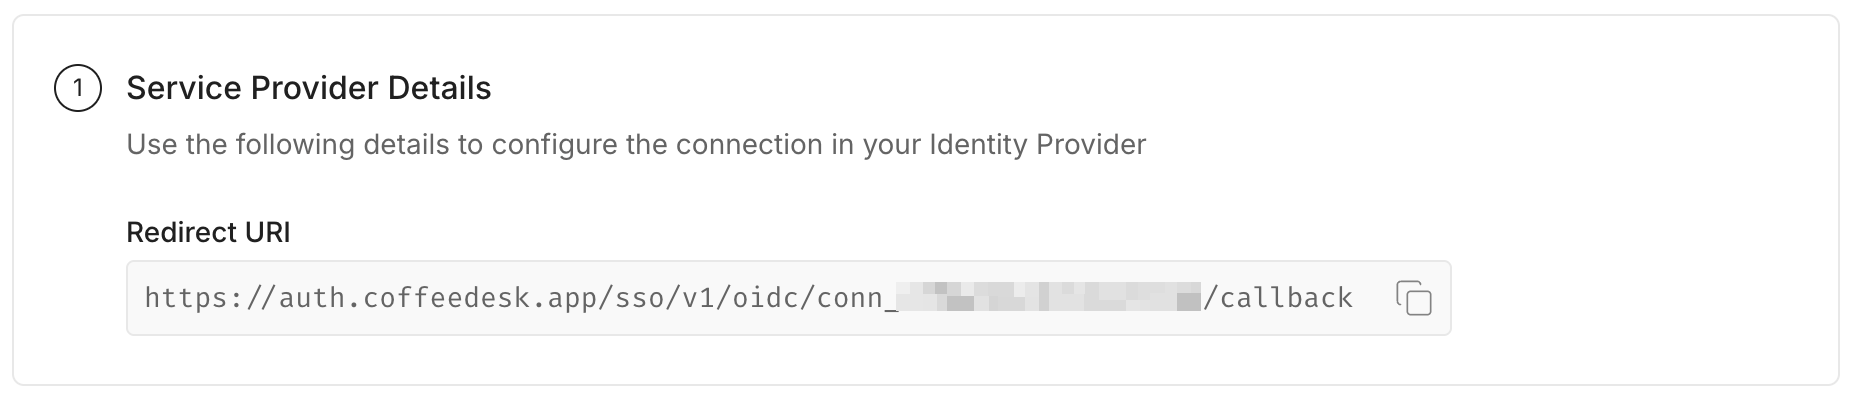
Section titled “Configure Redirect URL”From the SSO Configuration Portal, copy the Redirect URI under Service Provider Details.
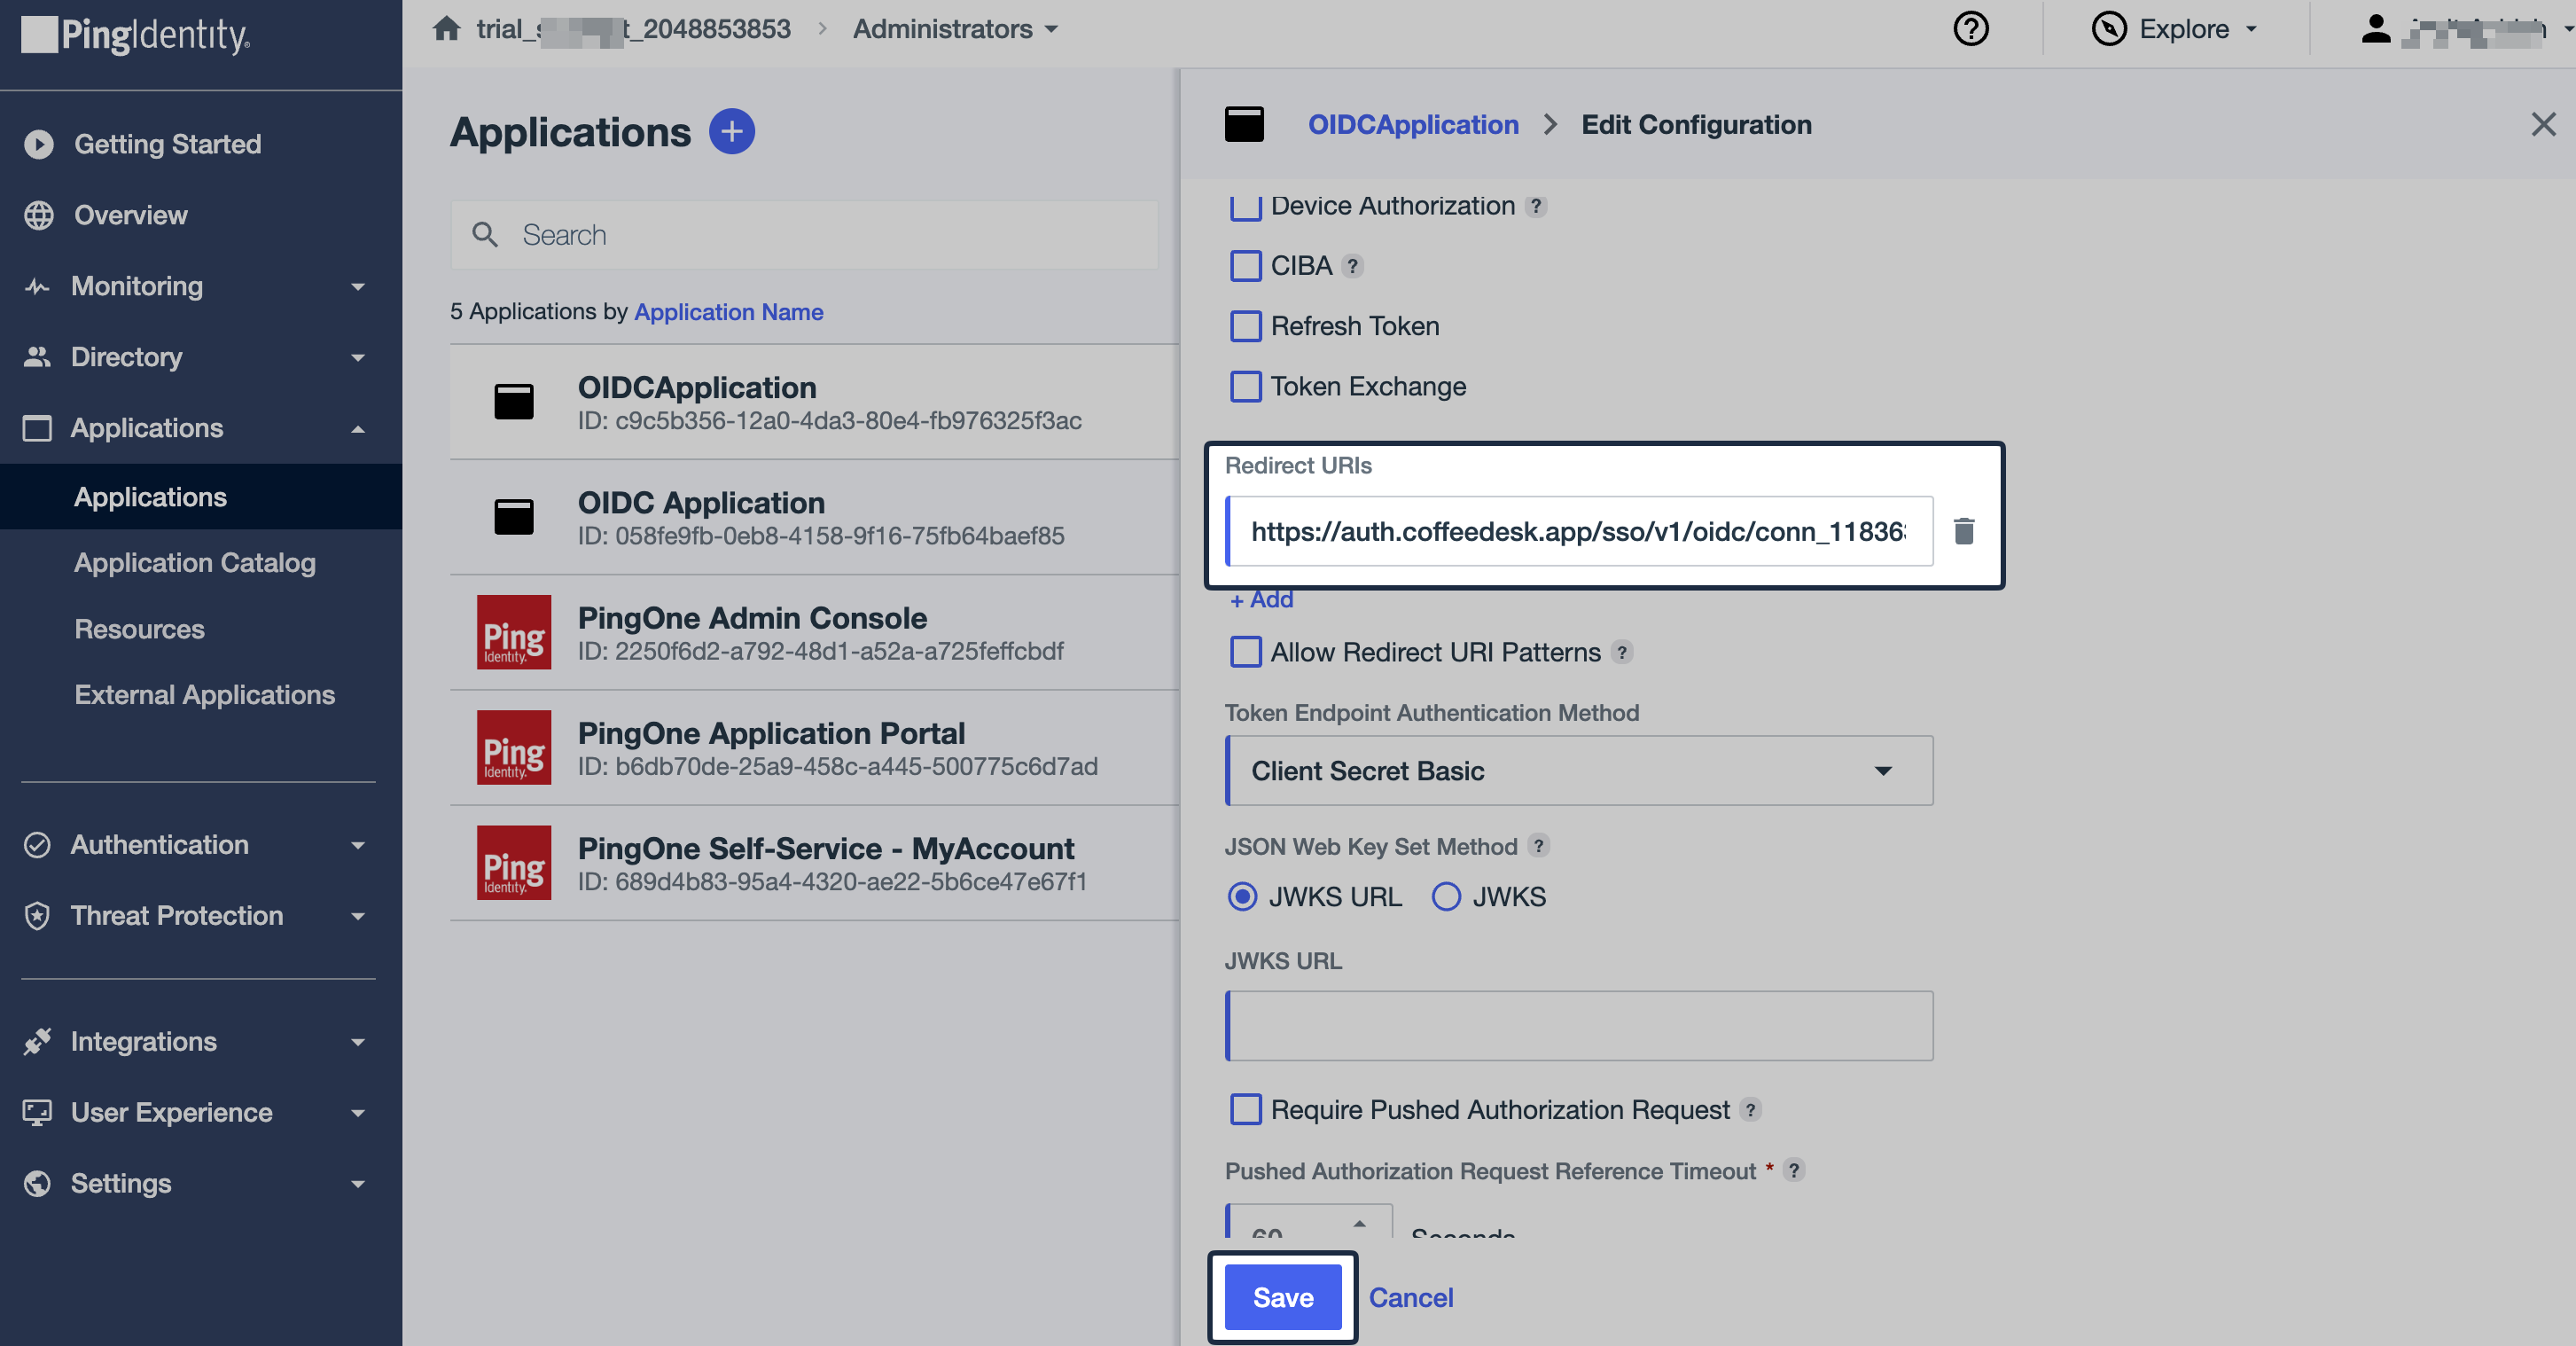
In Ping Identity, navigate to Configuration tab of recently created application and then click the Edit icon.

Scroll down to Redirect URIs, paste the copied URI into Sign-in redirect URI, and then click Save.
-
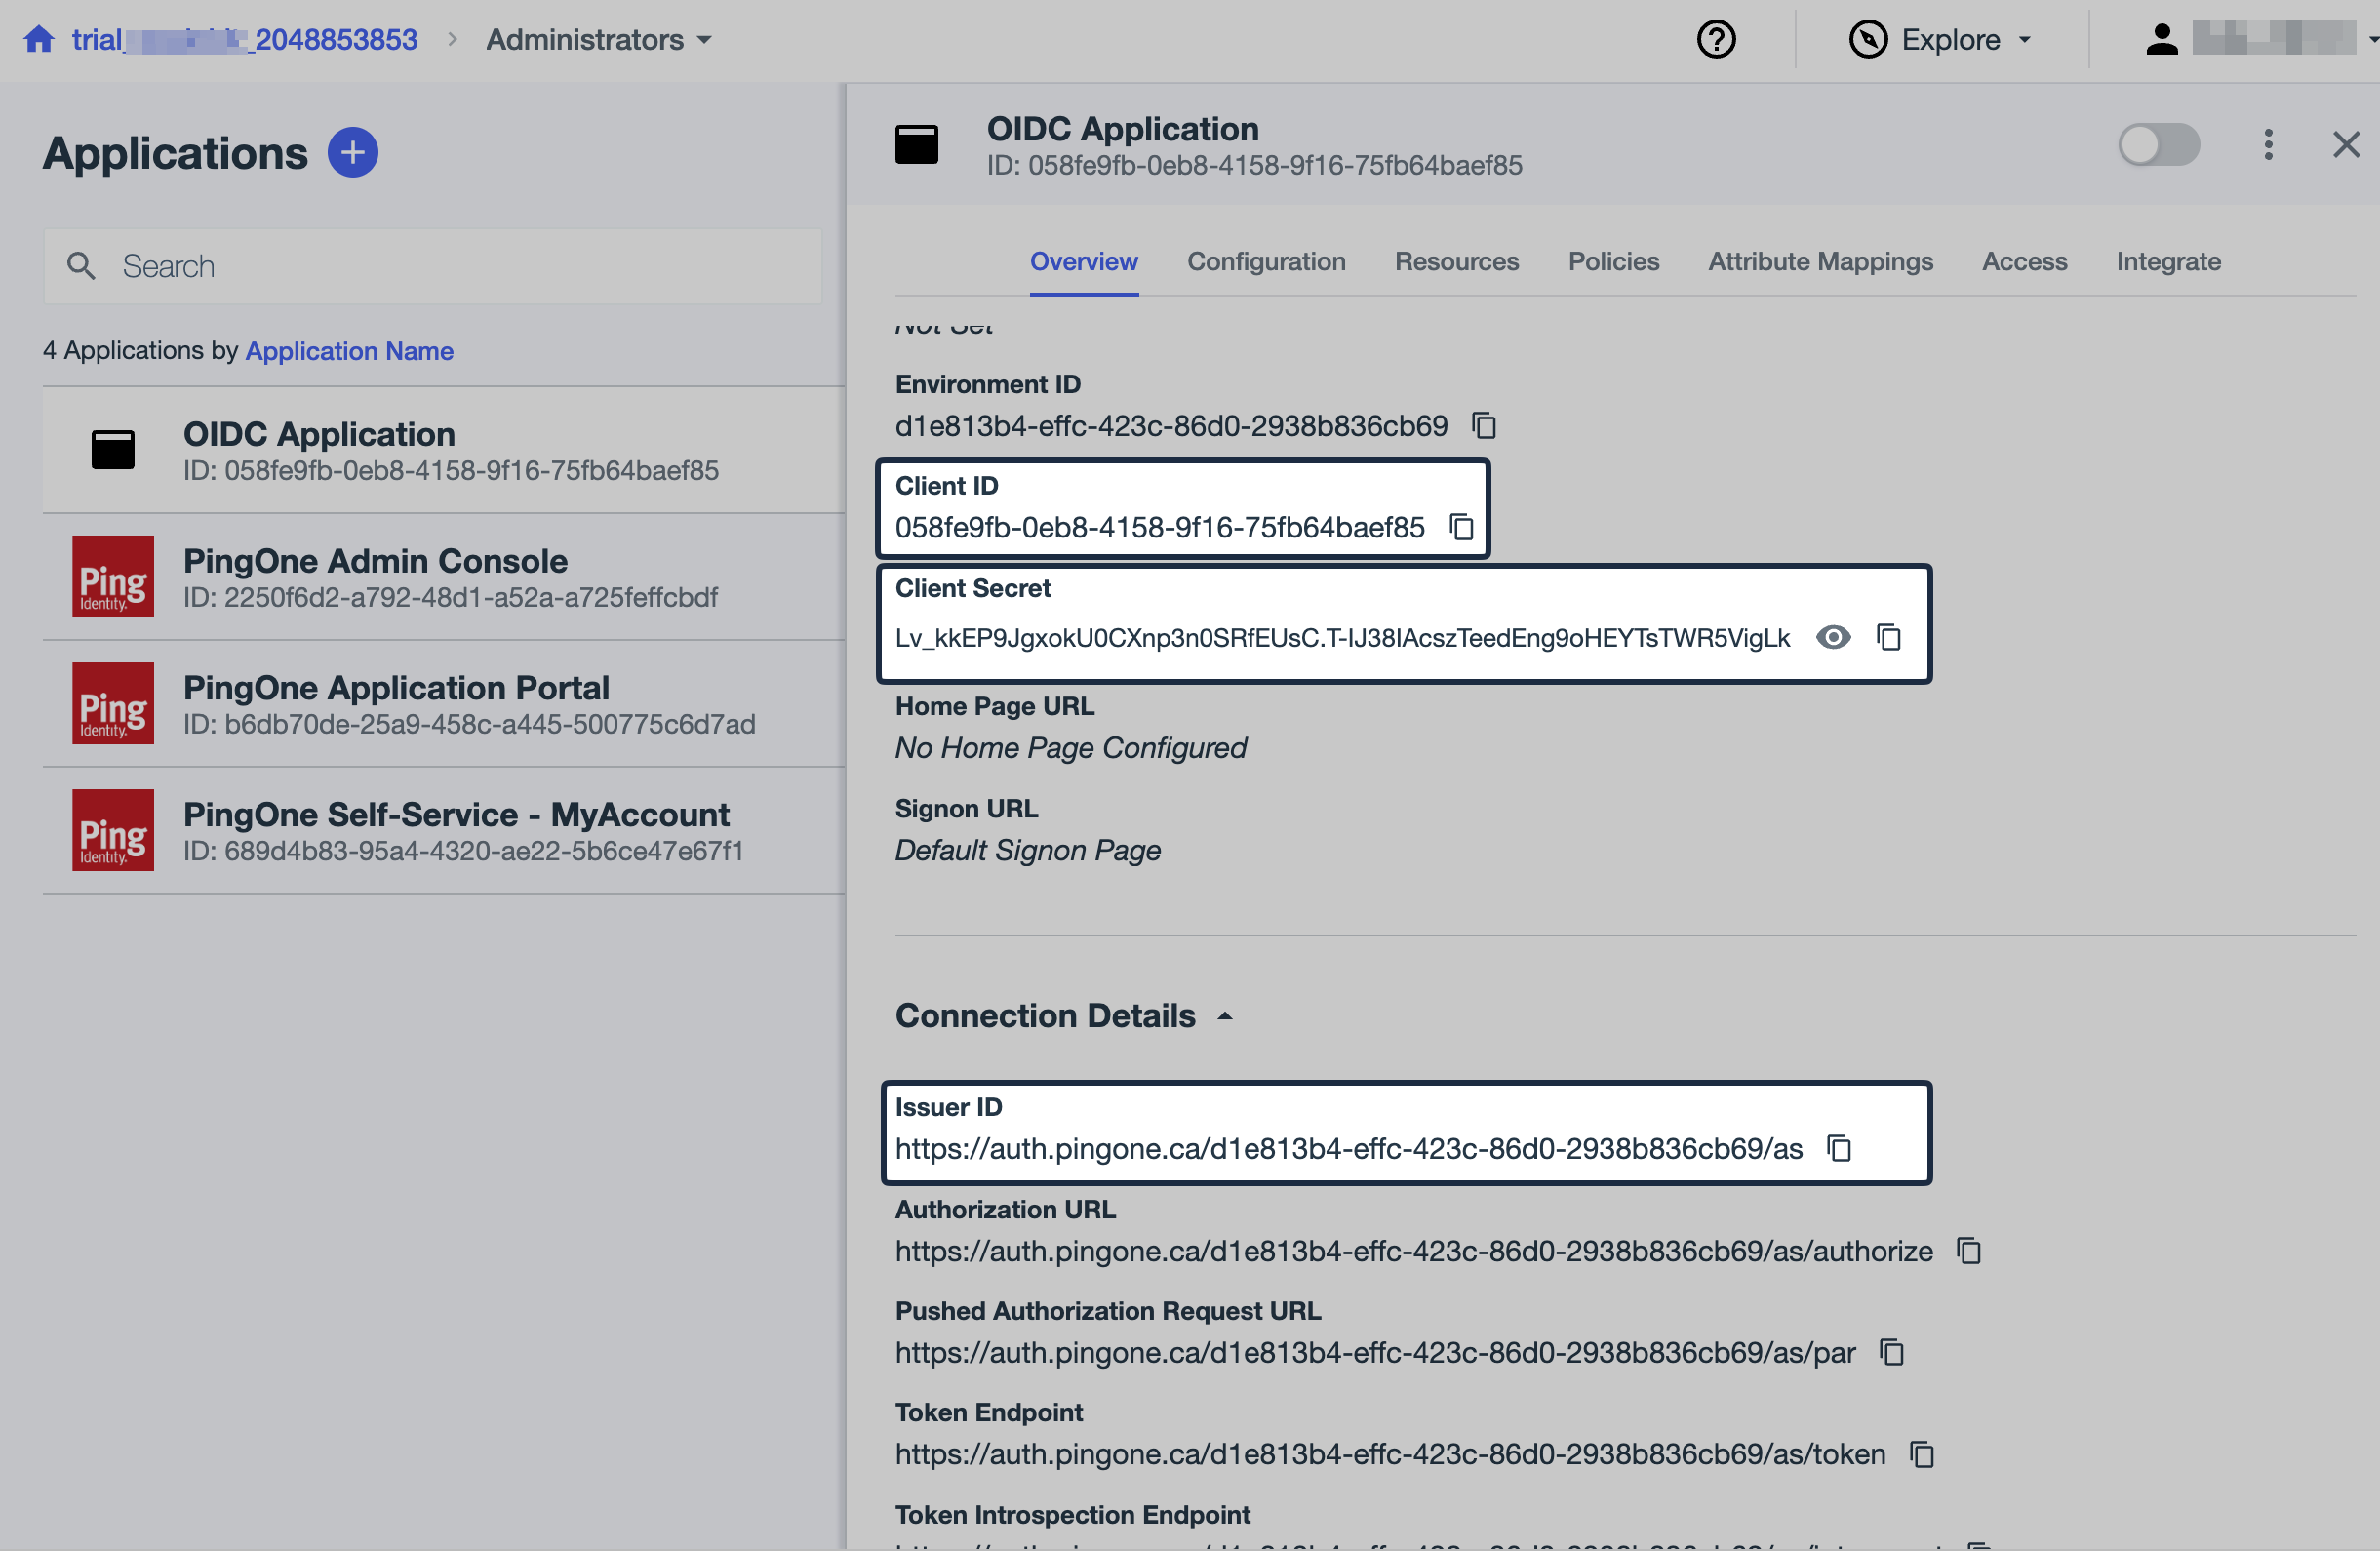
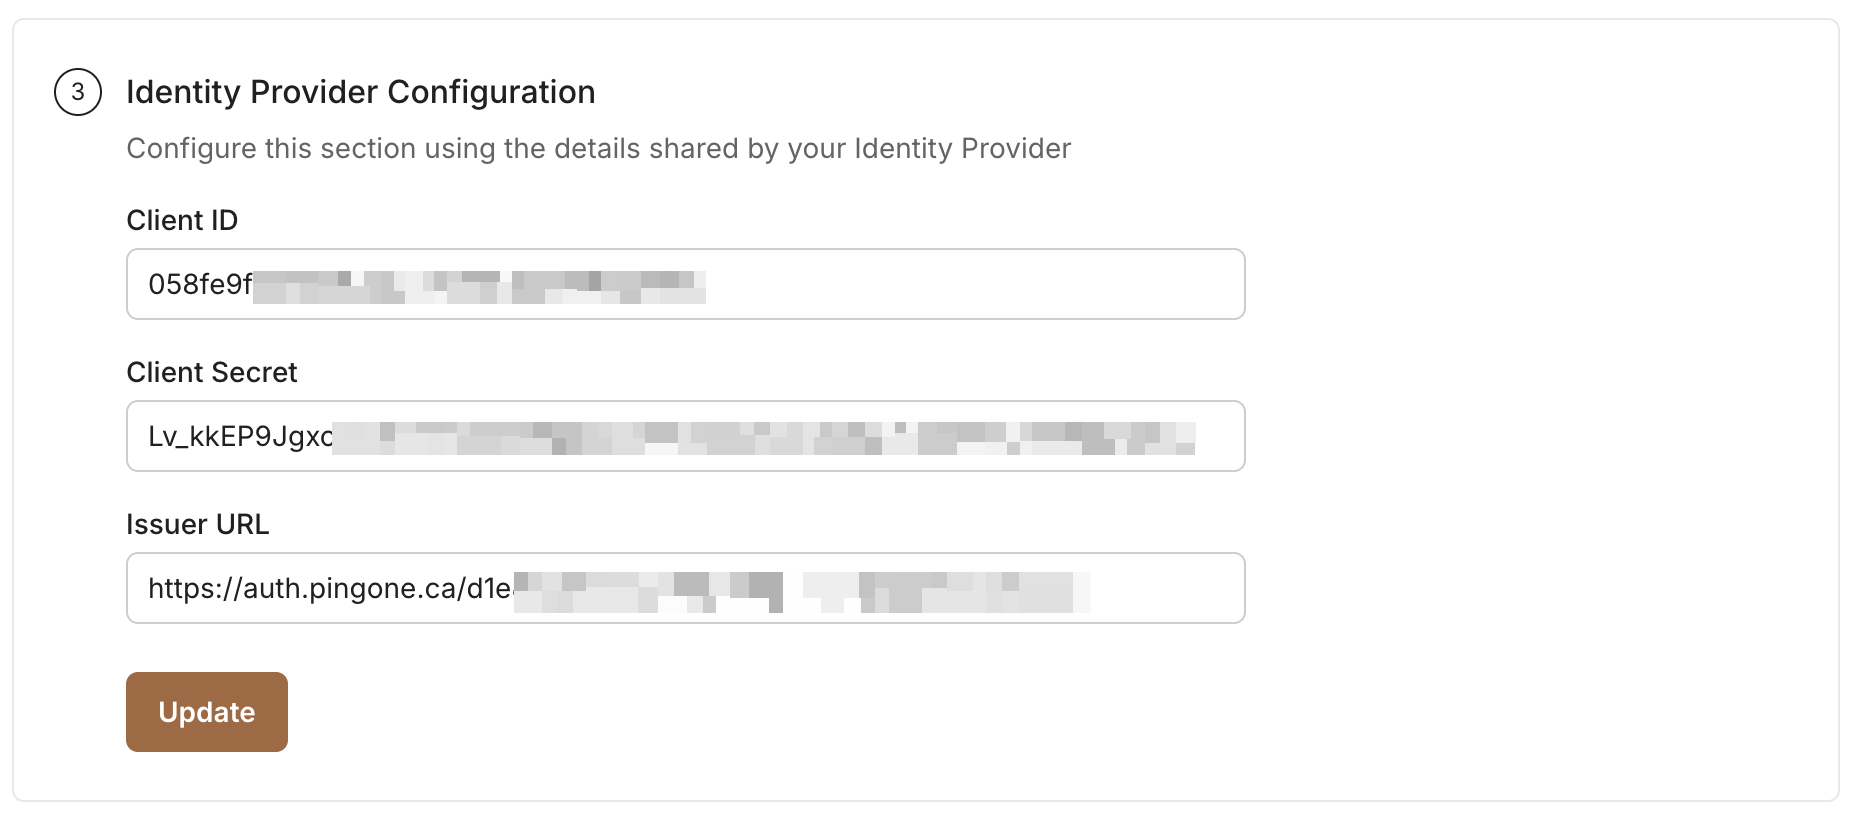
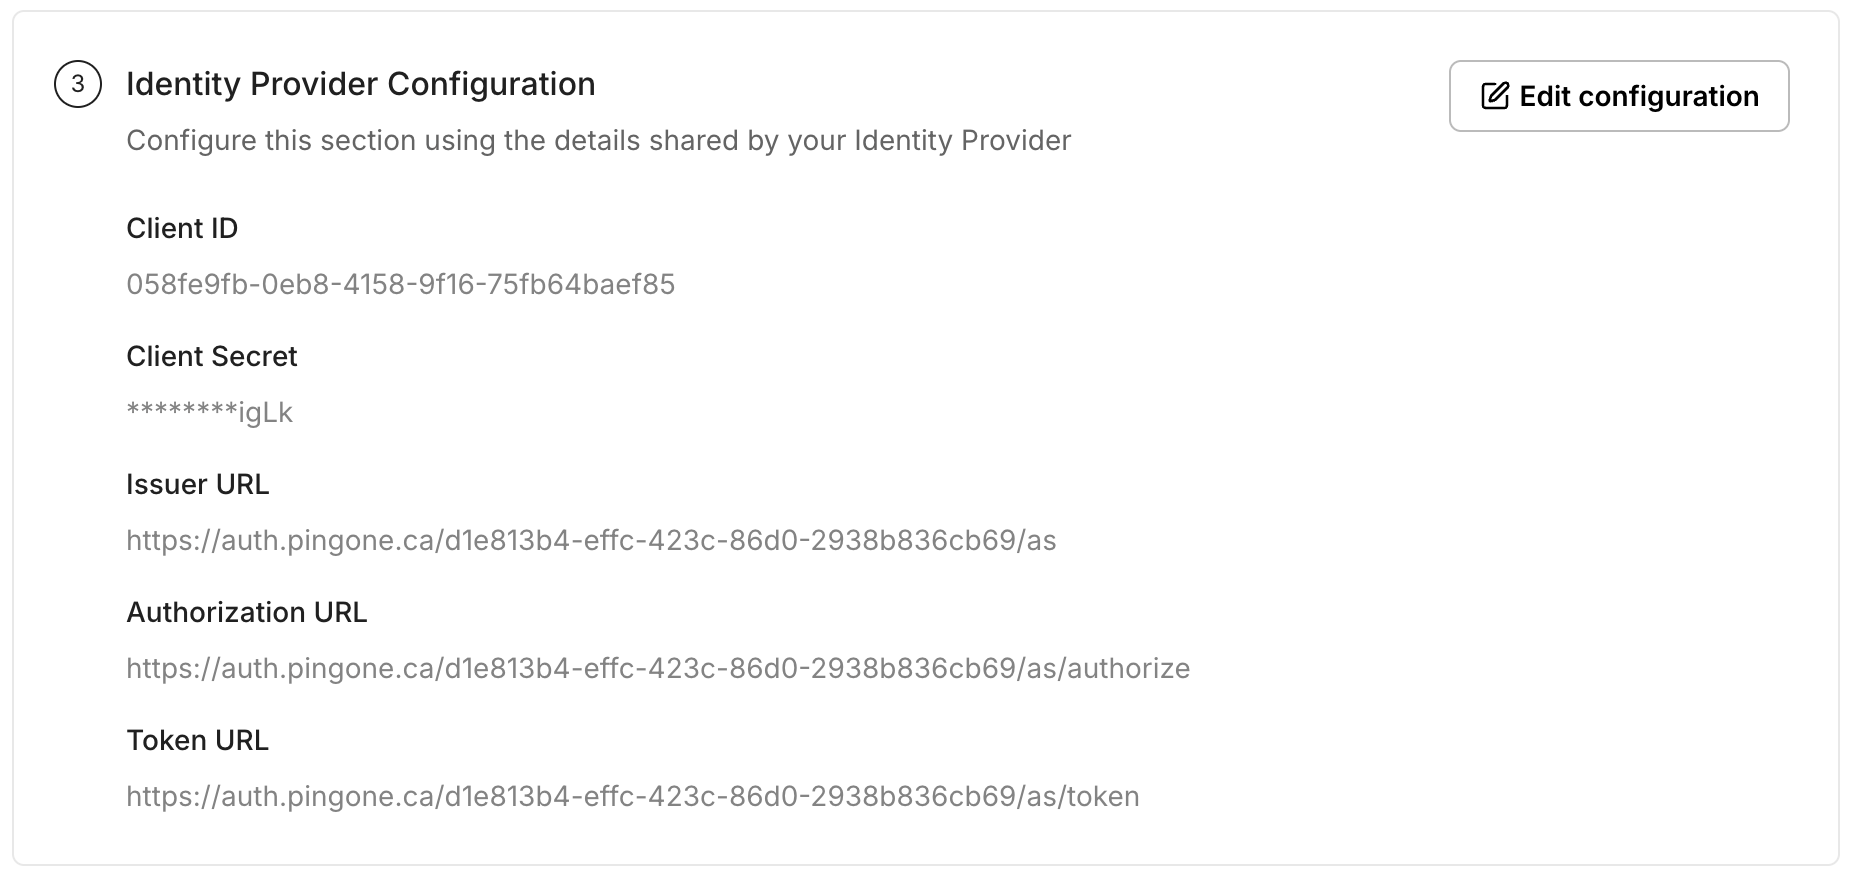
Provide OIDC Configuration
Section titled “Provide OIDC Configuration”In Ping Identity, navigate to Overview tab of recently created application and copy Client ID, Client Secret and Issuer ID (serves as Issuer URL).
Add the above values under Identity Provider Configuration in the SSO Configuration Portal, then click Update.
-
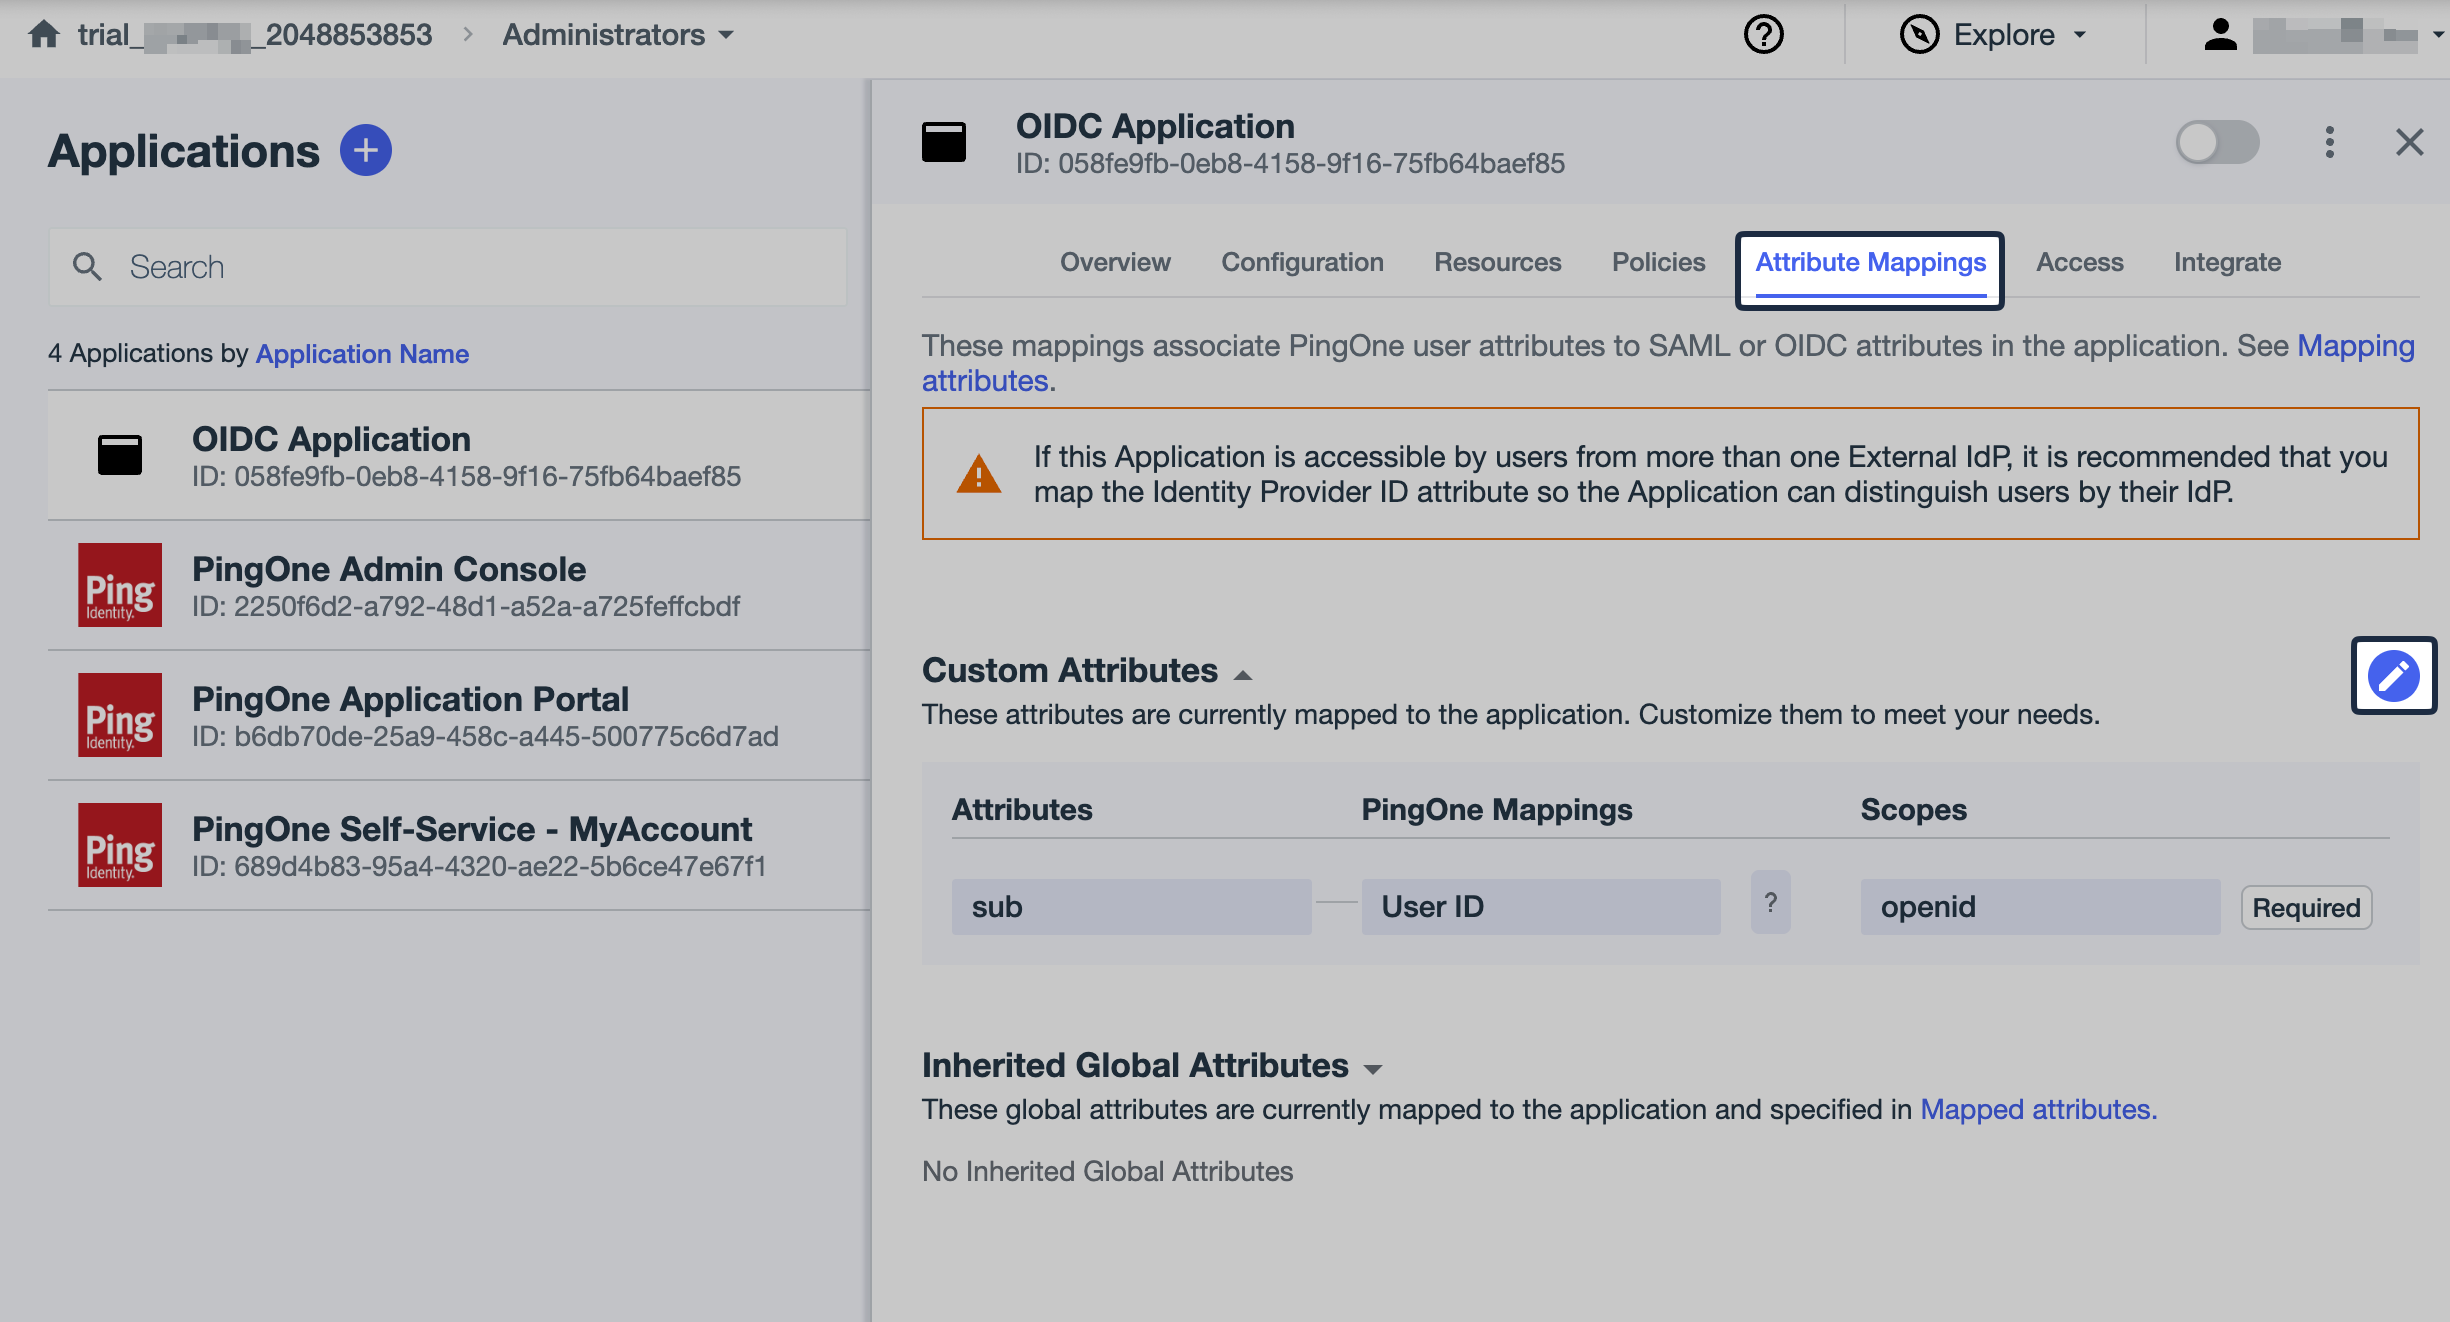
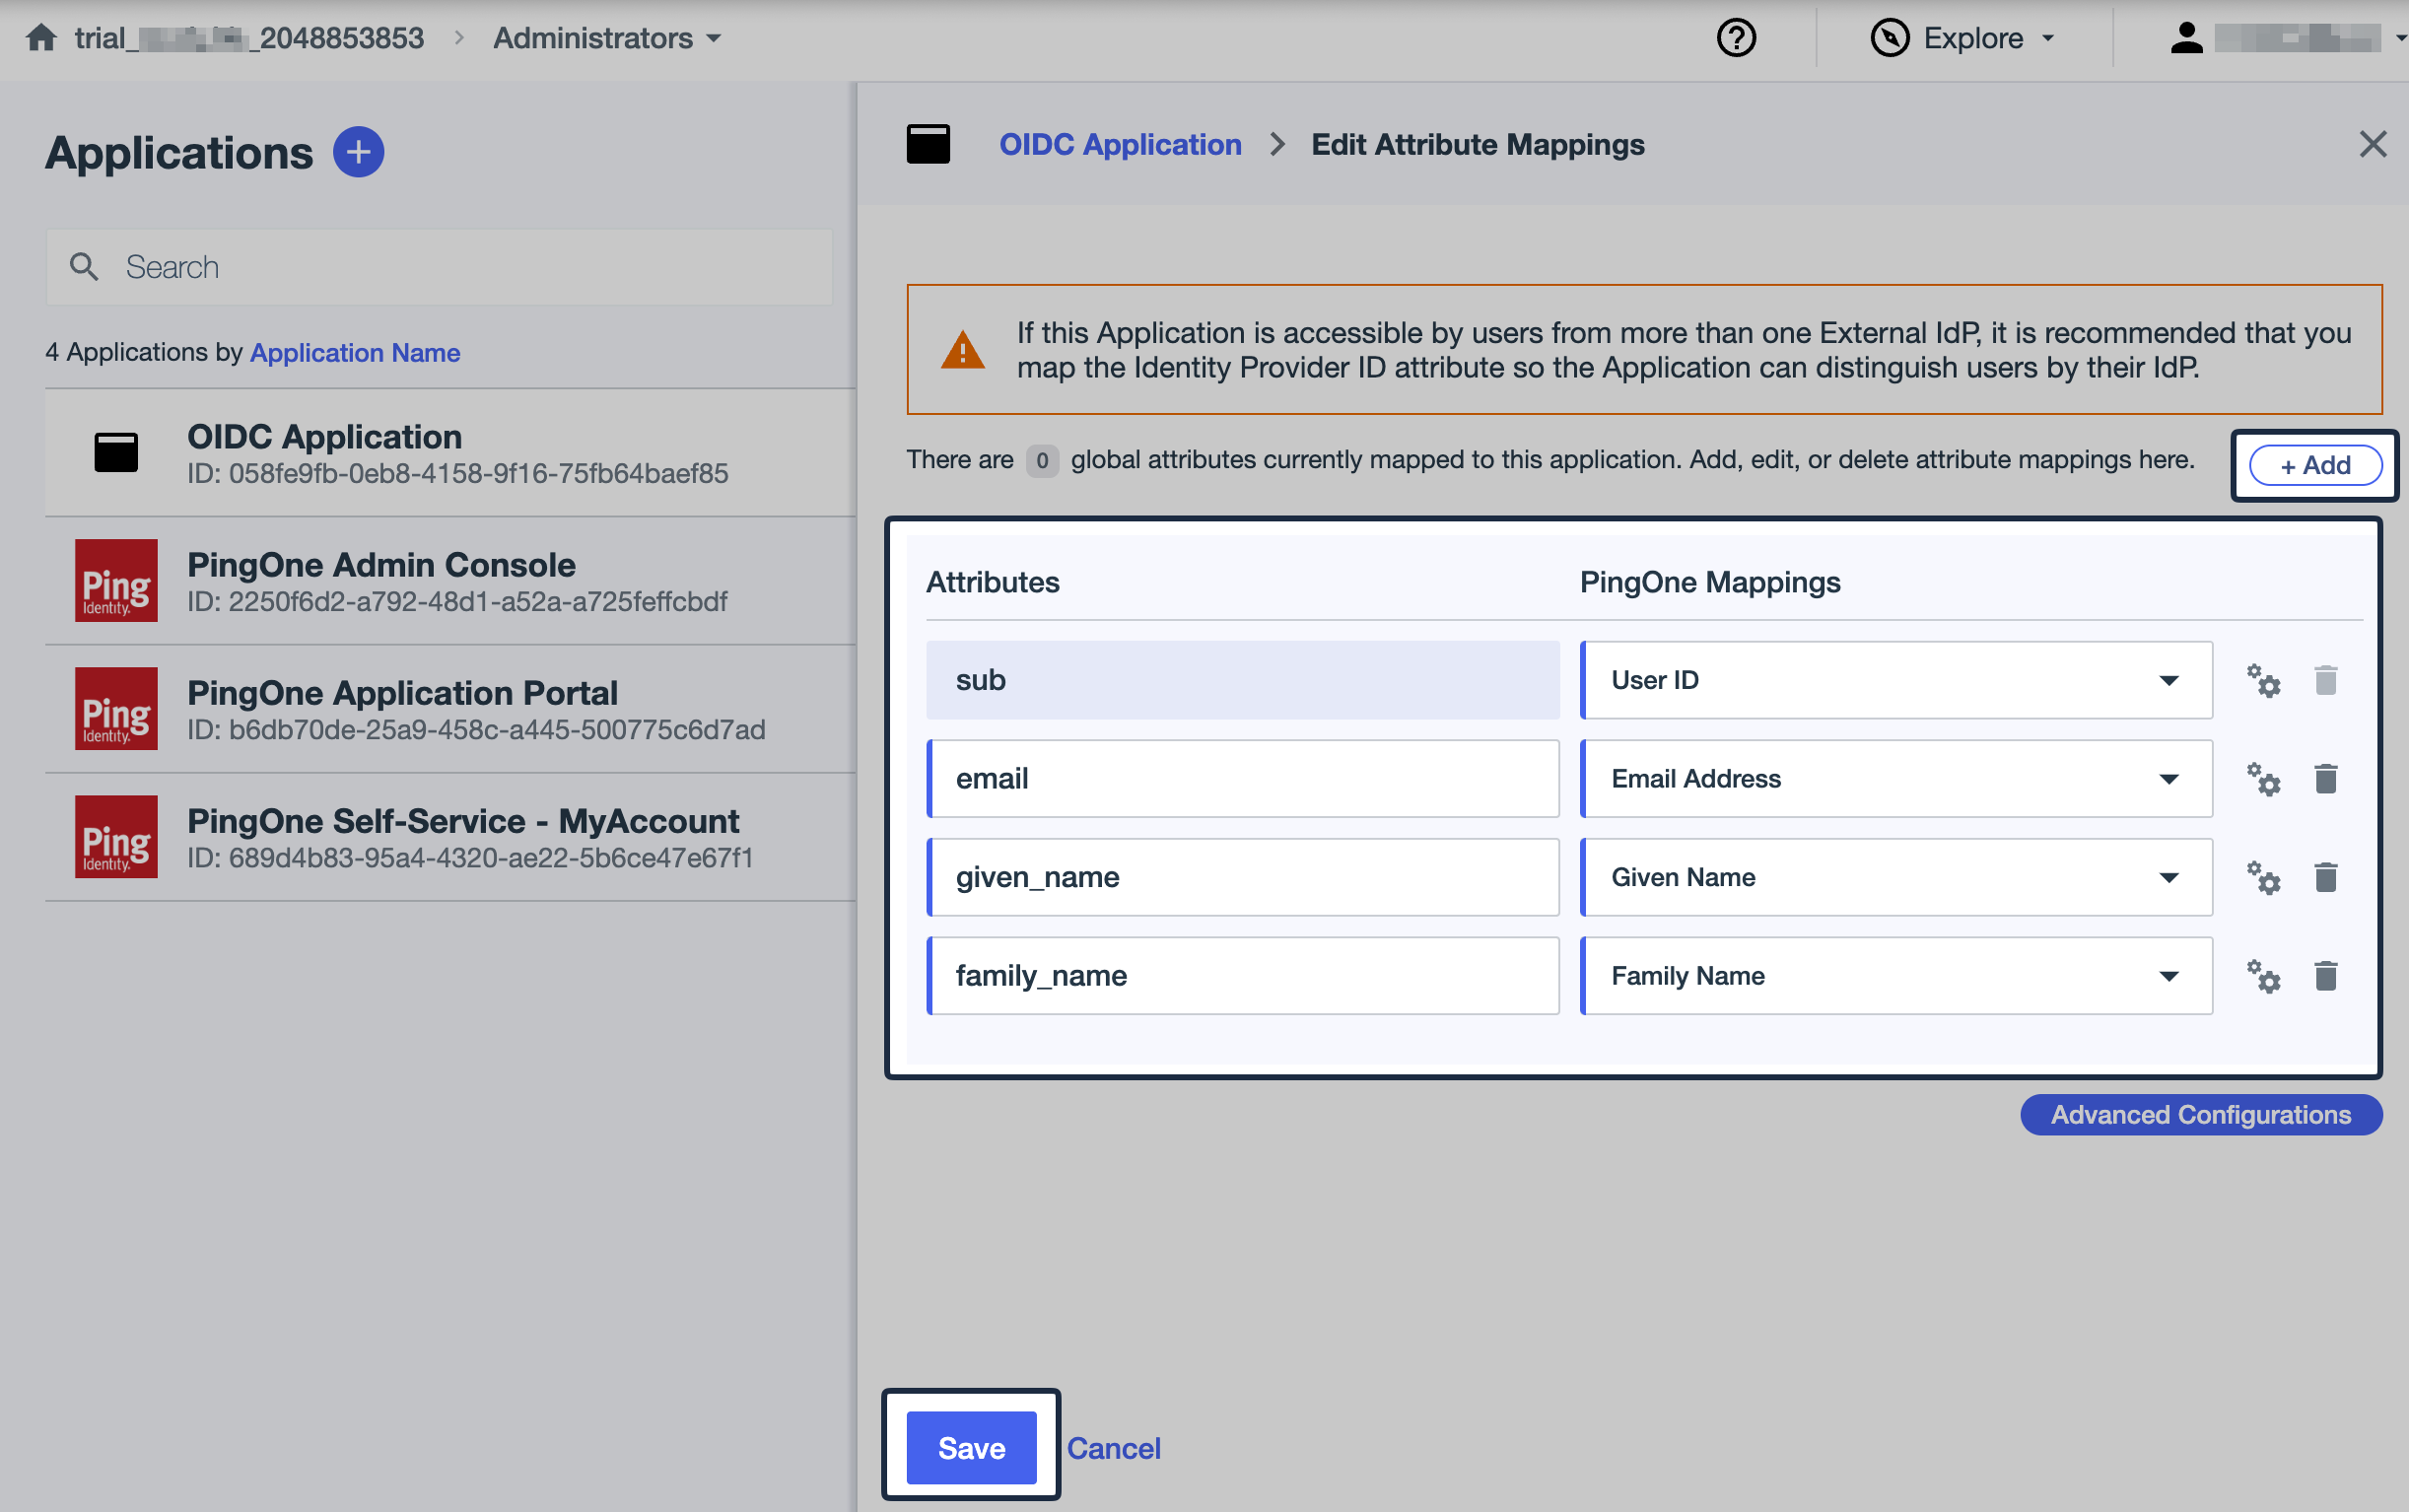
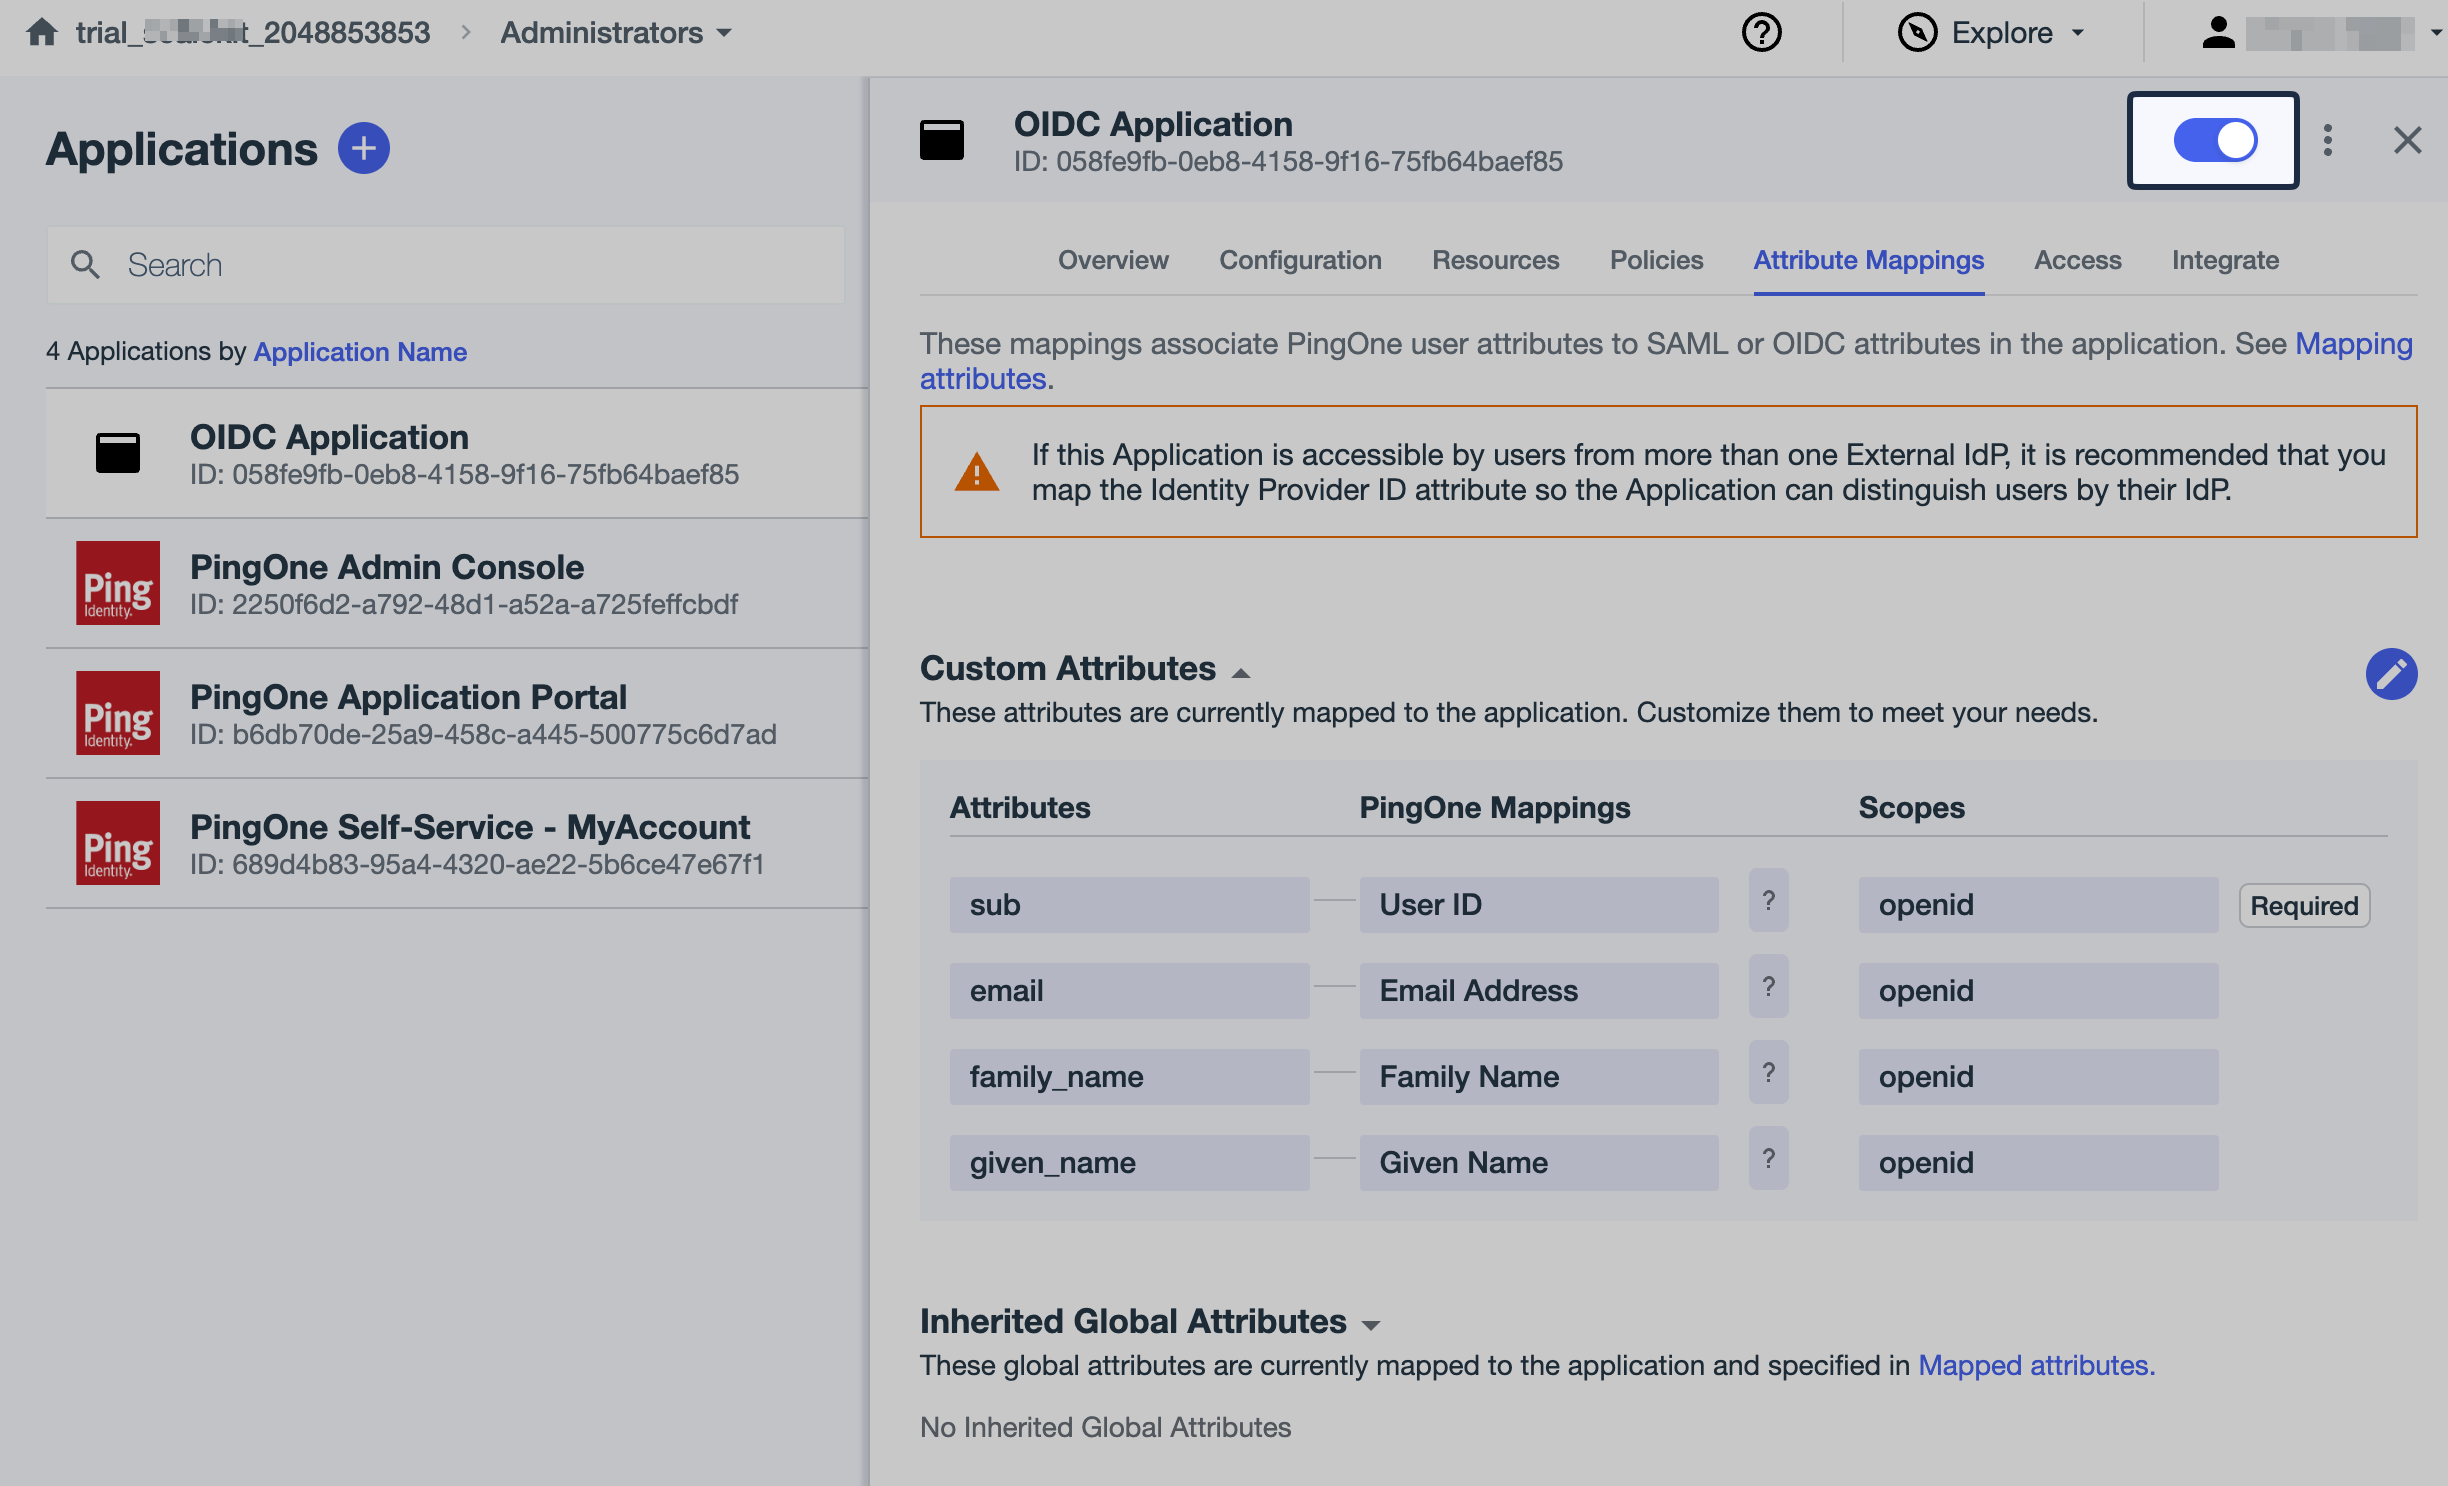
Configure Attributes
Section titled “Configure Attributes”Refer to the list of attributes shown on SSO Configuration Portal, these need to be added on Ping Identity.
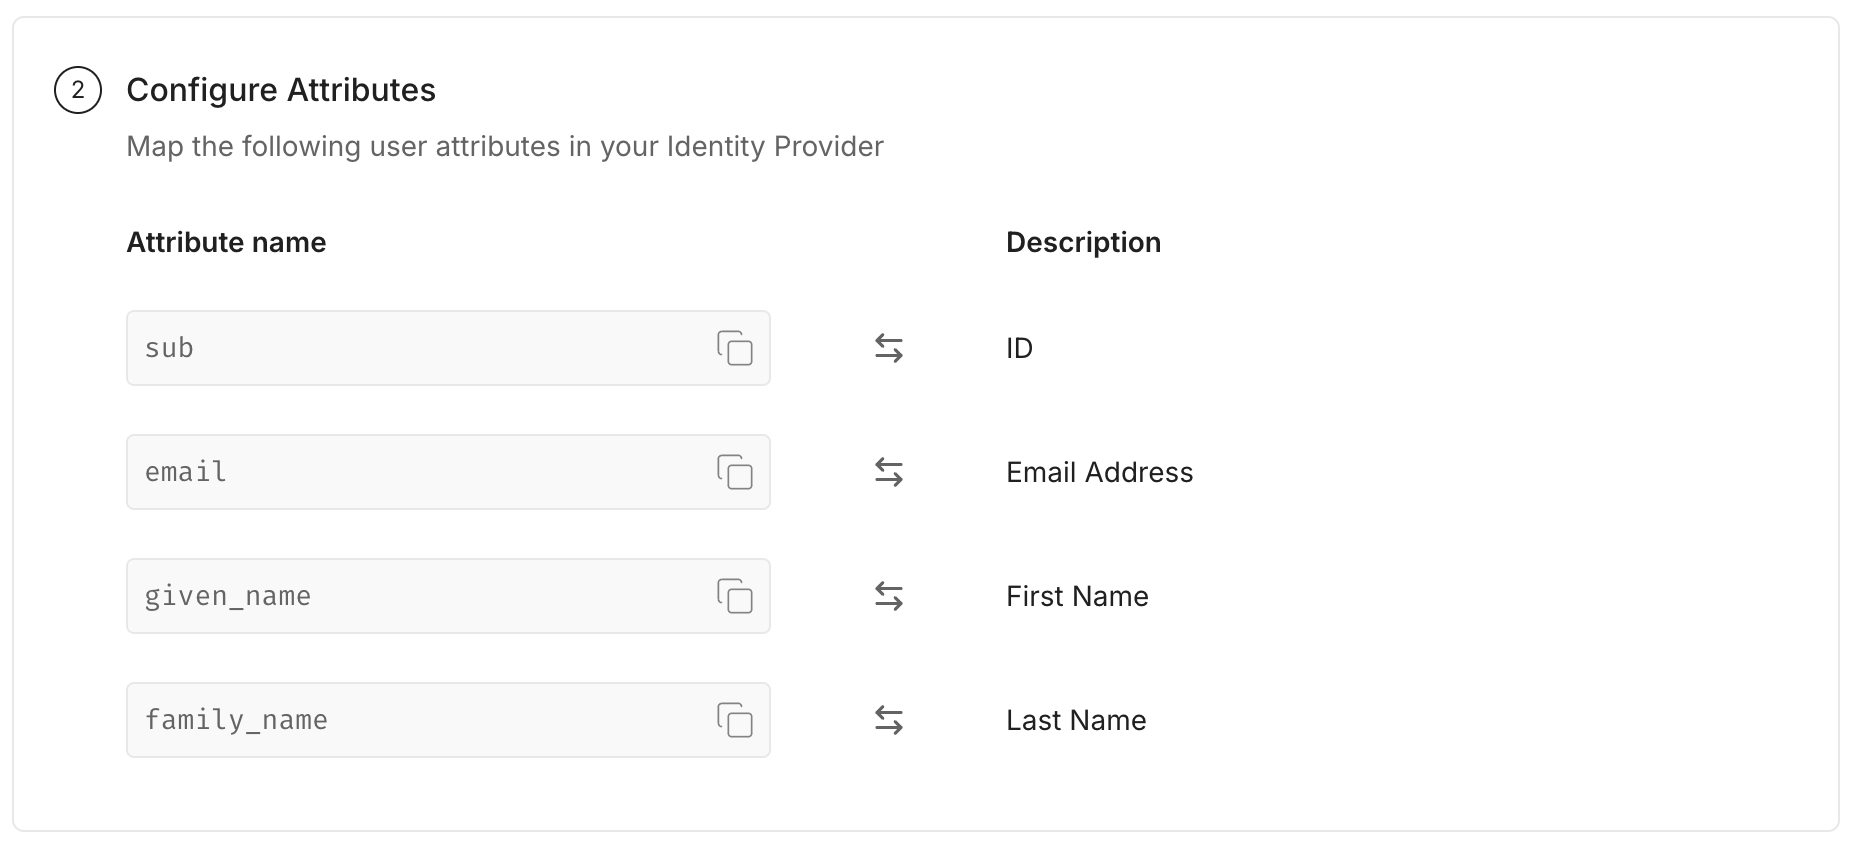
In Ping Identity, navigate to Attribute Mappings tab and click on Pencil icon to add attributes.
Click on Add button and add all attributes shown on SSO Configuration Portal to Ping Identity and then click Save.
Once you have finished the above step, turn on the toggle button to enable the application.
-
Test Connection
Section titled “Test Connection”In the SSO Configuration Portal, click Test Connection to verify your configuration.
-
Enable Single Sign-On
Section titled “Enable Single Sign-On”Once the test succeeds, click Enable Connection to allow users in your organization to sign in with Ping Identity OIDC.

This completes the Ping Identity OIDC SSO setup for your application.