Microsoft AD FS
Learn how to configure Microsoft AD FS as a SAML identity provider for secure single sign-on (SSO) with your application.
This guide walks you through configuring Single Sign-On (SSO) with Microsoft Active Directory Federation Services (AD FS) as your Identity Provider.
Before you begin
Section titled “Before you begin”To successfully set up AD FS SAML integration, you’ll need:
- Elevated access to your AD FS Management Console
- Access to the Admin Portal of the application you’re integrating Microsoft AD FS with
Configuration steps
Section titled “Configuration steps”-
Begin the configuration
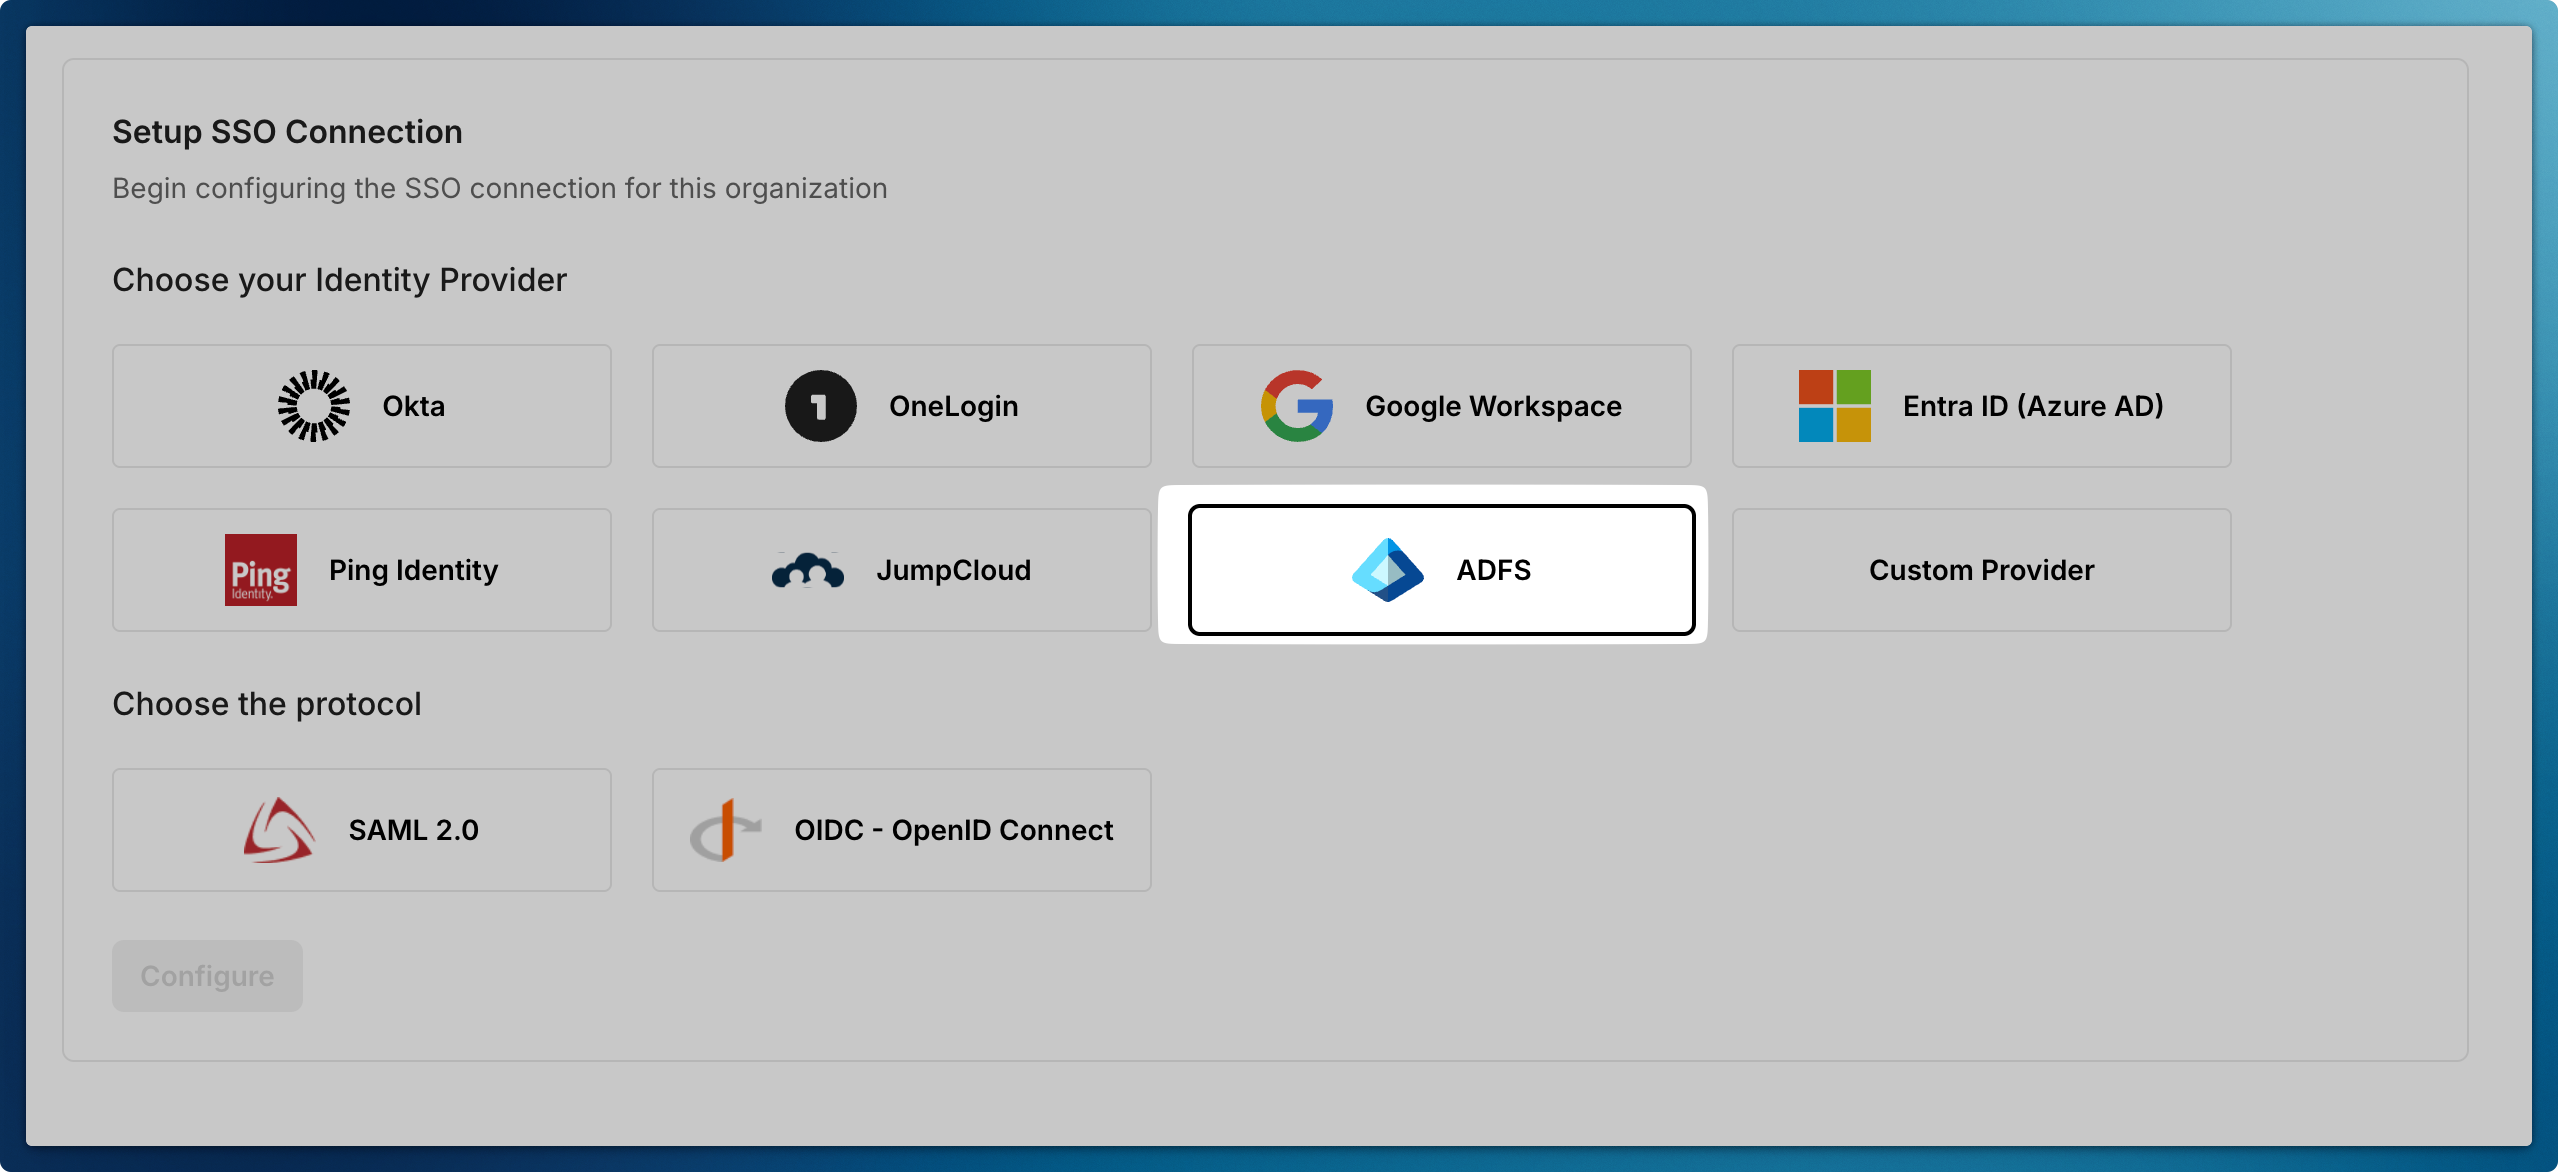
Section titled “Begin the configuration”Choose Microsoft AD FS as your identity provider
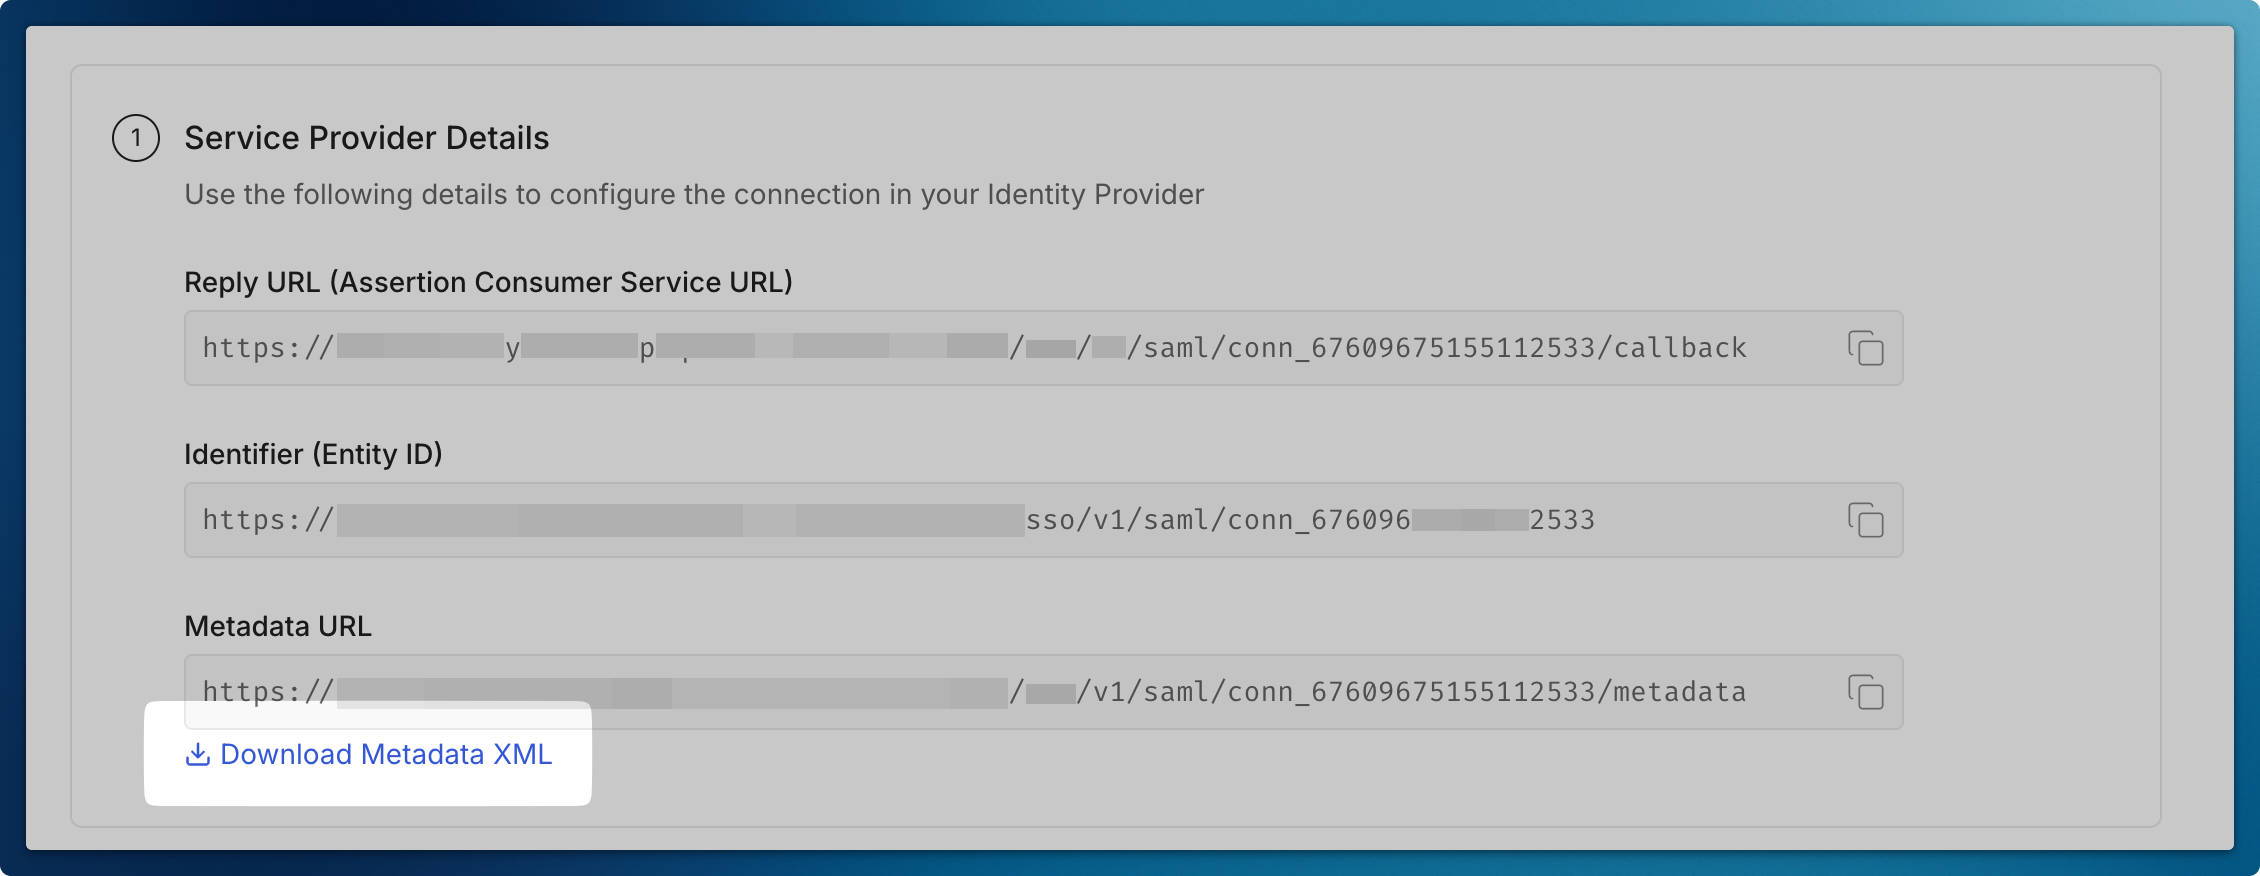
Download Metadata XML file so that you can configure AD FS Server going forward
-
Open AD FS Management Console
Section titled “Open AD FS Management Console”- Launch Server Manager
- Click ‘Tools’ in the top menu
- Select ‘AD FS Management’
-
Create a Relying Party Trust
Section titled “Create a Relying Party Trust”- In the left navigation pane, expand ‘Trust Relationships’
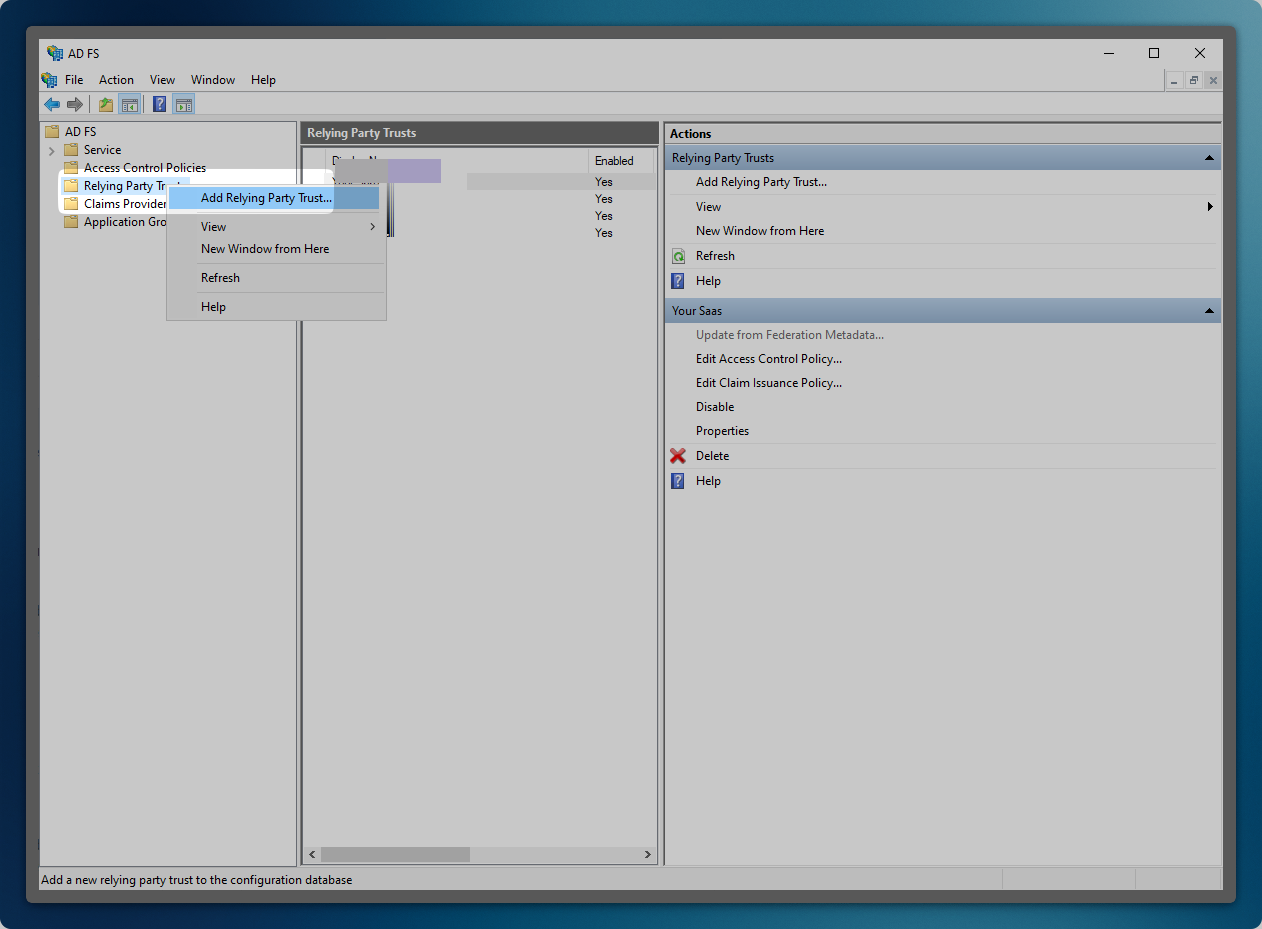
- Right-click ‘Relying Party Trusts’
- Select ‘Add Relying Party Trust’
- Click ‘Start’ to begin the configuration
-
Configure Trust Settings
Section titled “Configure Trust Settings”- Select ‘Claims aware’ as the trust type
- Choose ‘Enter data about the relying party manually’
- Click ‘Next’ to proceed
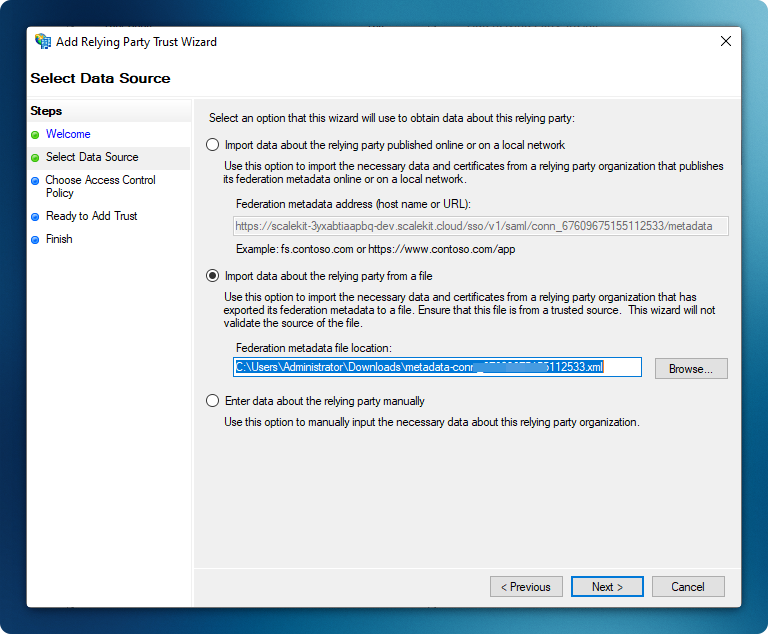
Import the Metadata XML file that you downloaded earlier
-
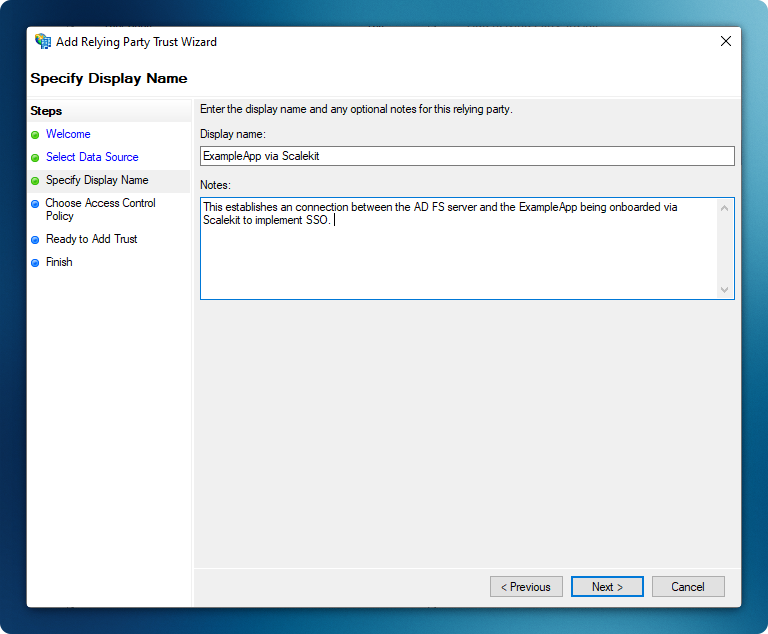
Set Display Name
Section titled “Set Display Name”- Enter a descriptive name for your application (e.g., “ExampleApp”)
- Click ‘Next’ to continue
-
Configure Access Control
Section titled “Configure Access Control”- Select an appropriate access control policy
- For purposes of this guide, select ‘Permit everyone’
- Click ‘Next’ to proceed
-
Review Trust Configuration
Section titled “Review Trust Configuration”- Verify the following settings:
- Monitoring configuration
- Endpoints
- Encryption settings
- Click ‘Next’ to continue
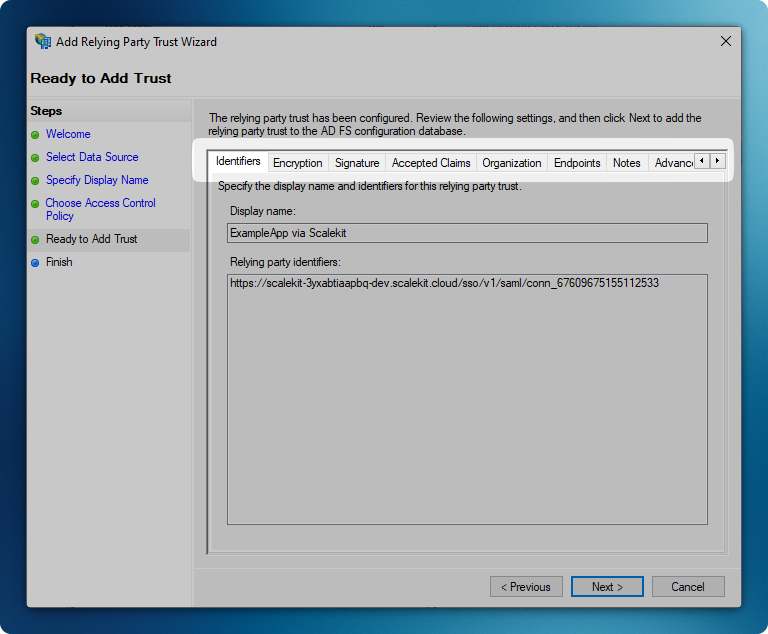
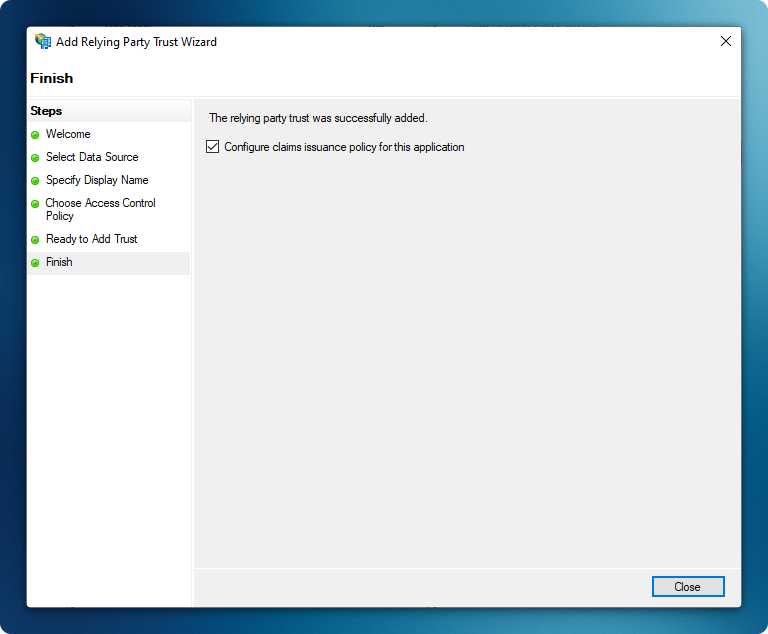
The wizard will complete with the ‘Edit Claim Issuance Policy’ option automatically selected
- Verify the following settings:
-
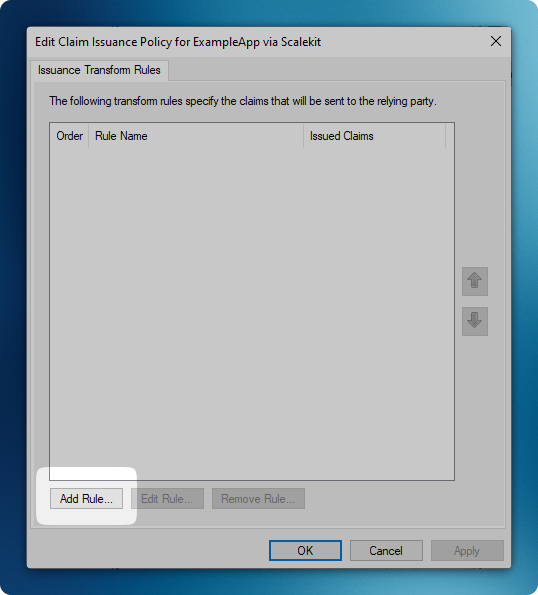
Create Claim Rules
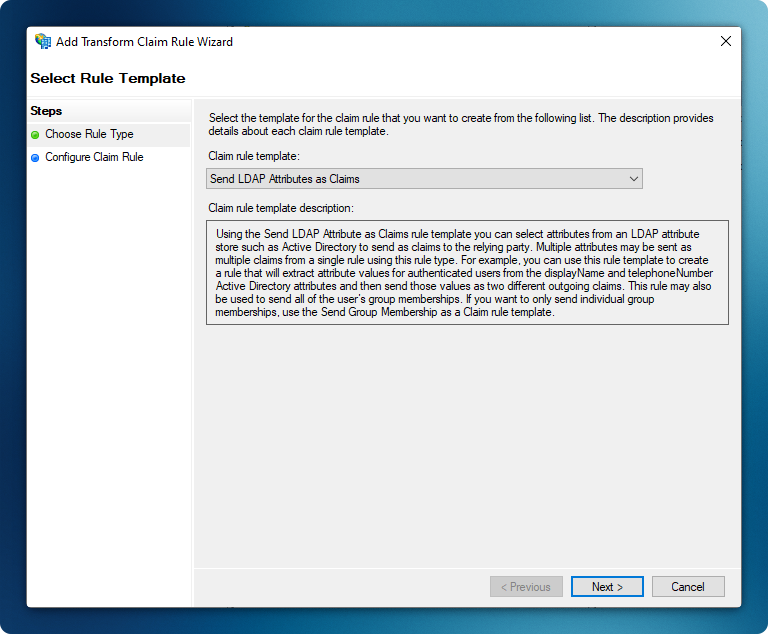
Section titled “Create Claim Rules”- Click ‘Add Rule’ to create a new claim rule
- Select ‘Send LDAP Attributes as Claims’ template
-
Map User Attributes
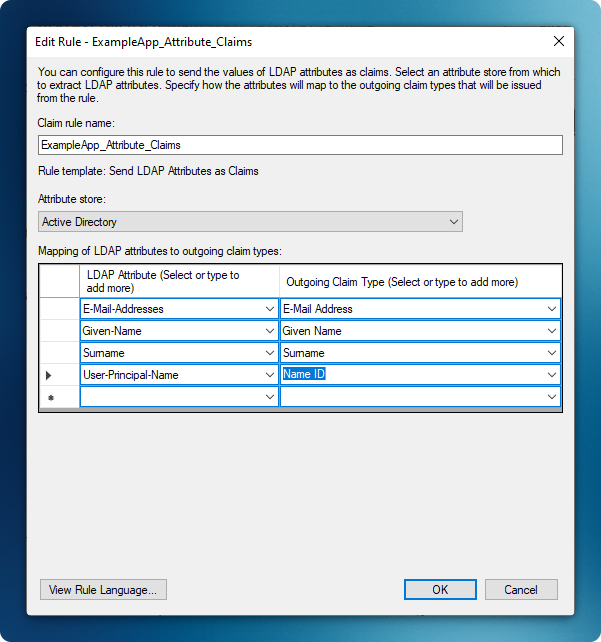
Section titled “Map User Attributes”- Enter a descriptive rule name (e.g., “Example App”)
- Configure the following attribute mappings:
E-Mail-Addresses→ E-Mail AddressGiven-Name→ Given NameSurname→ SurnameUser-Principal-Name→ Name ID
- Click ‘Finish’ to complete the mapping
-
Complete Admin Portal Configuration
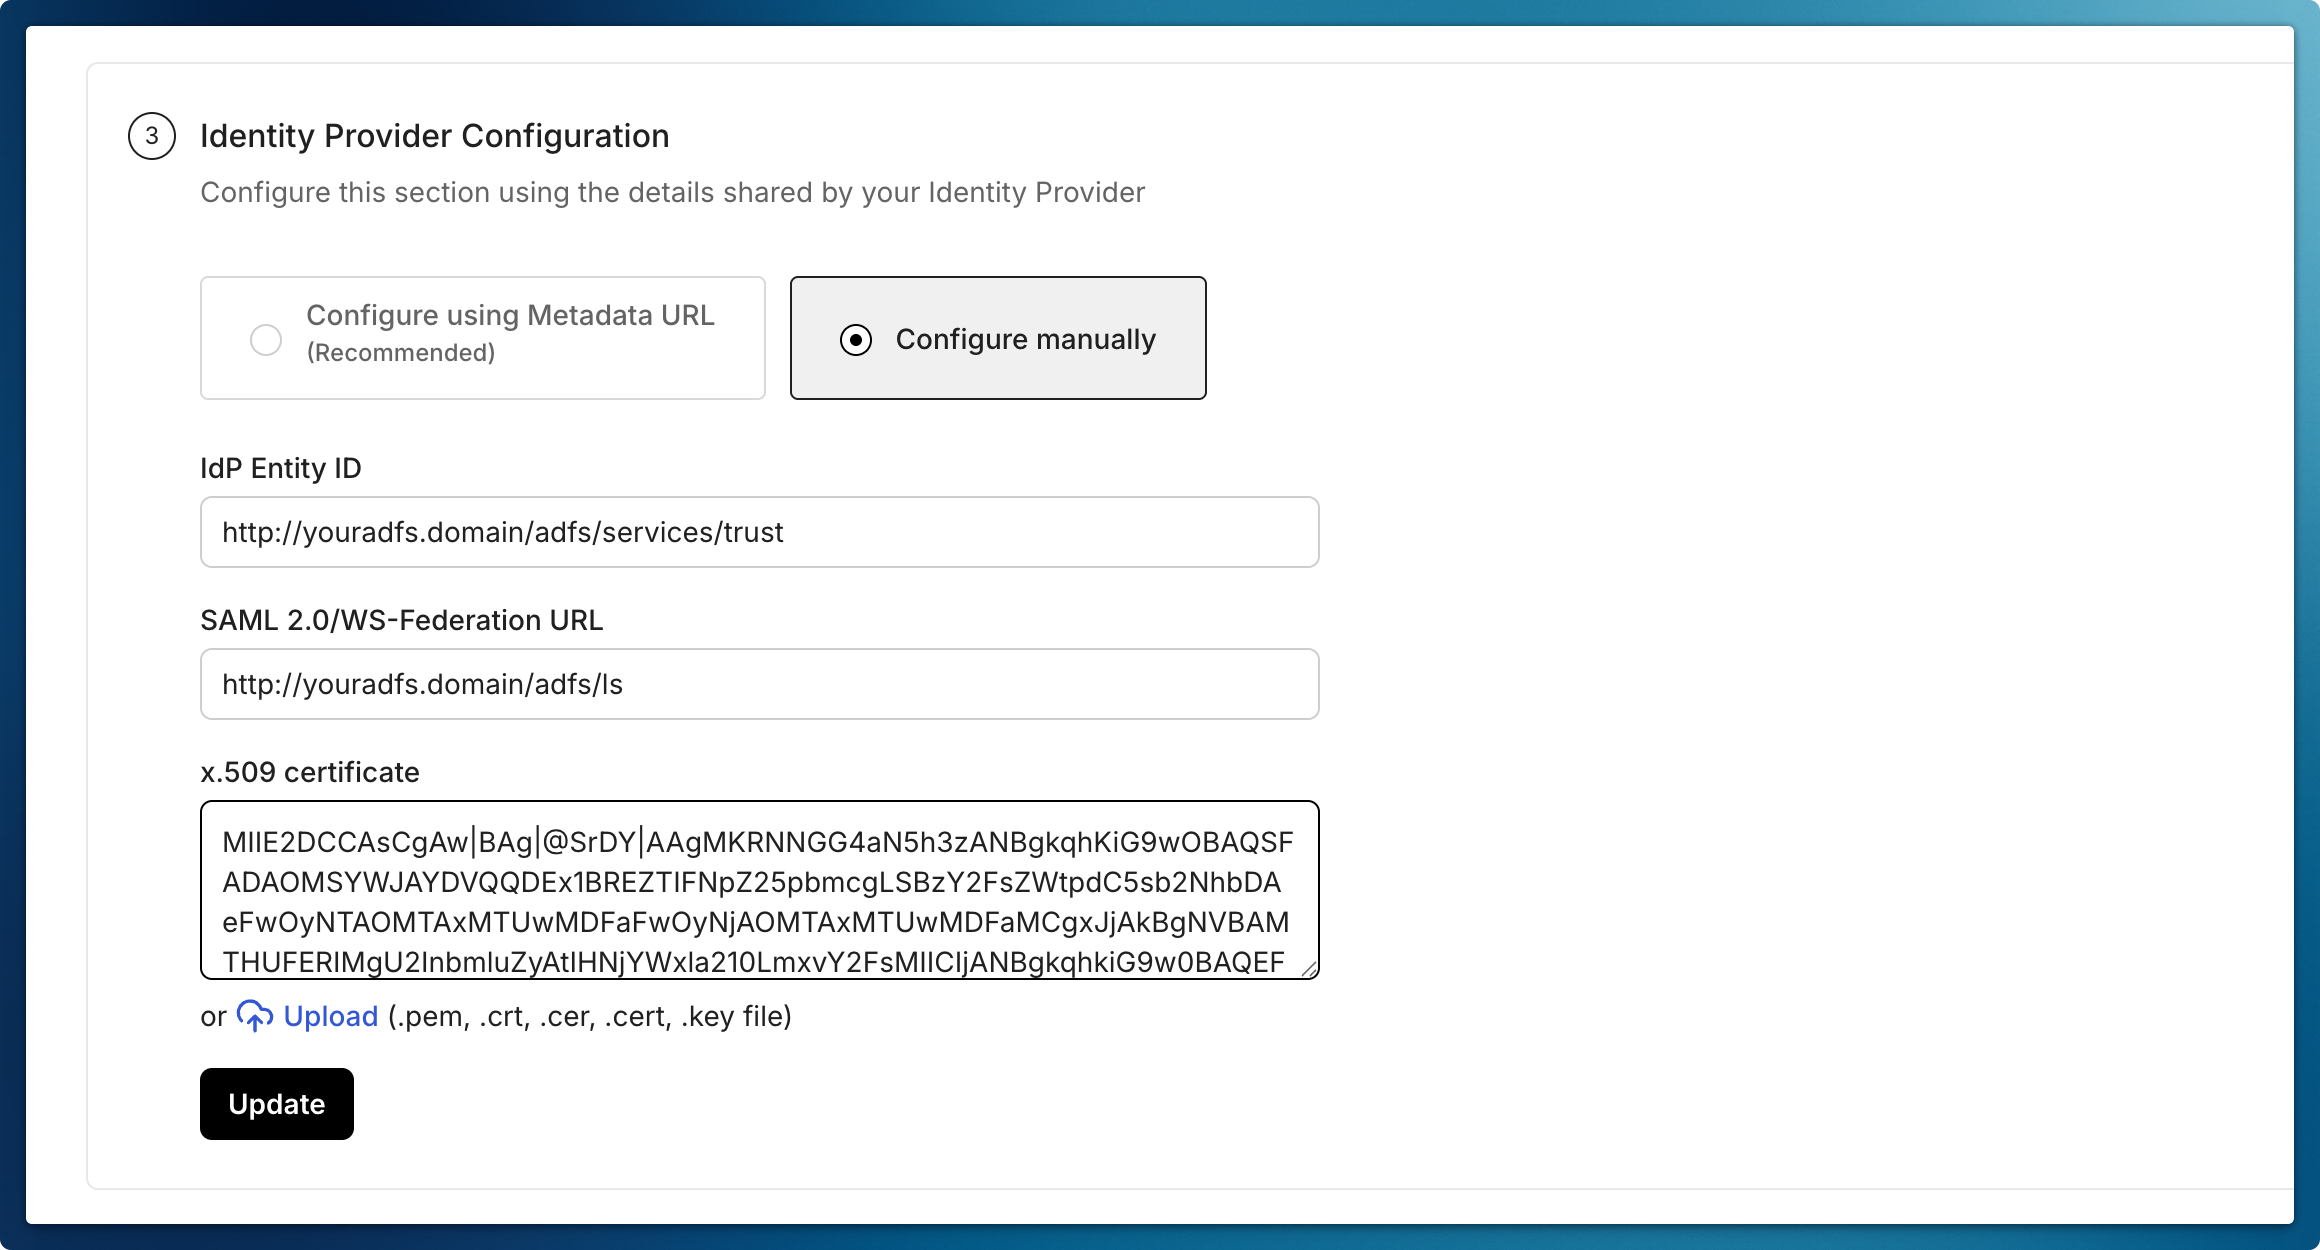
Section titled “Complete Admin Portal Configuration”- Navigate to Identity Provider Configuration in the Admin Portal
- Select “Configure Manually”
- The above endpoints are AD FS endpoints. You can find them listed in AD FS Console > Service > Endpoints > Tokens and Metadata sections. Enter these required details:
- Microsoft AD FS Identifier:
http://<your-adfs-server-domain>/adfs/services/trust - Login URL:
http://<your-adfs-server-domain>/adfs/ls - Certificate:
- Access Federation Metadata URL
- Locate the text after the first
X509Certificatetag - Copy and paste this certificate into the “Certificate” field
- Microsoft AD FS Identifier:
- Click “Update” to save the configuration
-
Test the Integration
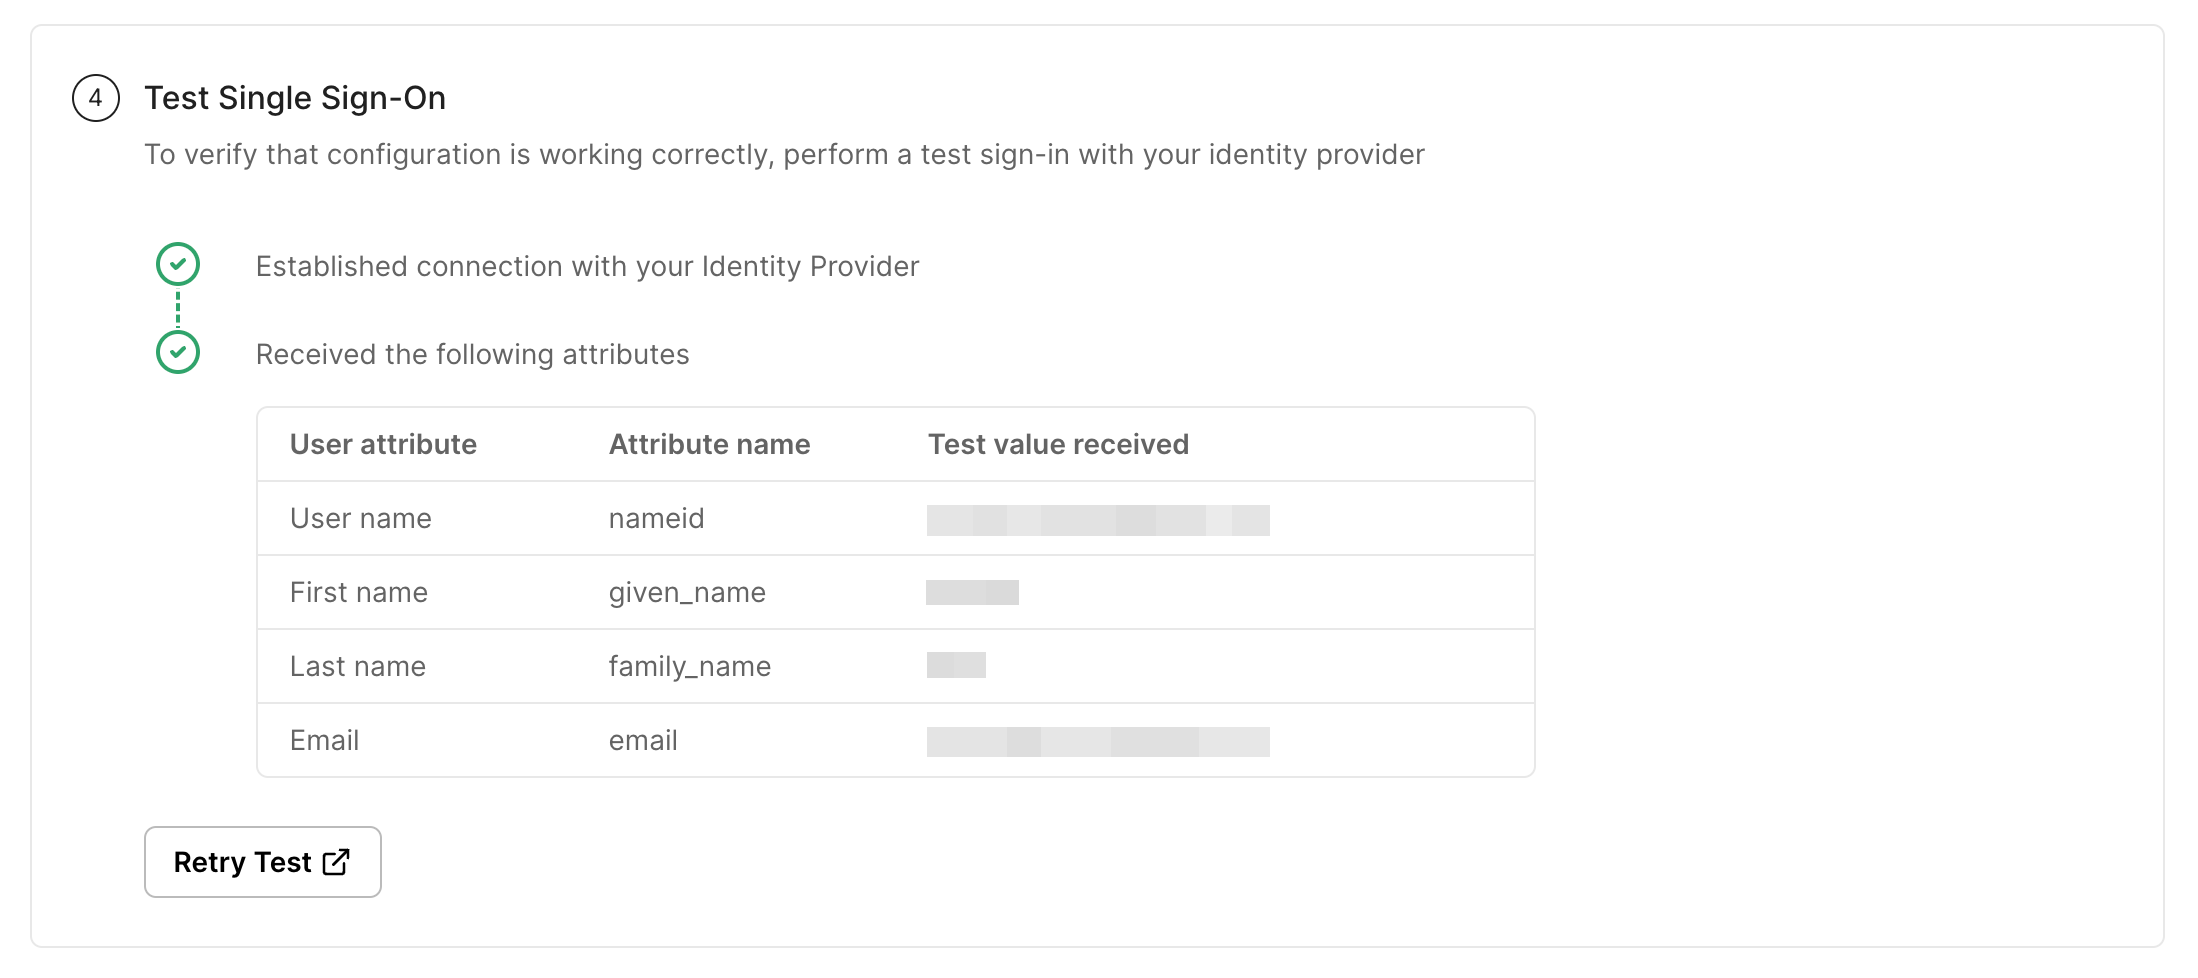
Section titled “Test the Integration”- In the Admin Portal, click “Test Connection”
- You will be redirected to the AD FS login page
- Enter your AD FS credentials
- Verify successful redirection back to the Admin Portal with the correct user attributes
-
Enable Connection
Section titled “Enable Connection”- Click on Enable Connection
- This will let all your selected users login to the new application via your AD FS SSO
