
Gong
Connect with Gong to sync calls, transcripts, insights, coaching and CRM activity
Connect with Gong to sync calls, transcripts, insights, coaching and CRM activity
Supports authentication: OAuth 2.0 , Api Key
Set up the agent connector
Section titled “Set up the agent connector”Register your Scalekit environment with the Gong connector so Scalekit handles the authentication flow and token lifecycle for you. The connection name you create will be used to identify and invoke the connection programmatically. You’ll need your app credentials from the Gong Developer Portal.
-
Set up auth redirects
-
In Scalekit dashboard, go to Agent Auth → Create Connection.
-
Find Gong from the list of providers and click Create.
-
Click Use your own credentials and copy the redirect URI. It looks like
https://<SCALEKIT_ENVIRONMENT_URL>/sso/v1/oauth/<CONNECTION_ID>/callback.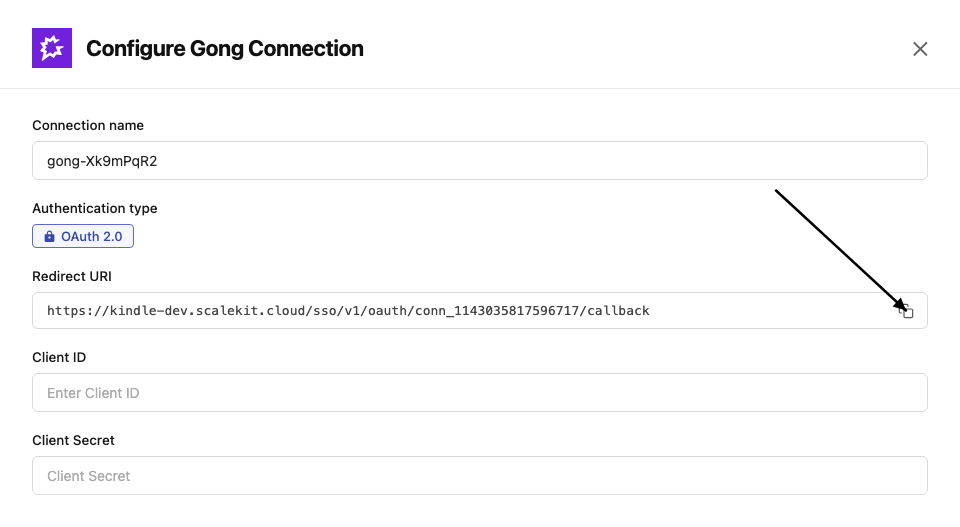
-
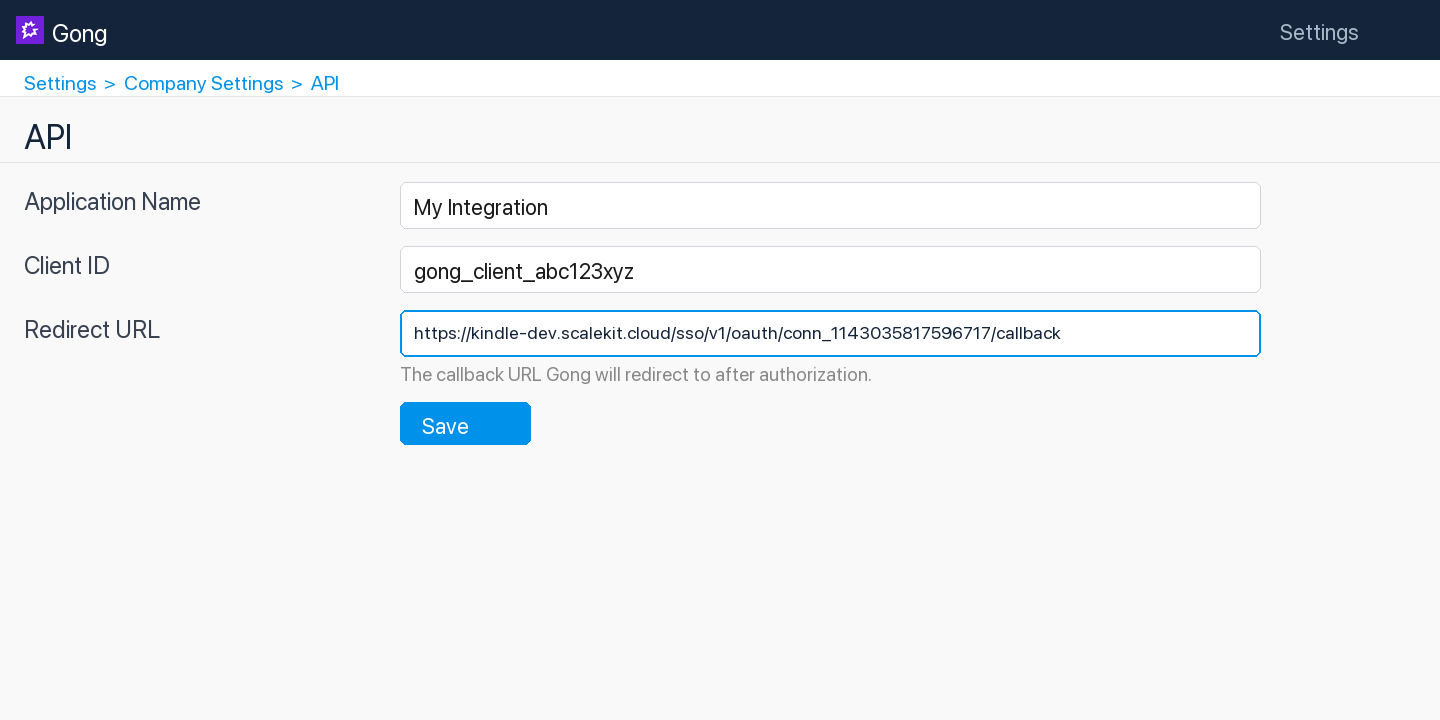
In the Gong Developer Portal, open your app.
-
Paste the copied URI into the Redirect URL field and click Save.
-
-
Get client credentials
- In the Gong Developer Portal, open your app:
- Client ID — listed under Client ID
- Client Secret — listed under Client Secret
- In the Gong Developer Portal, open your app:
-
Add credentials in Scalekit
-
In Scalekit dashboard, go to Agent Auth → Connections and open the connection you created.
-
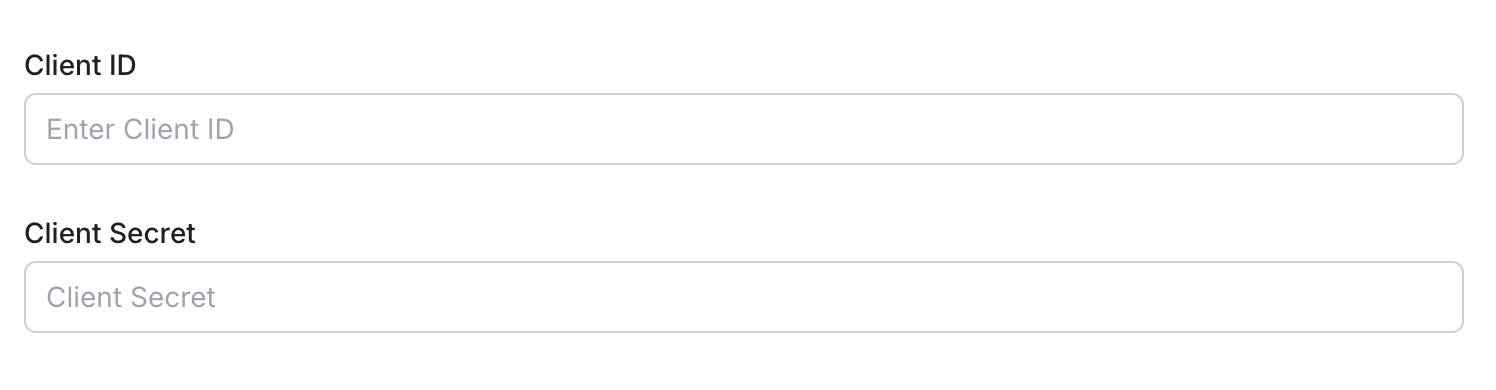
Enter your credentials:
- Client ID (from your Gong app)
- Client Secret (from your Gong app)
- Permissions — select the scopes your app needs
-
Click Save.
-
Connect a user’s Gong account and make API calls on their behalf — Scalekit handles OAuth and token management automatically.
You can interact with Gong in two ways — via direct proxy API calls or via Scalekit optimized tool calls. Scroll down to see the list of available Scalekit tools.
Proxy API Calls
import { ScalekitClient } from '@scalekit-sdk/node';import 'dotenv/config';
const connectionName = 'gong'; // get your connection name from connection configurationsconst identifier = 'user_123'; // your unique user identifier
// Get your credentials from app.scalekit.com → Developers → Settings → API Credentialsconst scalekit = new ScalekitClient( process.env.SCALEKIT_ENV_URL, process.env.SCALEKIT_CLIENT_ID, process.env.SCALEKIT_CLIENT_SECRET);const actions = scalekit.actions;
// Authenticate the userconst { link } = await actions.getAuthorizationLink({ connectionName, identifier,});console.log('🔗 Authorize Gong:', link);process.stdout.write('Press Enter after authorizing...');await new Promise(r => process.stdin.once('data', r));
// Make a request via Scalekit proxyconst result = await actions.request({ connectionName, identifier, path: '/v2/users', method: 'GET',});console.log(result);import scalekit.client, osfrom dotenv import load_dotenvload_dotenv()
connection_name = "gong" # get your connection name from connection configurationsidentifier = "user_123" # your unique user identifier
# Get your credentials from app.scalekit.com → Developers → Settings → API Credentialsscalekit_client = scalekit.client.ScalekitClient( client_id=os.getenv("SCALEKIT_CLIENT_ID"), client_secret=os.getenv("SCALEKIT_CLIENT_SECRET"), env_url=os.getenv("SCALEKIT_ENV_URL"),)actions = scalekit_client.actions
# Authenticate the userlink_response = actions.get_authorization_link( connection_name=connection_name, identifier=identifier)# present this link to your user for authorization, or click it yourself for testingprint("🔗 Authorize Gong:", link_response.link)input("Press Enter after authorizing...")
# Make a request via Scalekit proxyresult = actions.request( connection_name=connection_name, identifier=identifier, path="/v2/users", method="GET")print(result)Scalekit Tools
Tool list
Section titled “Tool list”gong_call_outcomes_list
Section titled “gong_call_outcomes_list”List all call outcome options configured in the Gong account. Returns outcome definitions such as name and ID that can be applied to calls to indicate the result of a conversation.
gong_calls_create
Section titled “gong_calls_create”Create (register) a new call in Gong. This adds a call record with metadata such as title, scheduled start time, participants, and direction. After creation, Gong returns a media upload URL that can be used to upload the call recording separately.
| Name | Type | Required | Description |
|---|---|---|---|
actual_start | string | Yes | The actual date and time the call started (ISO 8601 format, e.g., 2024-06-15T14:00:00Z). |
call_provider_code | string | No | The telephony or conferencing system used (e.g., ‘zoom’, ‘webex’, ‘ringcentral’). |
client_unique_id | string | No | A unique identifier for this call in your system, used to prevent duplicate uploads. |
direction | string | No | Direction of the call: ‘Inbound’ or ‘Outbound’. |
disposition | string | No | Outcome of the call (e.g., ‘Connected’, ‘No Answer’, ‘Left Voicemail’). |
duration | integer | No | Duration of the call in seconds. |
language | string | No | Primary language spoken on the call as a BCP-47 language tag (e.g., ‘en-US’, ‘es-ES’). |
parties | array<object> | No | Array of participant objects. Each participant should include emailAddress, name, speakerId, and userId fields. |
purpose | string | No | Purpose or topic of the call (e.g., ‘Discovery’, ‘Demo’, ‘QBR’). |
scheduled_end | string | No | Scheduled end time for the call (ISO 8601 format). |
scheduled_start | string | No | Scheduled start time for the call (ISO 8601 format). |
title | string | No | Title or subject of the call. |
workspace_id | string | No | Workspace ID to associate this call with a specific Gong workspace. |
gong_calls_get
Section titled “gong_calls_get”Retrieve extensive details for one or more Gong calls by their IDs. Returns enriched call data including participants, interaction stats, topics discussed, and CRM associations.
| Name | Type | Required | Description |
|---|---|---|---|
call_ids | array<string> | Yes | Array of Gong call IDs to retrieve extensive details for. |
cursor | string | No | Cursor value from a previous API response for paginating to the next page of results. |
from_date_time | string | No | Start of the date-time range to filter calls (ISO 8601 format). |
to_date_time | string | No | End of the date-time range to filter calls (ISO 8601 format). |
workspace_id | string | No | Optional workspace ID to restrict the results to a specific Gong workspace. |
gong_calls_list
Section titled “gong_calls_list”List Gong calls with optional filters for date range, workspace, and specific call IDs. Returns a page of calls with metadata such as title, duration, participants, and direction.
| Name | Type | Required | Description |
|---|---|---|---|
call_ids | string | No | Comma-separated list of specific call IDs to retrieve. |
cursor | string | No | Cursor value from a previous API response for paginating to the next page of results. |
from_date_time | string | No | Start of the date-time range for filtering calls (ISO 8601 format, e.g., 2024-01-01T00:00:00Z). |
to_date_time | string | No | End of the date-time range for filtering calls (ISO 8601 format, e.g., 2024-12-31T23:59:59Z). |
workspace_id | string | No | Optional workspace ID to restrict results to a specific Gong workspace. |
gong_calls_transcript_get
Section titled “gong_calls_transcript_get”Retrieve transcripts for one or more Gong calls by their IDs. Returns speaker-attributed, sentence-level transcript segments with timing offsets for each call.
| Name | Type | Required | Description |
|---|---|---|---|
call_ids | array<string> | Yes | Array of Gong call IDs whose transcripts to retrieve. |
cursor | string | No | Cursor value from a previous API response for paginating to the next page of results. |
from_date_time | string | No | Start of the date-time range to filter calls (ISO 8601 format). |
to_date_time | string | No | End of the date-time range to filter calls (ISO 8601 format). |
workspace_id | string | No | Optional workspace ID to restrict the results to a specific Gong workspace. |
gong_coaching_get
Section titled “gong_coaching_get”Get coaching data from Gong, including coaching sessions and feedback provided by managers to their team members. Supports cursor-based pagination for large result sets.
| Name | Type | Required | Description |
|---|---|---|---|
cursor | string | No | Cursor value from a previous response for paginating to the next page of results. |
gong_engage_digital_interactions_create
Section titled “gong_engage_digital_interactions_create”Add a digital interaction event (such as a web visit, content engagement, or other digital touchpoint) to a Gong Engage prospect’s activity timeline.
| Name | Type | Required | Description |
|---|---|---|---|
crm_account_id | string | No | The CRM account ID associated with this interaction. |
crm_contact_id | string | No | The CRM contact ID associated with this interaction. |
event_name | string | Yes | Name of the digital interaction event (e.g., ‘Visited Pricing Page’, ‘Downloaded Whitepaper’). |
event_timestamp | string | Yes | Timestamp when the digital interaction occurred (ISO 8601 format). |
prospect_email | string | No | Email address of the prospect who performed this digital interaction. |
url | string | No | URL associated with the digital interaction (e.g., the page visited or content accessed). |
gong_engage_email_activity_report
Section titled “gong_engage_email_activity_report”Report email engagement events (opens, clicks, bounces, unsubscribes) to Gong Engage so they appear in the activity timeline for a prospect.
| Name | Type | Required | Description |
|---|---|---|---|
email_id | string | Yes | External identifier for the email message that was engaged with. |
event_timestamp | string | Yes | Timestamp when the engagement event occurred (ISO 8601 format). |
event_type | string | Yes | The type of email engagement event to report. |
link_url | string | No | For EMAIL_LINK_CLICKED events, the URL of the link that was clicked. |
prospect_email | string | Yes | Email address of the prospect who triggered this engagement event. |
gong_engage_flow_content_override
Section titled “gong_engage_flow_content_override”Override field placeholder values in a Gong Engage flow for specific prospects, allowing personalized content without modifying the base flow template.
| Name | Type | Required | Description |
|---|---|---|---|
field_values | object | Yes | Key-value pairs of field placeholder names and their override values to substitute into the flow content. |
flow_instance_id | string | Yes | The unique ID of the flow instance to override content for. Retrieve from the Get Flows for Prospects endpoint. |
gong_engage_flow_folders_list
Section titled “gong_engage_flow_folders_list”List all Gong Engage flow folders available to a user, including company folders, personal folders, and folders shared with the specified user.
| Name | Type | Required | Description |
|---|---|---|---|
cursor | string | No | Cursor value from a previous API response for paginating to the next page of results. |
flow_owner_email | string | Yes | Email address of the Gong user whose flow folders to retrieve. Returns company folders plus personal and shared folders for this user. |
workspace_id | string | No | Optional workspace ID to filter flow folders by a specific workspace. |
gong_engage_flows_list
Section titled “gong_engage_flows_list”List all Gong Engage flows available to a user, including company flows, personal flows, and flows shared with the specified user.
| Name | Type | Required | Description |
|---|---|---|---|
cursor | string | No | Cursor value from a previous API response for paginating to the next page of results. |
flow_owner_email | string | Yes | Email address of the Gong user whose flows to retrieve. Returns company flows plus personal and shared flows for this user. |
workspace_id | string | No | Optional workspace ID to filter flows by a specific workspace. |
gong_engage_prospects_assign
Section titled “gong_engage_prospects_assign”Assign up to 200 CRM prospects (contacts or leads) to a specific Gong Engage flow.
| Name | Type | Required | Description |
|---|---|---|---|
crm_prospect_ids | array<string> | Yes | Array of CRM prospect IDs (contacts or leads) to assign to the flow. Maximum 200 per request. |
flow_id | string | Yes | The unique ID of the Gong Engage flow to assign the prospects to. |
flow_instance_owner_email | string | Yes | Email address of the Gong user who will own the flow to-dos and be responsible for this flow instance. |
gong_engage_prospects_assign_cool_off_override
Section titled “gong_engage_prospects_assign_cool_off_override”Assign CRM prospects to a Gong Engage flow while overriding the cool-off period restriction that would normally prevent re-enrollment.
| Name | Type | Required | Description |
|---|---|---|---|
crm_prospect_ids | array<string> | Yes | Array of CRM prospect IDs (contacts or leads) to assign to the flow, bypassing the cool-off period. Maximum 200 per request. |
flow_id | string | Yes | The unique ID of the Gong Engage flow to assign the prospects to. |
flow_instance_owner_email | string | No | Email address of the Gong user who will own the flow to-dos and be responsible for this flow instance. |
gong_engage_prospects_bulk_assign
Section titled “gong_engage_prospects_bulk_assign”Asynchronously bulk assign CRM prospects to a Gong Engage flow; returns an assignment ID that can be used to poll the operation status.
| Name | Type | Required | Description |
|---|---|---|---|
crm_prospect_ids | array<string> | Yes | Array of CRM prospect IDs (contacts or leads) to bulk assign to the flow. |
flow_id | string | Yes | The unique ID of the Gong Engage flow to assign the prospects to. |
flow_instance_owner_email | string | No | Email address of the Gong user who will own the flow to-dos and be responsible for this flow instance. |
gong_engage_prospects_bulk_assign_status
Section titled “gong_engage_prospects_bulk_assign_status”Retrieve the status and result of a previously submitted bulk prospect-to-flow assignment operation using its assignment ID.
| Name | Type | Required | Description |
|---|---|---|---|
assignment_id | string | Yes | The unique ID of the bulk assignment operation to check, returned from the Bulk Assign Prospects to Flow request. |
gong_engage_prospects_flows_list
Section titled “gong_engage_prospects_flows_list”List all Gong Engage flows currently assigned to a given set of CRM prospects (contacts or leads).
| Name | Type | Required | Description |
|---|---|---|---|
crm_prospect_ids | array<string> | Yes | Array of CRM prospect IDs (contacts or leads) to look up flow assignments for. Maximum 200 prospects per request. |
gong_engage_prospects_unassign
Section titled “gong_engage_prospects_unassign”Unassign CRM prospects (contacts or leads) from a specific Gong Engage flow using their CRM IDs, removing them from the flow sequence.
| Name | Type | Required | Description |
|---|---|---|---|
crm_prospect_ids | array<string> | Yes | Array of CRM prospect IDs (contacts or leads) to remove from the flow. |
flow_id | string | Yes | The unique ID of the Gong Engage flow to unassign the prospects from. |
gong_engage_prospects_unassign_by_instance
Section titled “gong_engage_prospects_unassign_by_instance”Unassign prospects from a Gong Engage flow using flow instance IDs rather than CRM prospect IDs.
| Name | Type | Required | Description |
|---|---|---|---|
flow_instance_ids | array<string> | Yes | Array of flow instance IDs identifying the specific prospect-flow enrollments to remove. |
gong_engage_task_complete
Section titled “gong_engage_task_complete”Mark a specific Gong Engage task as completed.
| Name | Type | Required | Description |
|---|---|---|---|
completion_notes | string | No | Optional notes about how the task was completed. |
task_id | string | Yes | The unique ID of the Gong Engage task to mark as completed. |
gong_engage_task_skip
Section titled “gong_engage_task_skip”Skip a specific Gong Engage task, indicating it should not be performed for this prospect.
| Name | Type | Required | Description |
|---|---|---|---|
skip_reason | string | No | Optional reason for skipping this task. |
task_id | string | Yes | The unique ID of the Gong Engage task to skip. |
gong_engage_tasks_list
Section titled “gong_engage_tasks_list”List Gong Engage tasks for a specified user, such as call tasks, email tasks, LinkedIn tasks, and other follow-up actions.
| Name | Type | Required | Description |
|---|---|---|---|
assignee_email | string | Yes | Email address of the Gong user whose tasks to retrieve. |
cursor | string | No | Cursor value from a previous response for paginating to the next page of results. |
from_date | string | No | Start date for filtering tasks (ISO 8601 format, e.g., 2024-01-01T00:00:00Z). |
to_date | string | No | End date for filtering tasks (ISO 8601 format, e.g., 2024-12-31T23:59:59Z). |
workspace_id | string | No | Optional workspace ID to filter tasks by a specific workspace. |
gong_engage_users_list
Section titled “gong_engage_users_list”List all active Gong users in the organization, useful for finding user emails to use as flow owners or assignees in Gong Engage.
| Name | Type | Required | Description |
|---|---|---|---|
cursor | string | No | Cursor value from a previous API response for paginating to the next page of results. |
include_avatars | boolean | No | Whether to include avatar URLs in the response. |
gong_engage_workspaces_list
Section titled “gong_engage_workspaces_list”List all company workspaces in Gong, which can be used to scope Gong Engage flows and tasks to specific business units or teams.
gong_library_folder_content_get
Section titled “gong_library_folder_content_get”Get the content of a specific Gong library folder by its folder ID. Returns calls, clips, and other media items stored inside the folder.
| Name | Type | Required | Description |
|---|---|---|---|
folder_id | string | Yes | The unique identifier of the library folder whose content should be retrieved. |
gong_library_folders_list
Section titled “gong_library_folders_list”List all library folders in the Gong account. Returns folder names, IDs, and hierarchy information. Optionally filter by workspace to retrieve folders scoped to a specific business unit.
| Name | Type | Required | Description |
|---|---|---|---|
workspace_id | string | No | Optional workspace ID to filter library folders belonging to a specific Gong workspace. |
gong_scorecards_list
Section titled “gong_scorecards_list”List all scorecard settings configured in the Gong account. Returns scorecard definitions including name, questions, and associated criteria used for call review and coaching.
gong_stats_interaction
Section titled “gong_stats_interaction”Get aggregated interaction statistics for Gong calls within a date range. Returns metrics such as talk ratio, longest monologue, patience, question rate, and interactivity for each participant. Optionally filter by specific call IDs.
| Name | Type | Required | Description |
|---|---|---|---|
call_ids | array<string> | No | Optional array of specific Gong call IDs to filter the statistics. |
cursor | string | No | Cursor value from a previous response for paginating to the next page of results. |
from_date_time | string | Yes | Start of the date range for retrieving interaction statistics (ISO 8601 format, e.g., 2024-01-01T00:00:00Z). |
to_date_time | string | Yes | End of the date range for retrieving interaction statistics (ISO 8601 format, e.g., 2024-12-31T23:59:59Z). |
gong_stats_user_actions
Section titled “gong_stats_user_actions”Get user activity and scorecard statistics for Gong calls within a date range. Returns aggregated scorecard metrics and activity data per user. Optionally filter by specific user IDs.
| Name | Type | Required | Description |
|---|---|---|---|
cursor | string | No | Cursor value from a previous response for paginating to the next page of results. |
from_date_time | string | Yes | Start of the date range for retrieving scorecard statistics (ISO 8601 format, e.g., 2024-01-01T00:00:00Z). |
to_date_time | string | Yes | End of the date range for retrieving scorecard statistics (ISO 8601 format, e.g., 2024-12-31T23:59:59Z). |
user_ids | array<string> | No | Optional array of Gong user IDs to filter scorecard statistics for specific users. |
gong_trackers_list
Section titled “gong_trackers_list”List all tracker (keyword tracker) settings configured in the Gong account. Returns tracker definitions including name, tracked phrases, and associated categories used for monitoring conversation topics.
gong_users_get
Section titled “gong_users_get”Get detailed user information for specific Gong users using an extensive filter. Filter by user IDs or by a creation date range. Returns full user profiles including settings, roles, and manager details.
| Name | Type | Required | Description |
|---|---|---|---|
created_from_date_time | string | No | Return users created on or after this date-time (ISO 8601 format, e.g., 2024-01-01T00:00:00Z). |
created_to_date_time | string | No | Return users created on or before this date-time (ISO 8601 format, e.g., 2024-12-31T23:59:59Z). |
cursor | string | No | Cursor value from a previous response for paginating to the next page of results. |
user_ids | array<string> | No | Array of Gong user IDs to retrieve detailed information for. |
gong_users_list
Section titled “gong_users_list”List all users in the Gong account. Returns user profiles including name, email, title, and manager information. Supports cursor-based pagination and optionally includes avatar URLs.
| Name | Type | Required | Description |
|---|---|---|---|
cursor | string | No | Cursor value from a previous response for paginating to the next page of results. |
include_avatars | boolean | No | Whether to include avatar image URLs in the response. |