The Gmail connector lets your AI agent act in each user's Gmail account. Each user signs in to Gmail once, and Scalekit stores and refreshes their tokens, so your agent never handles credentials. It comes with 48 tools.
- Tools
- 48
- What they doRead · write · destructive
- 21 · 19 · 821 read19 write8 destructive
- Users sign in with
- OAuth
- OAuth app
- Your own Google app
What you can do
- Read emails: fetch messages, threads, and attachments from any label or inbox
- Send and reply: compose new emails and reply to existing threads on behalf of your users
- Search messages: query Gmail with full search syntax to find emails by sender, subject, or content
- Manage labels: apply, remove, and list labels to organize messages
- Access contacts: look up contacts and people from the user’s address book
Setup
Install the SDK
Terminal window npm install @scalekit-sdk/node dotenvTerminal window pip install scalekit-sdk-python python-dotenvSet your credentials
Add your Scalekit credentials to your
.envfile. Find values in app.scalekit.com > Developers > API Credentials..env SCALEKIT_ENVIRONMENT_URL=<your-environment-url>SCALEKIT_CLIENT_ID=<your-client-id>SCALEKIT_CLIENT_SECRET=<your-client-secret>Create the Gmail connection
In AgentKit > Connections, create a Gmail connection and copy its redirect URI. The name you give it is the
connection_nameyour code passes. See Configure connections.Register a Google OAuth app
Scalekit credentials aren't available for Gmail. In Google Cloud Console, enable the Gmail API and create an OAuth client ID for a web application, with the redirect URI you copied.
Then enter the app's Client ID and Client Secret on the Gmail connection.
Console steps with screenshots
Register your Scalekit environment with the Gmail connector so Scalekit handles the authentication flow and token lifecycle for you. The connection name you create will be used to identify and invoke the connection programmatically. Then complete the configuration in your application as follows:
-
Set up auth redirects
-
In Scalekit dashboard, go to AgentKit > Connections > Create Connection. Find Gmail and click Create.
-
Copy the redirect URI. It looks like
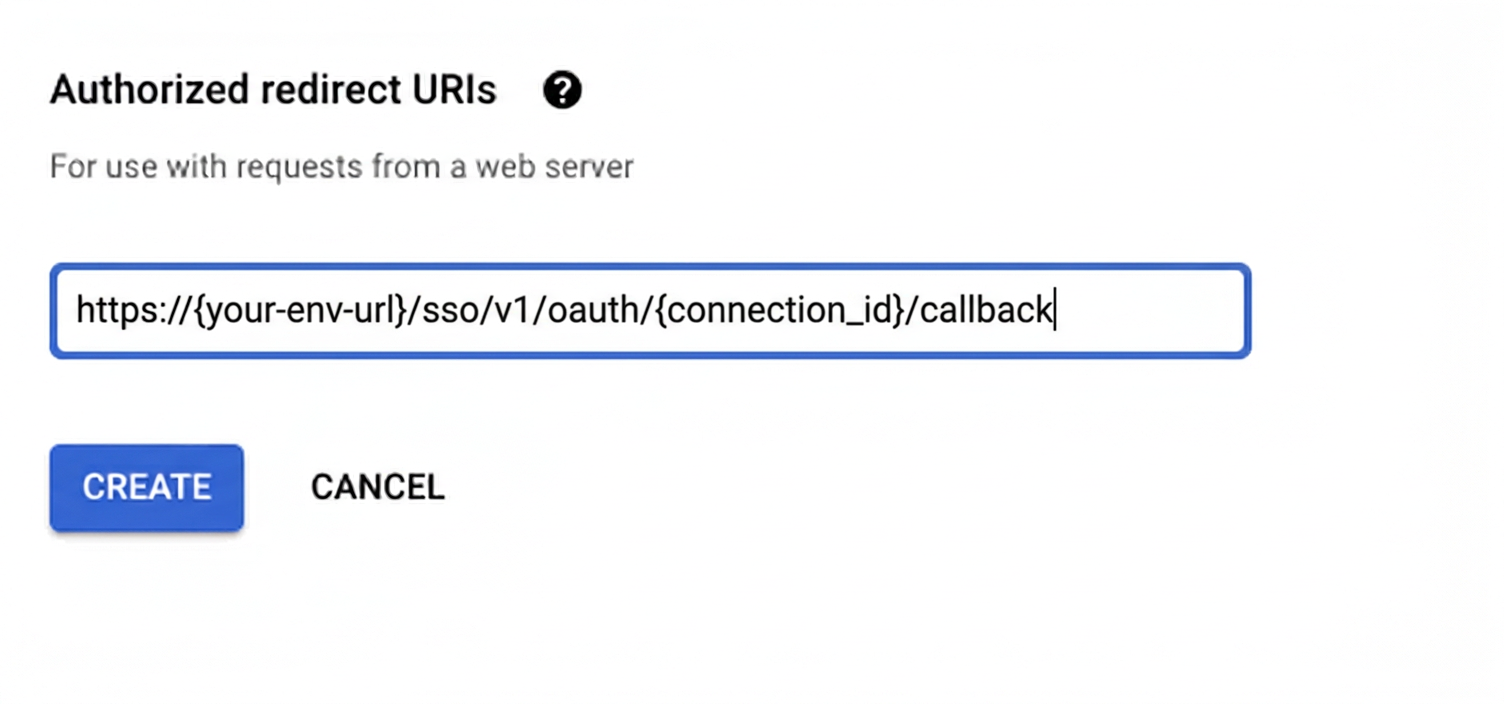
https://<SCALEKIT_ENVIRONMENT_URL>/sso/v1/oauth/<CONNECTION_ID>/callback.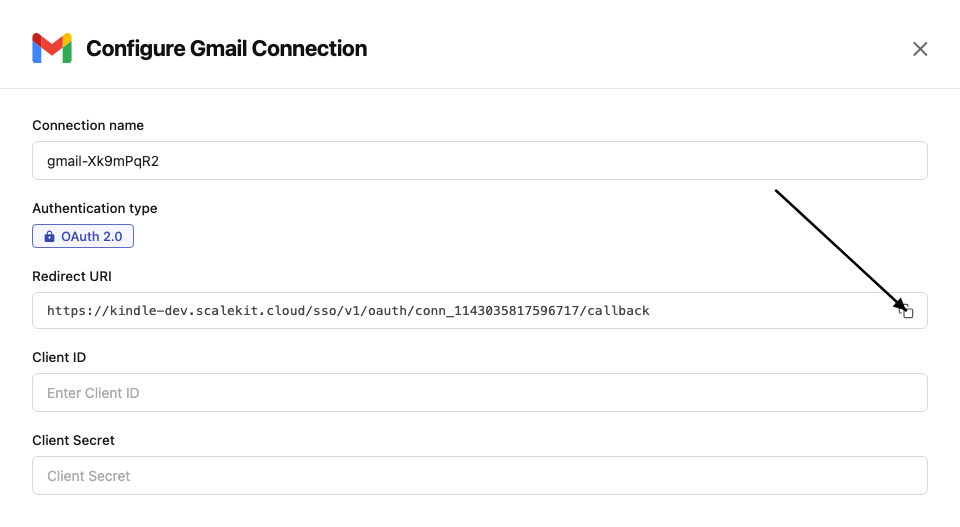
-
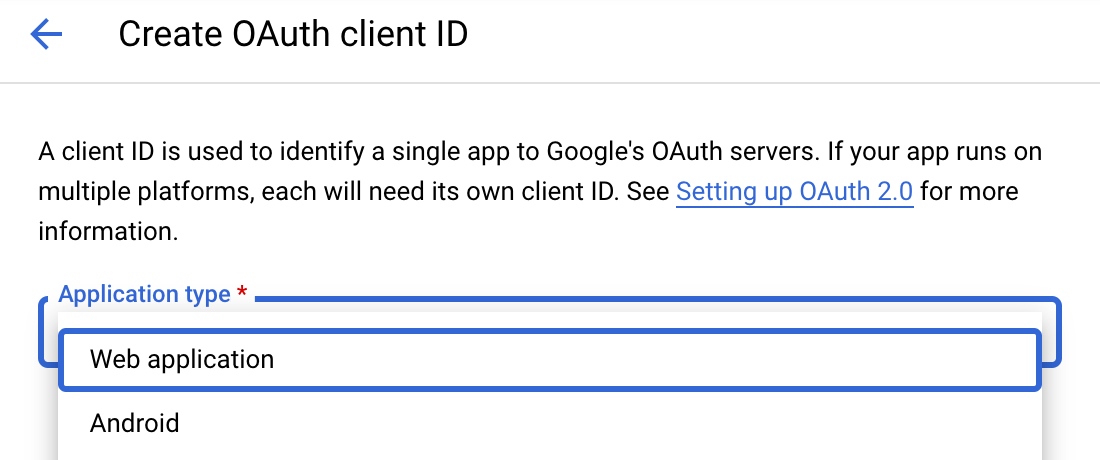
Navigate to Google Cloud Console → APIs & Services → Credentials. Click + Create Credentials, then OAuth client ID. Choose Web application as the application type.
-
Under Authorized redirect URIs, click + Add URI, paste the redirect URI, and click Create.
-
-
Enable Gmail API
-
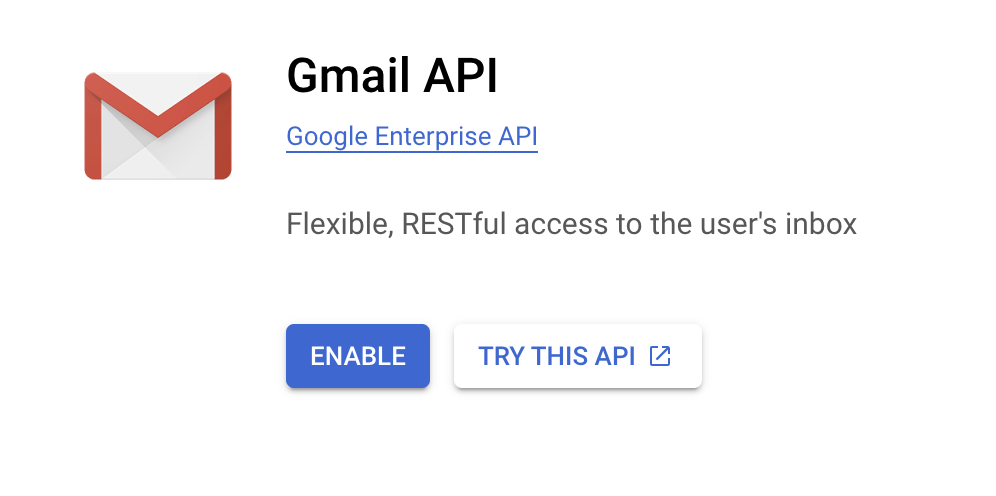
In Google Cloud Console, go to APIs & Services → Library. Search for “Gmail API” and click Enable.
-
-
Get client credentials
Google provides your Client ID and Client Secret after you create the OAuth client ID in step 1.
-
Add credentials in Scalekit
-
In Scalekit dashboard, go to AgentKit > Connections and open the connection you created.
-
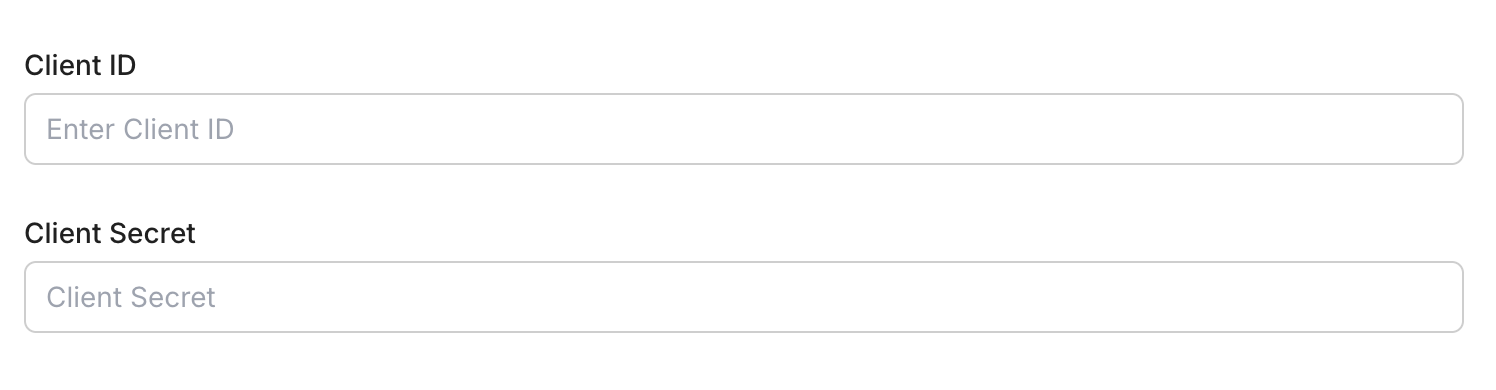
Enter your credentials:
- Client ID (from above)
- Client Secret (from above)
- Permissions (scopes beginning with
gmail— see Google API Scopes reference)
-
Click Save.
-
-
Authorize a user and make your first call
quickstart.mts import { ScalekitClient } from '@scalekit-sdk/node'import 'dotenv/config'import { createInterface } from 'node:readline/promises'const scalekit = new ScalekitClient(process.env.SCALEKIT_ENVIRONMENT_URL,process.env.SCALEKIT_CLIENT_ID,process.env.SCALEKIT_CLIENT_SECRET,)const actions = scalekit.actionsconst connector = 'gmail'const identifier = 'user_123'// Generate an authorization link for the userconst { link } = await actions.getAuthorizationLink({ connectionName: connector, identifier })console.log('Authorize Gmail:', link)const rl = createInterface({ input: process.stdin, output: process.stdout })await rl.question('Press Enter after authorizing...')rl.close()// Make your first callconst result = await actions.executeTool({connector,identifier,toolName: 'gmail_fetch_mails',toolInput: {},})console.log(result)Terminal window npx tsx quickstart.mtsquickstart.py import osfrom scalekit import ScalekitClientfrom dotenv import load_dotenvload_dotenv()scalekit_client = ScalekitClient(env_url=os.getenv("SCALEKIT_ENVIRONMENT_URL"),client_id=os.getenv("SCALEKIT_CLIENT_ID"),client_secret=os.getenv("SCALEKIT_CLIENT_SECRET"),)actions = scalekit_client.actionsconnection_name = "gmail"identifier = "user_123"# Generate an authorization link for the userlink_response = actions.get_authorization_link(connection_name=connection_name,identifier=identifier,)print("Authorize Gmail:", link_response.link)input("Press Enter after authorizing...")# Make your first callresult = actions.execute_tool(tool_input={},tool_name="gmail_fetch_mails",connection_name=connection_name,identifier=identifier,)print(result)Terminal window python quickstart.pyEach user signs in once. See Authorize a user for the full flow and statuses.
Tools
Pass the exact name toexecute_toolgmail_fetch_mailsFetch emails from a connected Gmail account using search filters.Read-onlyFetch Emails from Gmail
Fetch emails from a connected Gmail account using search filters. Requires a valid Gmail OAuth2 connection.
Inputs
formatstring- Format of the returned message.one of
minimalfullrawmetadatadefaultmetadata include_spam_trashboolean- Whether to fetch emails from spam and trash foldersdefault
false label_idsarray- Gmail label IDs to filter messages
max_resultsinteger- Maximum number of emails to fetch
page_tokenstring- Page token for pagination
querystring- Search query string using Gmail's search syntax (e.g., 'is:unread from:user@example.com')
Also accepts
schema_versionandtool_versionto pin a version.gmail_get_attachment_by_idRetrieve a specific attachment from a Gmail message using the message ID and attachment ID.Read-onlyFetch Attachment by Gmail ID
Retrieve a specific attachment from a Gmail message using the message ID and attachment ID.
Inputs
attachment_idstringrequired- Unique Gmail attachment ID
message_idstringrequired- Unique Gmail message ID that contains the attachment
file_namestring- Preferred filename to use when saving/returning the attachment
Also accepts
schema_versionandtool_versionto pin a version.gmail_get_auto_forwardingGet the auto-forwarding settings for the authenticated Gmail account, showing whether incoming mail is automatically forwarded to another address and what happens to the local copy.Read-onlyGet Auto-Forwarding Settings
Get the auto-forwarding settings for the authenticated Gmail account, showing whether incoming mail is automatically forwarded to another address and what happens to the local copy. Uses OAuth credentials.
Inputs
This tool takes no inputs.
gmail_get_contactsFetch a list of contacts from the connected Gmail account.Read-onlyFetch Gmail Contacts
Fetch a list of contacts from the connected Gmail account. Supports pagination and field filtering.
Inputs
max_resultsinteger- Maximum number of contacts to fetch
page_tokenstring- Token to retrieve the next page of results
person_fieldsarray- Fields to include for each person
Also accepts
schema_versionandtool_versionto pin a version.gmail_get_draftRetrieve a specific Gmail draft by draft ID.Read-onlyGet Gmail Draft
Retrieve a specific Gmail draft by draft ID. Optionally control the format of the returned message content. Uses OAuth credentials.
Inputs
draft_idstringrequired- The Gmail draft ID to retrieve. Obtain this from a list drafts operation. Example: 'r-1234567890123456789'.
formatstring- The format of the returned draft message. 'full' returns the parsed email with headers and body. 'minimal' returns only IDs and labels. 'raw' returns the full RFC 2822 message as a base64url string. 'metadata' returns headers only.one of
minimalfullrawmetadata
Also accepts
schema_versionandtool_versionto pin a version.gmail_get_filterGet details for a specific email filter in the authenticated Gmail account, including its criteria and actions.Read-onlyGet Email Filter
Get details for a specific email filter in the authenticated Gmail account, including its criteria and actions. Use the List Email Filters tool to find valid filter IDs. Uses OAuth credentials.
Inputs
filter_idstringrequired- The Gmail filter ID to retrieve. Obtain this from the List Email Filters tool. Example: 'ANe1BmiXxxxxxx'.
Also accepts
schema_versionandtool_versionto pin a version.gmail_get_forwarding_addressGet the verification status of a single forwarding address configured for the authenticated Gmail account.Read-onlyGet Forwarding Address
Get the verification status of a single forwarding address configured for the authenticated Gmail account. Uses OAuth credentials.
Inputs
forwarding_emailstringrequired- The forwarding email address to look up. Use List Forwarding Addresses to find configured addresses.
gmail_get_labelGet details for a specific Gmail label, including its name, type, and visibility settings.Read-onlyGet Gmail Label
Get details for a specific Gmail label, including its name, type, and visibility settings. Use the List Labels tool to find valid label IDs. Uses OAuth credentials.
Inputs
label_idstringrequired- The Gmail label ID to retrieve. Use system labels such as 'INBOX', 'STARRED', 'IMPORTANT', or a custom label ID obtained from the List Labels tool. Example: 'Label_123'.
Also accepts
schema_versionandtool_versionto pin a version.gmail_get_message_by_idRetrieve a specific Gmail message using its message ID.Read-onlyFetch Message by Gmail ID
Retrieve a specific Gmail message using its message ID. Optionally control the format of the returned data.
Inputs
message_idstringrequired- Unique Gmail message ID
formatstring- Format of the returned message.one of
minimalfullrawmetadata
Also accepts
schema_versionandtool_versionto pin a version.gmail_get_profileGet the Gmail profile for the authenticated user, including their email address, total message count, thread count, and current history ID.Read-onlyGet Gmail Profile
Get the Gmail profile for the authenticated user, including their email address, total message count, thread count, and current history ID. Uses OAuth credentials.
Inputs
This tool takes no inputs.
Also accepts
schema_versionandtool_versionto pin a version.gmail_get_send_asGet send-as alias settings including email signature for the authenticated Gmail account.Read-onlyGet Send-As Alias
Get send-as alias settings including email signature for the authenticated Gmail account. Use the user's own email address to retrieve the default send-as settings and signature. Uses OAuth credentials.
Inputs
send_as_emailstringrequired- The send-as alias email address to retrieve settings for. Use the user's own email address (e.g., 'user@example.com') to get their default signature and send-as settings.
Also accepts
schema_versionandtool_versionto pin a version.gmail_get_thread_by_idRetrieve a specific Gmail thread by thread ID.Read-onlyGet Gmail Thread by ID
Retrieve a specific Gmail thread by thread ID. Optionally control message format and metadata headers. Requires a valid Gmail OAuth2 connection with read access.
Inputs
thread_idstringrequired- Unique Gmail thread ID
formatstring- Format of messages in the returned thread.one of
fullmetadataminimaldefaultfull metadata_headersarray- Specific email headers to include when format is metadata
Also accepts
schema_versionandtool_versionto pin a version.gmail_get_vacation_settingsGet the vacation auto-reply settings for the authenticated Gmail account.Read-onlyGet Vacation Settings
Get the vacation auto-reply settings for the authenticated Gmail account. Uses OAuth credentials.
Inputs
This tool takes no inputs.
Also accepts
schema_versionandtool_versionto pin a version.gmail_list_draftsList draft emails from a connected Gmail account.Read-onlyList Gmail Drafts
List draft emails from a connected Gmail account. Requires a valid Gmail OAuth2 connection.
Inputs
max_resultsinteger- Maximum number of drafts to fetch
page_tokenstring- Page token for pagination
Also accepts
schema_versionandtool_versionto pin a version.gmail_list_filtersList all email filters for the authenticated Gmail account.Read-onlyList Email Filters
List all email filters for the authenticated Gmail account. Returns filter criteria and actions such as label assignment, forwarding, and archiving rules. Uses OAuth credentials.
Inputs
This tool takes no inputs.
Also accepts
schema_versionandtool_versionto pin a version.gmail_list_forwarding_addressesList all forwarding addresses configured for the authenticated Gmail account, including their verification status.Read-onlyList Forwarding Addresses
List all forwarding addresses configured for the authenticated Gmail account, including their verification status. Uses OAuth credentials.
Inputs
This tool takes no inputs.
gmail_list_historyList the history of changes (messages added, deleted, or labels changed) to a Gmail mailbox since a given historyId.Read-onlyList History
List the history of changes (messages added, deleted, or labels changed) to a Gmail mailbox since a given historyId. Used together with watch_mailbox to keep an external system in sync with mailbox changes without polling the full mailbox. History is only retained for a limited time, so a gap since the last known historyId may require a full resync.
Inputs
start_history_idstringrequired- Required. Returns history records after this historyId. Obtain this from the historyId field of a previous message/thread/profile response or a watch_mailbox notification.
history_typesarray- History types to return. Valid values: messageAdded, messageDeleted, labelAdded, labelRemoved. Omit to return all types.
label_idstring- Only return history records that concern this label ID.
max_resultsinteger- Maximum number of history records to return per page.
page_tokenstring- Page token for pagination, from a previous list_history response.
gmail_list_labelsList all labels (system and user-created) in the authenticated Gmail account.Read-onlyList Gmail Labels
List all labels (system and user-created) in the authenticated Gmail account. Returns label IDs, names, and visibility settings that can be used with message and filter operations. Uses OAuth credentials.
Inputs
This tool takes no inputs.
Also accepts
schema_versionandtool_versionto pin a version.gmail_list_send_asList all send-as aliases (including the primary address) configured for the authenticated Gmail account, showing each alias's display name, signature, and verification status.Read-onlyList Send-As Aliases
List all send-as aliases (including the primary address) configured for the authenticated Gmail account, showing each alias's display name, signature, and verification status. Uses OAuth credentials.
Inputs
This tool takes no inputs.
gmail_list_threadsList threads in a connected Gmail account using optional search and label filters.Read-onlyList Gmail Threads
List threads in a connected Gmail account using optional search and label filters. Requires a valid Gmail OAuth2 connection with read access.
Inputs
include_spam_trashboolean- Whether to include threads from Spam and Trashdefault
false label_idsarray- Gmail label IDs to filter threads (threads must match all labels)
max_resultsinteger- Maximum number of threads to return
page_tokenstring- Page token for pagination
querystring- Search query string using Gmail search syntax (for example, 'is:unread from:user@example.com')
Also accepts
schema_versionandtool_versionto pin a version.gmail_search_peopleSearch people or contacts in the connected Google account using a query.Read-onlySearch People in Google
Search people or contacts in the connected Google account using a query. Requires a valid Google OAuth2 connection with People API scopes.
Inputs
querystringrequired- Text query to search people (e.g., name, email address).
other_contactsboolean- Whether to include people not in the user's contacts (from 'Other Contacts').default
false page_sizeinteger- Maximum number of people to return.
person_fieldsarray- Fields to retrieve for each person.
Also accepts
schema_versionandtool_versionto pin a version.gmail_batch_modify_messagesAdd or remove labels on up to 1000 Gmail messages in a single batch request.WriteBatch Modify Gmail Messages
Add or remove labels on up to 1000 Gmail messages in a single batch request. Use label IDs such as 'INBOX', 'UNREAD', 'STARRED', 'IMPORTANT', 'TRASH', 'SPAM', or custom label IDs. At least one of add_label_ids or remove_label_ids should be provided. Uses OAuth credentials.
- Idempotent
Inputs
message_idsarrayrequired- List of Gmail message IDs to modify labels on, up to 1000 per request. Obtain these from a list or search messages operation. Example: ["17a1b2c3d4e5f6g7", "17a1b2c3d4e5f6g8"].
add_label_idsarray- List of label IDs to add to each message. Use system labels such as 'INBOX', 'UNREAD', 'STARRED', 'IMPORTANT', or custom label IDs retrieved from the Labels API. Example: ["STARRED", "INBOX"].
remove_label_idsarray- List of label IDs to remove from each message. Use system labels such as 'UNREAD', 'STARRED', 'INBOX', or custom label IDs. Example: ["UNREAD"].
Also accepts
schema_versionandtool_versionto pin a version.gmail_create_draftCreate a new draft email in Gmail for the authenticated user.WriteCreate Gmail Draft
Create a new draft email in Gmail for the authenticated user. Constructs a MIME message and saves it as a draft. Supports plain text and HTML content types, CC, BCC, and threading. Uses OAuth credentials.
Inputs
bodystringrequired- The body content of the draft email. Provide plain text or HTML depending on the content_type field. Example: 'Hello, this is my draft message.'
subjectstringrequired- The subject line of the draft email. Example: 'Meeting Follow-up'.
tostringrequired- The recipient email address(es) for the draft. Provide a single address or comma-separated list. Example: 'recipient@example.com' or 'a@example.com,b@example.com'.
bccstring- BCC recipients for the draft email. Provide a comma-separated list of email addresses, e.g., bcc1@example.com,bcc2@example.com. Optional.
ccstring- CC recipients for the draft email. Provide a comma-separated list of email addresses, e.g., cc1@example.com,cc2@example.com. Optional.
content_typestring- The MIME content type for the email body. Use 'text/plain' for plain text or 'text/html' for HTML content. Defaults to 'text/plain'.one of
text/plaintext/htmldefaulttext/plain thread_idstring- The Gmail thread ID to associate this draft with an existing conversation. If provided, the draft will be part of that thread. Example: '17a1b2c3d4e5f6g7'.
Also accepts
schema_versionandtool_versionto pin a version.gmail_create_filterCreate a new email filter for the authenticated Gmail account.WriteCreate Email Filter
Create a new email filter for the authenticated Gmail account. Specify criteria (sender, recipient, subject, query, or attachment) and actions (apply labels, forward, archive, star, trash, mark as read, etc.). At least one criteria field should be provided. Uses OAuth credentials.
Inputs
add_label_idsarray- List of Gmail label IDs to apply to matching messages (e.g., ['Label_123', 'STARRED']). Use the List Labels tool to find valid label IDs.
forwardstring- Email address to forward matching messages to. The address must already be configured as a forwarding address in the Gmail account.
fromstring- Sender email address or domain to match in the filter criteria (e.g., 'alerts@github.com' or '@newsletter.com').
has_attachmentboolean- If true, only match messages that have at least one attachment.
querystring- Gmail search query string to match messages using Gmail's search syntax (e.g., 'larger:10M', 'is:important').
remove_label_idsarray- List of Gmail label IDs to remove from matching messages (e.g., ['INBOX'] to archive, ['UNREAD'] to mark as read).
should_always_mark_importantboolean- If true, always mark matching messages as important regardless of Gmail's automatic importance detection.
should_archiveboolean- If true, skip the inbox for matching messages (equivalent to adding the 'Archive' action).
should_mark_readboolean- If true, automatically mark matching messages as read.
should_never_mark_importantboolean- If true, never mark matching messages as important, overriding Gmail's automatic importance detection.
should_never_spamboolean- If true, never send matching messages to the Spam folder.
should_starboolean- If true, automatically star matching messages.
should_trashboolean- If true, automatically move matching messages to the Trash.
subjectstring- Subject line text to match in the filter criteria (e.g., '[GitHub]' or 'Invoice').
tostring- Recipient email address to match in the filter criteria (e.g., 'team@example.com').
Also accepts
schema_versionandtool_versionto pin a version.gmail_create_labelCreate a new user label in the authenticated Gmail account.WriteCreate Gmail Label
Create a new user label in the authenticated Gmail account. Labels can be applied to messages for organization and are visible in the Gmail label list and message list based on the visibility settings. Uses OAuth credentials.
Inputs
namestringrequired- The display name of the new label. Must be unique within the account. Example: 'Follow Up'.
label_list_visibilitystring- Controls whether the label is shown in the Gmail label list. Use 'labelShow' to always show, 'labelShowIfUnread' to show only when it has unread messages, or 'labelHide' to hide it. Defaults to 'labelShow'.one of
labelShowlabelShowIfUnreadlabelHidedefaultlabelShow message_list_visibilitystring- Controls whether the label is shown in the message list. Use 'show' to display it or 'hide' to conceal it. Defaults to 'show'.one of
showhidedefaultshow
Also accepts
schema_versionandtool_versionto pin a version.gmail_import_messageImport an RFC 822 message into the authenticated Gmail mailbox using the standard receiving pipeline: spam classification and matching filters are applied, unlike gmail_insert_message which bypasses that pipeline.WriteImport Message
Import an RFC 822 message into the authenticated Gmail mailbox using the standard receiving pipeline: spam classification and matching filters are applied, unlike gmail_insert_message which bypasses that pipeline. Intended for migrating existing messages that already have their own headers (From, Date, Message-ID, etc.).
Inputs
raw_messagestringrequired- The full RFC 822 formatted message source, including headers (From, To, Subject, Date, etc.) and body, exactly as it should appear in the mailbox. This is base64url-encoded automatically before sending.
deletedboolean- Mark the imported message as immediately deleted (moved to Trash), e.g. to preserve a copy of a message that a delete-message policy already removed elsewhere.
internal_date_sourcestring- Source used to determine the message's internal (received) date shown in Gmail. 'dateHeader' uses the Date header from raw_message; 'receivedTime' uses the time this API call was made. Defaults to dateHeader.one of
dateHeaderreceivedTime label_idsarray- Label IDs to apply to the imported message. Example: ["INBOX", "UNREAD"].
never_mark_spamboolean- If true, the message is never marked as SPAM in the resulting thread, even if Gmail's spam classifier would otherwise flag it.
process_for_calendarboolean- If true, and the message contains a calendar invite, process the invite to add an entry to the user's calendar.
gmail_insert_messageDirectly insert a fully-formed RFC 822 message into the authenticated Gmail mailbox without sending it and without running it through Gmail's normal receiving pipeline (no spam filtering, no user filters applied).WriteInsert Message
Directly insert a fully-formed RFC 822 message into the authenticated Gmail mailbox without sending it and without running it through Gmail's normal receiving pipeline (no spam filtering, no user filters applied). Intended for migrating or restoring existing messages that already have their own headers (From, Date, Message-ID, etc.), unlike send_message which composes a new outgoing email. Uses OAuth credentials.
Inputs
raw_messagestringrequired- The full RFC 822 formatted message source, including headers (From, To, Subject, Date, etc.) and body, exactly as it should appear in the mailbox. This is base64url-encoded automatically before sending.
internal_date_sourcestring- Source used to determine the message's internal (received) date shown in Gmail. 'dateHeader' uses the Date header from raw_message; 'receivedTime' uses the time this API call was made. Defaults to dateHeader.one of
dateHeaderreceivedTime label_idsarray- Label IDs to apply to the inserted message. Example: ["INBOX", "UNREAD"].
gmail_modify_message_labelsAdd or remove labels on a Gmail message.WriteModify Gmail Message Labels
Add or remove labels on a Gmail message. Use label IDs such as 'INBOX', 'UNREAD', 'STARRED', 'IMPORTANT', 'TRASH', 'SPAM', or custom label IDs. At least one of add_label_ids or remove_label_ids should be provided. Uses OAuth credentials.
- Idempotent
Inputs
message_idstringrequired- The Gmail message ID whose labels will be modified. Obtain this from a list or search messages operation. Example: '17a1b2c3d4e5f6g7'.
add_label_idsarray- List of label IDs to add to the message. Use system labels such as 'INBOX', 'UNREAD', 'STARRED', 'IMPORTANT', or custom label IDs retrieved from the Labels API. Example: ["STARRED", "INBOX"].
remove_label_idsarray- List of label IDs to remove from the message. Use system labels such as 'UNREAD', 'STARRED', 'INBOX', or custom label IDs. Example: ["UNREAD"].
Also accepts
schema_versionandtool_versionto pin a version.gmail_modify_thread_labelsAdd or remove Gmail labels across every message in a thread at once, applying the change consistently to the whole conversation instead of one message at a time.WriteModify Thread Labels
Add or remove Gmail labels across every message in a thread at once, applying the change consistently to the whole conversation instead of one message at a time. Uses OAuth credentials.
- Idempotent
Inputs
thread_idstringrequired- The Gmail thread ID whose messages should be relabeled.
add_label_idsarray- Label IDs to add to every message in the thread.
remove_label_idsarray- Label IDs to remove from every message in the thread.
gmail_reply_to_threadSend a reply within an existing Gmail thread.WriteReply to Gmail Thread
Send a reply within an existing Gmail thread. Constructs a MIME message, optionally sets In-Reply-To and References headers to properly thread the reply against the original message, and sends it as part of the given thread. Uses OAuth credentials.
Inputs
bodystringrequired- The body content of the reply. Provide plain text or HTML depending on the content_type field. Example: 'Thanks for the update, sounds good.'
thread_idstringrequired- The Gmail thread ID to reply within. Obtain this from a list or search messages/threads operation. Example: '17a1b2c3d4e5f6g7'.
tostringrequired- The recipient email address(es) for the reply. Provide a single address or comma-separated list. Example: 'recipient@example.com' or 'a@example.com,b@example.com'.
bccstring- BCC recipients for the reply. Provide a comma-separated list of email addresses, e.g., bcc1@example.com,bcc2@example.com. Optional.
ccstring- CC recipients for the reply. Provide a comma-separated list of email addresses, e.g., cc1@example.com,cc2@example.com. Optional.
content_typestring- The MIME content type for the reply body. Use 'text/plain' for plain text or 'text/html' for HTML content. Defaults to 'text/plain'.one of
text/plaintext/htmldefaulttext/plain in_reply_to_message_idstring- The RFC822 Message-ID header value of the message being replied to. Used to set the In-Reply-To and References headers so mail clients thread the reply correctly. Example: '<abc123@mail.gmail.com>'.
subjectstring- The subject line of the reply. If omitted, defaults to 'Re:'. It's recommended to pass the original subject prefixed with 'Re: ', e.g., 'Re: Meeting Follow-up'.
Also accepts
schema_versionandtool_versionto pin a version.gmail_send_draftSend an existing draft email from the authenticated Gmail account.WriteSend Gmail Draft
Send an existing draft email from the authenticated Gmail account. The draft is removed from Drafts and delivered as a sent message. Uses OAuth credentials.
Inputs
draft_idstringrequired- The Gmail draft ID to send. Obtain this from a list drafts or create draft operation. Example: 'r-1234567890123456789'.
Also accepts
schema_versionandtool_versionto pin a version.gmail_send_messageSend an email message immediately from the authenticated Gmail account.WriteSend Gmail Message
Send an email message immediately from the authenticated Gmail account. Constructs a MIME message and sends it via the Gmail API. Supports plain text and HTML content types, CC, BCC, and attaching the message to an existing thread. Uses OAuth credentials.
Inputs
bodystringrequired- The body content of the email. Provide plain text or HTML depending on the content_type field. Example: 'Hello, this is my message.'
subjectstringrequired- The subject line of the email. Example: 'Meeting Follow-up'.
tostringrequired- The recipient email address(es) for the message. Provide a single address or comma-separated list. Example: 'recipient@example.com' or 'a@example.com,b@example.com'.
bccstring- BCC recipients for the email. Provide a comma-separated list of email addresses, e.g., bcc1@example.com,bcc2@example.com. Optional.
ccstring- CC recipients for the email. Provide a comma-separated list of email addresses, e.g., cc1@example.com,cc2@example.com. Optional.
content_typestring- The MIME content type for the email body. Use 'text/plain' for plain text or 'text/html' for HTML content. Defaults to 'text/plain'.one of
text/plaintext/htmldefaulttext/plain thread_idstring- The Gmail thread ID to associate this sent message with an existing conversation. If provided, the message is added to that thread. Example: '17a1b2c3d4e5f6g7'.
Also accepts
schema_versionandtool_versionto pin a version.gmail_stop_mailbox_watchStop receiving push notifications for the current Gmail mailbox by canceling any active watch registered via gmail_watch_mailbox.WriteStop Gmail Mailbox Watch
Stop receiving push notifications for the current Gmail mailbox by canceling any active watch registered via gmail_watch_mailbox. This operation is idempotent — calling it when no watch is active is a no-op. Uses OAuth credentials.
- Idempotent
Inputs
This tool takes no inputs.
Also accepts
schema_versionandtool_versionto pin a version.gmail_untrash_messageRemove a Gmail message from Trash and restore it to its previous location.WriteUntrash Gmail Message
Remove a Gmail message from Trash and restore it to its previous location. This operation is idempotent — untrashing a message that is not in Trash is a no-op. Uses OAuth credentials.
- Idempotent
Inputs
message_idstringrequired- The Gmail message ID to remove from Trash. Obtain this from a list or search messages operation. Example: '17a1b2c3d4e5f6g7'.
Also accepts
schema_versionandtool_versionto pin a version.gmail_untrash_threadRemove an entire Gmail thread from Trash, restoring it and its messages to their prior location.WriteUntrash Thread
Remove an entire Gmail thread from Trash, restoring it and its messages to their prior location. Idempotent — untrashing a thread that isn't in Trash is a no-op. Uses OAuth credentials.
- Idempotent
Inputs
thread_idstringrequired- The Gmail thread ID to remove from Trash.
gmail_update_draftReplace the content of an existing Gmail draft.WriteUpdate Gmail Draft
Replace the content of an existing Gmail draft. Constructs a new MIME message and overwrites the draft identified by draft_id. Supports plain text and HTML content types, CC, BCC, and threading. Uses OAuth credentials.
- Idempotent
Inputs
bodystringrequired- The body content of the draft email. Provide plain text or HTML depending on the content_type field. Example: 'Hello, this is my updated draft message.'
draft_idstringrequired- The Gmail draft ID to update. Obtain this from a list drafts or create draft operation. Example: 'r-1234567890123456789'.
subjectstringrequired- The subject line of the draft email. Example: 'Meeting Follow-up (updated)'.
tostringrequired- The recipient email address(es) for the draft. Provide a single address or comma-separated list. Example: 'recipient@example.com' or 'a@example.com,b@example.com'.
bccstring- BCC recipients for the draft email. Provide a comma-separated list of email addresses, e.g., bcc1@example.com,bcc2@example.com. Optional.
ccstring- CC recipients for the draft email. Provide a comma-separated list of email addresses, e.g., cc1@example.com,cc2@example.com. Optional.
content_typestring- The MIME content type for the email body. Use 'text/plain' for plain text or 'text/html' for HTML content. Defaults to 'text/plain'.one of
text/plaintext/htmldefaulttext/plain thread_idstring- The Gmail thread ID to associate this draft with an existing conversation. If provided, the draft will be part of that thread. Example: '17a1b2c3d4e5f6g7'.
Also accepts
schema_versionandtool_versionto pin a version.gmail_update_labelUpdate an existing user label in the authenticated Gmail account.WriteUpdate Gmail Label
Update an existing user label in the authenticated Gmail account. Change the label name or its visibility in the label list and message list. Use the List Labels tool to find the label ID. Uses OAuth credentials.
- Idempotent
Inputs
label_idstringrequired- The Gmail label ID to update. Use a custom label ID obtained from the List Labels tool. Example: 'Label_123'.
label_list_visibilitystring- Controls whether the label is shown in the Gmail label list. Use 'labelShow' to always show, 'labelShowIfUnread' to show only when it has unread messages, or 'labelHide' to hide it.one of
labelShowlabelShowIfUnreadlabelHide message_list_visibilitystring- Controls whether the label is shown in the message list. Use 'show' to display it or 'hide' to conceal it.one of
showhide namestring- The new display name for the label. Must be unique within the account. Example: 'Follow Up - Urgent'.
Also accepts
schema_versionandtool_versionto pin a version.gmail_update_send_asUpdate send-as alias settings such as the email signature, display name, or reply-to address for the authenticated Gmail account.WriteUpdate Send-As Alias
Update send-as alias settings such as the email signature, display name, or reply-to address for the authenticated Gmail account. Use the user's own email address to update their default signature. Uses OAuth credentials.
- Idempotent
Inputs
send_as_emailstringrequired- The send-as alias email address to update. Use the user's own email address (e.g., 'user@example.com') to update their default signature and settings.
display_namestring- The display name shown as the sender name for this alias (e.g., 'Jane Smith').
is_defaultboolean- If true, sets this send-as alias as the default address used when composing new messages.
reply_to_addressstring- An optional email address that appears in the Reply-To header for messages sent from this alias (e.g., 'replies@example.com').
signaturestring- HTML email signature to set for this alias. Supports full HTML markup (e.g., '<b>Jane Smith</b><br>Senior Engineer').
Also accepts
schema_versionandtool_versionto pin a version.gmail_update_vacation_settingsUpdate the vacation auto-reply settings for the authenticated Gmail account.WriteUpdate Vacation Settings
Update the vacation auto-reply settings for the authenticated Gmail account. Set enableAutoReply to true to activate out-of-office responses. Uses OAuth credentials.
- Idempotent
Inputs
enable_auto_replybooleanrequired- Whether to enable the vacation auto-reply. Set to true to turn on out-of-office responses, false to disable.
end_timestring- End time for the vacation auto-reply as epoch milliseconds in string format (e.g., '1754006400000'). After this time, auto-reply stops.
response_body_htmlstring- HTML body of the vacation auto-reply message. If both plain text and HTML are provided, HTML takes precedence for clients that support it.
response_body_plain_textstring- Plain text body of the vacation auto-reply message.
response_subjectstring- Subject line of the vacation auto-reply email (e.g., 'Out of Office: Back on Monday').
restrict_to_contactsboolean- If true, only contacts in the user's Google Contacts will receive the auto-reply. Default is false.default
false restrict_to_domainboolean- If true, only users in the same Google Workspace domain will receive the auto-reply. Default is false.default
false start_timestring- Start time for the vacation auto-reply as epoch milliseconds in string format (e.g., '1753401600000'). Auto-reply activates from this time.
Also accepts
schema_versionandtool_versionto pin a version.gmail_watch_mailboxSet up push notifications for changes to a Gmail mailbox by registering a Google Cloud Pub/Sub topic.WriteWatch Gmail Mailbox
Set up push notifications for changes to a Gmail mailbox by registering a Google Cloud Pub/Sub topic. Gmail publishes a notification to the topic whenever the mailbox's history changes. Each call replaces any existing watch and the watch expires after 7 days, so it must be renewed periodically. Uses OAuth credentials.
Inputs
topic_namestringrequired- The full Cloud Pub/Sub topic name to publish mailbox change notifications to. Must be in the format 'projects/{project}/topics/{topic}'. Example: 'projects/myproject/topics/mytopic'.
label_filter_behaviorstring- Whether label_ids should be used to INCLUDE (restrict notifications to only these labels) or EXCLUDE (notify on all labels except these) label changes. Only used when label_ids is provided. Defaults to INCLUDE.one of
INCLUDEEXCLUDE label_idsarray- List of label IDs to restrict notifications to (or exclude from, depending on label_filter_behavior). Example: ["INBOX"]. If omitted, all mailbox changes trigger notifications.
Also accepts
schema_versionandtool_versionto pin a version.gmail_batch_delete_messagesPermanently delete up to 1000 Gmail messages in a single batch request.DestructiveBatch Delete Gmail Messages
Permanently delete up to 1000 Gmail messages in a single batch request. This bypasses Trash entirely — the messages are immediately and permanently removed and CANNOT be recovered. Use gmail_trash_message or gmail_batch_modify_messages (with TRASH label) instead if the deletion should be reversible. Uses OAuth credentials.
- Idempotent
Inputs
message_idsarrayrequired- List of Gmail message IDs to permanently delete, up to 1000 per request. Obtain these from a list or search messages operation. Example: ["17a1b2c3d4e5f6g7", "17a1b2c3d4e5f6g8"]. WARNING: this permanently deletes the messages; they cannot be recovered.
Also accepts
schema_versionandtool_versionto pin a version.gmail_delete_draftPermanently delete a Gmail draft.DestructiveDelete Gmail Draft
Permanently delete a Gmail draft. This is a permanent removal and does not send the draft or move it to Trash for recovery. Uses OAuth credentials.
- Idempotent
Inputs
draft_idstringrequired- The Gmail draft ID to permanently delete. Obtain this from a list drafts operation. Example: 'r-1234567890123456789'.
Also accepts
schema_versionandtool_versionto pin a version.gmail_delete_filterPermanently delete an email filter from the authenticated Gmail account.DestructiveDelete Email Filter
Permanently delete an email filter from the authenticated Gmail account. This does not affect messages already processed by the filter. Use the List Email Filters tool to find the filter ID. Uses OAuth credentials.
- Idempotent
Inputs
filter_idstringrequired- The Gmail filter ID to permanently delete. Obtain this from the List Email Filters tool. Example: 'ANe1BmiXxxxxxx'.
Also accepts
schema_versionandtool_versionto pin a version.gmail_delete_labelPermanently delete a user label from the authenticated Gmail account.DestructiveDelete Gmail Label
Permanently delete a user label from the authenticated Gmail account. This removes the label from all messages it was applied to and cannot be undone. Use the List Labels tool to find the label ID. Uses OAuth credentials.
- Idempotent
Inputs
label_idstringrequired- The Gmail label ID to permanently delete. Use a custom label ID obtained from the List Labels tool. Example: 'Label_123'.
Also accepts
schema_versionandtool_versionto pin a version.gmail_delete_messagePermanently delete a single Gmail message.DestructiveDelete Gmail Message
Permanently delete a single Gmail message. This bypasses Trash entirely — the message is immediately and permanently removed and CANNOT be recovered. Use gmail_trash_message instead if the deletion should be reversible. Uses OAuth credentials.
- Idempotent
Inputs
message_idstringrequired- The Gmail message ID to permanently delete. Obtain this from a list or search messages operation. Example: '17a1b2c3d4e5f6g7'. WARNING: this permanently deletes the message; it cannot be recovered.
Also accepts
schema_versionandtool_versionto pin a version.gmail_delete_threadPermanently and immediately delete a Gmail thread and all of its messages, bypassing Trash.DestructiveDelete Thread
Permanently and immediately delete a Gmail thread and all of its messages, bypassing Trash. This cannot be undone — prefer trash_thread unless permanent deletion is specifically required. Uses OAuth credentials.
- Idempotent
Inputs
thread_idstringrequired- The Gmail thread ID to permanently delete.
gmail_trash_messageMove a Gmail message to the Trash.DestructiveTrash Gmail Message
Move a Gmail message to the Trash. The message is not permanently deleted and can be recovered from Trash within 30 days. This operation is idempotent — trashing an already-trashed message is a no-op. Uses OAuth credentials.
- Idempotent
Inputs
message_idstringrequired- The Gmail message ID to move to Trash. Obtain this from a list or search messages operation. Example: '17a1b2c3d4e5f6g7'.
Also accepts
schema_versionandtool_versionto pin a version.gmail_trash_threadMove an entire Gmail thread (all its messages) to Trash.DestructiveTrash Thread
Move an entire Gmail thread (all its messages) to Trash. The thread is not permanently deleted and can be recovered from Trash within 30 days. Idempotent — trashing an already-trashed thread is a no-op. Uses OAuth credentials.
- Idempotent
Inputs
thread_idstringrequired- The Gmail thread ID to move to Trash. Obtain this from a list or search threads operation.
No tools match.
Workflows
Use Gmail response fields as returned
Response fields from Gmail tools use camelCase, such as threadId, messageId, and internalDate. Tool input parameters use the snake_case names shown in the Tool list, such as thread_id and message_id. Extract values with camelCase, then pass them with snake_case.
const fetchResponse = await actions.executeTool({ connector: 'gmail', identifier: 'user_123', toolName: 'gmail_fetch_mails', toolInput: { query: 'is:unread', max_results: 5, },});
const messages = Array.isArray(fetchResponse.data?.messages) ? fetchResponse.data.messages : [];const threadId = typeof messages[0]?.threadId === 'string' ? messages[0].threadId : '';
if (threadId) { const threadResponse = await actions.executeTool({ connector: 'gmail', identifier: 'user_123', toolName: 'gmail_get_thread_by_id', toolInput: { thread_id: threadId, }, }); console.log(threadResponse.data);}fetch_response = actions.execute_tool( connection_name='gmail', identifier='user_123', tool_name="gmail_fetch_mails", tool_input={ "query": "is:unread", "max_results": 5, },)
data = fetch_response.data or {}messages = data.get("messages", [])thread_id = messages[0].get("threadId", "") if messages else ""
if thread_id: thread_response = actions.execute_tool( connection_name='gmail', identifier='user_123', tool_name="gmail_get_thread_by_id", tool_input={ "thread_id": thread_id, }, ) print(thread_response.data)Proxy API call
const result = await actions.request({ connectionName: 'gmail', identifier: 'user_123', path: '/gmail/v1/users/me/profile', method: 'GET',});console.log(result);result = actions.request( connection_name='gmail', identifier='user_123', path="/gmail/v1/users/me/profile", method="GET",)print(result)Google OAuth consent screen verification
Before you use your own Google OAuth credentials in production, understand what end users see on Google’s consent screen when they authorize a connected account.
| Audience type | Consent screen behavior | When to use |
|---|---|---|
| Internal | Shows your App Name and logo from Branding settings | Only users in your Google Workspace or Cloud Identity organization can authorize the connector |
| External | Shows {env_name}.scalekit.dev until Google verifies your app | Any user with a Google account can authorize the connector |
Why External is required for most AgentKit connectors:
- Internal restricts authorization to users in your Google Workspace or Cloud Identity organization. Users with
@gmail.comor other Google accounts outside your organization cannot complete OAuth. - External is required when end users outside your organization authorize tool access through connected accounts.
- Organization-managed OAuth clients follow the same rules as personal or developer OAuth clients. Switching to an org-owned client does not bypass Google verification.
- Until Google completes verification of your External app, users see
scalekit.devon the consent screen. After verification, your App Name and logo appear.
During development:
- Add Test users under APIs & Services → OAuth consent screen while publishing status is Testing.
- On unverified apps, users can click Advanced → Go to app (unsafe) to proceed during testing.
- Google Workspace admins may need to allowlist your OAuth client.
For Google’s verification requirements and timeline, refer to Google’s OAuth consent screen verification guide.