Google Forms connector
OAuth 2.0Files & DocumentsConnect to Google Forms. Create, view, and manage forms and responses securely
Google Forms connector
-
Install the SDK
Section titled “Install the SDK”Terminal window npm install @scalekit-sdk/nodeTerminal window pip install scalekit -
Set your credentials
Section titled “Set your credentials”Add your Scalekit credentials to your
.envfile. Find values in app.scalekit.com > Developers > API Credentials..env SCALEKIT_ENVIRONMENT_URL=<your-environment-url>SCALEKIT_CLIENT_ID=<your-client-id>SCALEKIT_CLIENT_SECRET=<your-client-secret> -
Set up the connector
Section titled “Set up the connector”Register your Google Forms credentials with Scalekit so it handles the token lifecycle. You do this once per environment.
Dashboard setup steps
Register your Scalekit environment with the Google Forms connector so Scalekit handles the authentication flow and token lifecycle for you. The connection name you create will be used to identify and invoke the connection programmatically. Then complete the configuration in your application as follows:
-
Set up auth redirects
-
In Scalekit dashboard, go to AgentKit > Connections > Create Connection. Find Google Forms and click Create. Click Use your own credentials and copy the redirect URI. It looks like
https://<SCALEKIT_ENVIRONMENT_URL>/sso/v1/oauth/<CONNECTION_ID>/callback.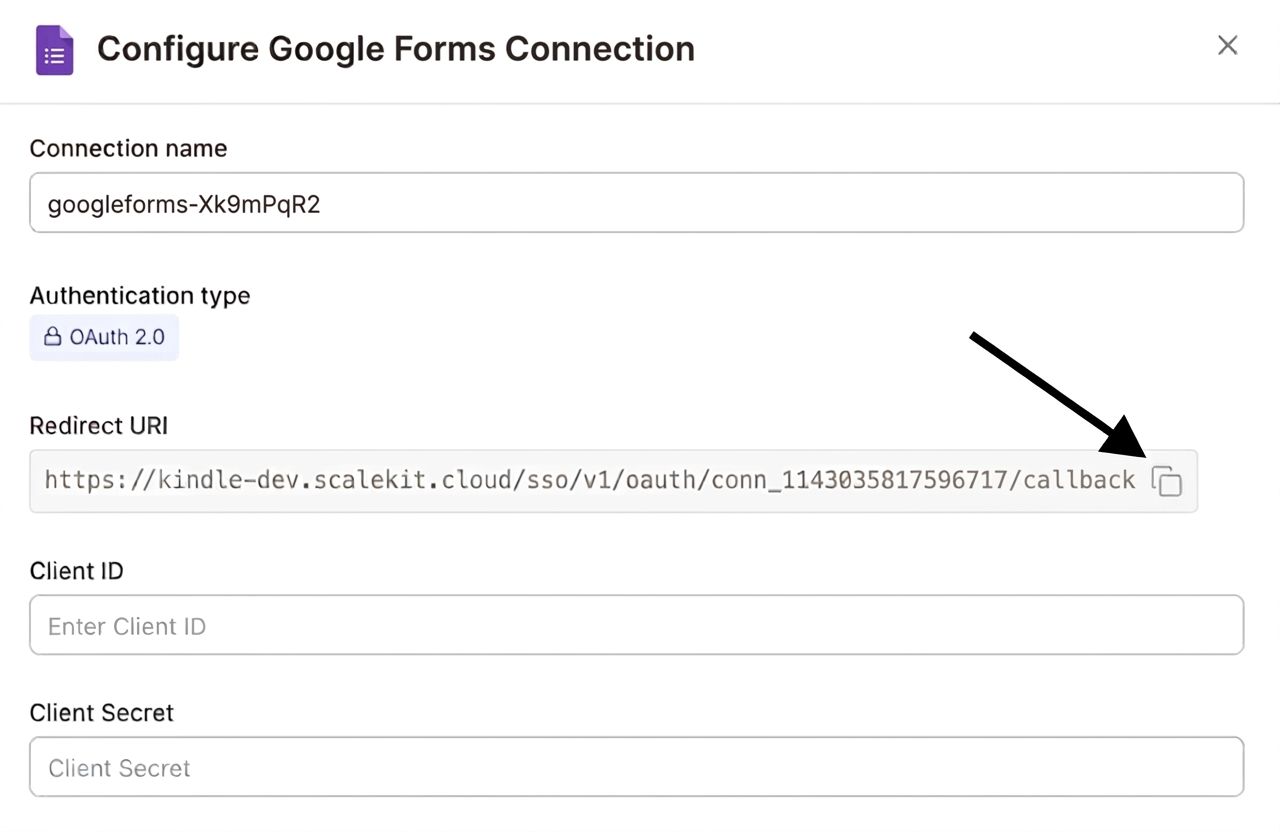
-
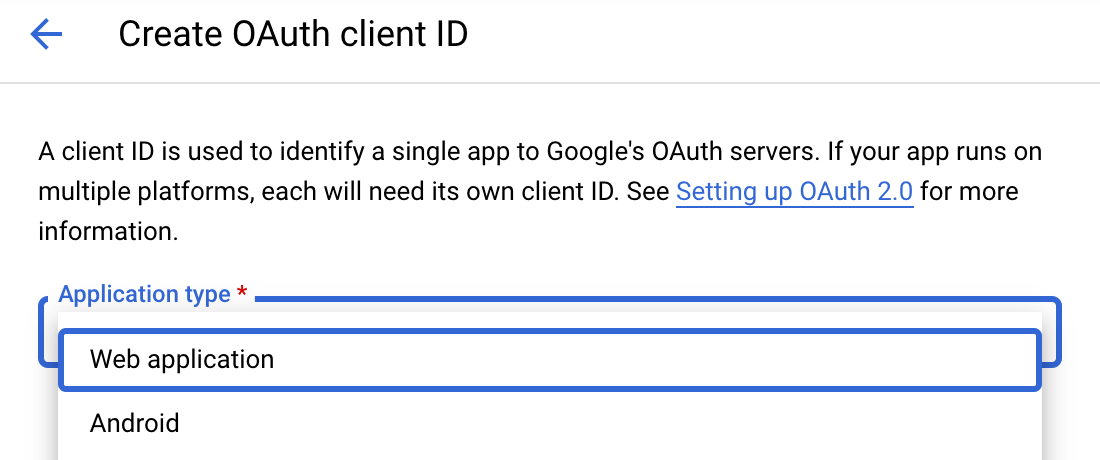
Navigate to Google Cloud Console → APIs & Services → Credentials. Select + Create Credentials, then OAuth client ID. Choose Web application from the Application type menu.
-
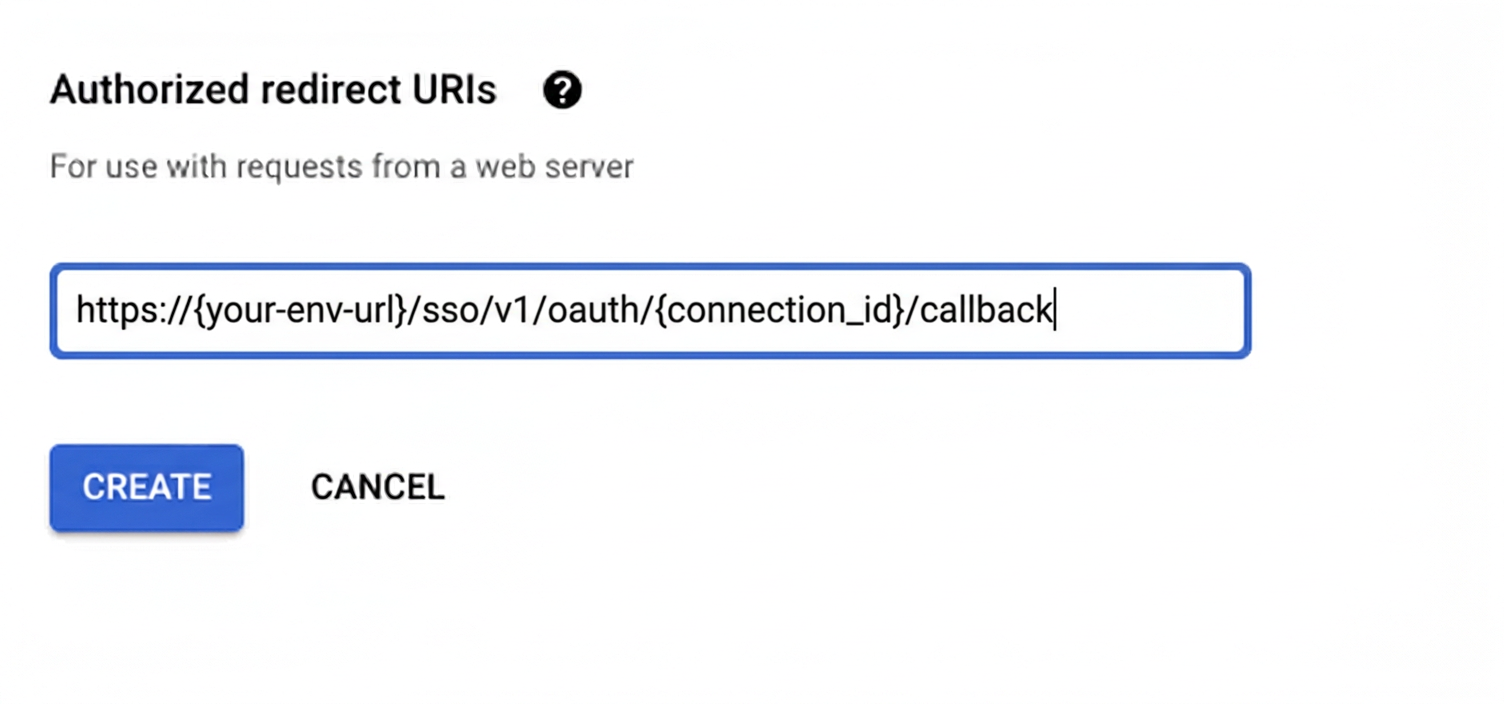
Under Authorized redirect URIs, click + Add URI, paste the redirect URI, and click Create.
-
-
Enable the Google Forms API
- In Google Cloud Console, go to APIs & Services → Library. Search for “Google Forms API” and click Enable.
-
Get client credentials
- Google provides your Client ID and Client Secret after you create the OAuth client ID in step 1.
-
Add credentials in Scalekit
-
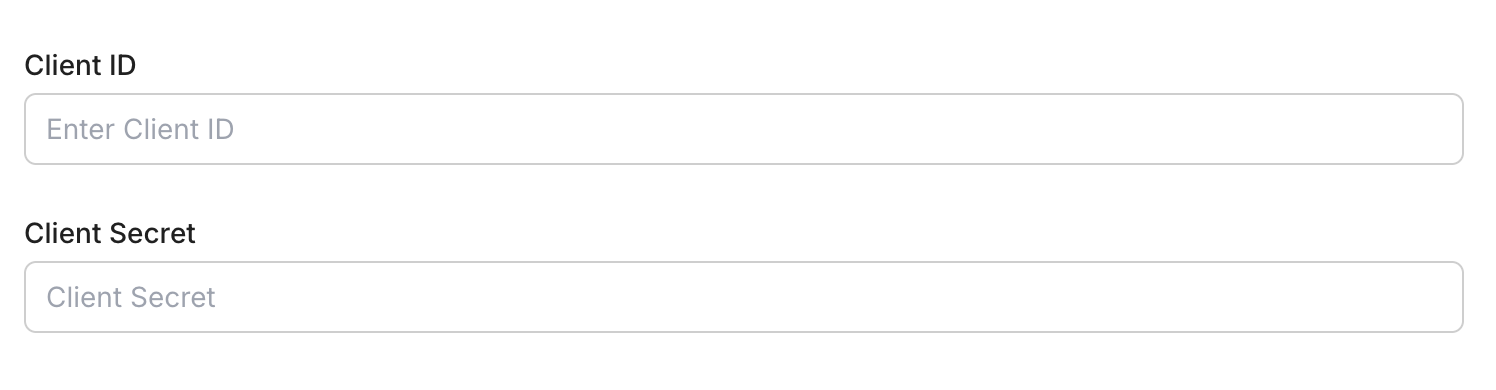
In Scalekit dashboard, go to AgentKit > Connections and open the connection you created.
-
Enter your credentials:
- Client ID (from above)
- Client Secret (from above)
- Permissions (scopes — see Google API Scopes reference)
-
Click Save.
-
-
-
Authorize and make your first call
Section titled “Authorize and make your first call”quickstart.ts import { ScalekitClient } from '@scalekit-sdk/node'import 'dotenv/config'const scalekit = new ScalekitClient(process.env.SCALEKIT_ENV_URL,process.env.SCALEKIT_CLIENT_ID,process.env.SCALEKIT_CLIENT_SECRET,)const actions = scalekit.actionsconst connector = 'googleforms'const identifier = 'user_123'// Generate an authorization link for the userconst { link } = await actions.getAuthorizationLink({ connectionName: connector, identifier })console.log('Authorize Google Forms:', link)process.stdout.write('Press Enter after authorizing...')await new Promise(r => process.stdin.once('data', r))// Make your first callconst result = await actions.executeTool({connector,identifier,toolName: 'googleforms_get_form',toolInput: { form_id: 'YOUR_FORM_ID' },})console.log(result)quickstart.py import osfrom scalekit.client import ScalekitClientfrom dotenv import load_dotenvload_dotenv()scalekit_client = ScalekitClient(env_url=os.getenv("SCALEKIT_ENV_URL"),client_id=os.getenv("SCALEKIT_CLIENT_ID"),client_secret=os.getenv("SCALEKIT_CLIENT_SECRET"),)actions = scalekit_client.actionsconnection_name = "googleforms"identifier = "user_123"# Generate an authorization link for the userlink_response = actions.get_authorization_link(connection_name=connection_name,identifier=identifier,)print("Authorize Google Forms:", link_response.link)input("Press Enter after authorizing...")# Make your first callresult = actions.execute_tool(tool_input={"form_id":"YOUR_FORM_ID"},tool_name="googleforms_get_form",connection_name=connection_name,identifier=identifier,)print(result)
What you can do
Section titled “What you can do”Connect this agent connector to let your agent:
- Get response, form — Get a single response submitted to a Google Form by its response ID
- List responses — List all responses submitted to a Google Form
- Create form — Create a new Google Form with a title and optional document title
Common workflows
Section titled “Common workflows”Proxy API call
const result = await actions.request({ connectionName: 'googleforms', identifier: 'user_123', path: '/v1/forms', method: 'GET',});console.log(result);result = actions.request( connection_name='googleforms', identifier='user_123', path="/v1/forms", method="GET")print(result)Execute a tool
const result = await actions.executeTool({ connector: 'googleforms', identifier: 'user_123', toolName: 'googleforms_create_form', toolInput: {},});console.log(result);result = actions.execute_tool( connection_name='googleforms', identifier='user_123', tool_name='googleforms_create_form', tool_input={},)print(result)Google OAuth consent screen verification
Before you use your own Google OAuth credentials in production, understand what end users see on Google’s consent screen when they authorize a connected account.
| Audience type | Consent screen behavior | When to use |
|---|---|---|
| Internal | Shows your App Name and logo from Branding settings | Only users in your Google Workspace or Cloud Identity organization can authorize the connector |
| External | Shows {env_name}.scalekit.dev until Google verifies your app | Any user with a Google account can authorize the connector |
Why External is required for most AgentKit connectors:
- Internal restricts authorization to users in your Google Workspace or Cloud Identity organization. Users with
@gmail.comor other Google accounts outside your organization cannot complete OAuth. - External is required when end users outside your organization authorize tool access through connected accounts.
- Organization-managed OAuth clients follow the same rules as personal or developer OAuth clients. Switching to an org-owned client does not bypass Google verification.
- Until Google completes verification of your External app, users see
scalekit.devon the consent screen. After verification, your App Name and logo appear.
During development:
- Add Test users under APIs & Services → OAuth consent screen while publishing status is Testing.
- On unverified apps, users can click Advanced → Go to app (unsafe) to proceed during testing.
- Google Workspace admins may need to allowlist your OAuth client.
For Google’s verification requirements and timeline, refer to Google’s OAuth consent screen verification guide.
Tool list
Section titled “Tool list”Use the exact tool names from the Tool list below when you call execute_tool. If you’re not sure which name to use, list the tools available for the current user first.
googleforms_create_form#Create a new Google Form with a title and optional document title. Returns the new form's ID and metadata.2 params
Create a new Google Form with a title and optional document title. Returns the new form's ID and metadata.
titlestringrequiredThe title of the form shown to respondentsdocument_titlestringoptionalThe title of the document shown in Google Drive (defaults to the form title if not provided)googleforms_get_form#Get the structure and metadata of a Google Form including its title, description, and all questions.1 param
Get the structure and metadata of a Google Form including its title, description, and all questions.
form_idstringrequiredThe ID of the Google Form to retrievegoogleforms_get_response#Get a single response submitted to a Google Form by its response ID. Returns the respondent's answers for all questions.2 params
Get a single response submitted to a Google Form by its response ID. Returns the respondent's answers for all questions.
form_idstringrequiredThe ID of the Google Formresponse_idstringrequiredThe ID of the specific response to retrievegoogleforms_list_responses#List all responses submitted to a Google Form. Returns response IDs, submission timestamps, and answer values for each respondent.4 params
List all responses submitted to a Google Form. Returns response IDs, submission timestamps, and answer values for each respondent.
form_idstringrequiredThe ID of the Google Form to list responses forfilterstringoptionalFilter responses by submission time. Format: timestamp > 2026-01-01T00:00:00Zpage_sizeintegeroptionalMaximum number of responses to return (max 5000)page_tokenstringoptionalToken for retrieving the next page of results